Showing posts with label fabric crafts. Show all posts

Wednesday, January 2, 2019

Best of 2018 Craft Tutorials


Happy New Year!  Here's to 2019 being full of good things and new ideas.  In over 10 years of this blog, I don't think I've ever done a best of the year round-up.  Probably because I'm always wiped out at the close of one year/start of another, but I'm starting a new year with a new approach, so here goes! 

Of all the posts of 2018, tutorials were the clear reader favorite.  I'd planned to do more, but running my new shop, having a baby & a serious accident with my daughter all kept me out of the craft room much more often so I had to scale back making things.  It definitely changed my perspective on a lot of things, so I'm much choosier about what I spend time on and projects have to be really special and/or useful for me these days.

Let's have a look at Sew Can Do's best tutorials of 2018!

My Peeking Pockets Tote Bag was the number 1 tutorial with readers.  I think it's probably my favorite too.  I use this bag all the time and it's different from most standard tote bag designs, yet just as easy to make.


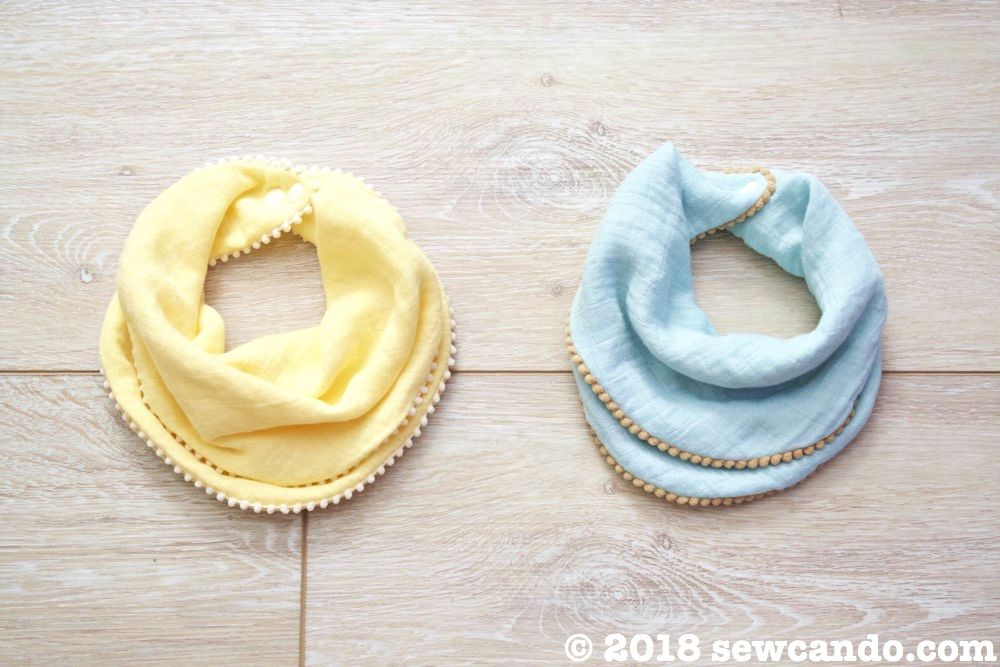
Free download patterns were also really popular, like my 3 in 1 Infinity Bib Pattern:


These stylish little bibs have been really handy in real life with a baby.  I love when projects turn out to be very useful and these are for sure.  Being cute doesn't hurt either!


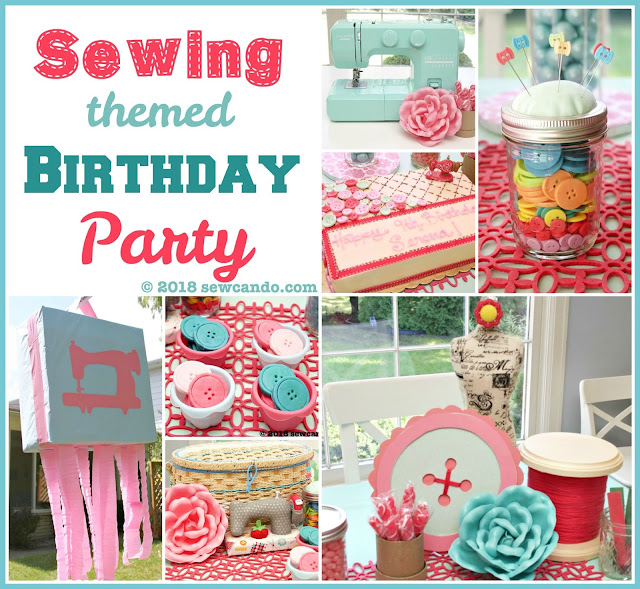
Our Sewing Themed Birthday Party was another post that was shown big love and was really fun for me to put together:


As was the Giant Thread Spool Storage Canister that I made as a prop and now use in my craft room: 


My 3-D Fabric Cornucopia, which was I designed for Team Timeless, was also a festive favorite.  


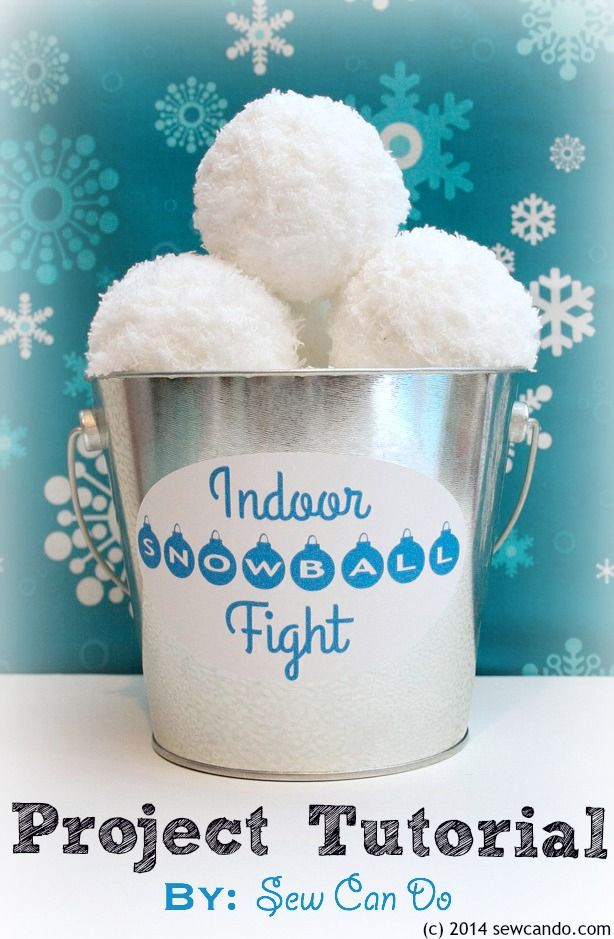
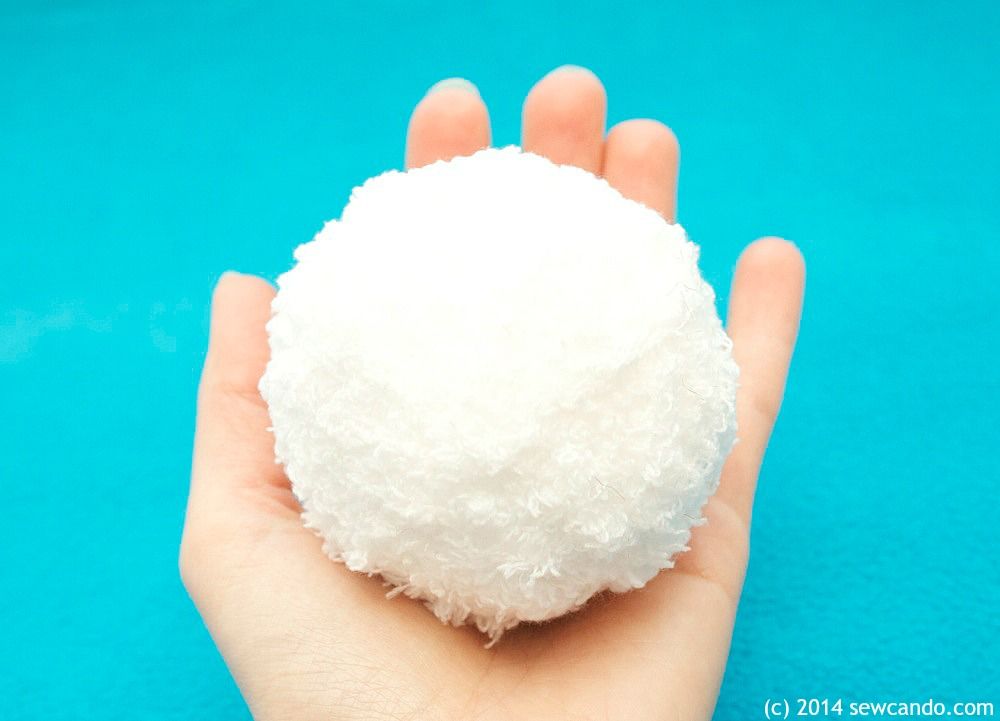
I also looked back at what's been my most popular winter tutorial of all time and it was this gem: The Indoor Snowball Fight Set.


This was such a fun project to make and even though they're all older, my kids STILL play with this every year - they even drag it out in the summer!


I'm looking forward to a near year with new tutorials to share, more projects & products to try and more crafty giveaways to make 2019 the very best year yet. 

Happy New Year!
  

Wednesday, July 25, 2018

Stenciling on Fabric: Best Tips & Supplies To Try


For a long time I avoided using stencils because I always had less than stellar results, but recently I decided it was time to conquer my issues and get it right for a change.  I've learned what makes the difference between blah and beautiful, so I thought I'd share some tips and what supplies work best to turn anyone into a stencil champ - and how to make this cute fairy bag too!


It's even got a fun textured feel to give it some extra detail:


Now, onto Stencil Success 101:

Get a good stencil.  Not all stencils are the same.  Some can be really thin and filmy which is much harder to work with  and too delicate to reuse.  I was asked by Stencil Revolution if I wanted to try some of theirs out, no strings attached, so I chose this pretty fairy moon design (you can find it here).  Their designs are all 10 millimeter mylar, so it was nice and sturdy.  I've used it 3 times now and it's still in great shape.


Wash & iron that fabric! It's really important that the fabric accepts the paint well.  It's so tempting to just start painting, but don't!  Washing it first removes any factory sizing, dust or dirt that can keep the paint from sticking.  If the item is going to need washing in the future it's a vital step.  There's nothing worse than painting something beautifully and then it starts wearing off after you wash it.  After pre-washing, get that fabric as flat and smooth as possible with a good ironing too.  I used a basic black tote from the craft store.


Use adhesive spray.  Painting on fabric has a higher chance of bleeding and shifting, so good adhesion is key for getting nice smooth edges.  For mylar stencils, stencil spray or spray adhesive is the secret.  Coat evenly on the back - especially around the tiny detail areas of the design, wait a minute for it to dry and then press into place. 


Use the right paints.  Some people say any old acrylic paint is fine, but for fabric it's important that the paint is pliable and washable so it doesn't look stiff, crack or wear off. There's a fabric medium you can add to regular paints and I've used it before, but it's easier, cheaper and more effective just to get paint that's made to work with fabric.  I decided to try out something new - Fabric Creations Plush paint from Plaid - that is meant for fabric.  It cost twice as much as the basic fabric paints, but since it was supposed to plump up and add texture, I figured it was worth the splurge at the craft store to try. 


Use the right brushes.  Dabbing up and down with a sponge pouncer adds the paint without seeing brushstrokes or bleeding the design.  After dipping it in the paint, dab the excess off and then get painting.


Pounce away.  Start at the edges and work inward to get a first coat and then go back over thinner patches.  You can always add more paint, but if you put too much right away you're out of luck.  Since I was doing two colors, I did the smaller sections first with a little pouncer so there'd be less chance of overlapping colors. 


Remove the stencil while wet.  Peel away the stencil while the paint is still wet, when it's still easy to touch things up and avoid the paint drying and acting like glue between the fabric and the stencil.  Because I was using a textured paint, I needed to make sure I got a good solid coat of paint on and was able to see that better, and add extra bits where needed, when the stencil was off.


Clean the stencils right away.  Paint dries mega fast on stencils and can be really hard to get off all the little nooks & crannies at that point.  Dried paint build up means the design won't come out as crisp the next time around too.  I find it easiest to use dish soap and a brush to get paint off quickly.  For the adhesive on the back I use Goo Gone and a paper towel and it's nice and smooth again in no time without having to scrub like crazy.    


After my paint dried and had 24hrs to cure, it was time to "plush it up".  I turned my bag inside out and steam ironed it according to the paint directions. I went over it a few times to be sure I was doing enough.


What started off as a flat design like this:


Turned into this puffier textured effect, which is pretty cool.  It works best with a good amount of paint (two good coats) and a fabric that isn't too thick, like this thinner tote.    


I stitched a little star button to the wand, to add to the dimensional look, and now we've got a sweet fairy bag to take out and about and I've gotten some stencil savvy.  Win-win!  


I was not financially compensated for this post.  I received my choice of stencils from Stencil Revolution to use as I desired.  The opinions are completely my own based on my experience.   For my complete disclosure policy, click here.

Wednesday, March 12, 2014

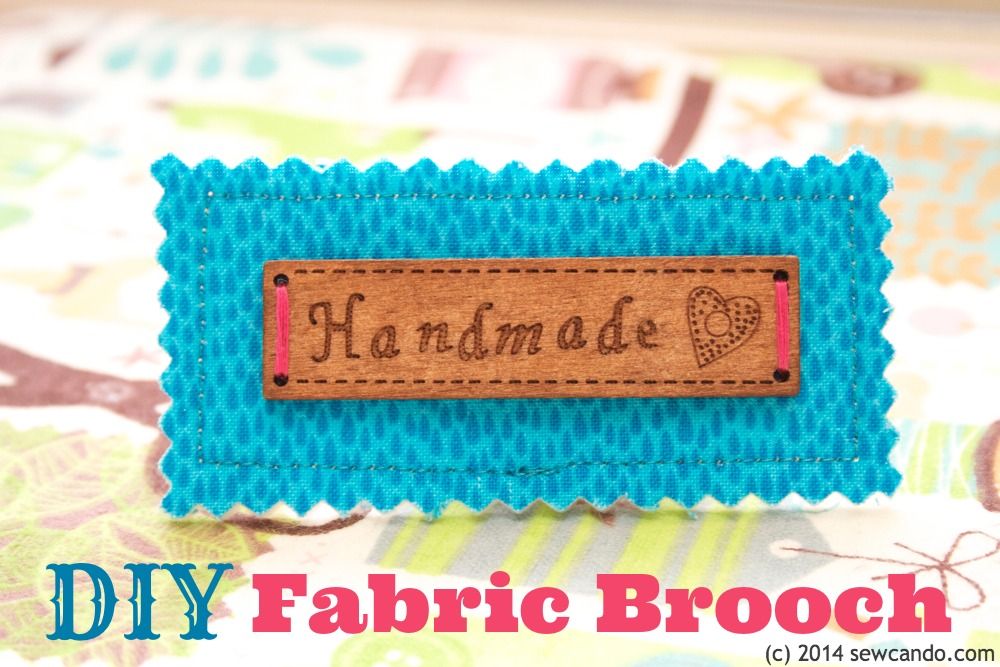
Scrap Buster Project: DIY Fabric Brooches


Got some pretty fabric scraps that are too small for most projects?  Or want to highlight a fabric's fun print on a small scale?  Then this project is for you!  Make pin-on brooches in minutes & add to any outfit or bag for some extra fabric fabulousness.  

I literally whipped this project up an hour before going to a craft event.  I wanted to be able to wear something crafty, that I'd made, and this worked out perfectly.  It's also a great way to feature a design or character from a busy fabric as well.

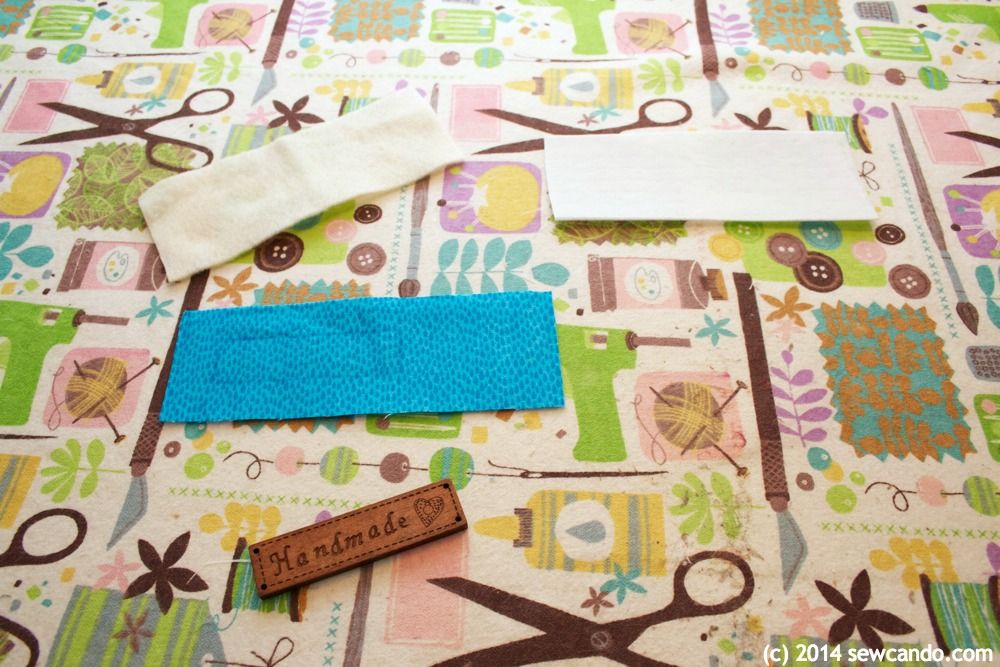
Materials:
- Scrap of quilting cotton (the fabric I used is Rain Basic in Aqua by Timeless Treasures)
- Scrap of felt
- Small piece of ultra firm stabilizer
- Safety Pin
- Sewing notions (disappearing marker, shears/scissors, iron)

Optional: paper-backed fusible web, button/embellishment, pinking shears, embroidery floss, hand sewing needle.  The "Handmade" wood embellishment I used can be found here

Start by cutting your desired shape from your fabric, felt and stabilizers.  Since I was going to add a rectangular embellishment on top, I echoed that shape, but made it about an inch wider and higher all the way around.


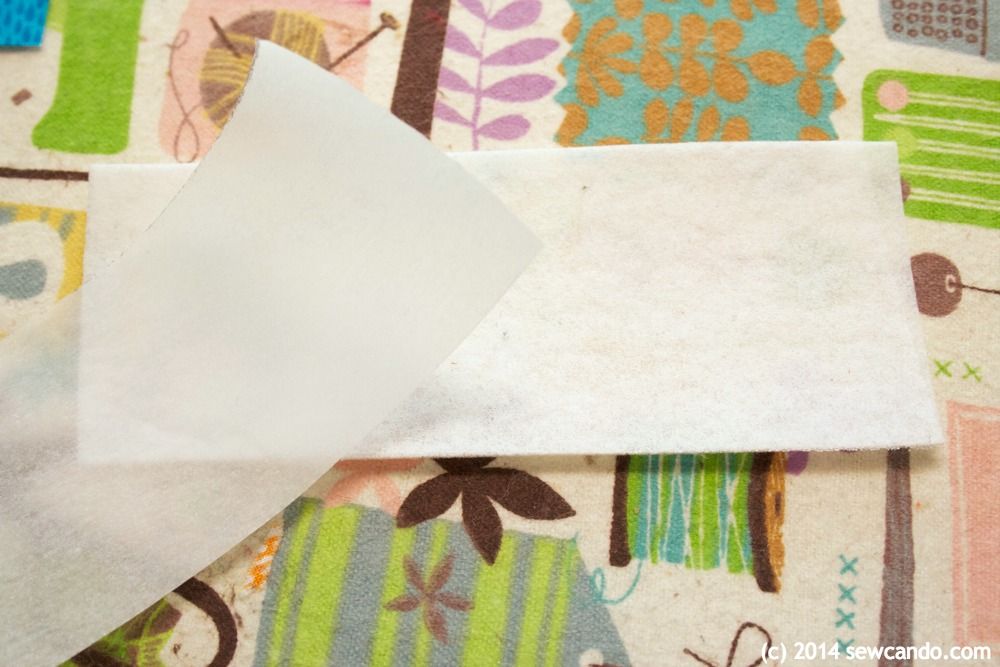
Next iron on some paper backed fusible to the wrong side of the fabric, peel aways the paper and then fuse to the ultra firm stabilizer.  Using paper backed fusible isn't required, but it will keep things from shifting while you sew, so it's a sanity saver.


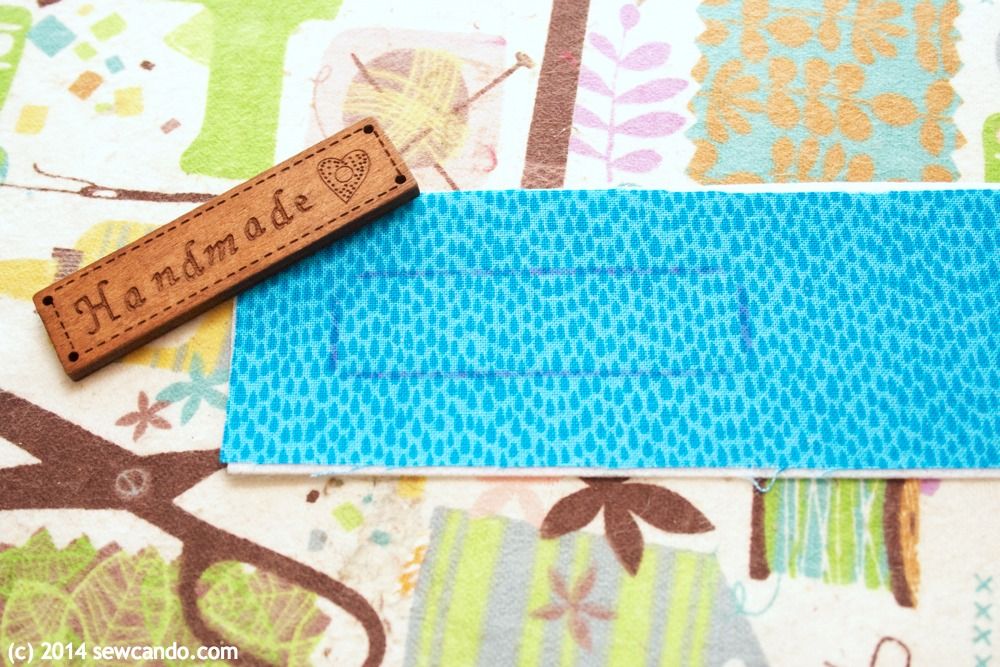
Use disappearing marker to draw the outline of any embellishment if that will be the shape you want to sew around. This makes sure things centered & gives a guide to sew around to make sure the topstitching will be even and straight.


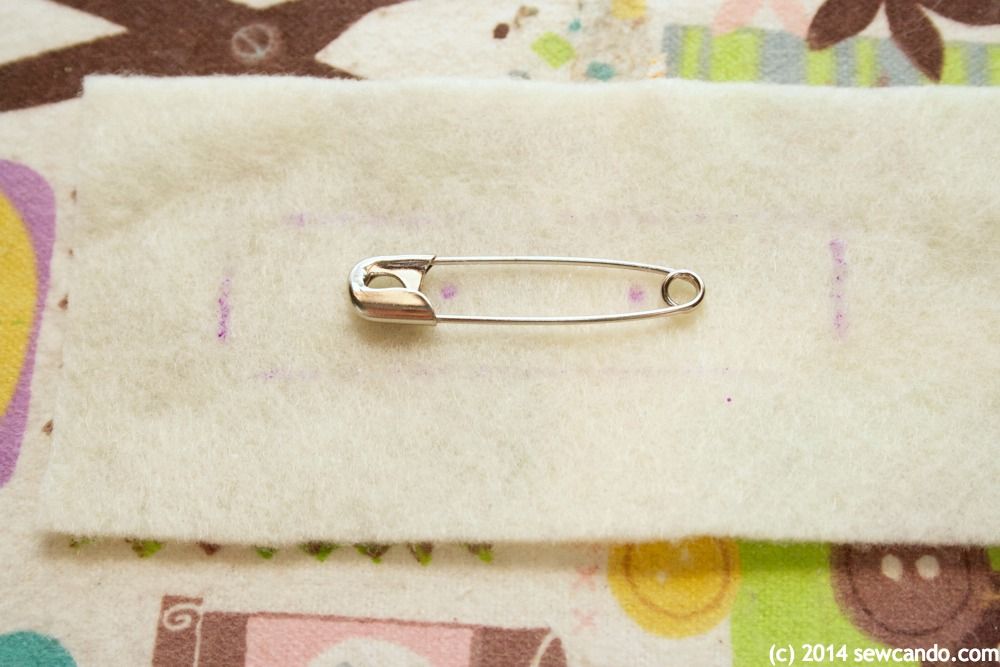
Lay the safety pin on the felt and center.  I used disappearing marker to draw the outline of my wood again to make sure I had things perfectly centered.  Make two small marks as shown:


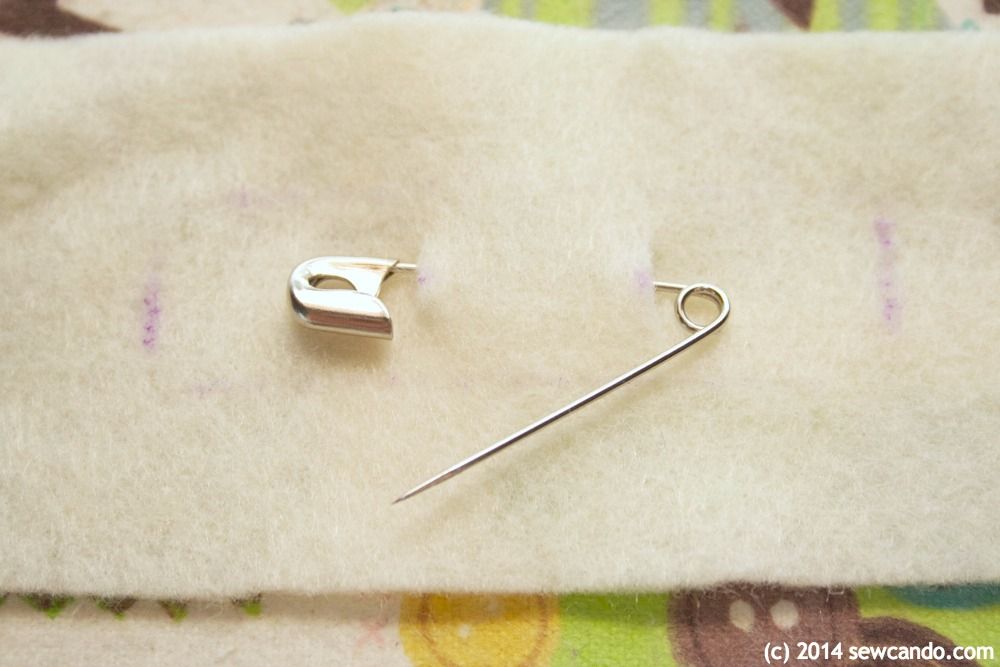
Snip the two marking points to about 1/4 inch high and slip safety pin in to make sure it fits. Slip back out and add after brooch is complete.


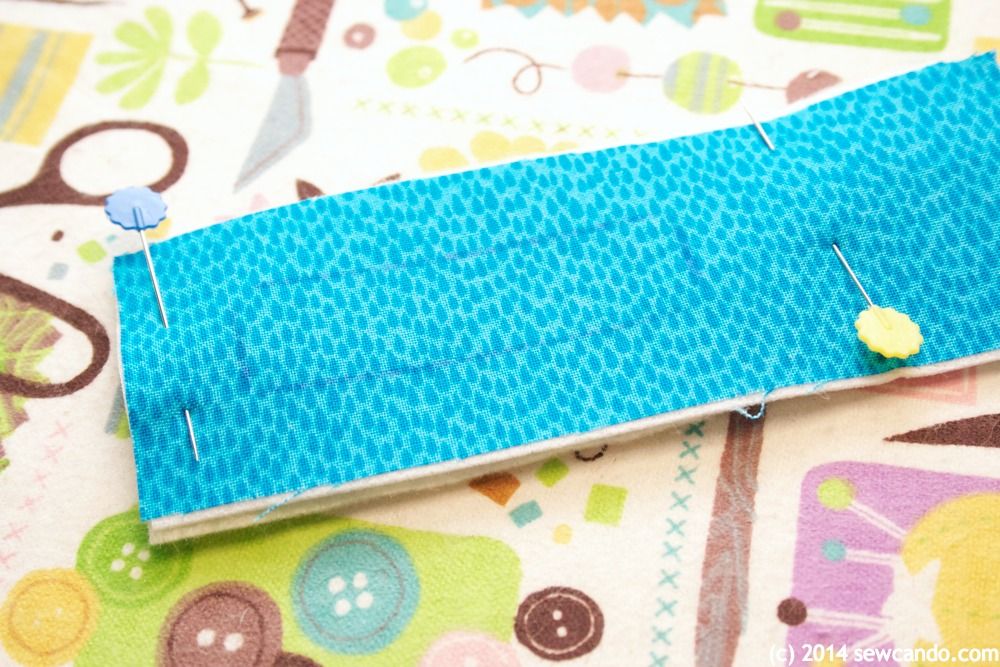
Place felt behind the fabric "sandwich" you've made and pin layers together:


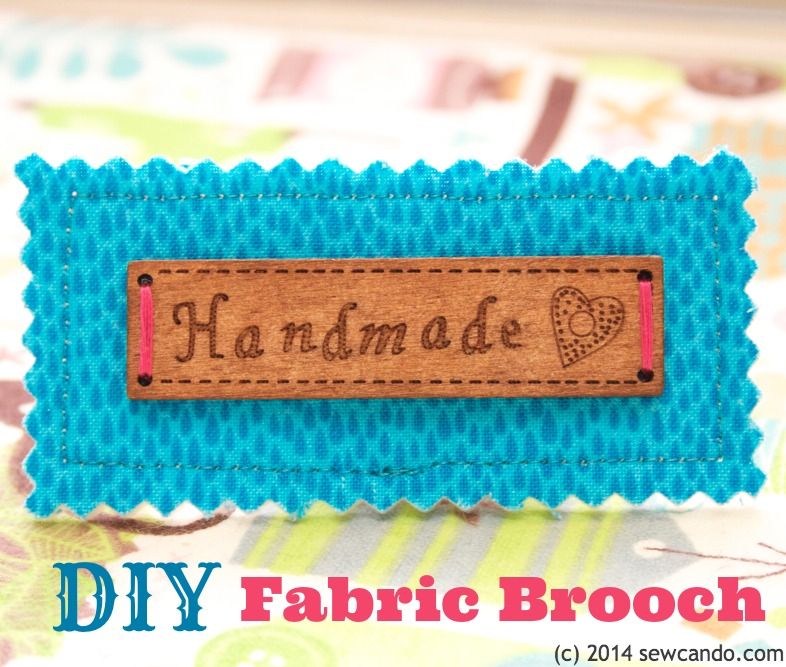
Topstitch all the way around. I did about 1/4 inch away from the outline of my wood piece. Trim just outside the stitching.  I used pinking shears for some extra decorative detail and to prevent fraying.  If using regular shears, add a little Fray Check around the raw edges to seal them.


If you're using an embellishment or decorative button(s) like I did, hand sew them on.  I used bright pink embroidery floss for some extra color.  Slip safety pin through slits in the back. Now the button is done and ready to wear!


I'm also sharing this project with my FAVE LINK PARTIES.
Click HERE to check them out!

Friday, February 14, 2014

FlapHappy Backpack Tutorial AND Modern Yardage Fabric Giveaway!


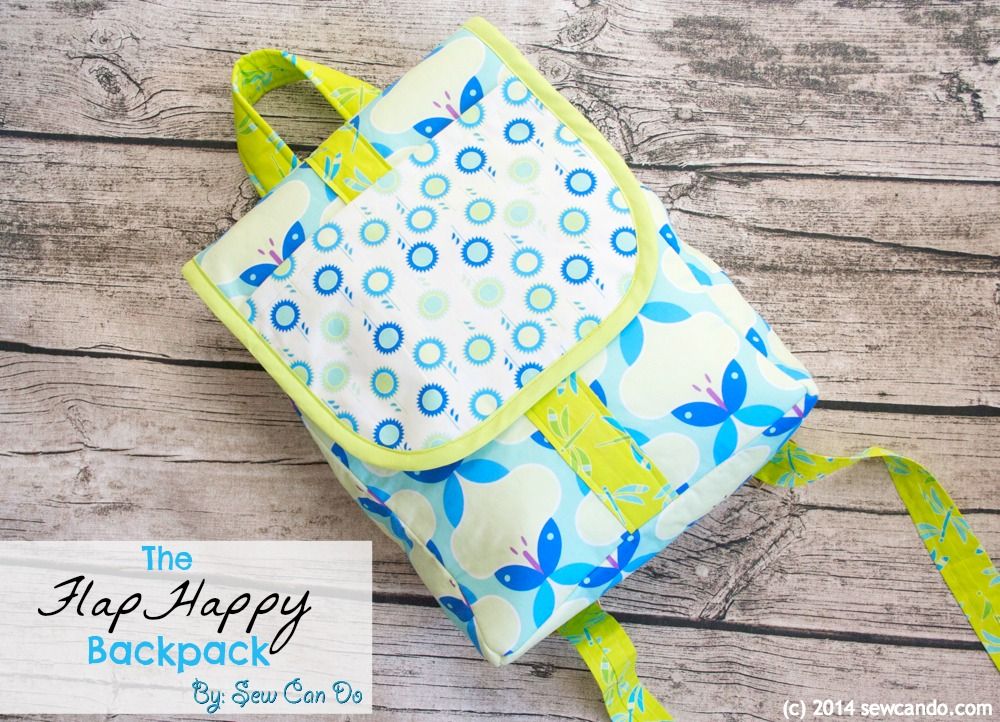
Friends, have I got a fabulous Friday duo for you!  Since it's Valentine's Day, and I love my readers, here's a special treat: a new, free bag tutorial AND an awesome fabric giveaway, featuring one of my new favorite fabric manufacturers, Modern Yardage.


Earlier this week I shared my experience trying fabric from Modern Yardage and what makes it a totally revolutionary way to choose fabric (if you haven't read it yet, and you love fabric, you'll want to check it out here) .  I also showed a teaser pic of the backpack I made with the fabric I tried.  Now I've got a full tutorial to share so you can make my Flaphappy Backpack too!


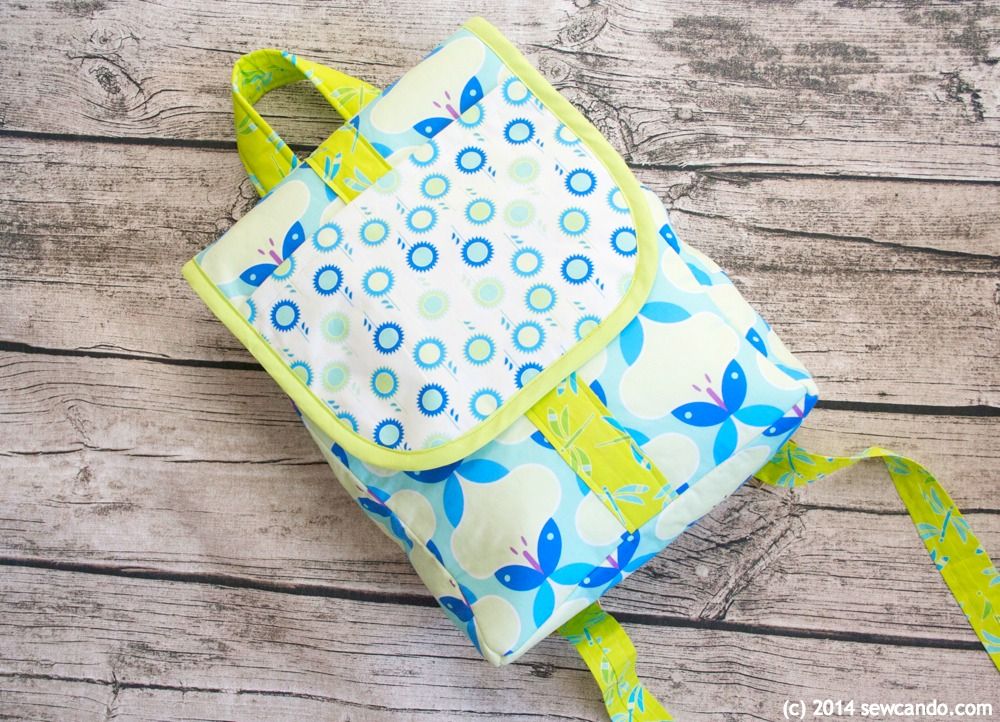
This backpack is sized to be perfect as a handbag alternative or as a child's backpack.  It's padded and has adjustable straps to fit just right.


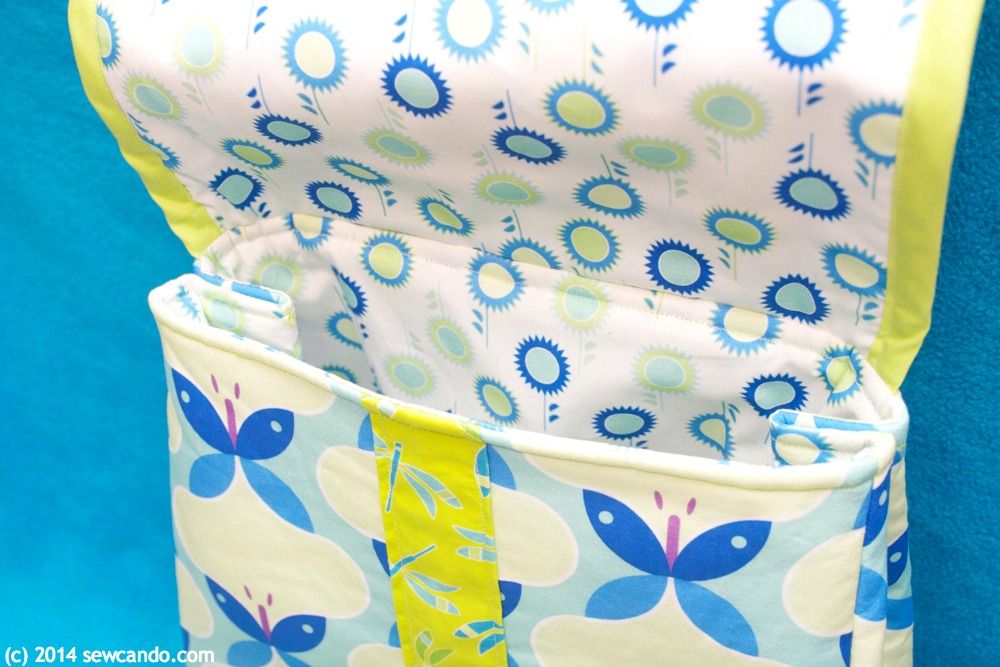
It's also fully lined inside and has pleated sides, so it's nice and wide at the bottom, but the top easily stays closed.


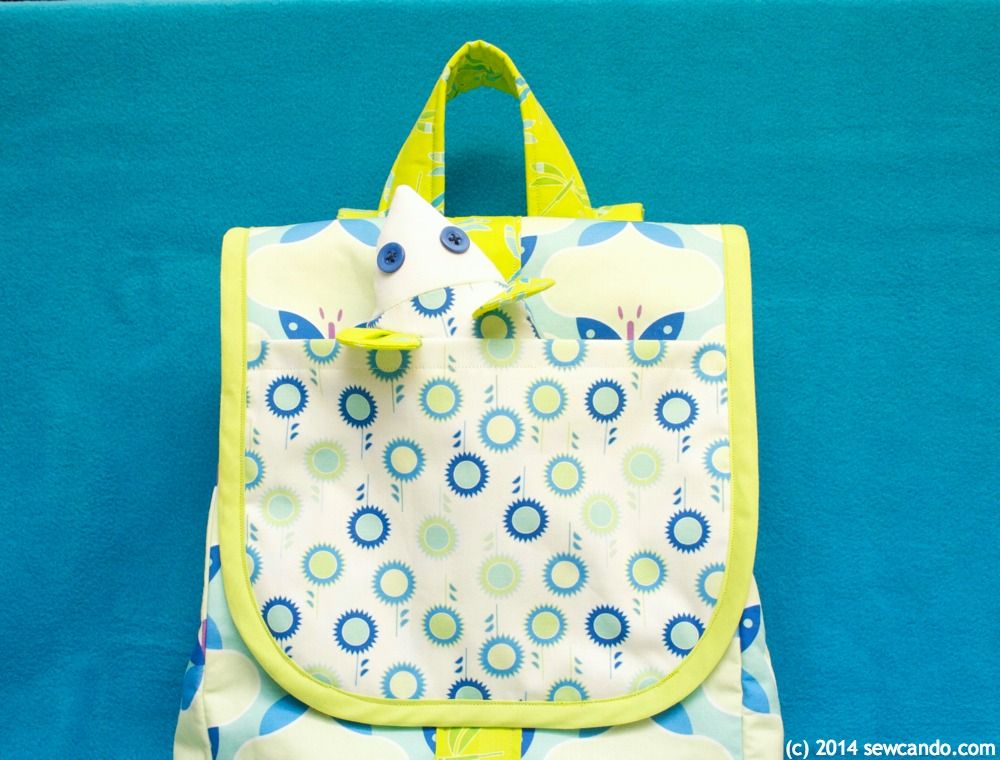
The name comes from the fold-over flap at the top, which makes it easy to open & close and has its own built-in pocket.


Now how to make your own FlapHappy Backpack...

Materials Needed:
- (3) 1/2 yds of cotton. Mine are the Amelia Harper Collection (Skye colorway) by Cindy Lindgren
- 1/2 yd fusible fleece 
- Package of double fold bias tape
- Two adjustable sliders
- Notions (coordinating thread, pins, iron, ruler/yardstick, rotary cutters/shears, hand sewing needle)

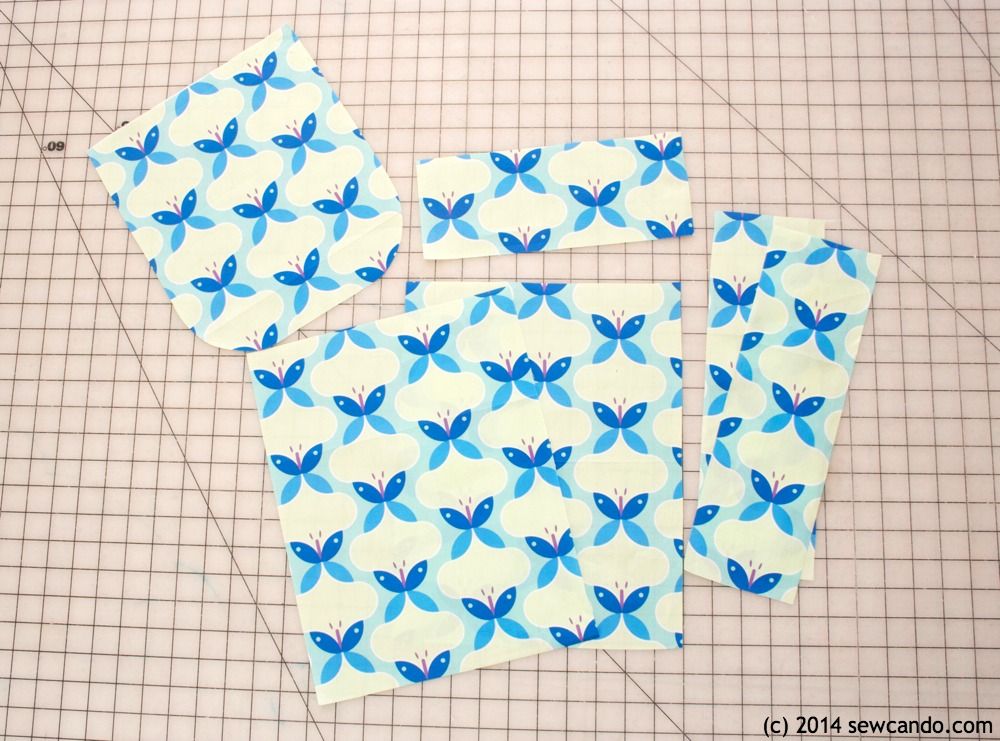
Cut the following pieces from both the Butterfly in Turquoise Large and fusible fleece:

(2) 10in wide by 13in high backpack main pieces
(2) 4in wide by 13in high backpack side pieces
(1) 10in wide by 4in high backpack bottom
(1) 9in wide by 11in high backpack flap (round lower corners)

Adhere fusible fleece to wrong sides of fabric with iron.


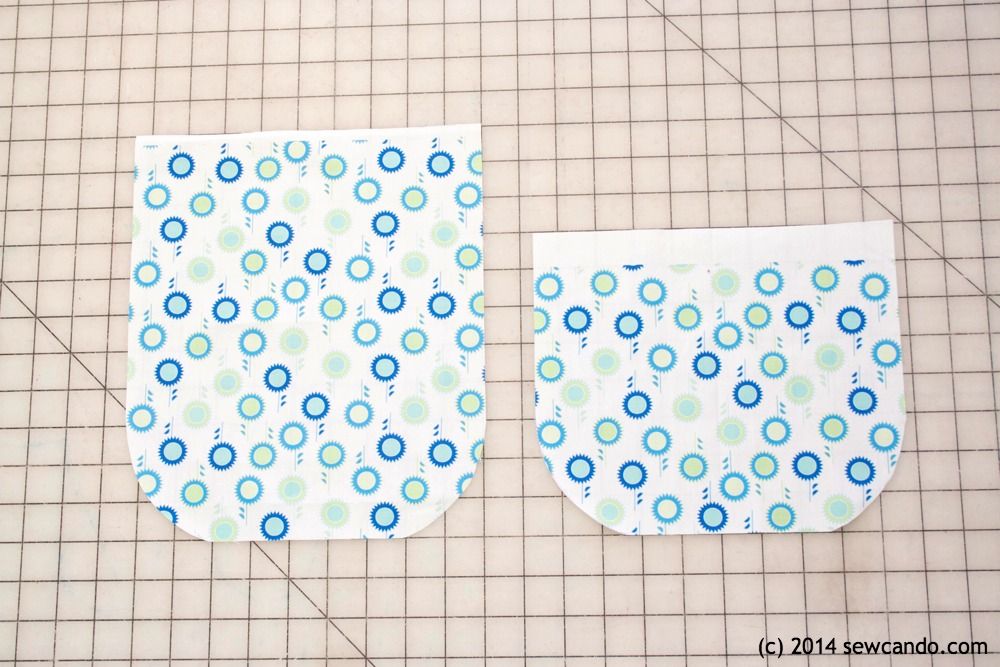
Cut the same pieces from the Flower in Turquoise Medium, except also cut an additional Flower piece just 3 inches shorter than the flap piece (this will make the outer pocket):


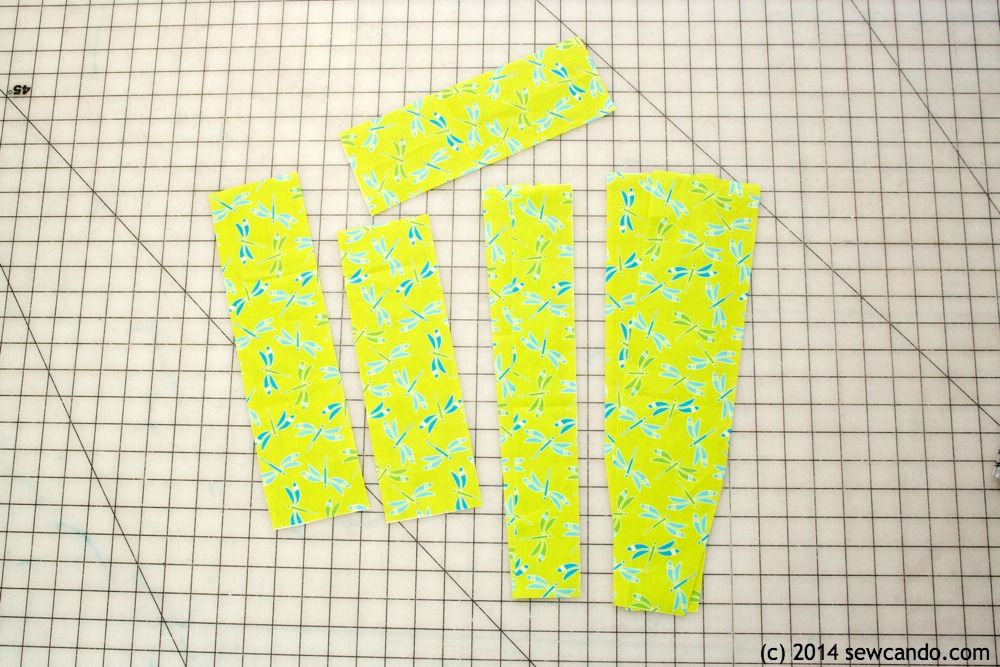
From the Dragonfly in Lime Medium cut:
(1) 3in wide by 11in high flap stripe
(1) 3in wide by 13in high backpack stripe
(1) 10in wide by 3 1/2in high handle
(2) 4in wide by 16in high upper straps
(2) 2 1/4in wide by 10in high lower straps

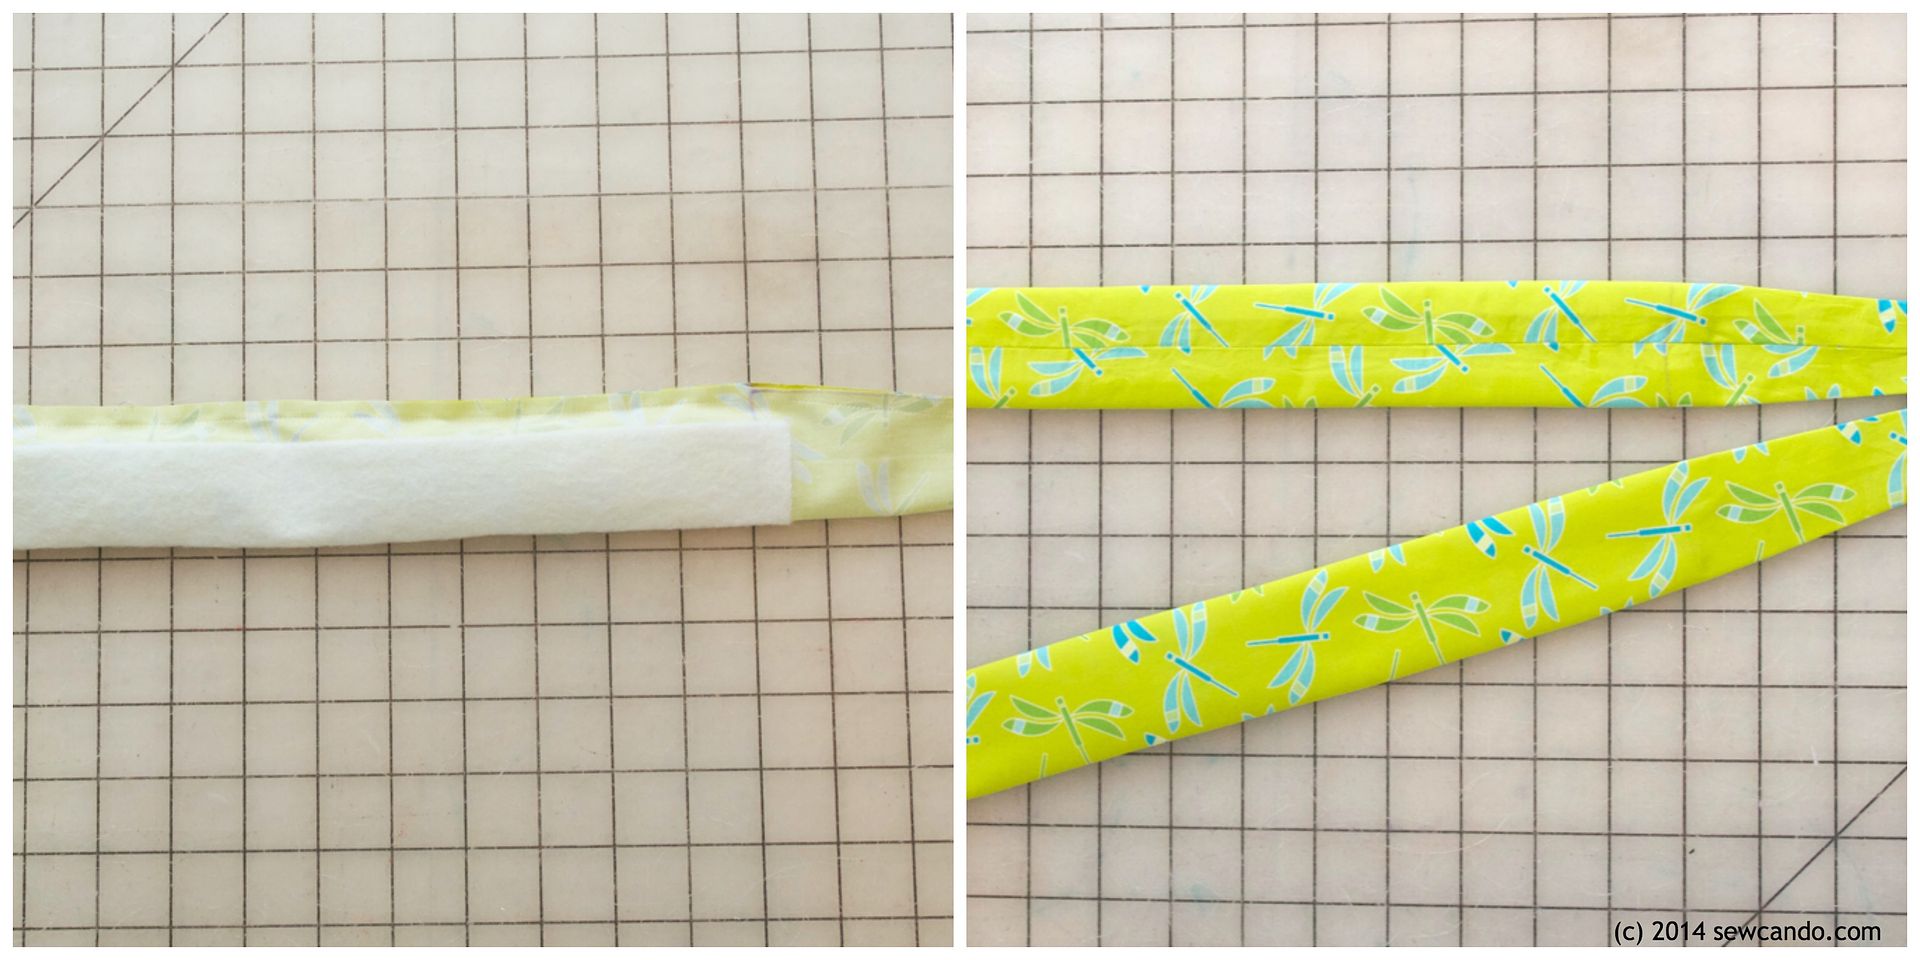
This will make the outer details & straps.  Narrow the upper strap pieces slightly on one end starting 11in down from top, so the bottom width is tapered down to 3 inches.  Iron on fusible fleece to wrong side of handle and upper straps (except tapered half of upper straps so it will make turning easier later):


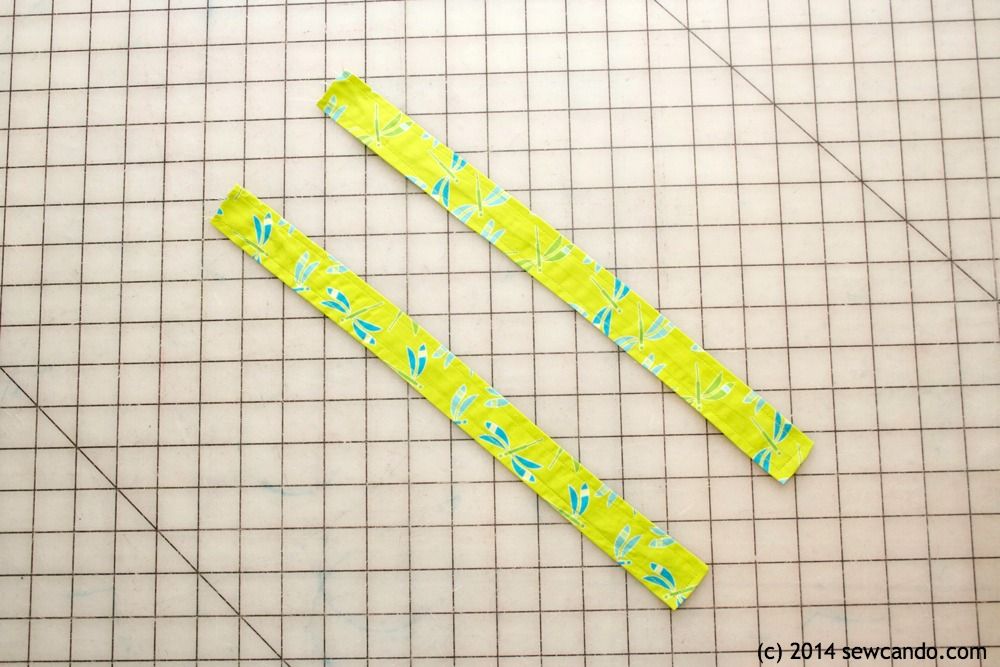
Take stripe pieces and fold in half lengthwise and stitch 1/4in from raw edge.  Turn right side out and press flat with the seam in center as shown.


Do same with handle and lower strap pieces, stitching one short end closed as well on lower straps. Topstitch along side seams of lower straps:


Do same with upper straps, except topstitch down the center of the padded area:


Center stripe on outer main piece and flap and stitch along stripe sides:


Double fold top edge of pocket 1/2in on the wrong side and press into place.  Note: Since I was using a bright white fabric and didn't want the pocket to look transparent when layering, I also cut a piece from the Dragonfly to line it and basted them together.  Stitch down the upper fold:


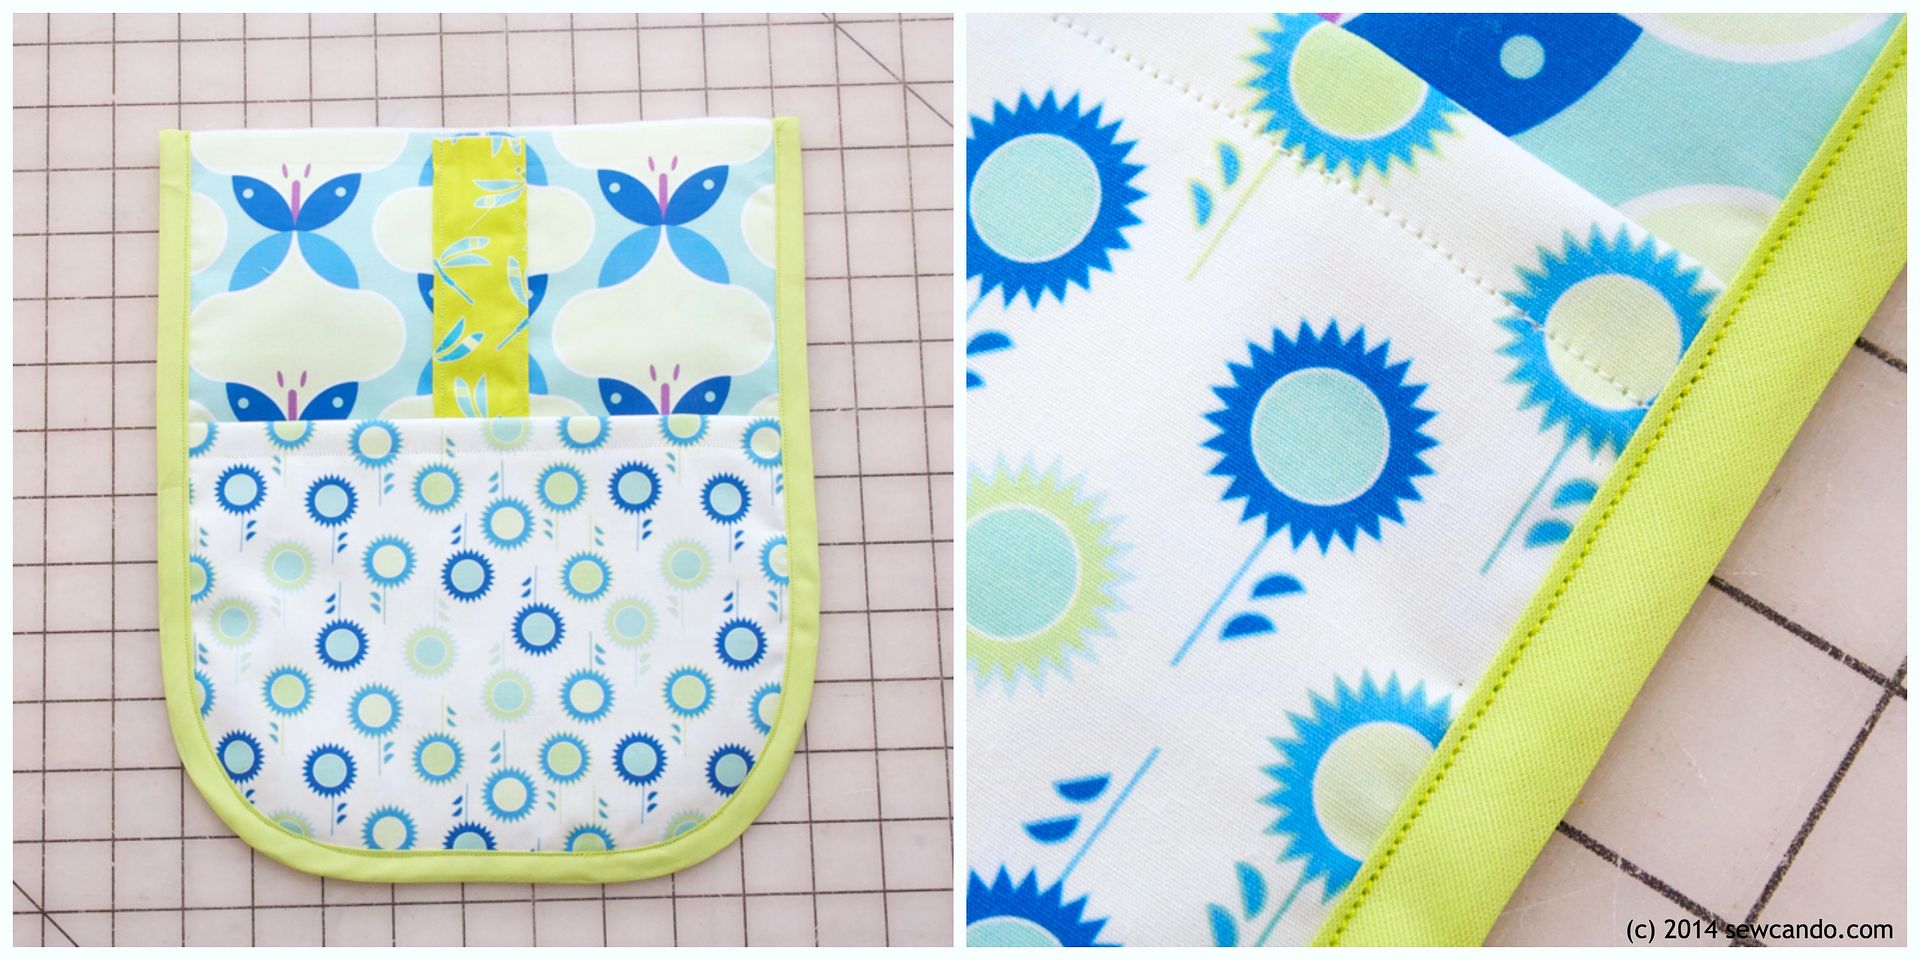
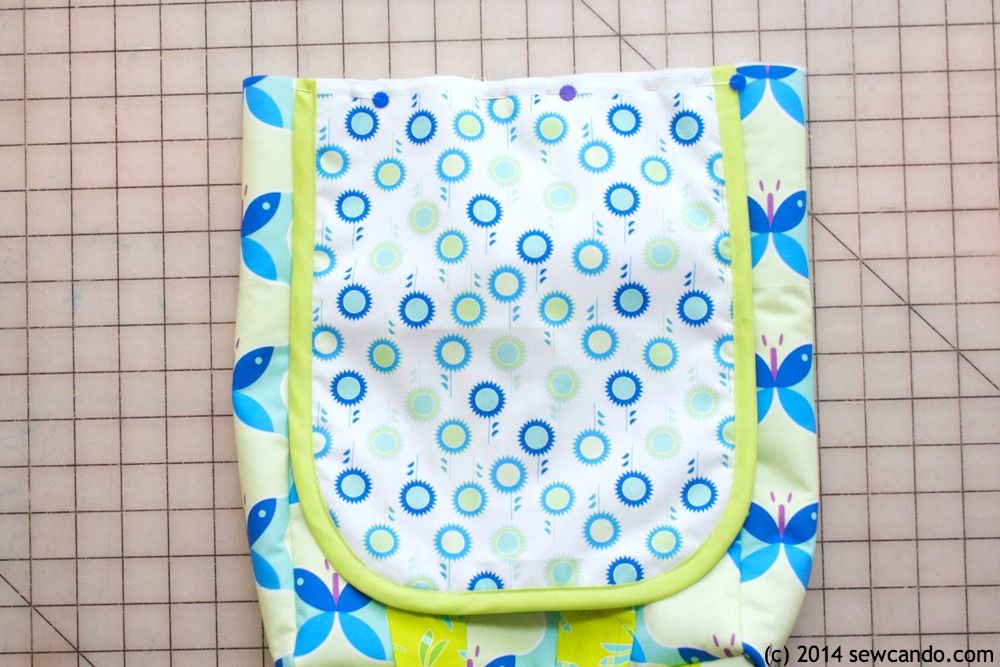
Layer the flap lining, outer and pocket pieces as shown (flap wrong sides facing, pocket right side out on top of outer flap) and baste together:


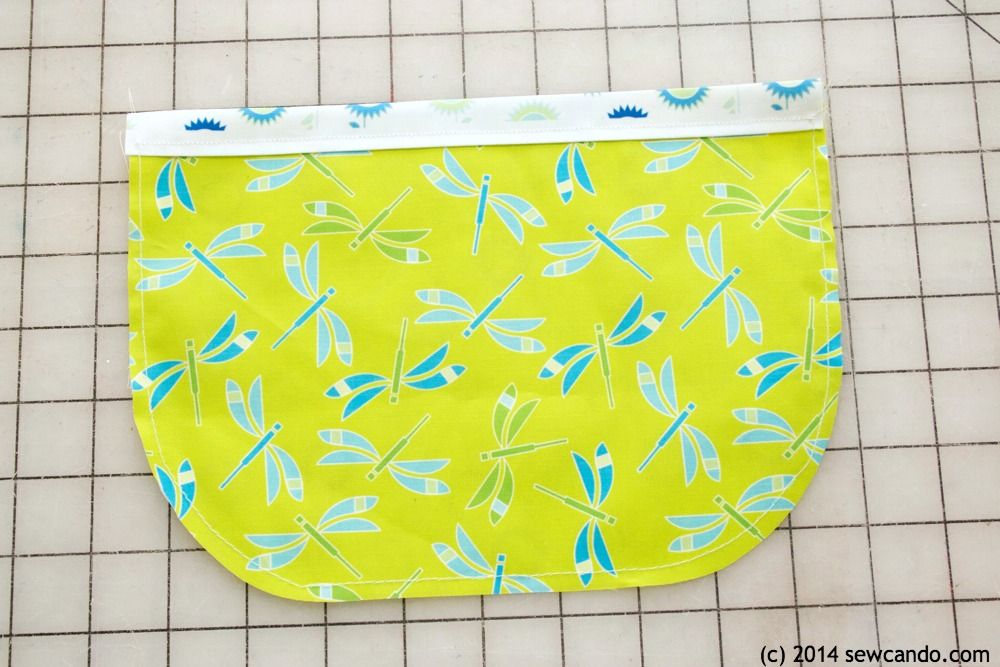
Encase edge of flap in bias tape:


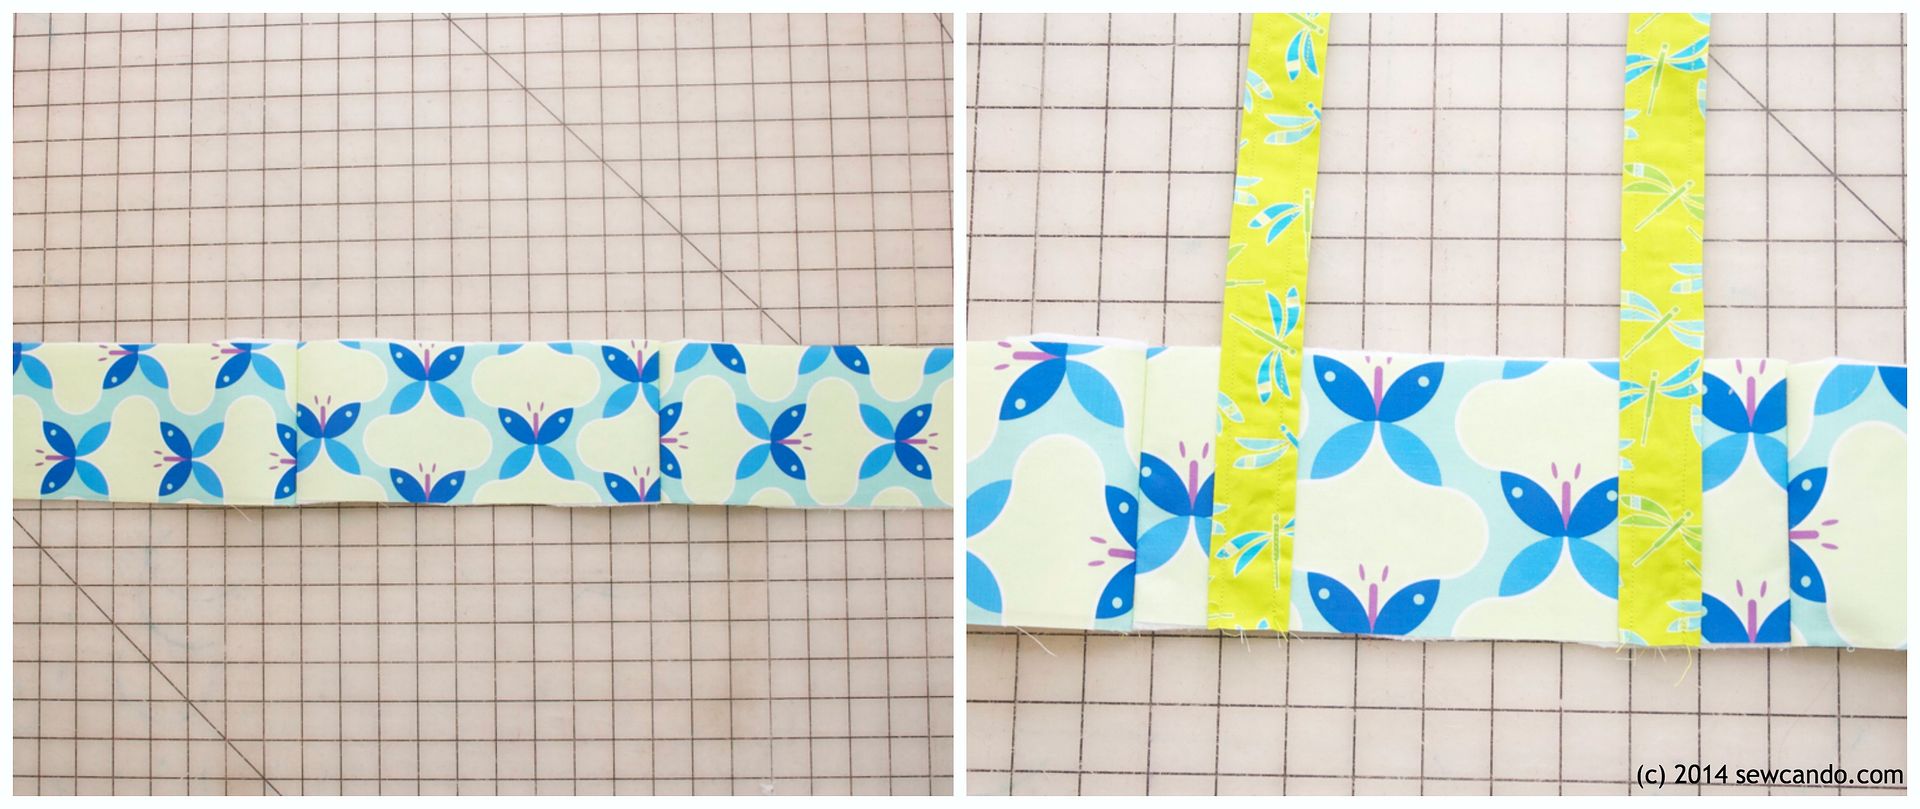
Take bottom and side pieces of outer and stitch together on short sides as shown, using a 1/4in seam allowance, with right sides facing, starting and stopping 1/4in inward from each end.  Baste lower straps to long side of bottom as shown 1 1/2in inward from either side:


Attach front and back pieces to bottom in same manner as sides.  Starting with one side at a time, pin and stitch together the side panels to the front and back pieces.


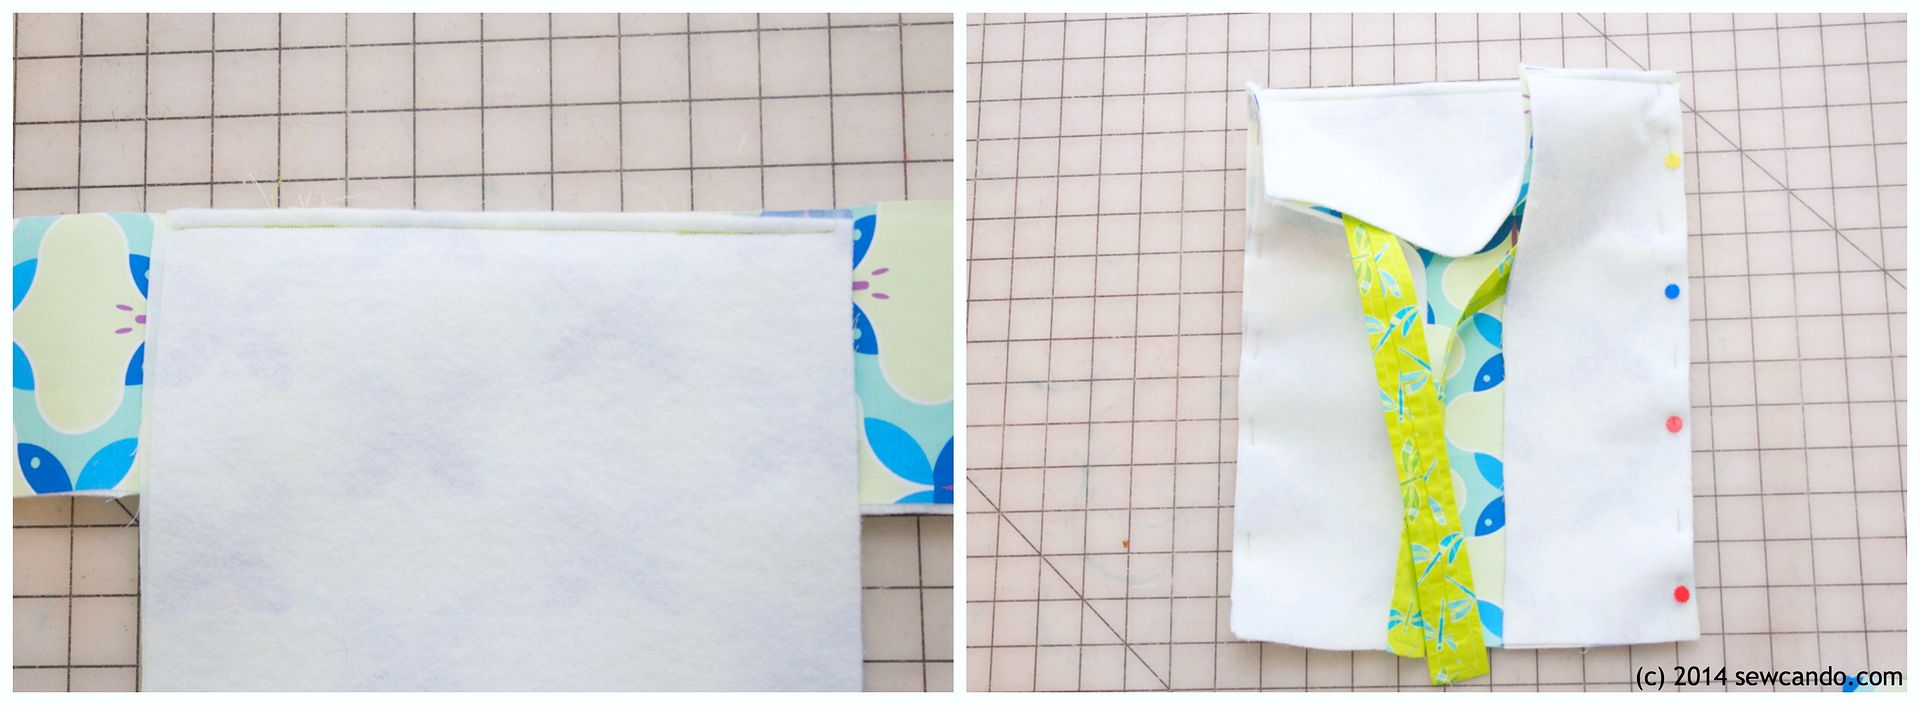
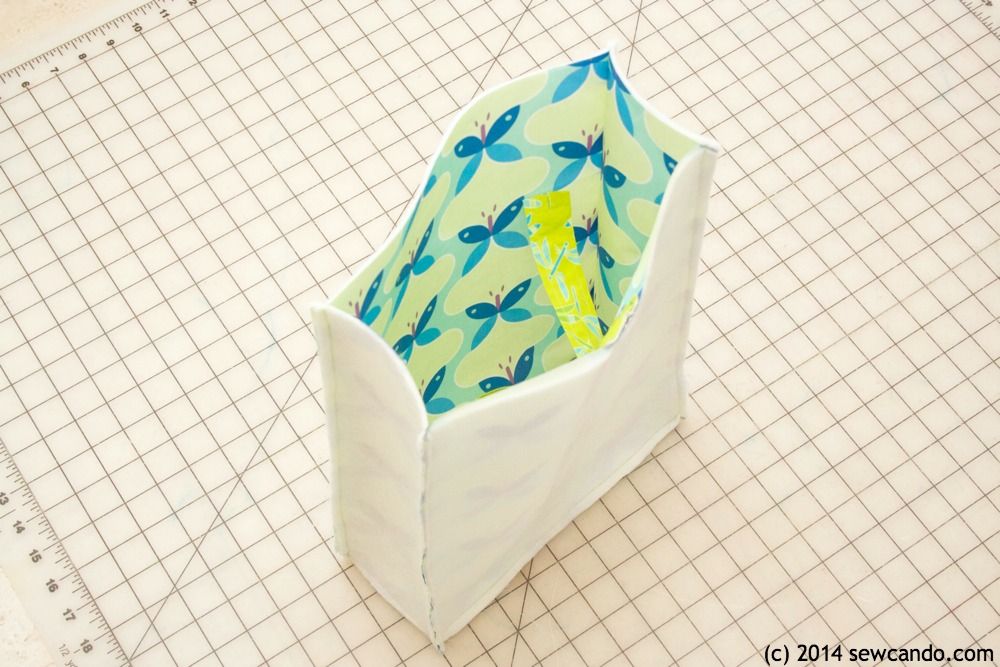
Repeat the previous two steps with the lining pieces, but leave a 3 in gap on one of the longer sides of the bottom piece for turning later.  The ending result will look like this:


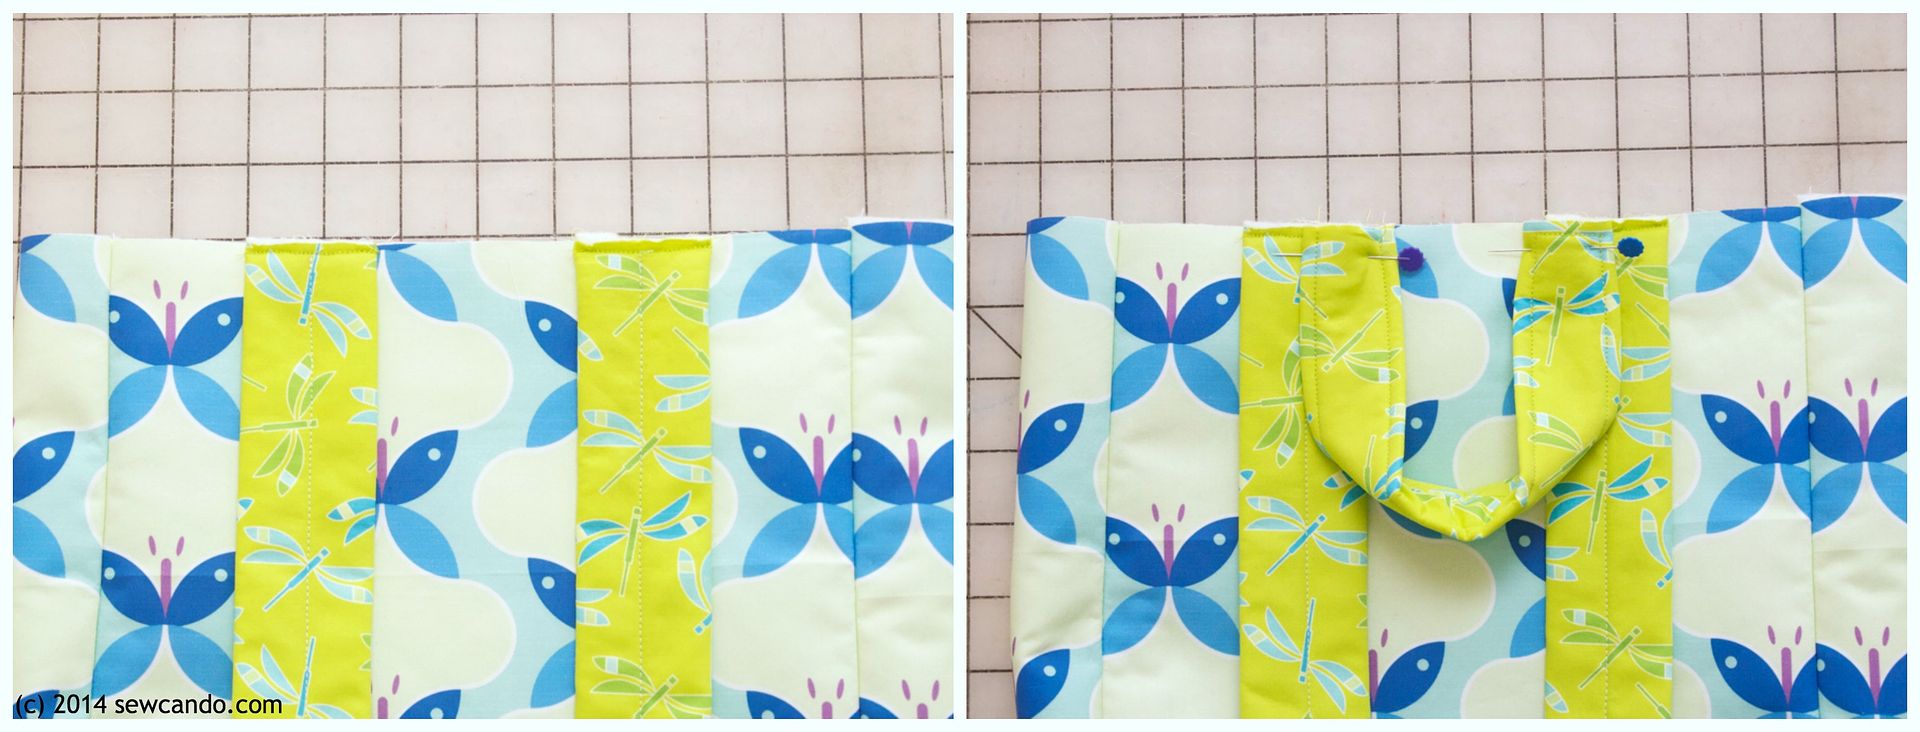
Turn outer backpack right side out and pin then baste the upper straps 2in inward from either side on top edge.  Add handle over them as shown, 2 1/2in inward from sides, basting into place.


Now take flap and with outer right sides facing, pin and baste flap onto back side of backpack.


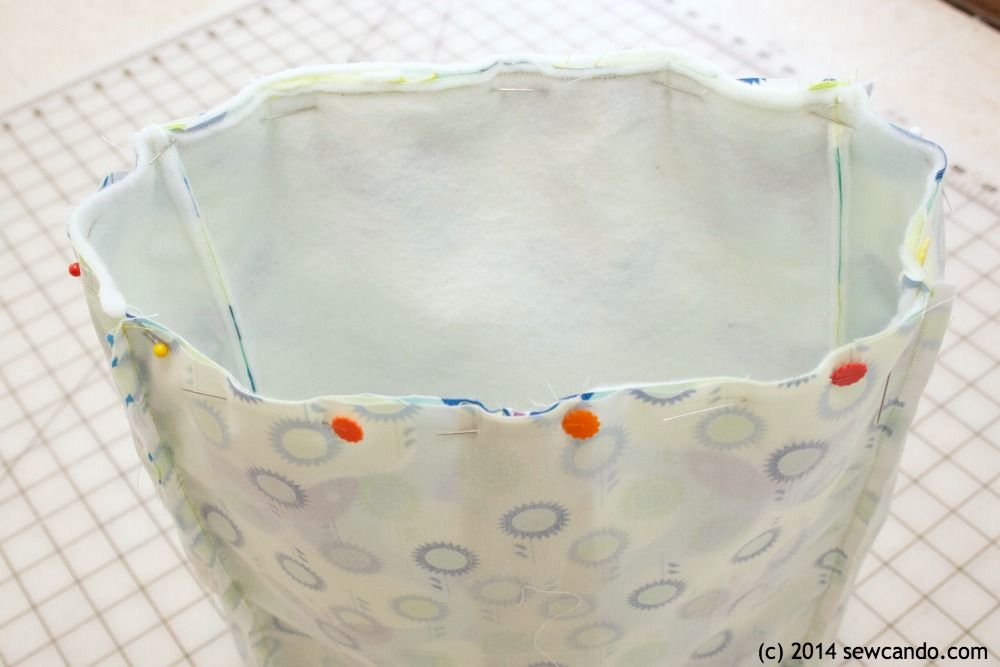
Insert outer backpack into lining, matching up side seams and pinning together along top edge.  Stitch all the way around.  


Pull backpack right side out through gap in bottom of lining.  Hand stitch gap closed and topstitch around top of backpack, about 1.4in from edge.  Thread sliders around open ends of upper straps, folding strap under and stitching closed with a double stitched "X".  Thread lower straps and size as desired. 


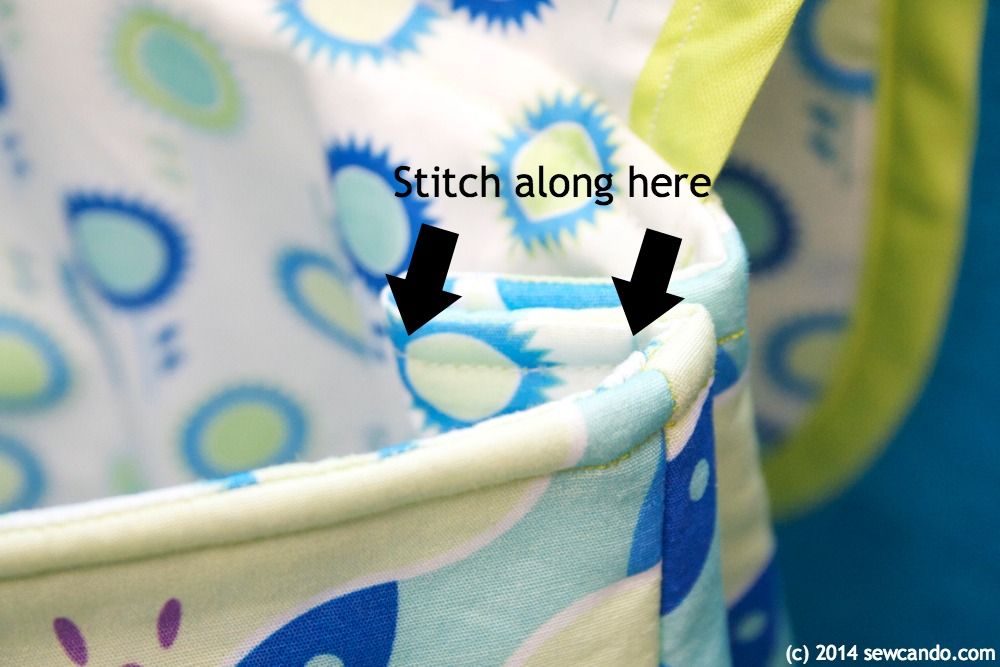
Open backpack and pinch sides inward about 1 1/2in and stitch into place, over topstitching, to create side pleats:


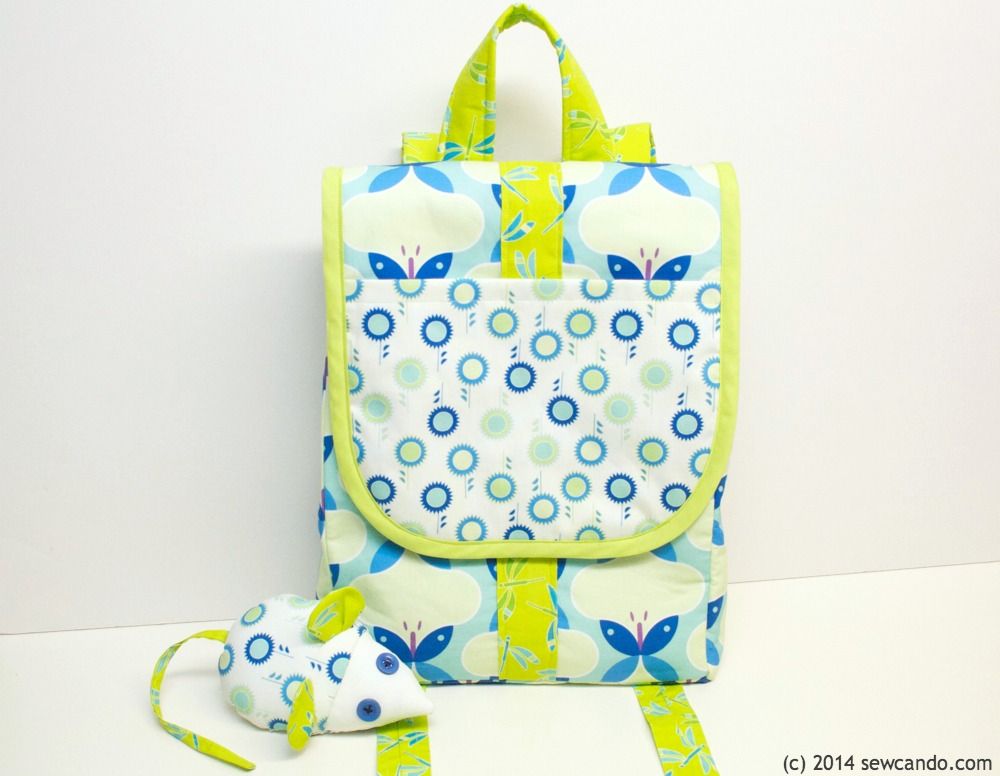
And the backpack is ready to fill!


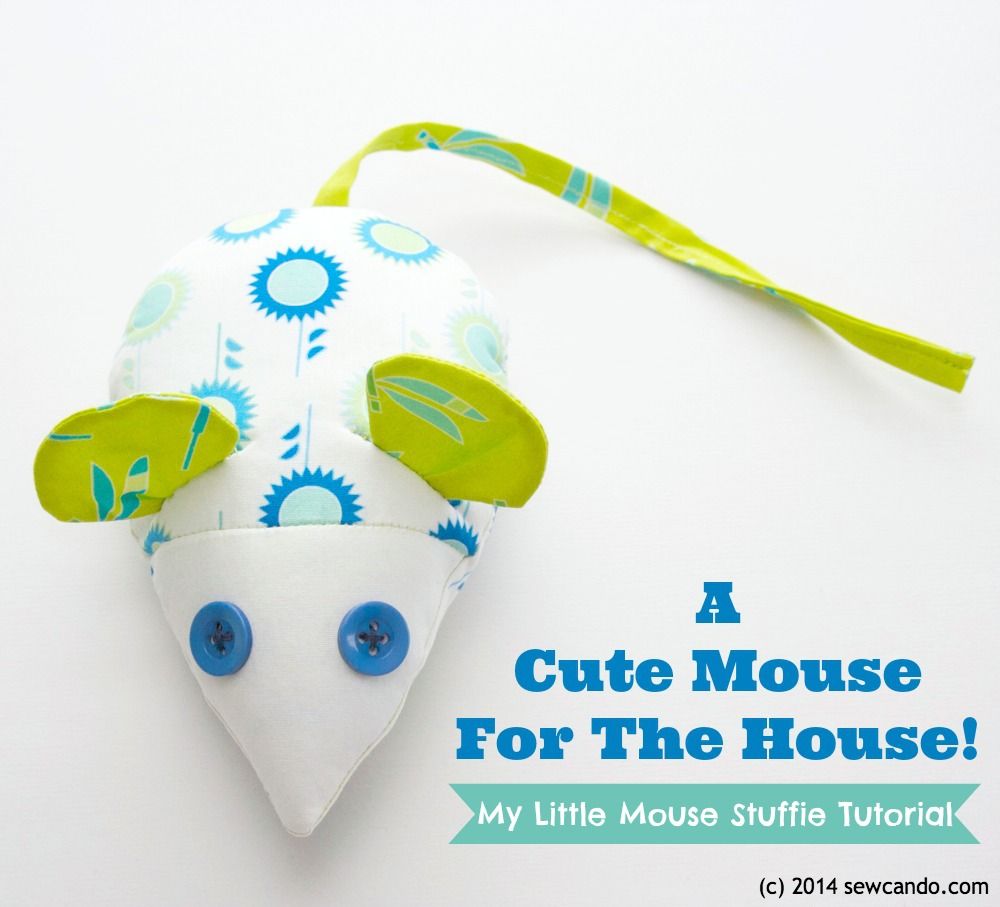
And if you want to make a cute little matching mouse to go with it, you can go to my FREE My Little Mouse Stuffed Toy PDF pattern & tutorial:


Now how about a chance to win some of this fabric, or any other prints you fancy, from Modern Yardage?  


One lucky Sew Can Do reader will get a choice of
8 Fat Quarters from Modern Yardage!

That's right - any designs you want.  Choose your favorite coordinating-collection prints like the Amelia Harper Collection I used:


or go for a diverse mix.  YOU get to pick!  


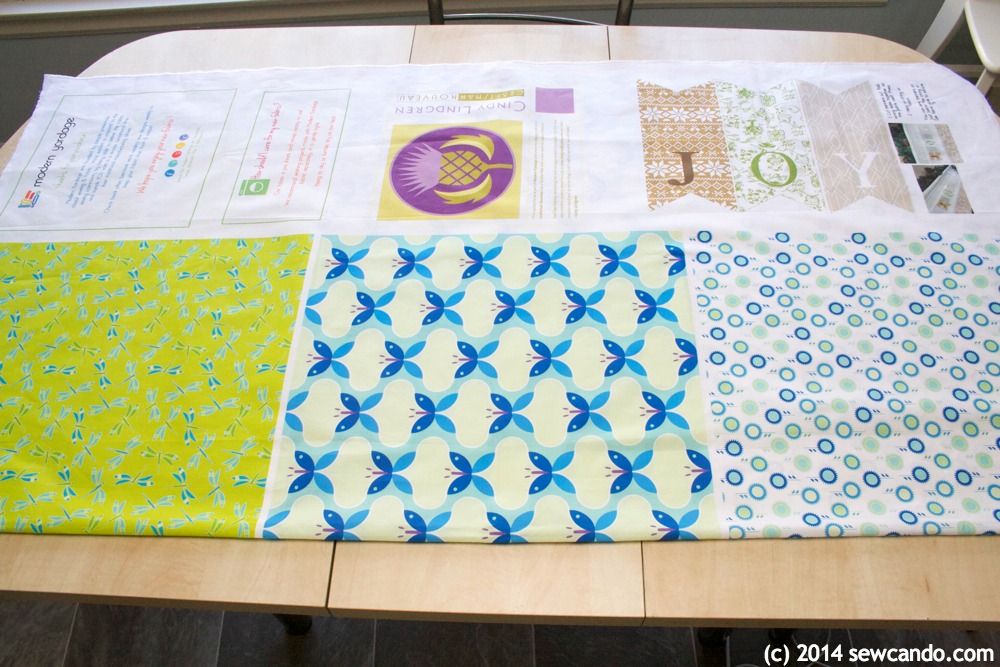
And all printed in an awesome, super wide fabric panel like this:


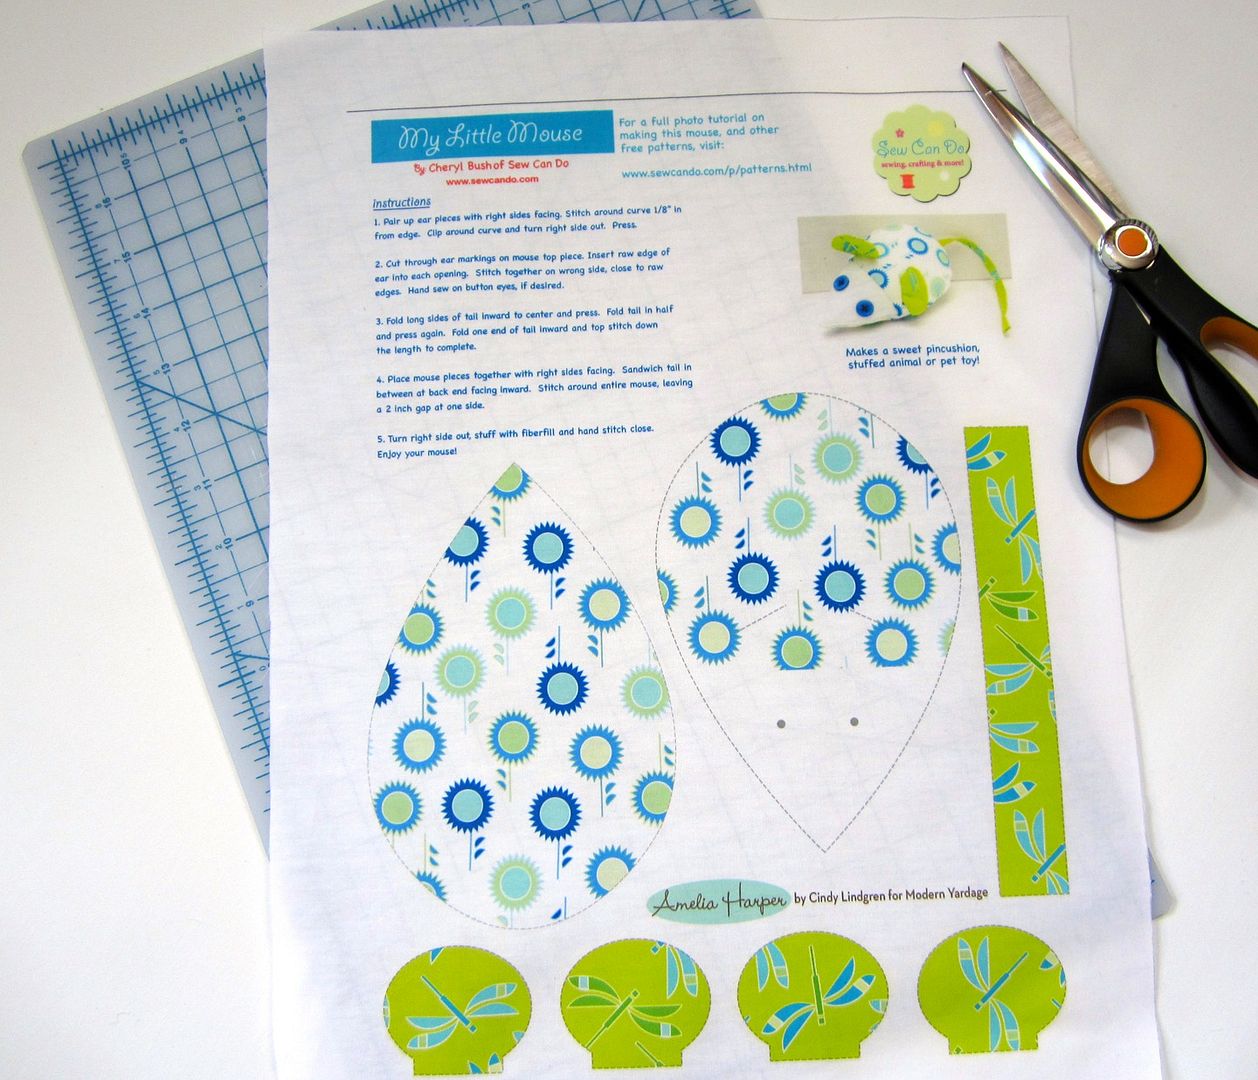
As I'd mentioned in my review post, there are free fabric goodies printed in the selvage of all Modern Yardage fabrics as a wonderful bonus. You can even select Sew Can Do's own original My Little Mouse cut & sew stuffie by using the code MYLITTLEMOUSE during checkout:


Then you could make this matching pair!


Good luck and Happy Valentine's Day Everyone!! XOXO

a Rafflecopter giveaway


I'm also sharing this project with my FAVE LINK PARTIES.
Click HERE to check them out!

LinkWithin

Related Posts with Thumbnails