

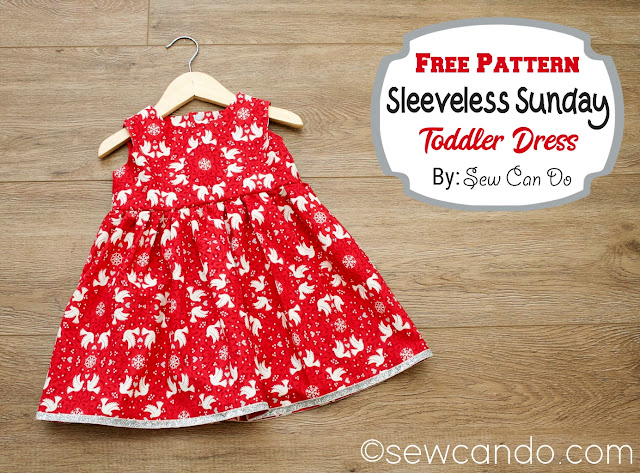
Make a versatile sleeveless dress that is nice enough for special events & church on Sunday, yet still casual for everyday with my
FREE PDF pattern Sleeveless Sunday Girl's Dress!

The bodice is fully lined to give a nice finish.

The snaps along the back center add a little detail and make it easy to wear too.

With a nice full skirt to be perfect on its own for those warm spring & summer days....

or paired with a little sweater for a nice outfit look.

I used this sweet print called Church Windows (available in my shop) to make it the ultimate dress for Sundays:

This pattern sews up so quick, I've made a bunch already. Now we have lots of cute dresses to choose from!

And it's easy to modify like this version that included a little stripe fabric placket and decorative buttons down the front:

My FREE pattern is for US girl size 8-10. I know this style is pretty simple and there are similar patterns for it for toddlers & little girls, but there really aren't many for the girls between 8-12yrs that can be sewn up in an hour or two. This one meets both goals!

The pattern inspiration: I find it very challenging to find basic girl dresses now that my daughter is in size 8 & up. Everything in stores for that size range seems to have sassy sayings, weird cold-shoulder or cut out designs or are basically shirts with an attached skirt. That's not what we're looking to wear to church or a nice restaurant.
The few store styles that are more classic tend to be super dressy materials and usually have a heftier price tag, so I decided to make our own. Using this design and cotton quilting fabric, it's easy to make a beautiful, durable dress, in whatever print you want, for under $20.

My pattern is US girl size 8-10, but by using 1/2 inch seam allowances, shortening the bodice by 1 inch and hem by 1 1/2inches, it scales down to size 6 too. If you need a bigger size, try my Sleeveless Sunday Tween Dress Pattern which fits most girls US 10-14:

I've also made a mini Sleeveless Sunday Toddler Dress Pattern to fit 12mos-2T:

- 1 1/2 yds cotton woven fabric (1 7/8 yds if self lining)
- 3/8 yd cotton woven fabric (only needed if using lining fabric)
- Lightweight fusible stabilizer
- 6 snap sets (or buttons)
- Thin cord or string
- My FREE PDF Sleeveless Sunday Dress Pattern
Notions: Iron, yard stick, rotary cutter/shears, pins, tailor's marking pen or chalk
Printing the Pattern: Click HERE to download my PDF bodice pattern. Print at 100% (actual size) no scaling. Measure with the test square to make sure the scale is correct. Cut out pattern pieces.


Start by cutting out the bodice front and back pieces from the outer and lining fabric. Transfer all markings. For the skirt portion, cut two rectangles that are 20 inches long by the width of the fabric (usually 42-44 inches). Trim off the selvages. Mark the top center points of both pieces.

Start with the bodice. With right sides facing, pin together the front bodice outer and lining around the neckline and the arm scythe.

Stitch together using a 3/8 inch seam allowance. Do the same on the back bodice pieces, also stitching down the straight center sides.

Trim down the seam allowances of all the seams.


Turn the front bodice piece right side out and press around the seam to get them nice and flat. Insert the shoulder sections into each of the shoulder sections of the back bodice pieces, matching up the fabrics and seams.


Thank you so much I know my granddaughter will love this.
ReplyDeleteIs there a size chart
ReplyDeleteNo, as noted, My pattern is US girl size that fits 8-10, but by using 1/2 inch seam allowances, shortening the bodice by 1 inch and hem by 1 1/2inches, it scales down to size 6 too.
DeleteLove how you've done this thanks for sharing can't wait to make one
ReplyDeleteConcerning this beautiful pattern, what about size 10-12 years old size pls?? Thank you very much!
ReplyDeleteThe cutest dress!I love the fact that it's for older girls. I have great nieces that getting older. And, yes, it's hard to find dresses that are overtly sexy and have cuts and designs that are too mature.
ReplyDeleteLove this dress!
ReplyDeleteSure is a sweet little dress and has so many options for making it different every time. Thank you so much for the free pattern.
ReplyDeleteI really like this dress, and finding a free pattern for older girl, SCORE!! I've never seen gathering with the cord. Looks like it will save time. If I have a sleeve pattern, would it be easy to add a sleeve to the size of the armhole?
ReplyDeleteThank you. It might fit - you'd have to do a muslin to see if the sleeve curve would fit the shoulder of this pattern. It would also mean changing the lining to be a facing that would be along the neck area & back sides. Personally, it's a lot simpler to pair a sleeveless dress with a cardigan if you want to have the arms covered. No modifications needed, but makes it a more year-round option.
DeleteThis dress is so lovely!
ReplyDeleteI’m struggling to make the skirt portion though. Are the two panels of the skirt one pattern and one lining, or are they 2 of the pattern?
The skirt panels are the front & back of the skirt (there's no lining). You need it to be big enough to gather nicely. Once gathered, you'll match up the two seams of the skirt to the side seams of the bodice to sew them together. Hope this helps! Would love to see it when you have it done!!
DeleteHi - I’m a beginner sewer. I don’t understand what the pattern pieces labeled as “Attach to upper portion of Front Bodice here” and “Attach to upper portion of Back Bodice here” are (what is their purpose?). Can you please explain?
ReplyDeleteHi Tina. The bodice pieces are larger than what will fit on 8.5x11 paper so the front and back pieces had to be split into two pages each. You'll need to attach the bodice upper and lower halves as specified for the front and back and tape them together so they'll be the proper size to cut from.
DeleteThank you!
DeleteThank you for sharing this pattern!! I agree, there's hardly any nice "little girl" dress patterns for older girls.
ReplyDeleteIt's good to hear I'm not the only one feeling that & that it's helpful to be making what the big pattern places & stores don't:)
Deletelove this pattern.. have used it a few times with varied skirts for my goddaughter who loves them ... will use it for dresses for my granddaughter too when she is a little older.. thank you so much x
ReplyDeleteWe don't use US sizes here in Germany. How do i know what size to use or if this will fit?
ReplyDeleteA quick internet search for "US to European children's clothing sizing" will tell you how sizes convert in chart form. 8-10 US is approx. 134-140 EU.
DeleteI have been searching for a pattern just like this. Thank you for sharing. I had one just like it about 25 years ago when my daughter was young. I now have grand daughters to sew for and their school friend's mum has been searching for a modest dress pattern for her very tall 5 year old daughter who wears size 8-10 already and is finding it hard to get dresses suitable for such a young child.
ReplyDeleteI'm so glad to see others looking for the same thing and using my pattern. Would love to see them when yours are done!
DeleteThank you so much for sharing this pattern. It’s adorable! I’m going to try and scale down to a size 5-6 for my very tall 4 year old. I adjust the seam allowances and hem length as you suggested. Any suggestions on how to adjust the arm holes so they aren’t too large? Thank you!
ReplyDeleteYou could try bringing up the bottom curve of the armhole a bit higher so it becomes smaller - Find a shirt that has an armhole size that is what you'd like and lay that over the pattern's armhole and use that as a model to re-draw the curve as needed.
DeleteThank you for sharing this. Is there a way to make an adult version so I can match with my daughter. ☺️
ReplyDeleteI’ve been looking for similar pattern for ages. Being a newbie I’m a bit confused about the length and width of the 2 skirt rectangles. Can you help please? Thanks
ReplyDeleteOh and thank you for the free pattern 😊x
DeleteThe skirt rectangles should each be 20 inches long by 42-44 inches wide (that would be the width of most cotton fabrics). The length sides of the two pieces then get sewn together to make a "tube" and are gathered along the top to fit against the bodice and create the skirt fullness. I hope this clarifies it...not sure what else you might be looking for.
DeleteThat’s really helpful. I was confused as all my fabrics have different widths. I’ll use each rectangle 40-42 inches wide and 20 inches long. Thank you again x
DeleteSooo I finally made this dress today. Shortened the bodice by 1” and skirt by 2” and it’s perfect for my 6 years old. The fit is just perfect.
ReplyDeleteI could’ve done it in 1-2 hours (beginner here) but I decided to make things a bit complicated 🤦🏻♀️ for myself by top stitching, encasing the skirt between bodice pieces and then doing stitch in the ditch which looks more like a top stitch 😂. Also gathered the skirt by two straight lines of basting stitches so that was a bit fiddly and frustrating.
Wish there was an option to share a picture here as the dress came out so cute. Thank you again for the free pattern. I’m definitely making another one this weekend.
That is so wonderful to hear. I love to see my patterns in action - you can email me a picture to cheryl@sewcando.com and if you'd like it shared I can post it here and at the weekly Craftastic Monday link party as a little reader made feature:)
DeleteI have 2 granddaughters the same age, but one is a 7-8 and the other is a 10-12. How much do I need to add to the bodice for the larger size? The skirt should be a simple conversion. Thanks
ReplyDeleteI'm going to be working on a 10-12 version soon, since my own daughter is now that size and her body shape is changing and we need more dresses for the coming summer. Sizing up for that age-range isn't as easy as just adding a bit extra to sides, so I want to get it right. I'll make a new post with it when I do. If you subscribe via email, you'll see it as soon as it's up:)
DeleteI would also like to see a size 10-12. Thank you.
DeleteI am very grateful tha you shared this pattern. I found it very easy to do by looking at your pics. All I am doing different is adding pockets. Very versatile pattern.
ReplyDeleteWonderful to hear & I'd love to see it with pockets if you want to email me a photo to cheryl@sewcando.com!
DeleteHi Cheryl, I'm having trouble understanding how the back bodice joins to the front bodice. I turned the front bodice right side out to press the seams... How am I inserting the back bodice? Like a person into a sleeping bag? Is the back bodice still inside out?
ReplyDeleteYou're inserting the front shoulders (right side out) into the back shoulders (wrong sides out). When you match up the shoulder seams with one inside the other, you'll have little "tubes" to stitch together along the raw edges of the shoulders to make the shoulder seam for the outer & lining at the same time. Then when you pull everything right side out, the shoulders of the front & back will be sewn together for both the outer and the lining. I'm working on a tween size of this pattern right now and will be doing a post in the coming weeks sharing the bigger size and some more detailed photos of the steps. I hope this helps in the meantime.
DeleteThat was so so helpful. It was 3 am last night and since I lined my bodice with the same fabric, I couldn't visually keep track of it all. I finally just basted and said, I guess I'll try something. I did it wrong but I only took out ten stitches lol. Then I did it like you're saying, before I got your reply. What you wrote makes a ton of sense. I've only recently learned how to sew with seam allowances, 8 years later as my daughter grows. I'm a total Novice but I love creating. Thank you. I want your size 10-12 it looks great so far !
DeleteHere I am again, I just wanted to let you know I am thrilled beyond belief I am about to accomplish this project! I am completely self taught, with a lot of online video help. The hardest thing I have ever done before is sew a doll outfit with elastic, and that project took me two weeks as I learn every instruction from scratch. We're talking my "expertise" at this point is cutting a square fabric and pinning on bias tape. I am such a novice! Buuuut... I just learned how to attach snap buttons tonight (2 hours and videos later) I have this beautiful bodice all snapped up - I can't believe they really work! - and I have the gathered skirt pinned with matching seams. Tomorrow a. M. I have an hour break and I'm going to sew that 1/2 inch seam allowance to connect the skirt with the bodice and holy Lord- I will have created my first ever dress!!!
DeleteI'm so thrilled to hear you have taken the plunge into sewing and am honored you're using my pattern for your first sewn dress! I am also self taught & began about 12 yrs when my older kids were small. It has been such a gift to gain these skills and make so many things over the years. I hope you are blessed with the same - a whole new world opens up to you when you can sew! I'm currently working on the bigger version to accommodate a more tween body shape and hope to have that available soon. I would LOVE to see your finished dress too. Please email me a photo to cheryl@sewcando.com when you finish.
DeleteBeginner here and I'm a bit confused on how to get the snap buttons on? Do they just push through? Do I need to cut holes? TIA! Love the pattern, so cute!
ReplyDeleteThey push through - for some of the metal variety they have some teeth in the cap part on the outside of the fabric and you place the other portion of the snap on the other side and then hammer so the teeth go through the fabric and into the other piece. Plastic buttons like I used can be set with a handheld snap press or a large handled one. This older post shows the plastic options (and the place where I bought mine) http://www.sewcando.com/2011/09/crafty-gear-411-lets-get-snappy.html
DeleteHi Cheryl
ReplyDeletelove your wonderful dress patterns. I would like to make one for a ten year old but I am confused about US sizing versus UK. The sleeveless Sunday day dress is US size 8 - 10. When I have googled it it looks like US size 9-10 is a UK age 8-9 and a US size 10 is a UK age 9-10. I don't have the 10 year old to size the dress against so can you tell me if you think the pattern would fit a 10 year old - tall but thin child?
Many thanks
Angela
Hi Angela! My daughter was just a couple months shy of 10 when I made this. If you're able to get measurements, the finished dress is around 27 inches around at the bodice and about 12 inches from shoulder to waist. If that seems too small, I'd recommend using my new Sleeveless Sunday Tween Dress that runs bigger and skip the dart portion: http://www.sewcando.com/2021/05/free-pattern-sleeveless-sunday-tween.html. I'd love for you to email me a photo when you make one!
DeleteI emailed you with pictures and my concern.
ReplyDeleteWhat would you do to strengthen the fabric around the snaps if you have no interfacing?
ReplyDeleteI'd recommend adding a strip of a stronger fabric there instead - maybe some felt or canvas. If you don't have anything else I'd say to put two more layers of your dress fabric to build it up so the snaps don't strain your dress fabric too much when pulled open.
DeleteI just made two dresses for my daughters following your pattern. Thank you so much! Your pattern was easy to follow!
ReplyDeleteThank you and I'm so very happy to hear that. Would love to see them if you want to email photos to cheryl@sewcando.com. I like to feature reader made dresses so others can be inspired:)
DeleteHi this looks beautiful thanks for sharing. If I have no buttons or snaps what else can I do for closure? Thank you
ReplyDeleteThose would be best, but you could also use velcro.
DeleteThank you so so so much for this pattern!!! I chose to do this for my first ever project and I am so happy! Some of the instructions I couldn't get my head around when reading first but when I got to that part and read it again I understood.
ReplyDeleteI wish I could post a photo but it won't let me so just let me say little miss 7 is absolutely in love with her new dress.
P.s. I made it out of two flat bed sheets 😂
Danni, this is wonderful to hear! You can email photos to cheryl@sewcando.com and I'd be happy to feature it. I LOVE seeing dresses made with this pattern and hearing about the joy they have brought the recipients:)
DeleteThank you so much for this! I am not sure though about the sides of the bodice ... are you sewing across by where the pins are ? are you folding down the top part ? Thank you... Diane
ReplyDeleteYes, you sew from the bottom edge of one pair of outer fabric sides over where the underarm meets the lining's underarm and all the way to the bottom edge of the lining sides. Then you trim down the seam allowance and fold them down with the wrong sides facing. And repeat with the other side. Then the bodice sides for inside and out all are sewn closed to complete the bodice construction. Hope this helps & would love to see your dress when it is finished! You can email photos to cheryl@sewcando.com and have your dress featured:)
DeleteThank you for your time! It worked :) I found your site looking for instructions it's been over 25 years making dresses and now I have a grand daughter... she is only 3.5 so I had a pattern but the same dress! Thanks again, Diane
DeleteHi. How could I add a zip closure to the back instead of buttons? Love this pattern
ReplyDeleteA lot of design and assembly modifications would have to be made to make a zipper feasible. That would require the reader to have fairly advanced sewing skills, so it is not recommended with this pattern. Buttons, snaps or even velcro would all be options for this as it is.
DeleteThank you so much for your generosity in sharing this pattern. Having never made much clothing, it was great to have something so clear to follow.
ReplyDeleteThank you so much - that was my goal and it's been such a gift to know how many new-to-sewing people have taken the plunge with my humble pattern:)
DeleteI love how mine turned out. I went with a variety of bigger multicolored buttons for the back which really made it pop (and I know how to do buttonholes now, yay!). I wound up using a different method for creating the gathers on the skirt and attaching it to the bodice, which tripped me up a bit but it's ready for Easter. Thanks for sharing this pattern!
ReplyDelete-Sarah
Great to hear! Would love to see how it turned out if you want to email it to cheryl@sewcando.com. Happy Easter!!
DeleteI love, love, love this pattern, so simple and the directions are so well written. Thank you!
ReplyDeleteMade this today in a cute Jaguar pattern!
ReplyDeleteSuper easy pattern ! I have copy pasted already 4 times the same pattern. Adjusting two darts at the front and back I made it fit to my 4 years old girl.
ReplyDelete