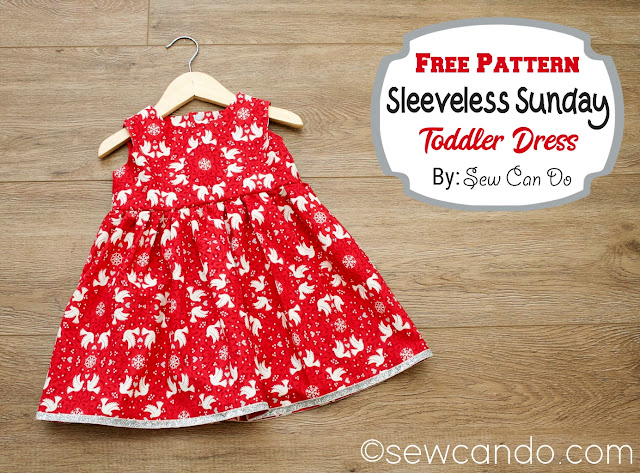
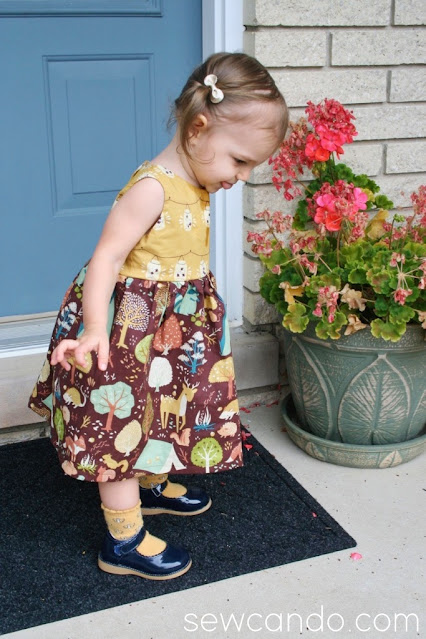
Make a versatile sleeveless dress that is nice enough for special events & church on Sunday, yet still casual for everyday with my
FREE PDF pattern Sleeveless Sunday Toddler Girl's Dress!
I originally created this pattern in girl's size 8-10 and 10-14 versions and they've been wildly popular. It's been incredible seeing all the dresses people have made with them! This style dress, in those sizes, is hard to find in stores. Same goes with patterns. And lots of these big girls have little sisters (like mine does), or other relations, that would look sweet in a matching version. While there are dresses like this in toddler sizes, many patterns have lots of fiddly, complicated assembly details or take ages to sew. And store bought versions are kind of pricey for something so small.
This pattern is easy and it's also FREE,
so you can make beautiful dresses for very little $$!
The bodice is fully lined to give a nice finish.
The snaps along the back center add a little detail and make it easy to wear too.
And there's a a nice full skirt for pretty girl twirls:)
It's the perfect year round dress style too. Sleeveless for warm weather, or pair with tights and a little sweater (or a long sleeved top/onesie underneath) to work just as well in cooler weather.
My test version was made with some lovely fall themed fabrics from the Fort Firefly collection:
For this one I used this sweet print called Scandi Dove Hygge Glow Red (available in my shop) to make it the ultimate dress for the Christmas, but still very wearable through the rest of the winter season. Added bonus, this fabric also glows in the dark. How cool is that!?!
This pattern sews up quick, so you can have a dress ready in next to no time - very handy during the busy holiday season. Now we have some cute dresses for every season and the ability to do some matching little & big sister versions!
And it's easy to modify with decorative buttons down the front or trim the hem with some pretty ribbon like this:
Using this design and cotton quilting fabric, it's easy to make a beautiful, durable dress, in whatever print you want, for under $15.
Sizing: My FREE pattern is for US girl sizes 12mos-2T. My pattern is US girl size 12-18 months if you use 1/2 inch seam allowances, shorten the bodice by 1/2 inch and the hem by 1 1/2inches. It's a 24mos/2T if you use a 1/4 inch seam allowance and the measurements below. My daughter is an average sized 22 month old and the 24mos/2T version has plenty of growth room.
Materials:
- 1 yds cotton woven fabric (1 1/4 yds if self lining)
- 1/4 yd cotton woven fabric (only needed if using lining fabric)
- Lightweight fusible stabilizer
- 3-4 snap sets (or buttons)
- My FREE PDF Sleeveless Sunday Toddler Dress Pattern
Notions: Iron, yard stick, rotary cutter/shears, pins, tailor's marking pen or chalk
Optional: 1.5yds of 3/8in or 1/2in wide ribbon (I used this metallic velvet trim)
Printing the Pattern: Click HERE to download my PDF bodice pattern. Print at 100% (actual size) no scaling. Measure with the test square to make sure the scale is correct. Cut out pattern pieces.
Start by cutting out the bodice front and back pieces from the outer and lining fabric. Transfer all markings. For the skirt portion, cut two rectangles that are 14 inches long by 28 inches wide. Mark the top center points of both rectangle pieces.
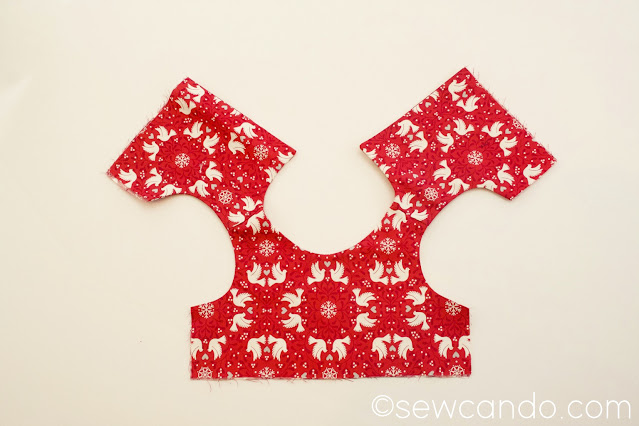
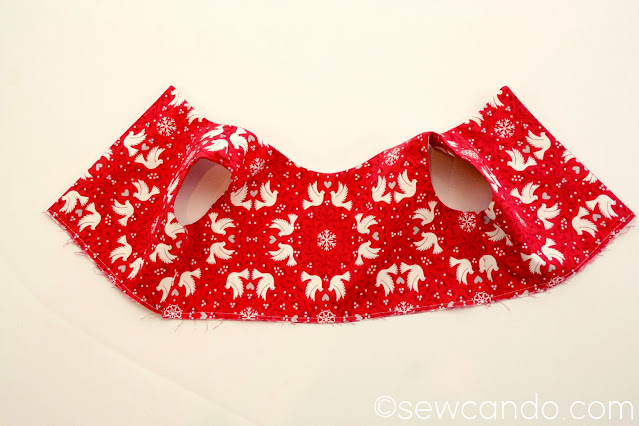
Start with the bodice. With right sides facing, pin together the front bodice outer and lining around the neckline and the arm scythe.
Stitch together using a 1/4 inch seam allowance. Do the same on the back bodice pieces, also stitching down the straight center sides. Trim down the seam allowances of all the seams.
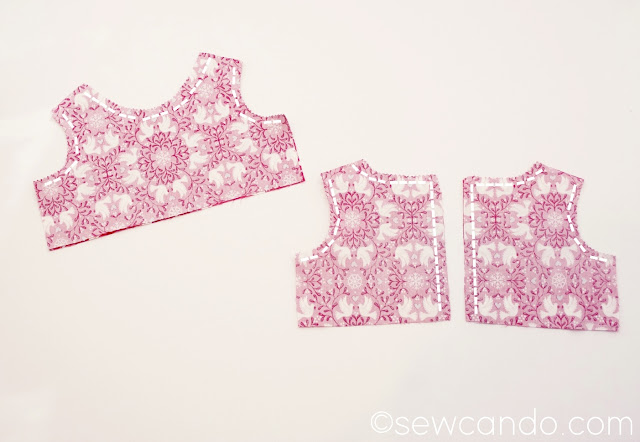
Cut two pieces of fusible stabilizer that are 1 inch wide by 8 inches long and fuse to the wrong side of the back pieces, just next to the newly sewn straight side seams. This will be to stabilize where the snaps/buttons will be.
Turn the front bodice piece right side out and press around the seam to get them nice and flat. Insert the shoulder sections into each of the shoulder sections of the back bodice pieces, matching up the fabrics and seams.
Pin so that each shoulder will be a little tube. Stitch all the way around.
Turn right side out and press entire bodice flat.
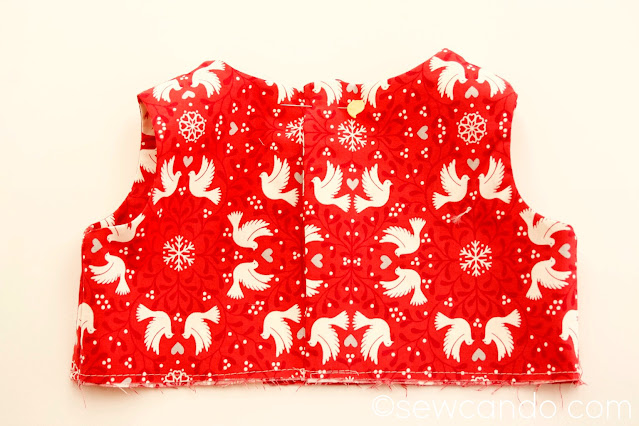
Now, take the open sides and match up the raw edges and, with right sides facing, sew across from the outer to the lining on each side of the bodice. Trim seam allowance.
Turn right side out and press layers flat. If doing button closure, do button holes now.
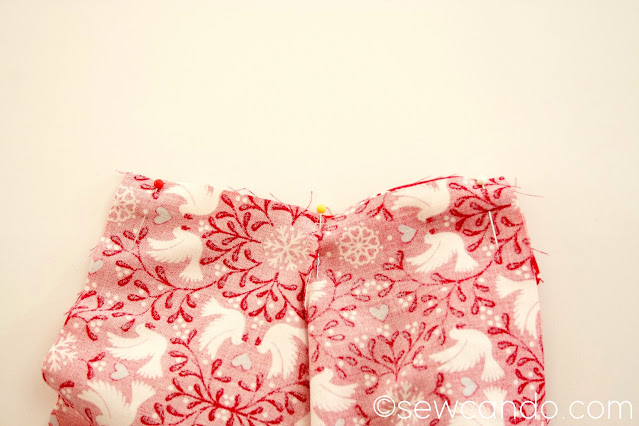
Overlap the back center of the bodice by 1 inch and baste layers together along the bottom. Mark the bodice front and back centers. Set aside.
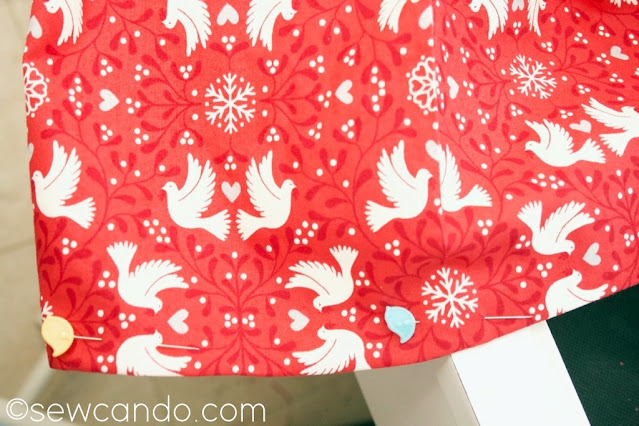
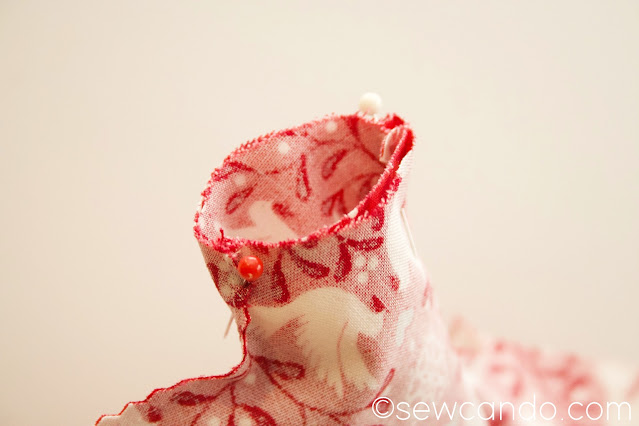
With right sides facing, pin the short sides of the skirt rectangles together and stitch both sides. To easily gather the skirt, with fabric still turned wrong side out, baste from one side seam to the other and then repeat on the other side, leaving few inch tails on both ends.
Pull up the bobbin threads and spread gathers evenly.
Insert bodice, right side out, into the skirt, matching up the raw edges at center markings and side seams. Adjust gathering as needed and pin. Stitch together with a 1/2 inch seam allowance. Serge or zig-zag over the raw edges.
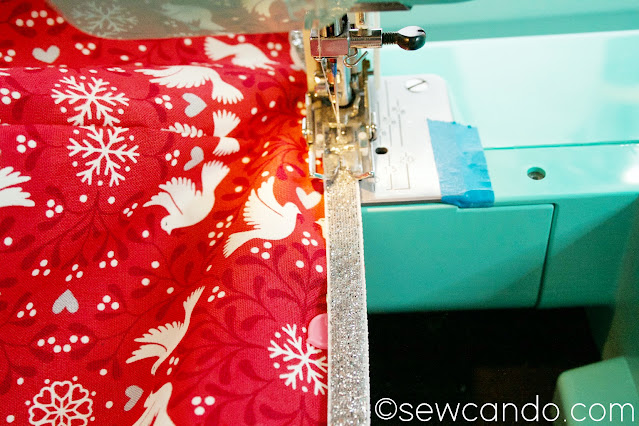
Try on to determine desired length of hem and finish as desired. I preferred double folding the hem up 5/8 in (for 1 1/4in total) and then topstitching.
For a little extra detail I added some 3/8in wide metallic silver velvet ribbon to the hem edge and used a triple zig-zag stitch to secure it. This ribbon is great because it looks like glitter but is actually metallic thread and totally washable, so no shedding and loads of sparkle. Yay! I bought a bunch to use to decorate other wearables and it was very easy to sew with, so I'm excited to do more with it.
Lastly, set the snaps along markings, or as desired, and enjoy your little one's pretty new dress!


this is so beautiful <3
ReplyDeleteThank you :)
ReplyDeleteWhat a sweet little cutie!!!
ReplyDeleteI've pinned it for later.
Happy Christmas!!
Bridie
https://hearthearthcrafting.wordpress.com/
Very sweet patterns and your little model is precious!
ReplyDeleteThank you for sharing this at the Homestead Blog Hop
Laurie
Ridge Haven Homestead
Homestead Blog Hop
I came across this post as I was searching for a pattern for my almost 3-year-old. Looks super easy! Thank you for the instructions and photos! Any tips for resizing this for 3T and 4T?
ReplyDeleteI would love to see a 3T-4T size also!
DeleteThis comment has been removed by the author.
ReplyDelete