Showing posts with label Heavenly Fabric Shop. Show all posts

Wednesday, August 14, 2024

Quilt Kit Bundle Giveaway!


I've got a great giveaway over in my fabric shop, Heavenly Fabric Shop, so I wanted to share it with my crafters here to give them all a chance to win too!  I'm giving away this Faith Quilt Kit Bundle.  It contains all the coordinating fabrics (including backing) below + pattern to make a beautiful Faith themed quilt with a cross panel center.  A value of over $65!  


The pattern included is Panel Frames and the giveaway bundle creates the quilt shown below.   The pattern itself contains 3 different framing layout options that can be made with 3 half yard cuts and a 24" panel.  Sew many possiblities!  
You can also purchase the pattern HERE.


Enter below for a chance to win!


Friday, December 15, 2023

My Leave the Light On Fabric House for the Holidays

In better-late-than-never news, I finally have a moment to share one of the few holiday projects I had time to make this year.  In normal circumstances, I spend the season making a number of decor & wearables, but this year it's felt like everything has been preventing me from getting into my craft room (including getting hit with another virus this week as soon as I'd expected some down time...when will it end?!?).  So I was extra grateful to have the time a little while back to make this sweet little light up fabric house.

I used the Aunties Two Leave the Light on Pattern to make it.  Full disclosure, I actually purchased the pattern to carry in my shop.  I thought it was so cute and loved that it also came with a bonus pattern to make a mini ornament version:


There weren't a lot of "beauty shots" really showing the finished house in full and I also like to test out specialty patterns to see how they are to sew up, so I picked out some Christmas-y fabrics and set to making one for myself.

This fabric house is nice & sturdy thanks to good stabilization.


It's fully lined and opens up to put in battery powered tea lights or fairy lights:


By using template plastic or vellum paper for the windows, it gives off a soft glow:


Overall, the directions are really good.  I also liked that the designer offers some YouTube videos to show how to assembly some of the more complicated steps, like how to bind the windows.  The techniques used were easier than I expected, which was helpful since I'm not sewing as often these days:


The roof and sides are supposed to have a clapboard effect to be scrap-friendly.  The one variation I made was to only do the clapboard on the roof, since I wanted to showcase the pine tree print of the fabric on the sides.  The fabric collection I used was Comfort & Joy by Create Joy Project, which I also carry in my shop.  By using the teal color ways, I can keep my little house out long after Christmas for an extended decor season.  After putting the time into making it, I wanted to maximize its use!


I would make this again and definitely will do some of the ornaments since those are even quicker to put together.  If I can find a little time, I might try to do some to give as gifts this year.  I also could see doing another version in the future with a gingerbread motif, so I'm going to keep this pattern in my holiday sewing stash.  


I just love when goodies I find for my shop end up being great finds for my own stash too!

Wednesday, August 9, 2023

Finally Sewing Again: Making A Table Topper Quilt


After a really long time not feeling creative, or having time to do anything crafty, I'm slowly finding some free moments and a bit of inclination to tackle things.  Truthfully speaking, most days I'm exhausted from dealing with my big kids, corralling my toddlers and keeping my shop running, but the crafting spark hasn't totally gone out!  

What pushed me to start sewing again was needing a sample project for my shop (so this post kind of ends up being a bit of an "advertorial", but more because this really is what I'm making right now - not because I want to get all sales-y on ya!).  

I've just started carrying digital quilt patterns, which is great for getting customers sewing asap, but one design didn't have a finished project photo or digital mock-up to go with it.  Kind of hard to sell an item without an image of it, right?  So I decided to use fabrics from a new Christmas collection I got in (called Comfort & Joy) to make this sample table topper quilt:


To be honest, I'd been a bit nervous to start it.  I've been a self-taught sewer of bags, clothes, home decor and literally every other fabric project for years, but I'm not really a quilter.  I've only made a handful of basic quilts and since I'd not sewn anything in months I was a little apprehensive of my rusty skills making a go of it.  Add the fact that two of the fabrics I was using were directional, I needed to take a little extra time to make sure I had them cut with the pine trees and text facing the right ways:


I do have to say it came together pretty quickly.  The design is the Guiding Star Table Topper Digital Quilt Pattern The instructions are very straightforward so a beginner quilter like me can easily make it.  It features an 8 inch focal square, so I fussy cut from my text print fabric to make a nice holiday phrase block:


The one modification I made was to make the back self-binding rather than doing a separate backing piece and binding edge.  


It saved me a bunch of time and made it easier to get a nice even binding edge on the front.  I used this handy how-to for getting nice mitered corners with a self binding, since it had been so long since I'd done them last: 


This little quilt can be used as a table topper, wall hanging finished or as a center for making a larger quilt.  


I feel confident enough to do another one (or more) and possibly piecing them to make a larger quilt, so I'm pleased I could get back in the sewing saddle and test drive a new pattern at the same time.  Plus, I've got a nice, new, Christmas-y item already sewn up early.  Boy, does it feel good to be ahead on a project for a change!


Wednesday, March 29, 2023

DIY Tiered Tray Set Painting


I was looking for some fun Easter craft supplies for my shop and discovered, tiered tray sets.  I decided to do one up myself to create some finished project photos and now I am ADDICTED!

Even if you're not super crafty, or great with decorating or short on space, these sets make it easy to create something lovely for the season (or everyday).


You simply paint and assemble the various dimensional elements and then place them with some little plants & knick knacks for a pretty themed look you can put anywhere.  I'd seen a few dimensional sets like these and just assumed you had to be some incredible detail painter to make them look good, but the secret is that they come unassembled so you don't have to worry about staying in the lines.  

I researched a bit and discovered that there were a few videos on YouTube showing some ways to paint them, but not very many and almost no blog posts.  I like to do a quick read and then jump in to a craft rather than watch 1/2hr long videos that have a lot of filler chatter, so I thought I'd put together all the best tips I learned (and some of my own) for doing tiered tray decorations.

Tiered Tray Set Painting Tricks

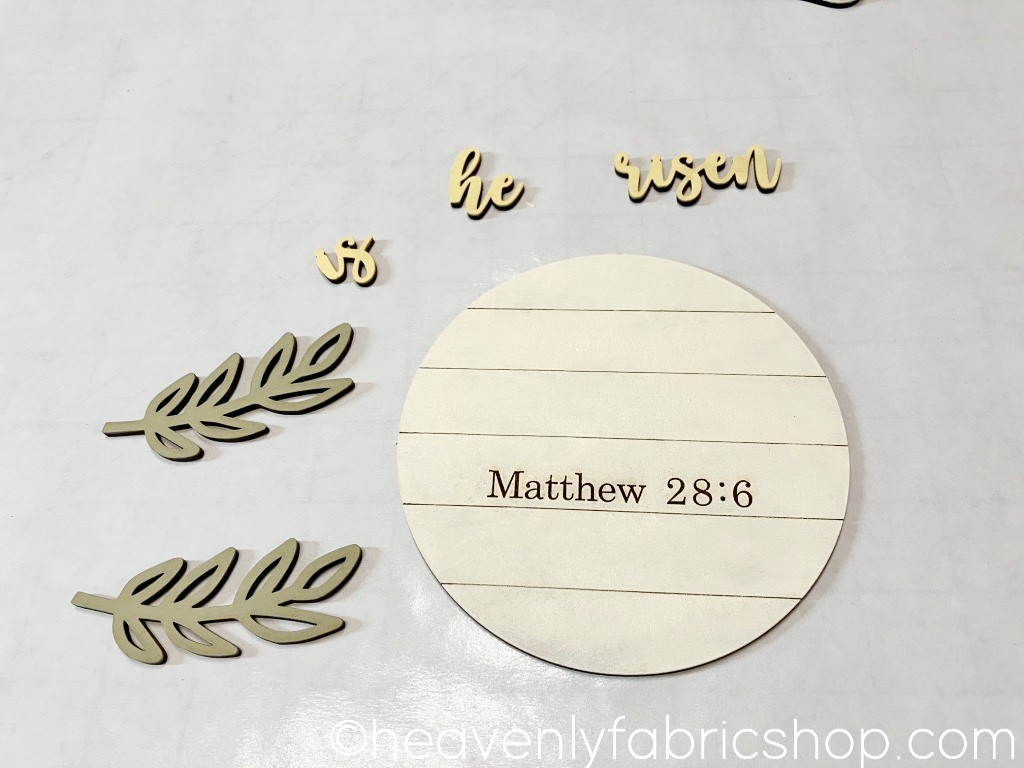
This particular set is for Easter & has these layered elements:


It's recommended to plan out your color scheme and group the elements by color to be efficient.  For mine I chose an off-white, sage green, butter yellow and chocolate brown:


I did all my painting on freezer paper (shiny side up) to keep things clean and no-stick.  


The trick to painting without brushstrokes is to use foam makeup wedges and dab the paint on.  Super easy and drip-free too:


To make it simple to do the little pieces like letters, put a strip of painter's tape sticky side up and put the pieces on it.  Then you can hold the tape rather than the pieces.  Less mess and easier to coat:


I gave all the light colored pieces a double coat of paint.  The trick to keeping the cut-in lettering nice & contrasting (unpainted) like the Matthew 28:6 here is to dab gently with very little paint in those areas and use a wet toothpick to remove any paint that does get in the grooves:


To smooth the finish, go over them gently with a high (fine) grit sandpaper.  If you want to distress them, sand a little harder.


When dry, I grouped all my elements back together:


The detail pieces for mine were self adhesive so I just peeled the backing paper off and stuck them in place:


You can seal them with a poly spray if you want - especially if using for outdoors.  I strung the banner elements on some baker's twine:


As someone who's free time is in short supply, I really loved how quick these came together and how fun it was to style them up.  I also like that they don't take up a ton of storage space out of season, unlike wreaths and bigger decorations.  

I used mine on a tiered tray, but they are also ideal to use in wreaths or turn into magnets.  I could also see adding some pretty ribbon loops and hanging them to make an Easter tree too.


I bought this lovely tray off Amazon here.  The quality is really nice for the price and it also came with the wood bead garland.  My faux plants and flowers were all from Hobby Lobby.  I know I can easily use them in other ways when it comes time to change the decor.  You can find this set and others like it in my shop here.  Happy decorating! 



Wednesday, March 22, 2023

Easter Fabric Bundle Giveaway!


I'm celebrating the arrival of spring with a special Easter fabric giveaway!

It is HARD to find fun gifts or fabrics for Easter that go beyond the bunnies & eggs to the real point of the holiday.  To fill that void, I've been creating new fabrics & patterns for my shop to really celebrate the meaning of Easter.  I wanted to give someone the chance to win some of them to make their very own Easter items and share the celebration that He Is Risen:)

Sew up wonderful additions to an Easter basket or a fun Lent activity.

And have all the key figures for an authentic holiday theme:

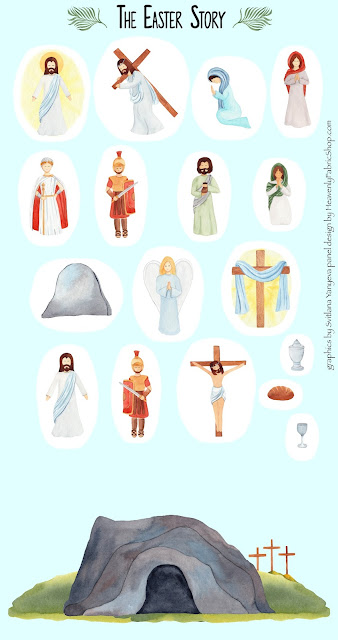
First up is The Easter Story Panel & Dual Project Pattern.  The fabric panel features all the key figures of the real story of Easter and a tomb scene backdrop for acting out the entire story.  

It makes a full 18 piece Easter set and comes with printed directions for two complete project design options:

A Soft Toy Play Set

Which has 17 character & accessory stuffed toy pieces,

that are perfectly sized for little hands and pretend play.

plus a 18" w x 9 1/2" h background scene pillow. 

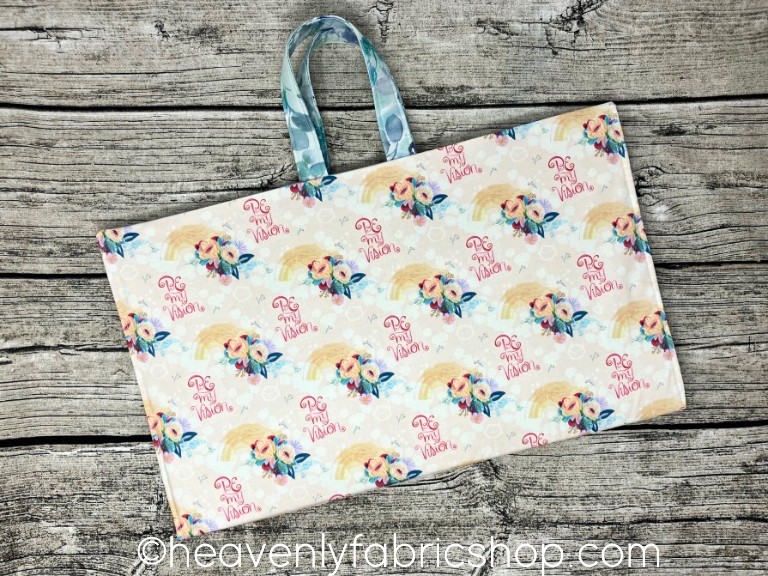
That also doubles as a storage bag for all the figures:

or

A Felt Playmat Tote

Which makes 17 Felt backed character & accessories plus a 18"w x 21 1/2"h background play mat tote.

 Complete with handy storage pocket and handles to take it anywhere or to hang the mat as a wall panel for play.

Either one makes the perfect way to share & teach the story of Easter - in a beautiful play set all ages can enjoy!

The 100% sateen cotton panel measures a full 36"h x 19"w and comes with the detailed paper instructions include step-by-step photos for making either project (the panel itself will make your choice of 1 project).

The panel figures and scene can also be cut apart to use as appliqués or for decorations.  One clever customer used them for a no-sew Easter-themed bulletin board:

  
I'm also including 1.5 total yds of additional coordinating fabric needed to make the winner's choice of set,


and a matching Story of Easter Fat Quarter Panel, that can easily be made into a pillow, gift bag, table runner or wall hanging:


Enter here for a chance to win.


LinkWithin

Related Posts with Thumbnails