Showing posts with label Spring clothes. Show all posts

Wednesday, March 31, 2021

My DIY'd Little Lamb Easter Baby Dress Set & Teether


What could be sweeter for Easter for a baby girl than a little lamb outfit?  I thought it would be an ideal change from the usual bunnies & flowers and better suited to the meaning of the holiday.
 
I couldn't find a pattern that had all the features I wanted: puff sleeves, full skirt, pullover neckband, so I drafted up my own. 
 
 
Since the weather here usually is chilly at Easter, I also made a coordinating pair of leggings with the Ottobre Design Lola pants pattern:


I used that pant pattern it just a month ago with this outfit:
 
 
The fabric I used this time was a soft rib knit velour, that is cuddly, but light in weight:

 
I also used it for the neckband on the dress and the color was a perfect match:

 
I also found some decorative lace elastic in my stash so I added that as an extra detail on the sleeves:
 

I even made a matching silicone teether toy (and one to send as a gift for my baby nephew too):


I'll be honest though, I didn't think this new Easter outfit would be done in time.  I literally just finished it and it was 50/50 until the last stitch that I was going to have to scrap the dress and scramble to do something else.  The fabric was super cute, and I'd bought it months ago eagerly waiting to use it for Easter, but it just didn't seem to want to cooperate.  Literally everything seemed to go wrong. 
 
 
There were several times when the thread randomly bunched up during basic stitching.  Total bird nests.  The fabric curled quite a bit when cut and shifted around a lot when sewing too, even when well pinned and using a walking foot.  Even with fresh bobbin, re-threading & fresh needle it was fiddly, which was odd since euro knits usually sew like a dream.  My seam ripper got a work out!
 
My gathering technique with cord for the skirt portion normally works well too - where you baste a wide zig-zag around some thin cord to easily pull the ends & gather.  This time the cord kept jumping as I stitched so it threaded through the cord in a number of spots.  That meant I couldn't pull it without snipping those stitches.  It should look like this, captured between them:

 
And I'm not going to totally blame the fabric, because I may have made the sleeves a little tight with the elastic as well. 


When I first stretched the elastic to gather the sleeves it didn't seem to cinch up enough and looked too loose despite it being several inches shorter than the sleeve width.  I tried steaming it to shrink up a little, but it did nothing.  So I unpicked an entire sleeve and stretched the elastic a bit more as I sewed, which looks better, but may now be a bit too snug on her chubby arms.  
 
I'm going to try it on her today & if it is I may do a chop shop on the sleeves to remove that section and re-hem them (thank God I made them a little longer than I usually do so there's a little extra length there!).  I also ran out of my favorite fusible tape, which makes hemming on knits that curl MUCH easier, so there was more messing around to finish that too.

 
I was really pleased with how quick the teether toys came together though.  I'd bought the beads from different places, but I feel like they paired together really well:

 
I'd originally planned to make them circular but didn't like how they looked as I threaded them, so I did clip versions instead and these cute angel wing heart teethers I had in my bead stash were perfect for the tail ends:

 
When all is said & done, the outfit did turn out as I'd imagined despite the hurdles.  I'm going to try my pattern on another fabric and if it works out there, I'll make it into a free PDF & tutorial.


Happy Easter!



Wednesday, May 8, 2019

FREE Pattern: Sleeveless Sunday Girl's Dress


Make a versatile sleeveless dress that is nice enough for special events & church on Sunday, yet still casual for everyday with my 
FREE PDF pattern Sleeveless Sunday Girl's Dress!


The bodice is fully lined to give a nice finish.


The snaps along the back center add a little detail and make it easy to wear too.


With a nice full skirt to be perfect on its own for those warm spring & summer days....


or paired with a little sweater for a nice outfit look.


I used this sweet print called Church Windows (available in my shop) to make it the ultimate dress for Sundays:


This pattern sews up so quick, I've made a bunch already.  Now we have lots of cute dresses to choose from!


And it's easy to modify like this version that included a little stripe fabric placket and decorative buttons down the front:


My FREE pattern is for US girl size 8-10. I know this style is pretty simple and there are similar patterns for it for toddlers & little girls, but there really aren't many for the girls between 8-12yrs that can be sewn up in an hour or two.  This one meets both goals!


The pattern inspiration: I find it very challenging to find basic girl dresses now that my daughter is in size 8 & up. Everything in stores for that size range seems to have sassy sayings, weird cold-shoulder or cut out designs or are basically shirts with an attached skirt.  That's not what we're looking to wear to church or a nice restaurant.

The few store styles that are more classic tend to be super dressy materials and usually have a heftier price tag, so I decided to make our own.  Using this design and cotton quilting fabric, it's easy to make a beautiful, durable dress, in whatever print you want, for under $20.


My pattern is US girl size 8-10, but by using 1/2 inch seam allowances, shortening the bodice by 1 inch and hem by 1 1/2inches, it scales down to size 6 too.  If you need a bigger size, try my Sleeveless Sunday Tween Dress Pattern which fits most girls US 10-14:


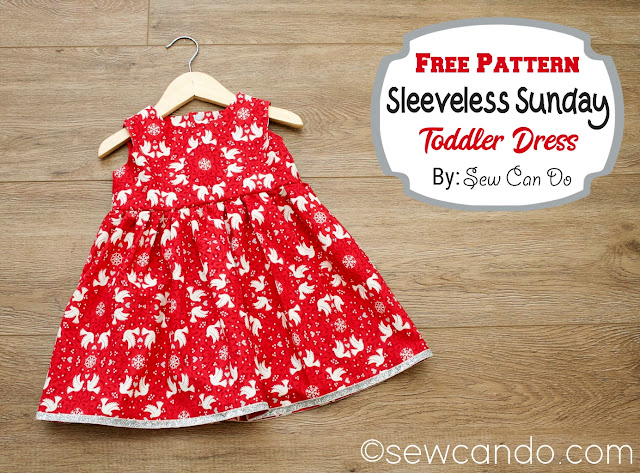
  I've also made a mini Sleeveless Sunday Toddler Dress Pattern to fit 12mos-2T:


Materials:
- 1 1/2 yds cotton woven fabric (1 7/8 yds if self lining)
- 3/8 yd cotton woven fabric (only needed if using lining fabric)
- Lightweight fusible stabilizer 
- 6 snap sets (or buttons)
- Thin cord or string
- My FREE PDF Sleeveless Sunday Dress Pattern
Notions: Iron, yard stick, rotary cutter/shears, pins, tailor's marking pen or chalk

Printing the Pattern:  Click HERE to download my PDF bodice pattern.  Print at 100% (actual size) no scaling.  Measure with the test square to make sure the scale is correct.  Cut out pattern pieces.


Start by cutting out the bodice front and back pieces from the outer and lining fabric. Transfer all markings.  For the skirt portion, cut two rectangles that are 20 inches long by the width of the fabric (usually 42-44 inches).  Trim off the selvages.  Mark the top center points of both pieces.


Start with the bodice.  With right sides facing, pin together the front bodice outer and lining around the neckline and the arm scythe.


Stitch together using a 3/8 inch seam allowance.  Do the same on the back bodice pieces, also stitching down the straight center sides.


Trim down the seam allowances of all the seams.


Cut two pieces of fusible stabilizer that are 1 inch wide by 11 inches long and fuse to the wrong side of the back pieces, just next to the newly sewn straight side seams.  This will be to stabilize where the snaps/buttons will be.  


Turn the front bodice piece right side out and press around the seam to get them nice and flat.  Insert the shoulder sections into each of the shoulder sections of the back bodice pieces, matching up the fabrics and seams.  


Pin so that each shoulder will be a little tube.


Stitch all the way around.  


Turn right side out and press entire bodice flat.


Now, take the open sides and match up the raw edges and, with right sides facing, sew across from the outer to the lining on each side of the bodice. Trim seam allowance.  


Turn right side out and press layers flat.  If doing button closure, do button holes now.


Overlap the back center of the bodice by 1 inch and baste layers together along the bottom.  Mark the bodice front and back centers.  Set aside.


With right sides facing, pin the short sides of the skirt rectangles together and stitch.  To easily gather the skirt, with fabric still turned wrong side out, use a wide and long zig-zag stitch and stitch along the top raw edge with the thin cording/string between the stitching.  


Do this all the way around, careful to keep the string in between the stitching since that needs to be able to slide.


Pull up the string ends and spread gathers evenly.  


Insert bodice, right side out, into the skirt, matching up the raw edges at center markings and side seams.  Adjust gathering as needed and pin.  


Stitch together with a 1/2 inch seam allowance.  Serge or zig-zag over the raw edges.


Try on to determine desired length of hem and finish as desired.  We preferred double folding the hem up 5/8 in (for 1 1/4in total) and then topstitching.  Set the snaps along markings and enjoy your pretty new dress!


LinkWithin

Related Posts with Thumbnails