
.%20)
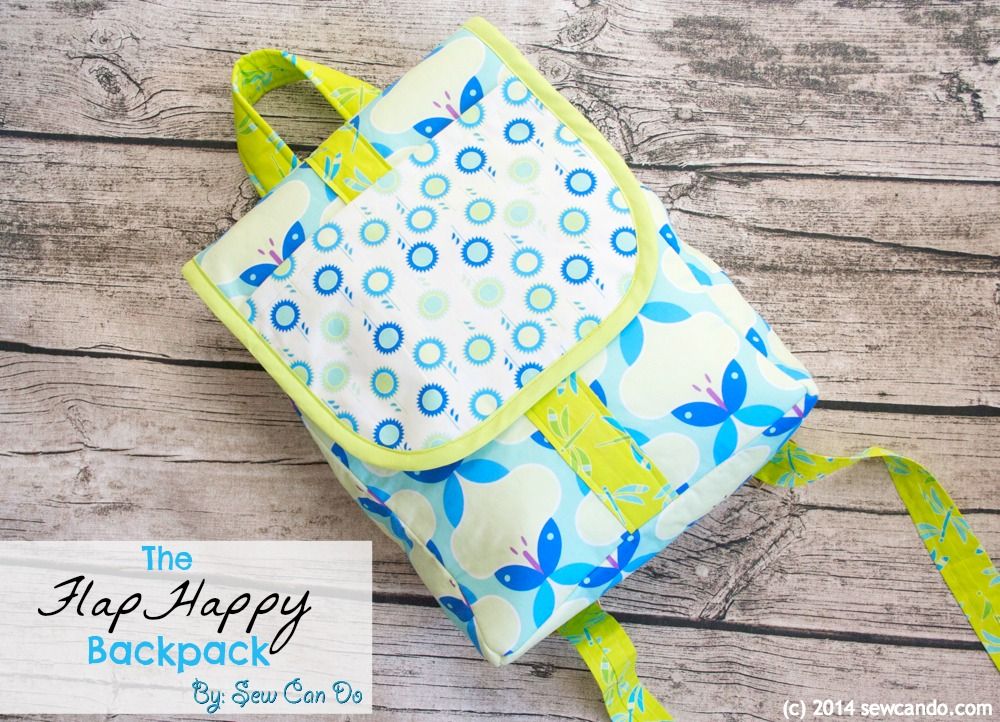
Friends, have I got a fabulous Friday duo for you! Since it's Valentine's Day, and I love my readers, here's a special treat: a new, free bag tutorial AND an awesome fabric giveaway, featuring one of my new favorite fabric manufacturers, Modern Yardage.

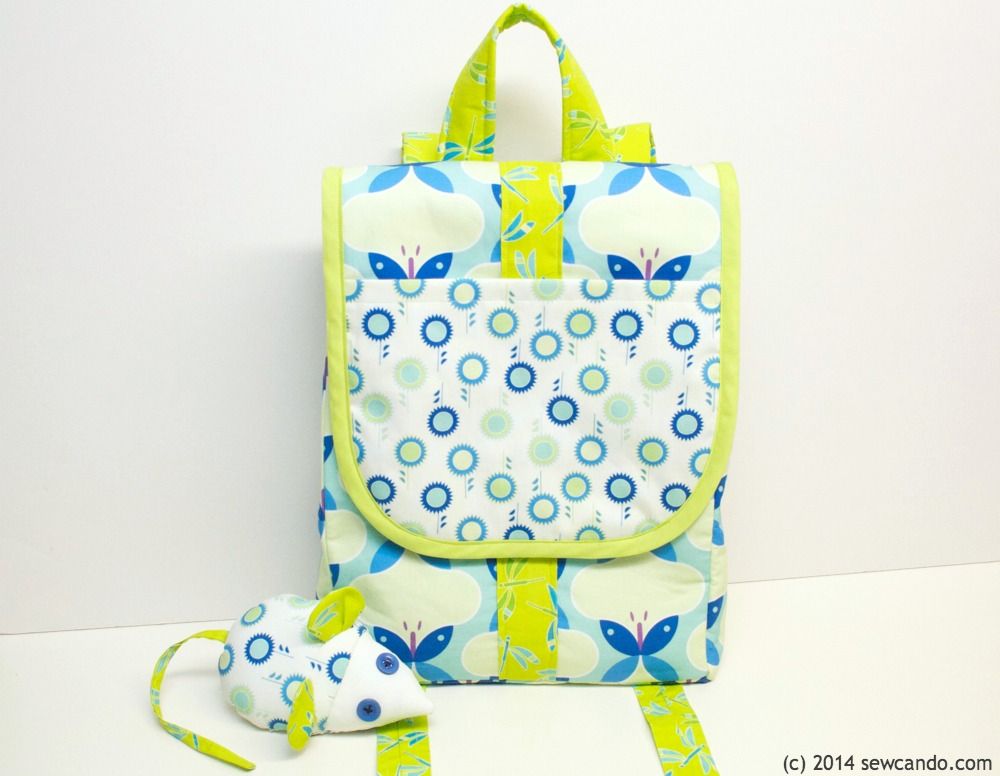
This backpack is sized to be perfect as a handbag alternative or as a child's backpack. It's padded and has adjustable straps to fit just right.

It's also fully lined inside and has pleated sides, so it's nice and wide at the bottom, but the top easily stays closed.
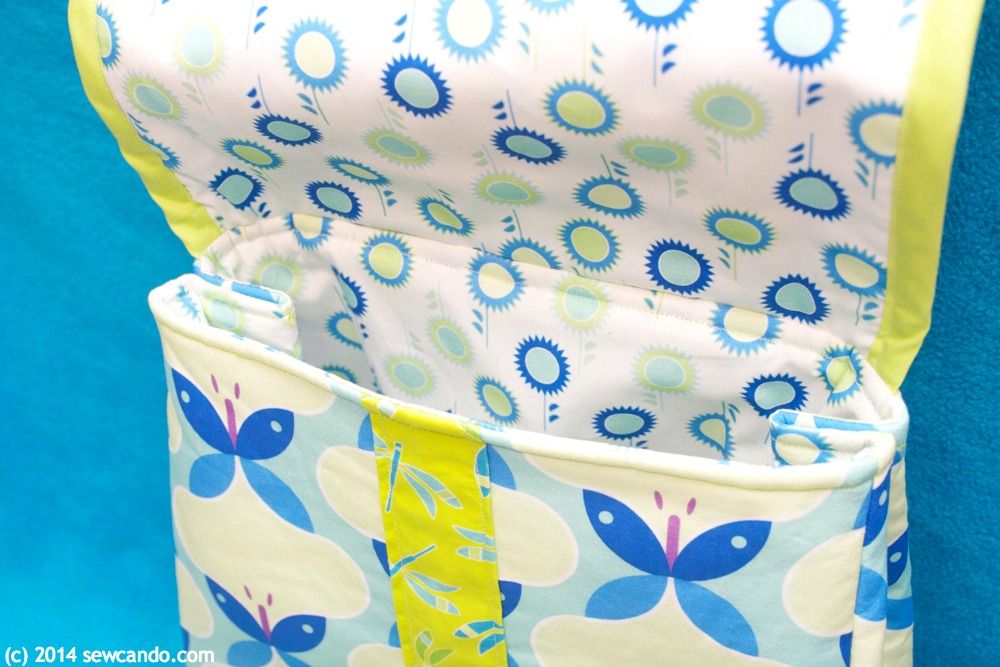
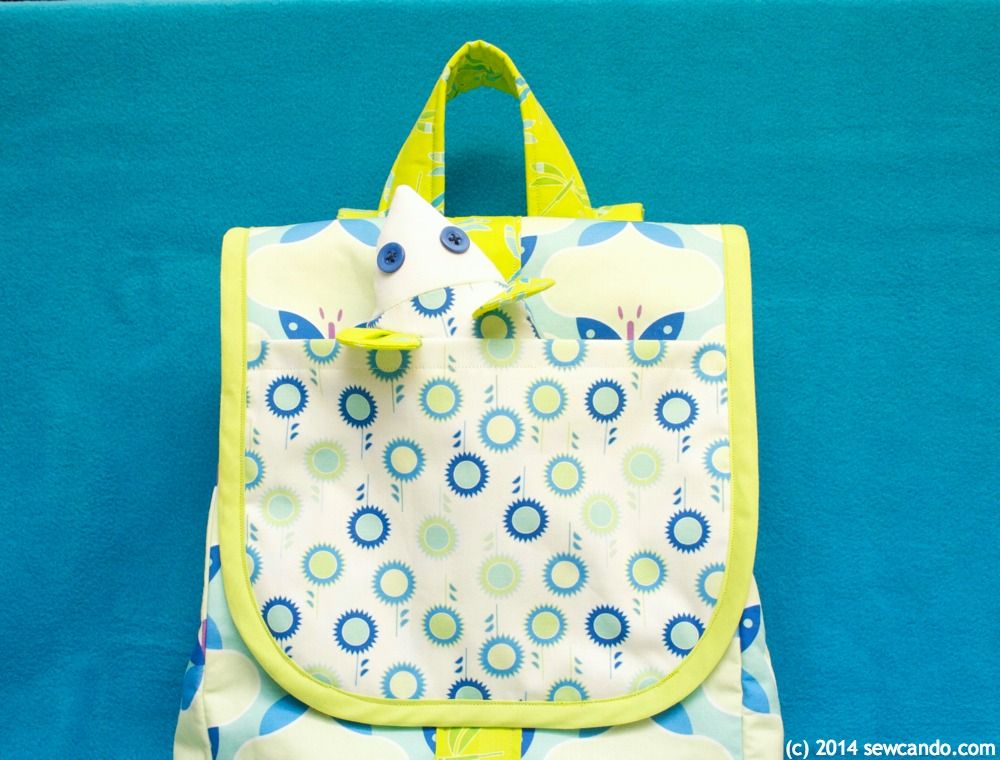
The name comes from the fold-over flap at the top, which makes it easy to open & close and has its own built-in pocket.
Now how to make your own FlapHappy Backpack...
Materials Needed:
- (3) 1/2 yds of cotton. Mine are the Amelia Harper Collection (Skye colorway) by Cindy Lindgren
- 1/2 yd fusible fleece
- Package of double fold bias tape
- Two adjustable sliders
- Notions (coordinating thread, pins, iron, ruler/yardstick, rotary cutters/shears, hand sewing needle)
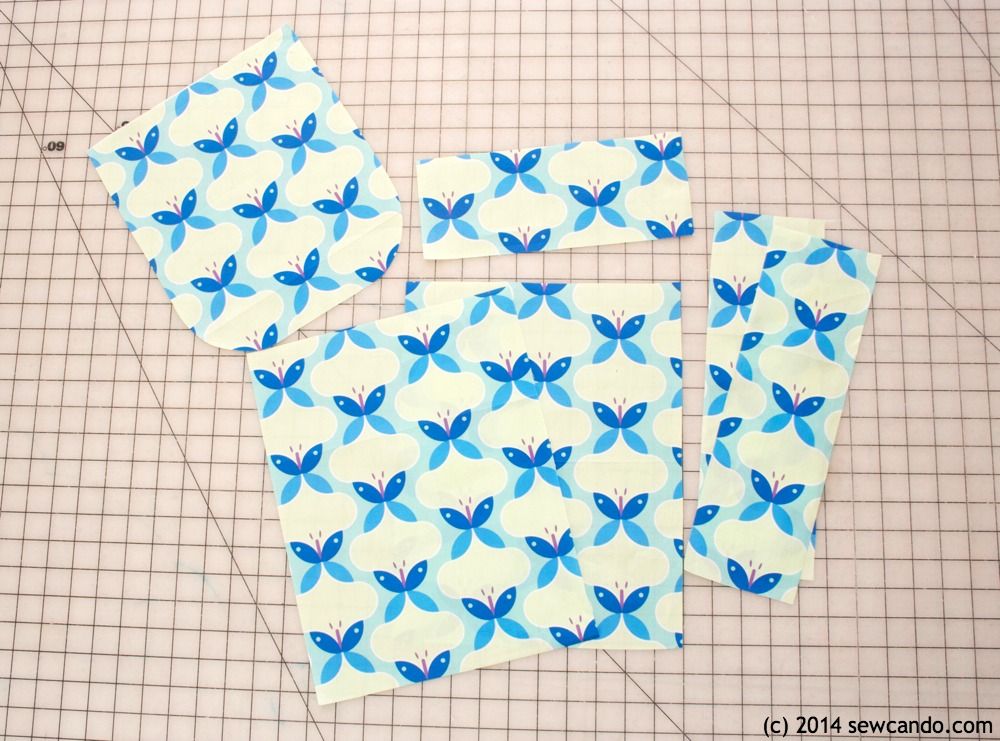
Cut the following pieces from both the Butterfly in Turquoise Large and fusible fleece:
(2) 10in wide by 13in high backpack main pieces
(2) 4in wide by 13in high backpack side pieces
(1) 10in wide by 4in high backpack bottom
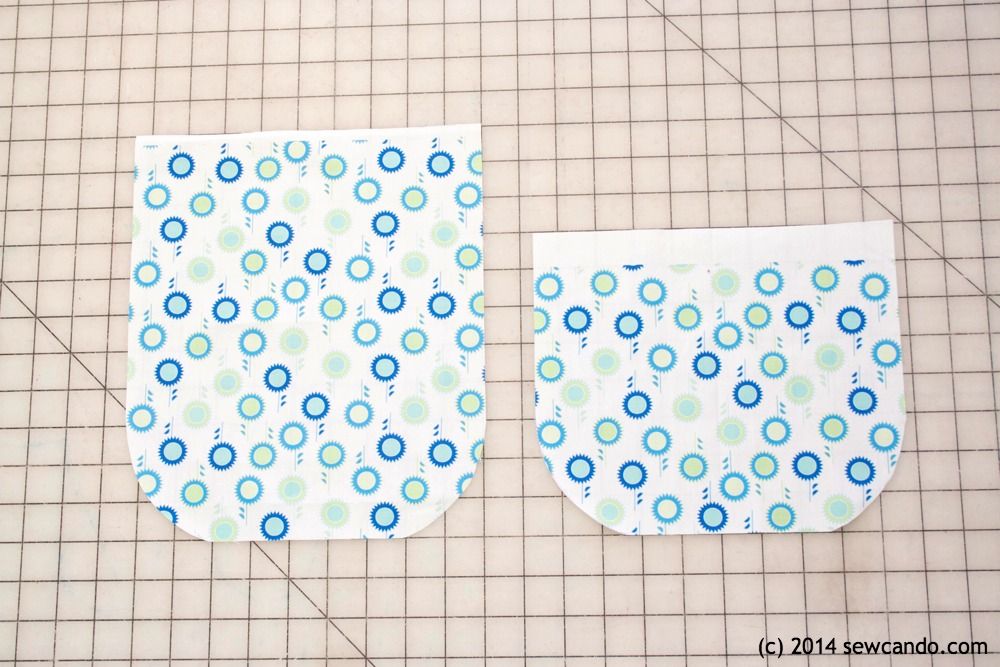
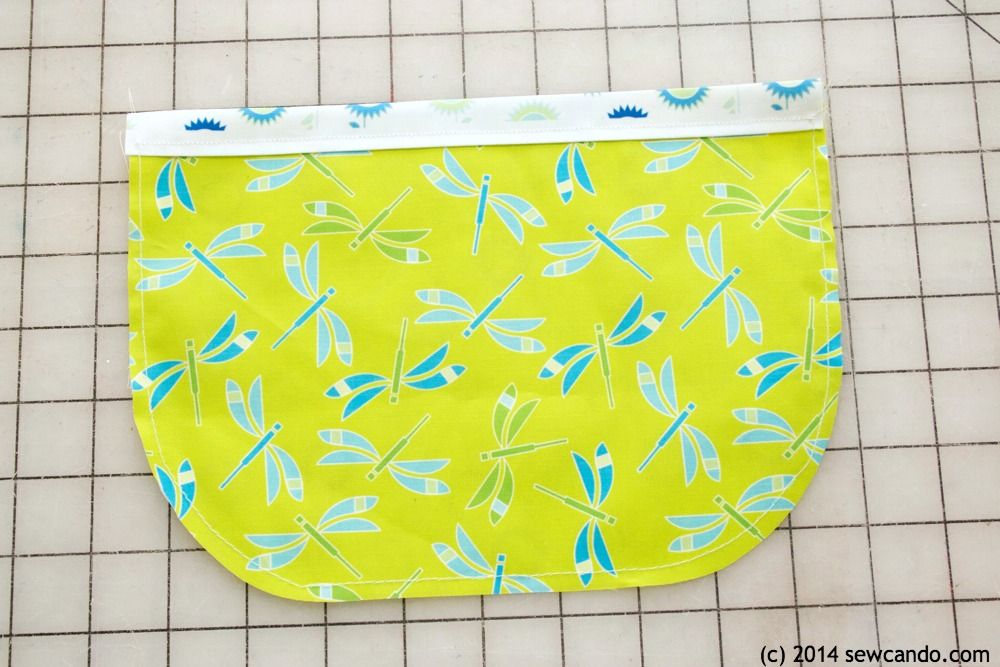
(1) 9in wide by 11in high backpack flap (round lower corners)
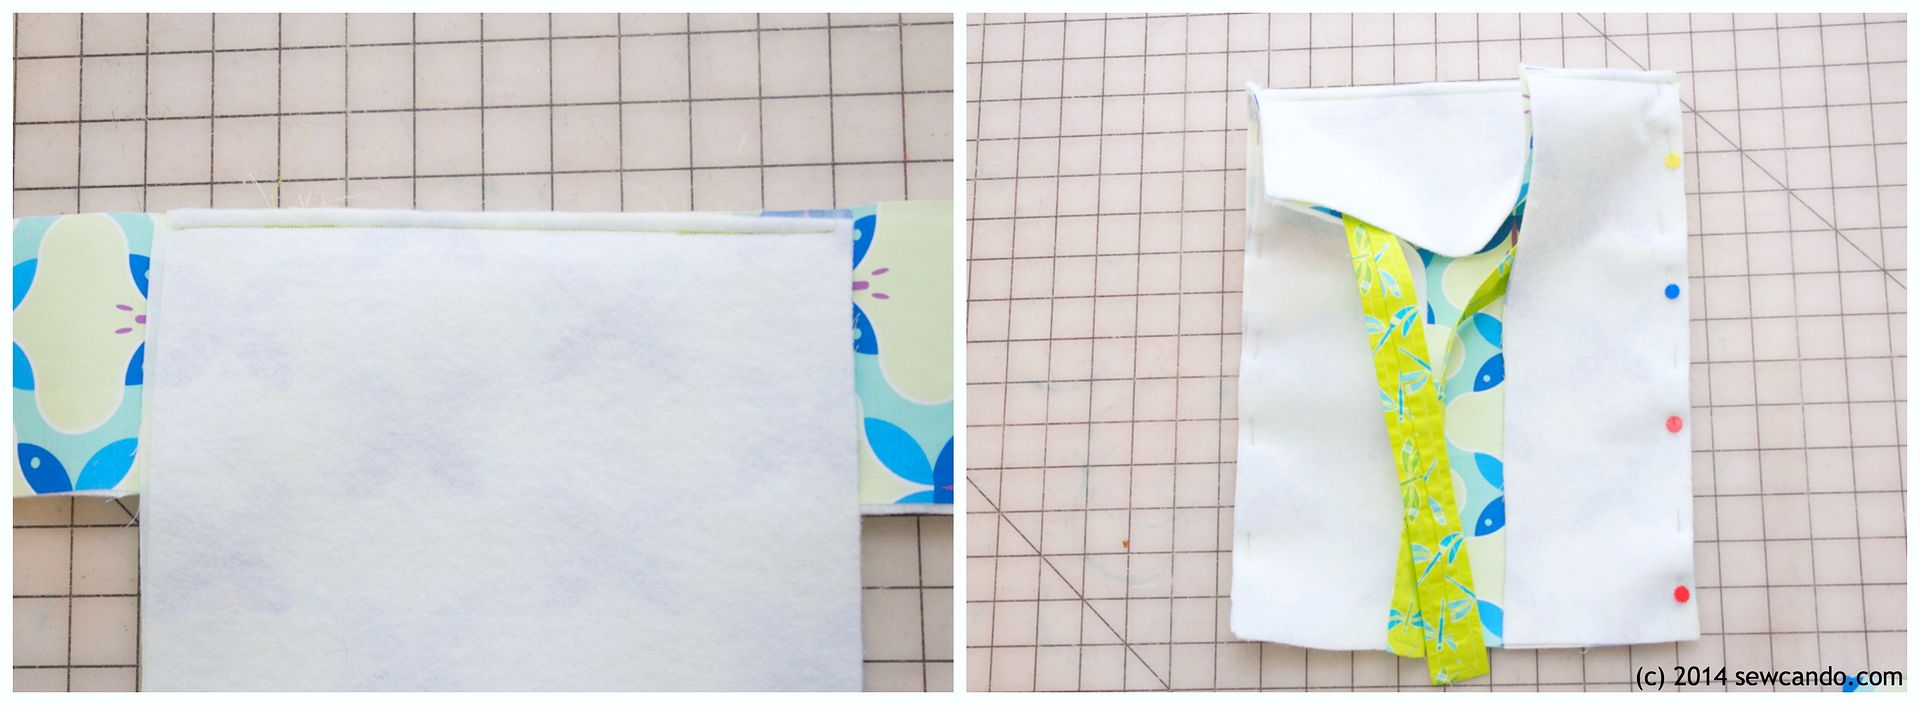
Adhere fusible fleece to wrong sides of fabric with iron.
Cut the same pieces from the Flower in Turquoise Medium, except also cut an additional Flower piece just 3 inches shorter than the flap piece (this will make the outer pocket):
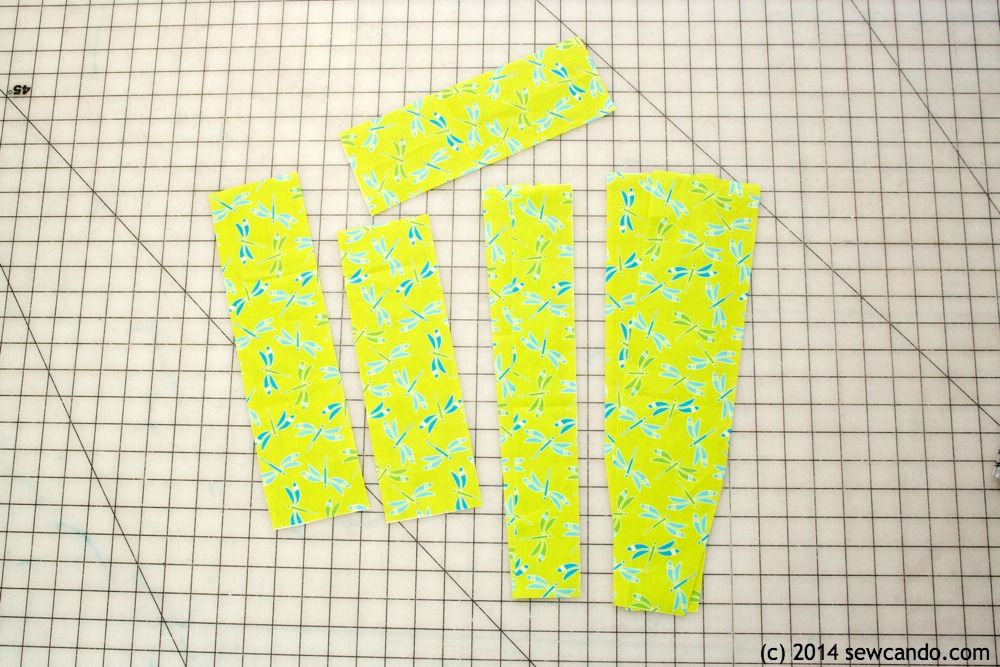
(1) 3in wide by 11in high flap stripe
(1) 3in wide by 13in high backpack stripe
(1) 10in wide by 3 1/2in high handle
(2) 4in wide by 16in high upper straps
(2) 2 1/4in wide by 10in high lower straps
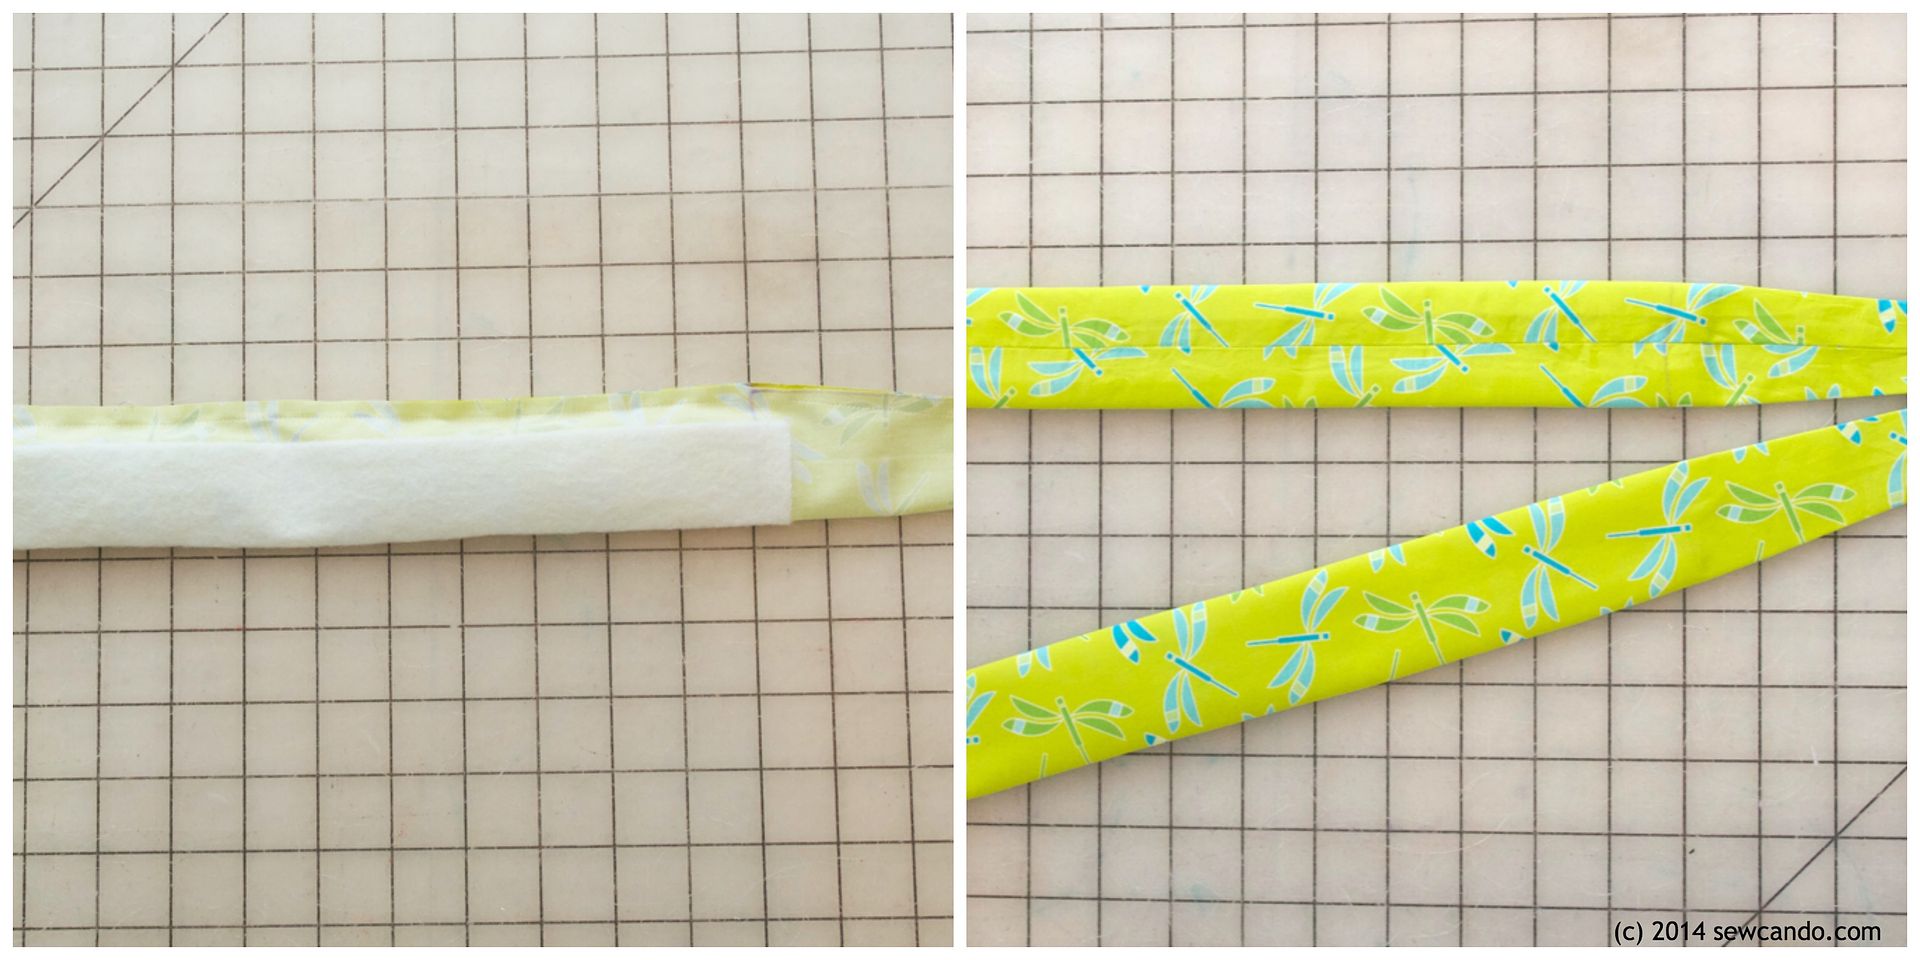
This will make the outer details & straps. Narrow the upper strap pieces slightly on one end starting 11in down from top, so the bottom width is tapered down to 3 inches. Iron on fusible fleece to wrong side of handle and upper straps (except tapered half of upper straps so it will make turning easier later):
Take stripe pieces and fold in half lengthwise and stitch 1/4in from raw edge. Turn right side out and press flat with the seam in center as shown.

Do same with handle and lower strap pieces, stitching one short end closed as well on lower straps. Topstitch along side seams of lower straps:
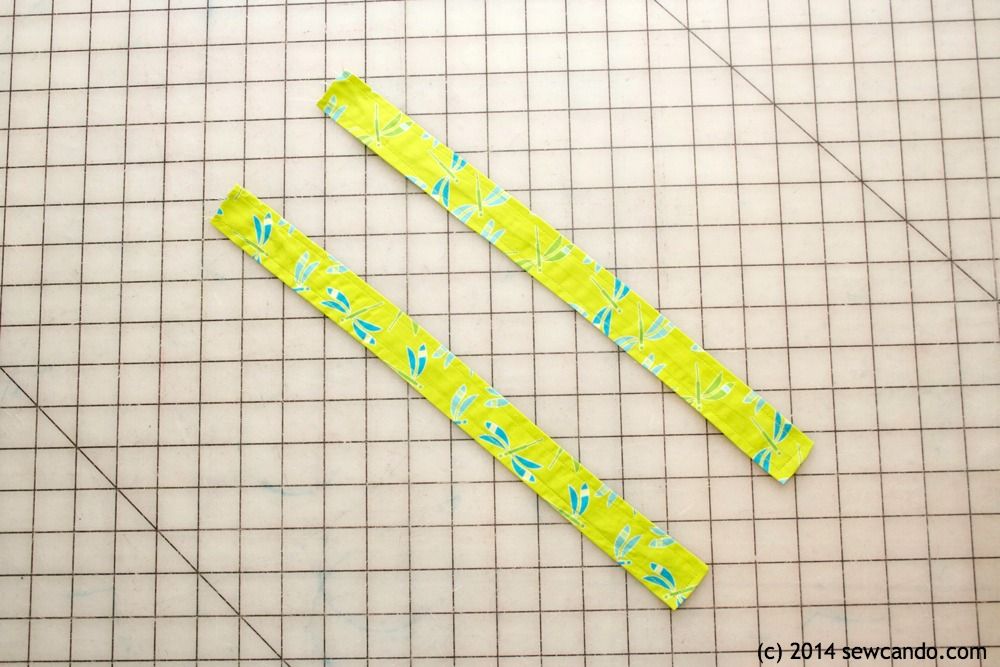
Do same with upper straps, except topstitch down the center of the padded area:
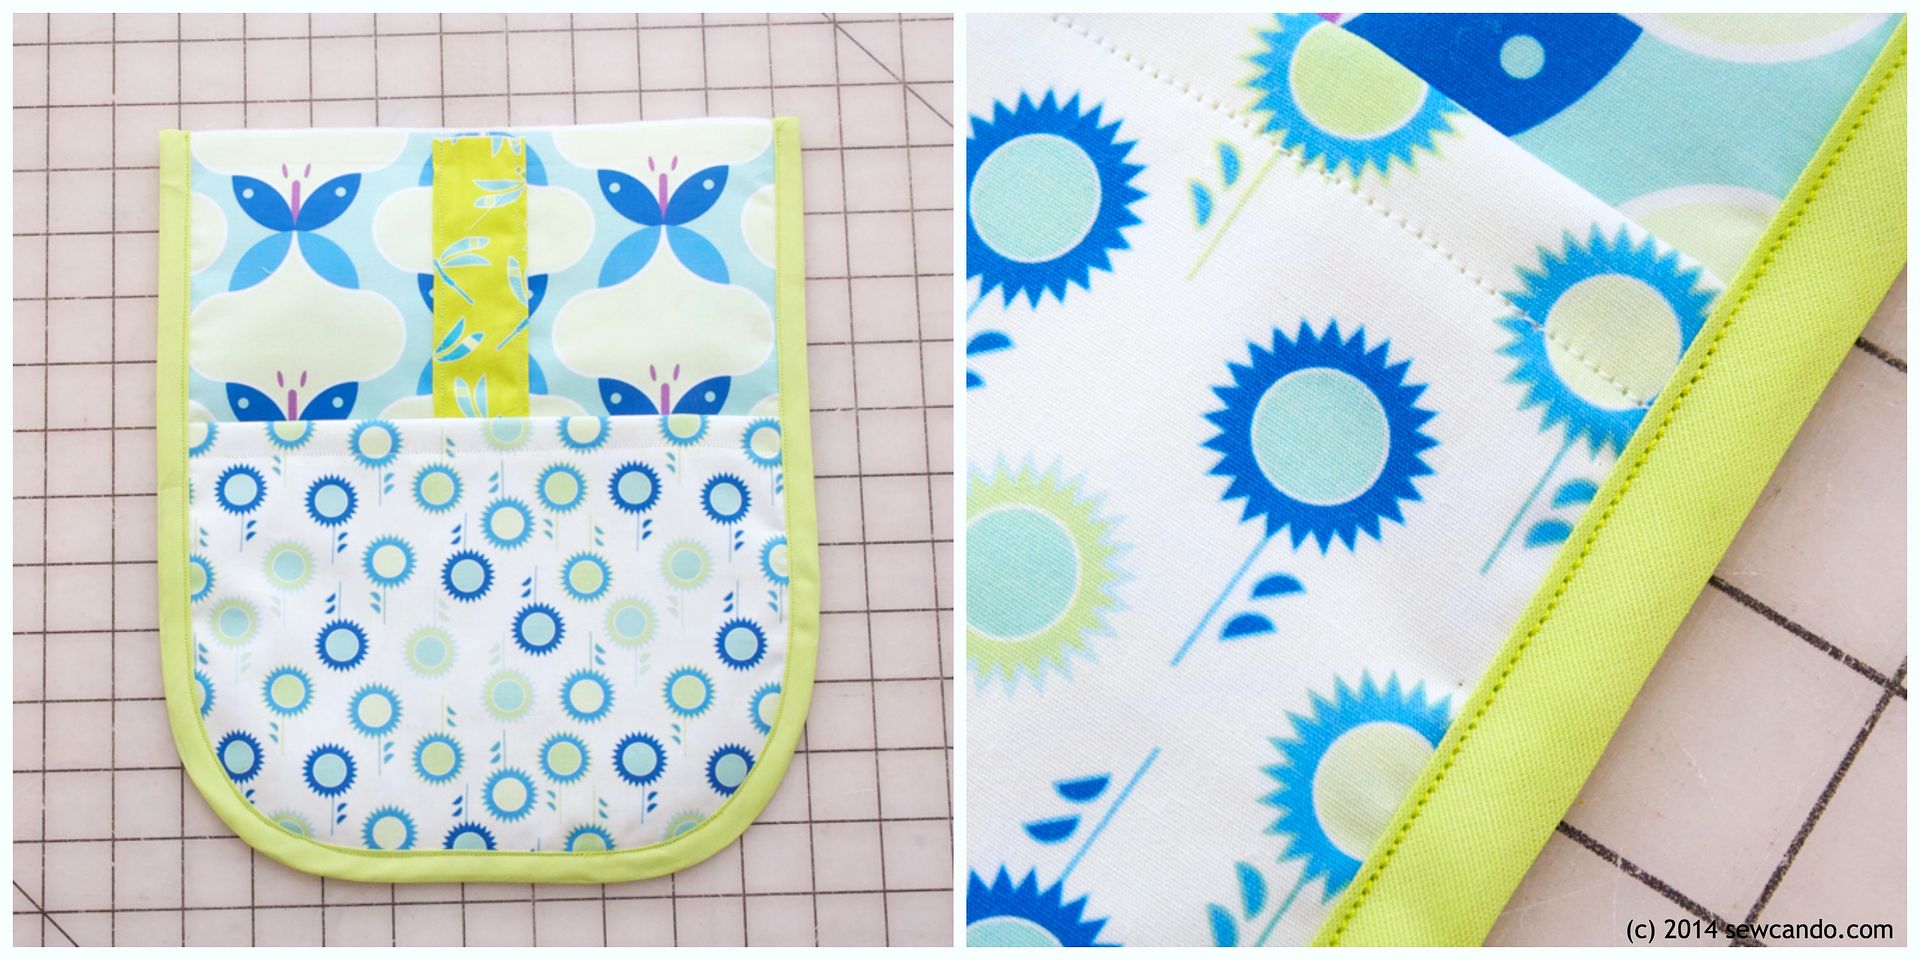
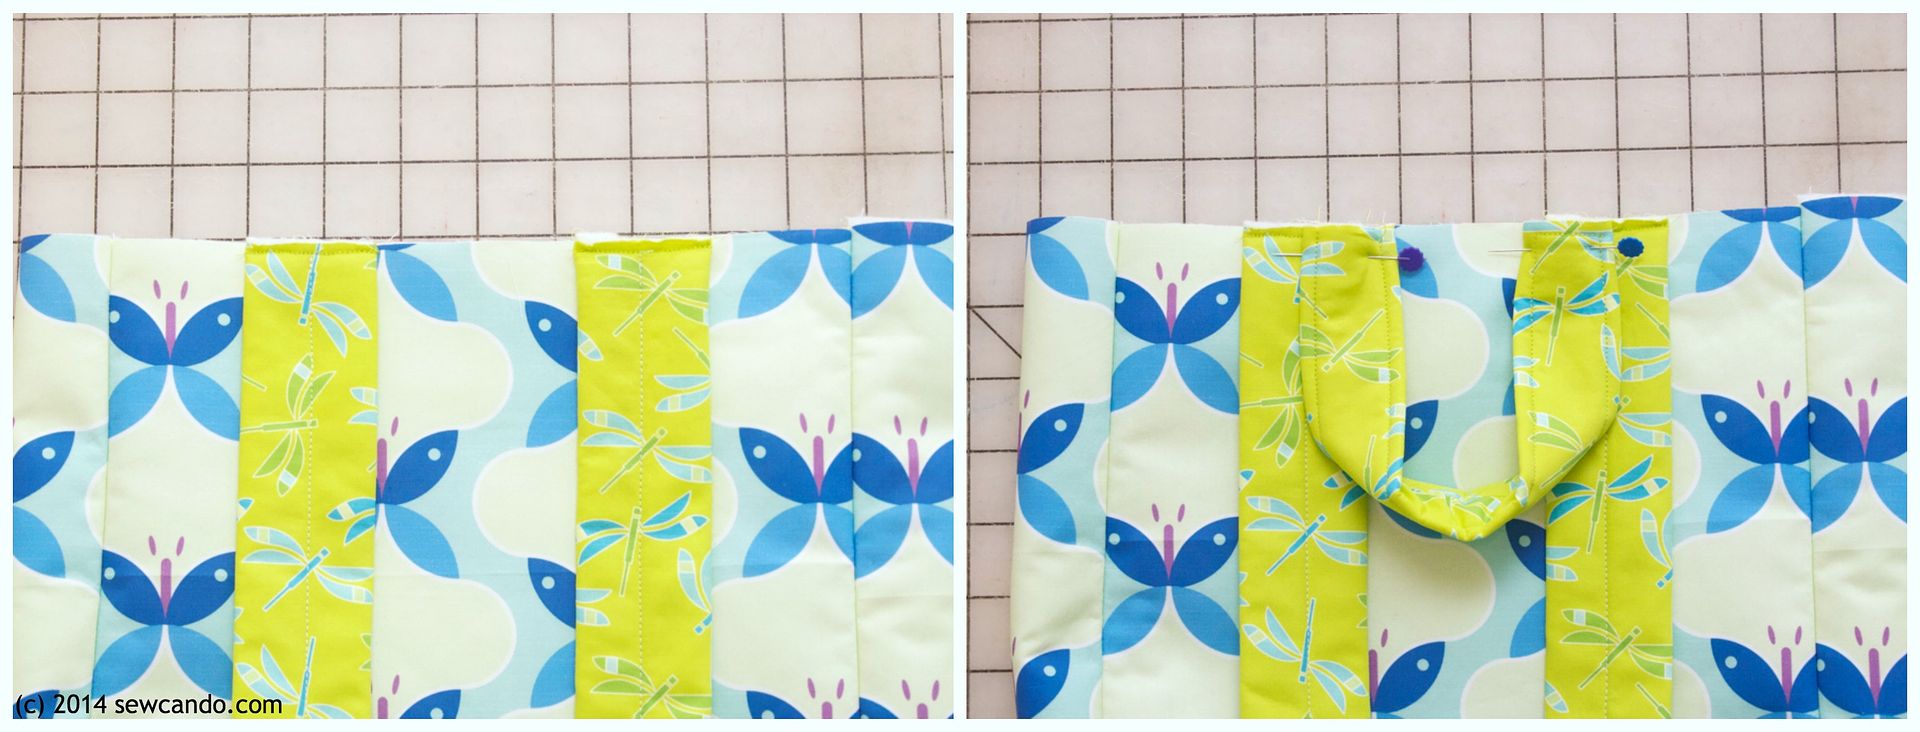
Center stripe on outer main piece and flap and stitch along stripe sides:

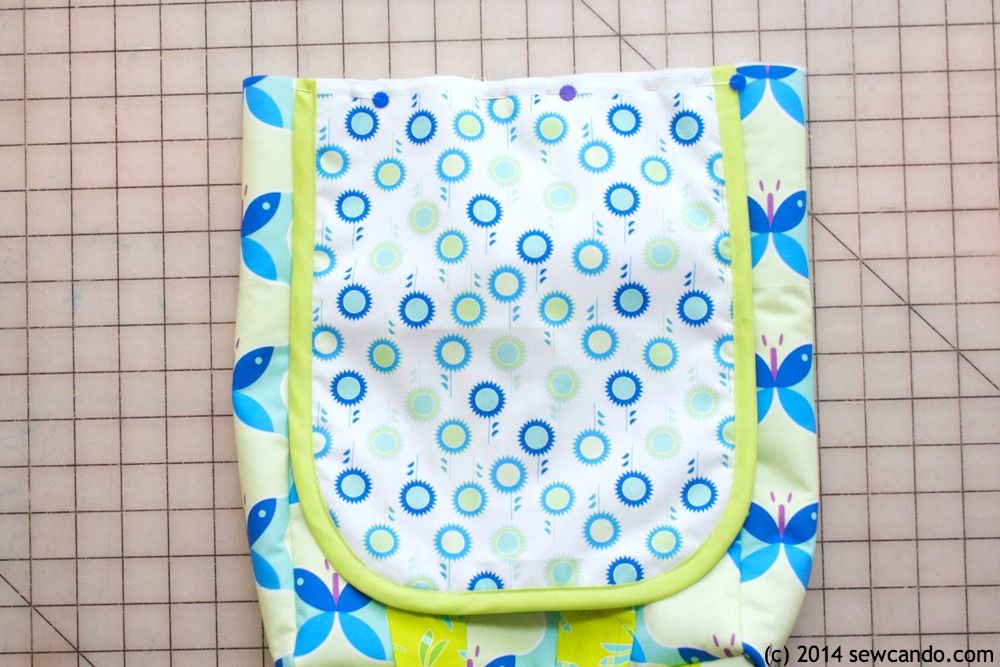
Double fold top edge of pocket 1/2in on the wrong side and press into place. Note: Since I was using a bright white fabric and didn't want the pocket to look transparent when layering, I also cut a piece from the Dragonfly to line it and basted them together. Stitch down the upper fold:
Layer the flap lining, outer and pocket pieces as shown (flap wrong sides facing, pocket right side out on top of outer flap) and baste together:

Encase edge of flap in bias tape:
Take bottom and side pieces of outer and stitch together on short sides as shown, using a 1/4in seam allowance, with right sides facing, starting and stopping 1/4in inward from each end. Baste lower straps to long side of bottom as shown 1 1/2in inward from either side:

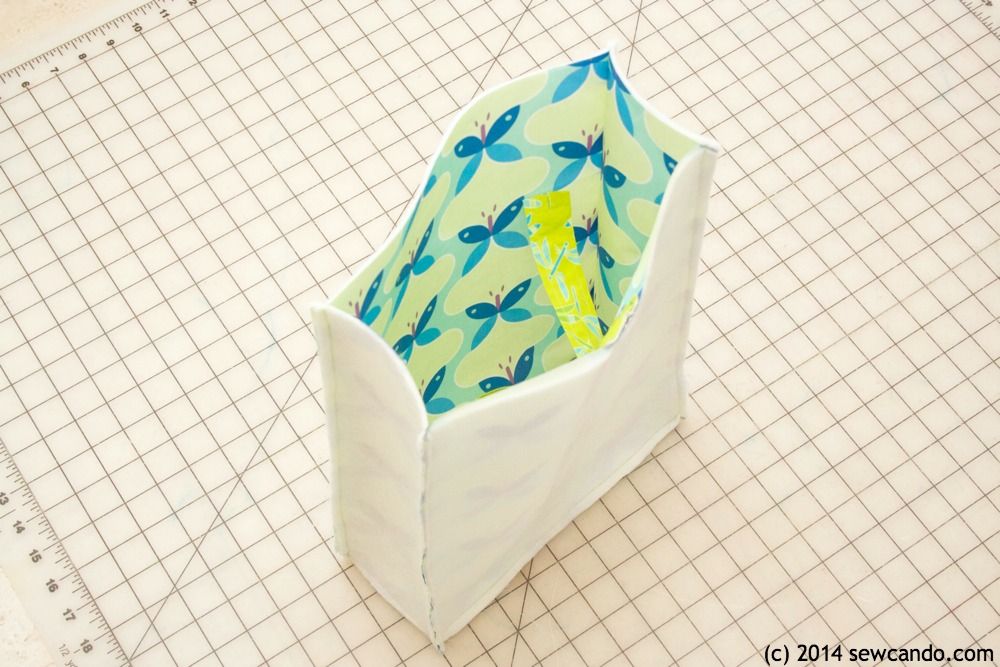
Attach front and back pieces to bottom in same manner as sides. Starting with one side at a time, pin and stitch together the side panels to the front and back pieces.
Repeat the previous two steps with the lining pieces, but leave a 3 in gap on one of the longer sides of the bottom piece for turning later. The ending result will look like this:
Turn outer backpack right side out and pin then baste the upper straps 2in inward from either side on top edge. Add handle over them as shown, 2 1/2in inward from sides, basting into place.
Now take flap and with outer right sides facing, pin and baste flap onto back side of backpack.
Insert outer backpack into lining, matching up side seams and pinning together along top edge. Stitch all the way around.
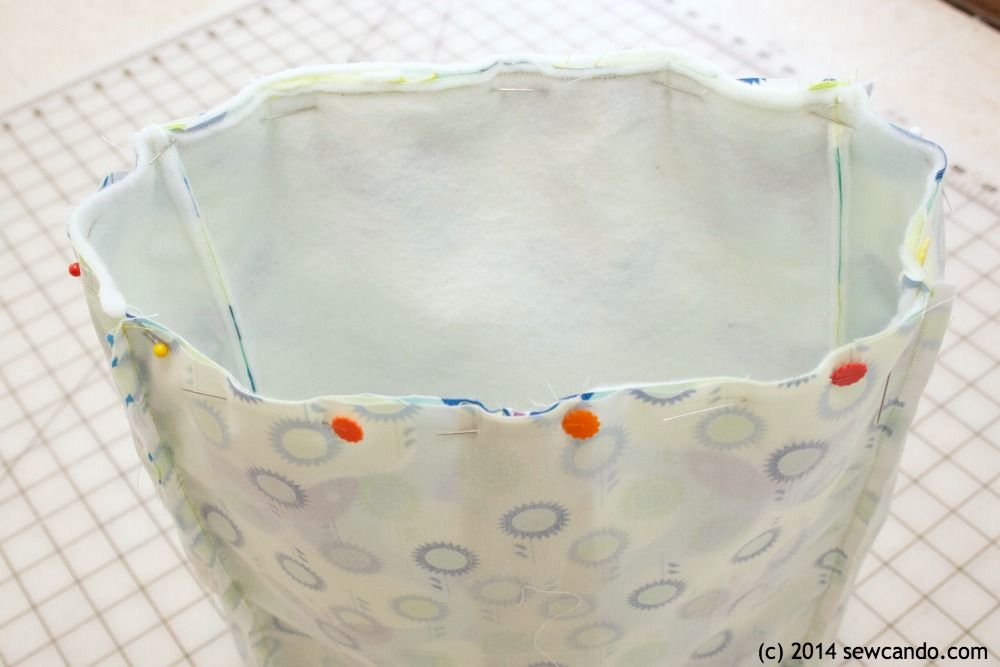
Pull backpack right side out through gap in bottom of lining. Hand stitch gap closed and topstitch around top of backpack, about 1.4in from edge. Thread sliders around open ends of upper straps, folding strap under and stitching closed with a double stitched "X". Thread lower straps and size as desired.

Open backpack and pinch sides inward about 1 1/2in and stitch into place, over topstitching, to create side pleats:
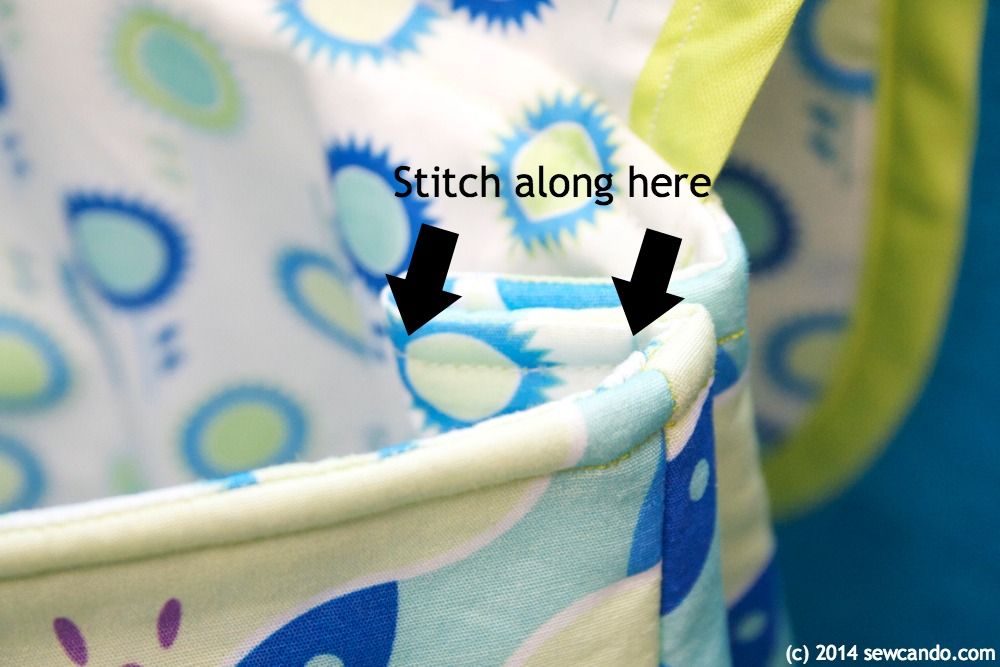
And the backpack is ready to fill!

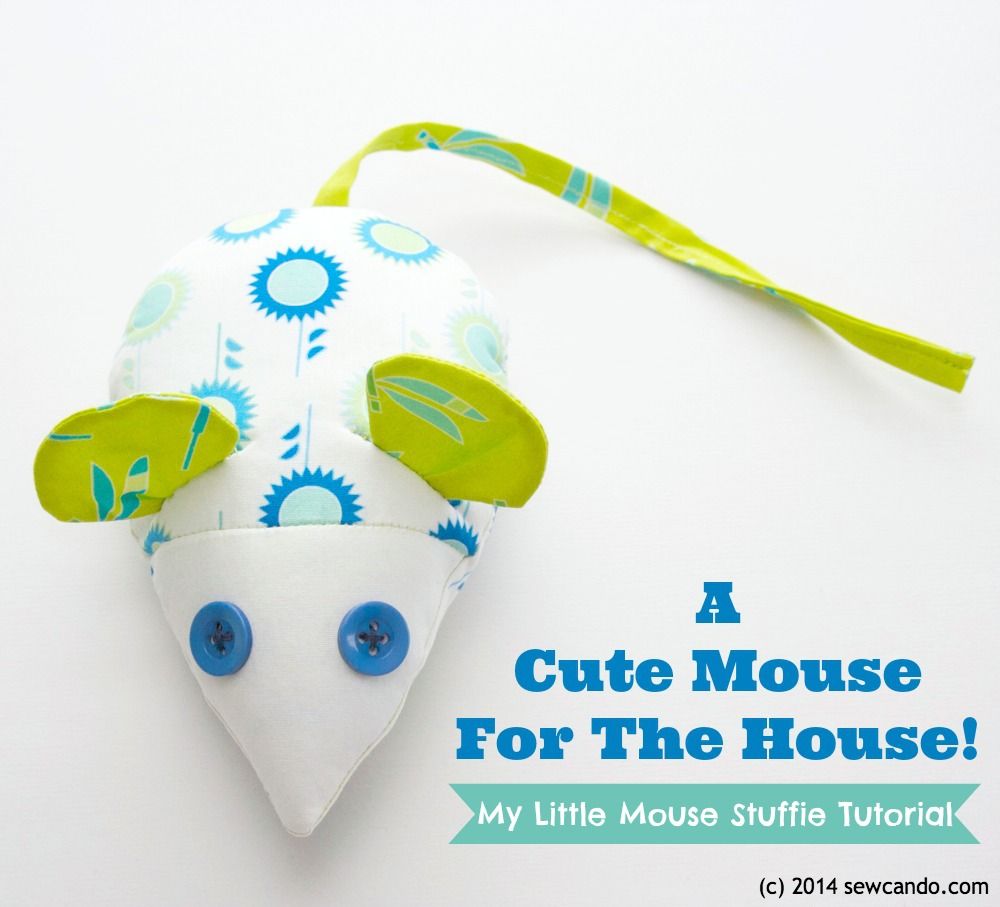
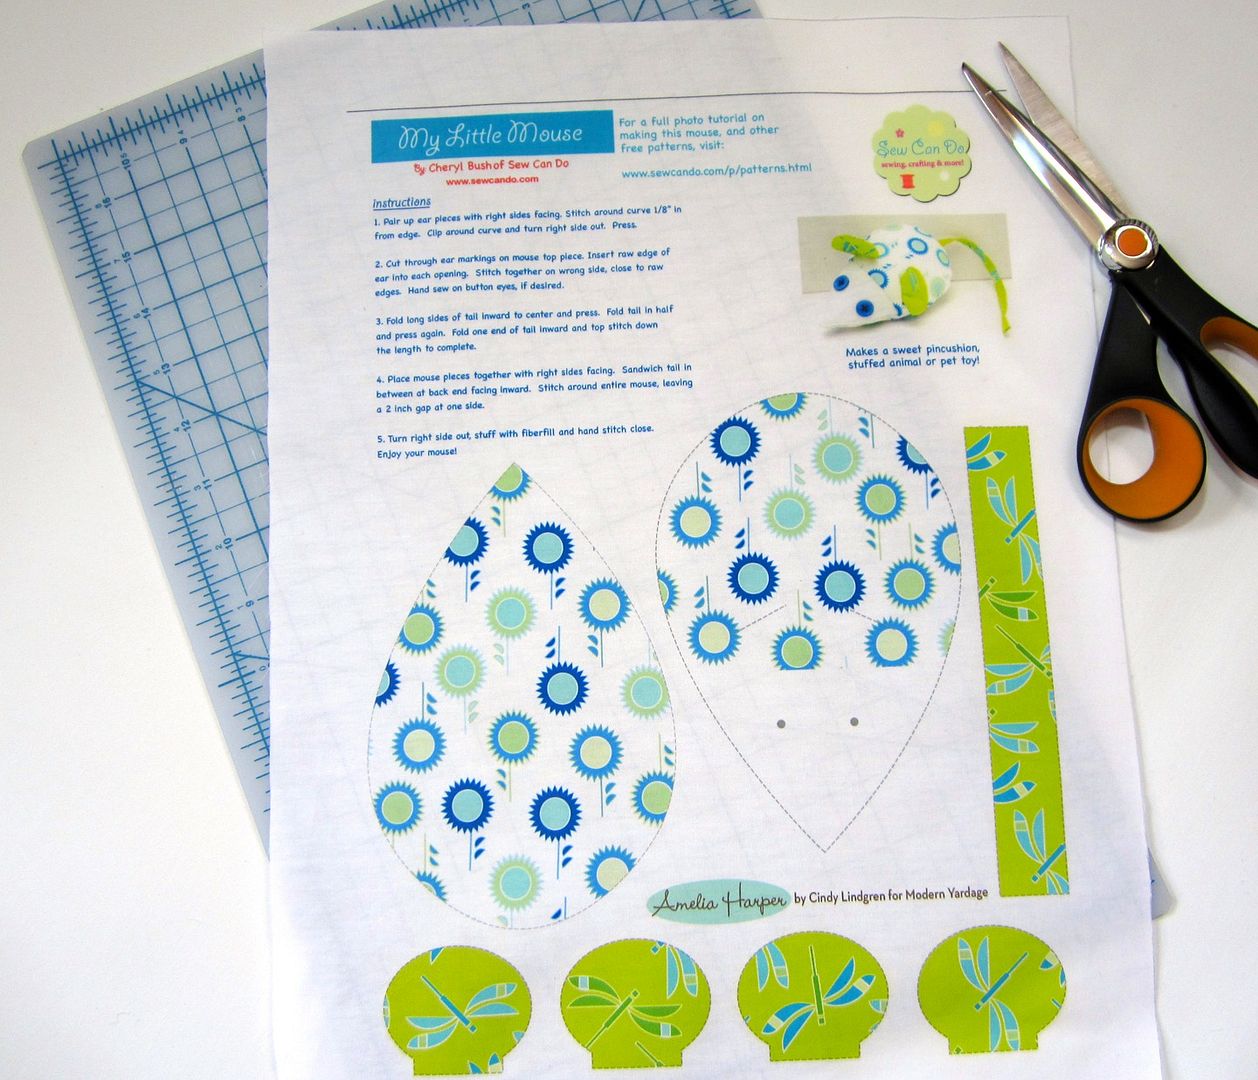
And if you want to make a cute little matching mouse to go with it, you can go to my FREE My Little Mouse Stuffed Toy PDF pattern & tutorial:
One lucky Sew Can Do reader will get a choice of
8 Fat Quarters from Modern Yardage!
That's right - any designs you want. Choose your favorite coordinating-collection prints like the Amelia Harper Collection I used:

or go for a diverse mix. YOU get to pick!

And all printed in an awesome, super wide fabric panel like this:
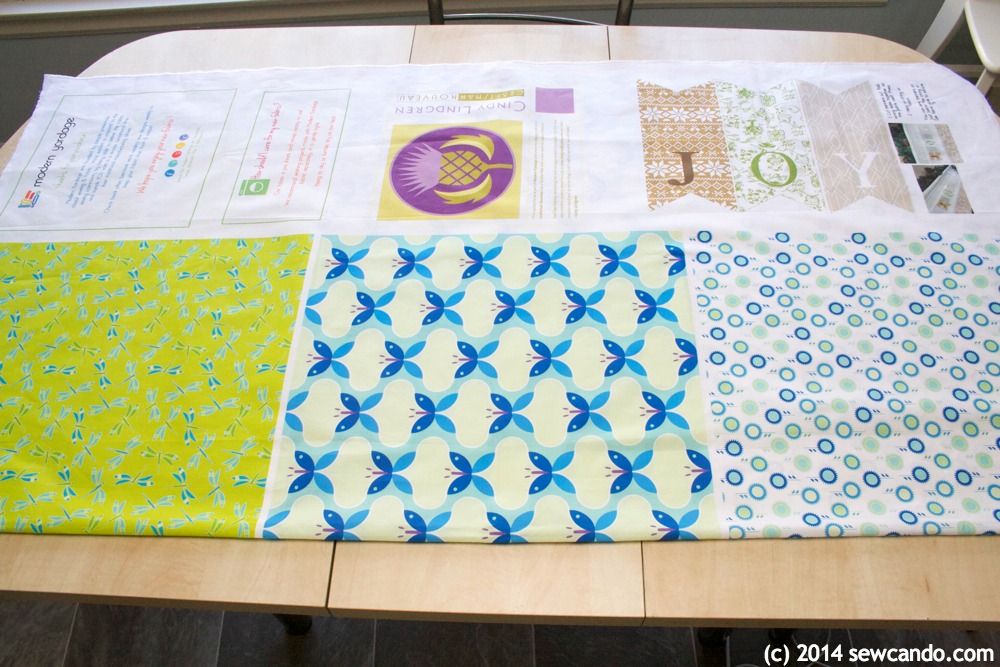
As I'd mentioned in my review post, there are free fabric goodies printed in the selvage of all Modern Yardage fabrics as a wonderful bonus. You can even select Sew Can Do's own original My Little Mouse cut & sew stuffie by using the code MYLITTLEMOUSE during checkout:
Then you could make this matching pair!
Good luck and Happy Valentine's Day Everyone!! XOXO

I'm also sharing this project with my FAVE LINK PARTIES.
Click HERE to check them out!
I really love the colors in the Autumn Equinox collection.
ReplyDeleteLove all the fabric and this adorable little bag...and mouse :)
ReplyDeleteI love the Autumn Equinox collection. I love the colors and patterns. Great bag by the way!
ReplyDeleteI love Willow Wisp! Such great backpack and the little mouse is adorable.
ReplyDeleteI love the Cirque De Millefiori By Mary Tanana colours
ReplyDeleteWhat a super cute backpack. There are a number of choices I would love. I think any of them would make really cute backpacks my oldest granddaughter would just love.
ReplyDeleteI'm not sure how I would choose from these three however as I love them all.
Autumn Equinox by Nicole Ketchum
SnOwls by Cindy Lindgren
Indigofera by Katie Schrader
I love the Seed Pods in Festive Whites collection...now I'm thinking of all the things I could make with this!
ReplyDeleteI'd get some of the Millie in Apple fabrics - thanks for the tutorial & the chance to win.
ReplyDeleteI like that the ink is non-toxic and eco friendly- perfect for babies. I would get Rondo in Folly Green, Floral Ogee in Sunshine Orange, or Buttons in Earth. Everything is so cute!
ReplyDeleteI really love the Everglades collection by Liz Ablashi. And, while I don't usually gravitate towards pink, it's my favorite of the group! I also really like Deep Sea in Tide by Liz Ablashi (it has an anglerfish on it!).
ReplyDeleteNote: I thought I submitted this already, but don't see it, so if it's a duplicate, I apologize!
Earth to Sky collection by Katie Schrader and Under The Boardwalk by Heather Dutton are my choices.
ReplyDelete24Tangent@gmail.com
I like the Perennial in Mint!
ReplyDeleteCoffee Break in Mocha is a fun collection, I would get that.
ReplyDeleteI love the Amelia Harper in the reds that they offer. I LOVE Modern Yardage and think what they are doing is brilliant! I love that you can order the fabrics in different scales. Again, I must say Brilliant!!! LOL
ReplyDeleteI think I would choose the fabrics you have - it looks great!
ReplyDeleteDots in blue and windy leaves in teal
ReplyDeleteI really love Autumn Equinox!
ReplyDeletei like the charms in rose
ReplyDeleteSo hard to choose....but I love three collections, Bohemian by Nicole Ketchum, Poppy Hop by Cindy Lindgren, and Willow Wisp by Julie Hamilton.
ReplyDeleteI really love Leighton Gardens! Thanks for a great giveaway!!
ReplyDeleteWhere's the giveaway entry form?
ReplyDeleteIt's in the Rafflecopter widget above the Comments section. Or if you can't see it, you can access it here: http://www.rafflecopter.com/rafl/share-code/NzY3YzM4YzIyZDQ1NDU3YmFjODlhYjk5NmE1YmRlOjM3/
DeleteSuch a great little bag!
ReplyDeleteI could get lost looking through all the great selections! But...the Swamp Friends is really fun! Thanks for a great tutorial and giveaway!
ReplyDeleteBreezin 2 in Midnight, Code of Elegance in Navy, Dexterity in Cinnamon Stick and in Parsley
ReplyDeleteI really like Festibloom
ReplyDeleteLove the Garden Delight in Spring! I want some of that...Oma's kitchen in Persimmon is another goodie! Love Neighborhoods in Multi.. I gotta order some of this awesome stuff!!!! Thanks for the giveaway!
ReplyDelete:0)
Love the Cirque and Willow Wisp both ..Very nice ..
ReplyDeleteThanks for the chance to win
I love the Leighton Gardens collection - it has an Art Deco feel that I really like. Thanks for the great tutorial!
ReplyDeleteemyerly(at)wideopenwest(dot)com
Love the Equinox but would really have a hard time choosing they are all so vivid and fun!
ReplyDeleteI've actually never seen the fabrics you used until today, but I love them! Thanks for the awesome giveaway!
ReplyDeleteZoo
ReplyDeleteWillow Wisp
poetry in motion
Jazz
Love the fabric label designs too :)
I love Garden Party Festive and Vintage Romance.
ReplyDeleteI like the custom quilt labels and the Bold Basics line, I can see using that in a lot of quilts!
ReplyDeletemissysaprons@gmail.com
I collect black and white fabric so Bold Basics was perfect.
ReplyDeleteI love those fabrics, so bright and cheerful.
ReplyDeleteI'd pick the Folky Dokey collection for this backpack. My granddaughter would love it!
ReplyDeleteBeen perusing so long...loved so many!! lol Choose the Vintage Romance ones, Paper Daisy & the Sunshine Pillow Kit in Yellow!! Whew.....
ReplyDeletereally like the Happy Camper Yard. :) love the colors, everything. :)
ReplyDeleteLove it! I'm totally making it, thanks ;)
ReplyDeleteSno Owls, Autumn Equinox and Amelia Harper are great. Love your tutorial project, too!
ReplyDeleteSuper cute back pack - I'd like to give that a try!
ReplyDeleteI love the Bohemian collection by Nicole Ketchum
ReplyDeleteI love them all, Coffee Break and Wildwood are the 2 with patterns I'd like the most in my stash!
ReplyDeleteCute backpack! Thanks for the tutorial. I never heard of Modern Yardage before. That have some gorgeous patterns of fabric. Thanks for the chance to win some.
ReplyDeleteMelissa
I LOVE Happy Critters fabric!
ReplyDeletelenelson(at)mail(dot)com
I'd get Devine Deco
ReplyDeleteI really love the "A Slice of Citrus Collection" it's so cheerful! I also like the "Modern by Nature in Summer" collection. I think some accents with these fabrics in my kitchen would be awesome!
ReplyDeleteI like the fun Happy Camper collection.
ReplyDeleteI like the Bloem In Nordic By Heather Dutton collection.
ReplyDeleteautumn equinox collection is so pretty!
ReplyDeleteWhat a cute little backpack :) Thank you for sharing :)
ReplyDeleteAutumn Equinox, Snow Owls and Amelia Harper are beautiful, actually, I don't mind any....thanks for sharing.
ReplyDeleteBoth these patterns are so cute!
ReplyDeleteI'd pick ManLove in Blue and Ombre Stripe in Navy
ReplyDeleteI like Daisy blush, lemonaide, citron, dewberry, taupe and there were a few other colors too.
ReplyDeleteI love Boho and Burst in the tomato and lilac. Thanks
ReplyDeleteAutumn equinox
ReplyDeleteJ'Adore Paris In Multi
ReplyDeleteMy boy needs one! Thank you for sharing this tutorial.
ReplyDeleteI like Gato by Liz A
ReplyDeleteOhh! I love the Bohemian and the Zoo collections!! Well, I actually like all the designs!! :-D
ReplyDeleteO M G these are beautiful ... a couple that I'd start with are Adrift in Coral, Willow Wisp, and Summersdown. Wow -- thanks for introducing me to Modern Yardage!
ReplyDeleteThere are so many beautiful designs and colors, it is so hard to pick. I really like the Doily in Coral and the Genie in two tone red!
ReplyDeleteThanks for the great tutorial!
ReplyDeleteI love the Circle of Life pattern and Festibloom.
ReplyDeletelovely fan fair in blue
ReplyDeleteWhat a gorgeous backpack... Love the fabric choices and the tutorial.... Thank you....!!
ReplyDelete:)
hugs x, Crystelle
Crystelle Boutique
This is so dang cute! and the little mouse! Great job on the tutorial!
ReplyDeleteI'm liking the Autumn Equinox collection at Modern Yardage. Thanks for the tutorial and the chance to win!
ReplyDeleteFolky Dolky
ReplyDeleteI like the willow wisp collection.
ReplyDeleteI also like the animal prints like the dragonfly in sage.
DeleteI like J'Adore Paris in Multi, Small, Broken Fences in Sky, and and Windy Leaves in Teal, small
ReplyDeleteI love this! Thanks for sharing! You are one of the features today at the Anything Blue Friday party at The Dedicated House. Here is the link for this week's party. http://thededicatedhouse.blogspot.com/2014/02/anything-blue-friday-week-47.html Hope to see you again at the little blue soiree! Toodles, Kathryn @TheDedicatedHouse
ReplyDeleteBecause I have an embroidery business (hobby), I would've leaned toward some of the collections with tiny prints, etc. However, after delving into the selections, and utilizing the color match chart, oh my gosh I know I would buy the Genie 2 Emerald in Large to make drapes for my den! It's exactly what I've been looking for!
ReplyDeleteI really like the festibloom collection, simple but effective, what a lovely giveaway x
ReplyDeleteI love the Bold Basics (b&w). I would pair it w/ teal or red to make a quilt. Lots to choose from there!
ReplyDeleteI really like the Cirque de Millefiori collection.
ReplyDeleteI would love to get Coffee Break By Allison Beilke. Thanks for hosting this great giveaway!
ReplyDeleteI particularly like the Whimsy in Spring (medium) Personality Collection by Emilie Daly, Dana Morgan's Geometric Collection - Carbonate in Green, and Gato y Pescado in Pink, Medium, Gato Collection by Liz Ablashi (not necessarily to use together in the same project but they just appeal to me ;)
ReplyDeleteSuch a cute backpack. My kiddos would LOVE if I made one (or two) for them. You've been featured today at Gingerly Made!
ReplyDeleteI adore this backpack! It's being featured at this week's link party. Thanks for linking up last week. http://www.thelifeofjenniferdawn.com/2014/02/a-little-bird-told-me-link-party-80.html
ReplyDeleteThe colors are so fun on this bag! I absolutely love it darlin' :) Thanks for linking up with me! You are amazing as always.
ReplyDeleteThanks so much Krista. And the colors are just what's needed with this dreary perma-winter outside!
DeleteJust made this and turned out wonderful, but I have to add velcro for the flap to keep it in place, and put something firm for the bottom to make it sturdy :) Thank you so much for the tutorial!
ReplyDeleteThat's great to hear Meilina & I'd love to see your backpack. Those are great additions to make it super strong to hold anything:)
DeleteHere's the picture of the backpack:
Deletehttp://i596.photobucket.com/albums/tt50/si_wida_nih/Mobile%20Uploads/image.jpg
It looks terrific Meilina! Would love to share your pic on the Sew Can DO FB page if that would be ok.
DeleteYes that would be great!
DeleteWhat a super cute backpack! Love this tutorial - thanks for sharing! -Deanna {sewmccool}
ReplyDeleteThanks a lot Deanna! :)
DeleteWhat are the finished dimensions? I must be missing it :)
ReplyDeleteThe finished bag is 9.5in w x 12.5in h x 3.5in d
DeleteThis comment has been removed by the author.
ReplyDeleteEverything is so so pretty and cute. Simply love the colours and the print. The free pattern for mouse is super.
ReplyDeleteThanks so much - I hope you enjoy it!
DeleteMaking this bag now and loving the modern look of it! Great turturial, thank you for sharing it!
ReplyDeleteFantastic to hear that. Would love to see it:)
DeleteI just came to your blog for the first time when looking for waterproof fabric and found this project too - LOVE it!! Do you think it would work with the waterproof oxford fabric? Would love a waterproof backpack. I am just getting into sewing but think I can handle this. It's awesome! Thanks.
ReplyDeleteHi Heather - I'm glad you found me & my backpack! Yes, I think the waterproof oxford would be great with this. I'd recommend either still doing the lining in woven or just forgoing a lining all together and folding the raw edges of the top inward. Then the backpack will stay lightweight.
DeleteThank you! I'm so excited to give this a try. Might be a *bit* ambitious for one of my first projects - but looks like I'd definitely get introduced to several techniques all at once :-). Thanks again.
ReplyDeleteSometimes that's the best way to learn. I know when I was getting started I tackled some challenging fabrics & techniques right away, but it got me confident at trying new things.
Delete