

Looking for a cute accent for your craft space? Extra storage that is fun & functional? Make a handy Giant Thread Spool Storage Canister!
I came up with this project as a party decoration for the Sewing Themed Birthday Party I put together for my daughter:

A giant faux spool of thread (aka cotton reel for my UK friends) was a super cute table accent:
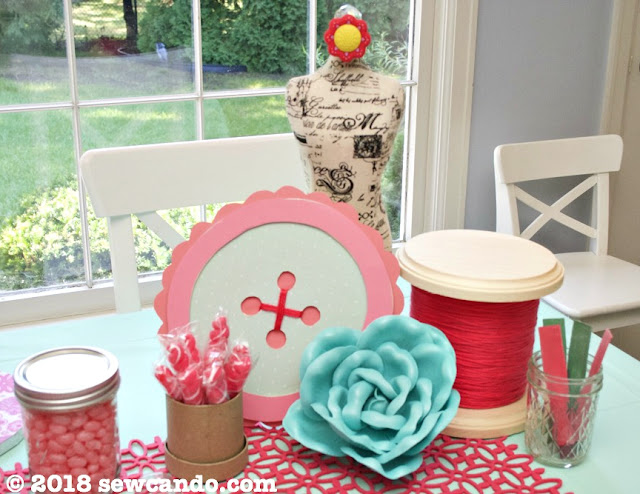
Not only was it the perfect table decoration, but it's become totally practical after the party, thanks to its great hidden storage for small notions and accessories:

Now let's make one the easy way!

Materials:
- Yarn
- 2 wood circles (beveled edge is ideal)
- Cardboard canisters - mine were nesting
- Tacky glue, hot glue
I got all my supplies at the local big box craft store, so easy to find. I gathered my yarn, wood circles and cardboard can to get started:

I totally lucked out and found a skein of yarn in the exact shade of pink that matched our other party decorations (and my craft room for its later residence) in the clearance bin:

For the canister I used the largest of the nesting 3 container set, but the lid from the middle size so the top edge of my finished container would fit into it to stay on. If you don't have a smaller top to use, you could probably roll a strip of cardboard into a circle slightly smaller than the base or use a lid from something else.

I started by giving the entire canister a good coat of tacky glue using a foam brush.

I put a dab of hot glue at the edge to tack down the start of my yarn and then began winding it around the canister in a single row, fairly close together:

It was ok there were some small gaps in this layer since another layer was going over it.

I wound a second later back down, keeping it pretty taut so it would stay even:

I put another dab of hot glue to attach the tail end to the bottom edge. Hot glue works ideally because you don't have to wait for it to set:

Then it was time to attach it to the base. A round squiggle of hot glue on the top of one wood circle was all that was needed and then stuck the canister on it:

To do the top I did another round squiggle of glue on the other wood circle, but this time it was on the underside and put the smaller canister lid on it.

Boom - All done and ready to fill with all those crafty supplies!


This is SEW Cute!!! What a Fab idea for making oversized functional storage!!! TFS!!
ReplyDeleteThanks so much - we crafters can never have enough storage, right?
DeleteI love it!!! What a cute and practical idea!
ReplyDeleteThat's how I judge a successful project these days - it's got to look fun but also be useful too!
DeleteThis is so clever that I have to ask... how did the original inspiration come to you?
ReplyDeleteI actually saw a similar prop decoration online, but that's all it was and there was no detail on how it was made. So I thought about what supplies I could find to make one and had the idea to make it open with a lid so it could be used.
DeleteGenius!!! Sooooooo cute ! Or should I say "Sew" cute !
ReplyDeleteAbsolutely! I'll take either one ;)
DeleteThis is brilliant, I love your cotton reel (and I'm so excited to hear that you know what we call them on this side of the pond!)
ReplyDeleteThanks Julie. And I'm glad to learn the differences of all the names so I can use both.
DeleteThat's totally cute! I would love to replicate this as decor for my sewing room, but I need to see if I can find the wood circles.
ReplyDeleteThank you for sharing at The Really Crafty Link Party this week. Pinned!
You can get the wood circles at most big box craft stores - I found these at Hobby Lobby:)
DeleteWhat a great tutorial Cheryl, thanks so much for sharing!
ReplyDeleteThank you Connie!
DeleteI just found your page today! Brilliant!!! I LOVE the big spool and can't wait to run to the craft store to get the supplies to make one for myself. Thanks so much.
ReplyDeleteThat's music to my ears. So glad you're making one - I'd love to see a photo when you do!
DeleteBought the wood rounds and had the canister. hank you for the tutorial!🤗
ReplyDeleteAwesome to hear - I'd love to see yours when you make it. I'm starting a new "Reader Made" feature and would be happy to include yours if you email a finished photo:)
DeleteI made the spool on my YouTube channel https://youtu.be/obAKiGzJBpc and I linked the info back to you. I did do one change and that was to use Beacon 3 in one clear glue instead of the Aleene's tacky glue, although I did start out with that.
ReplyDeleteWhat a cute idea! I LOVE the flower pincushion too! I'll be putting this on my 'to-do' list!
ReplyDelete