Showing posts with label craft supplies. Show all posts

Wednesday, February 23, 2022

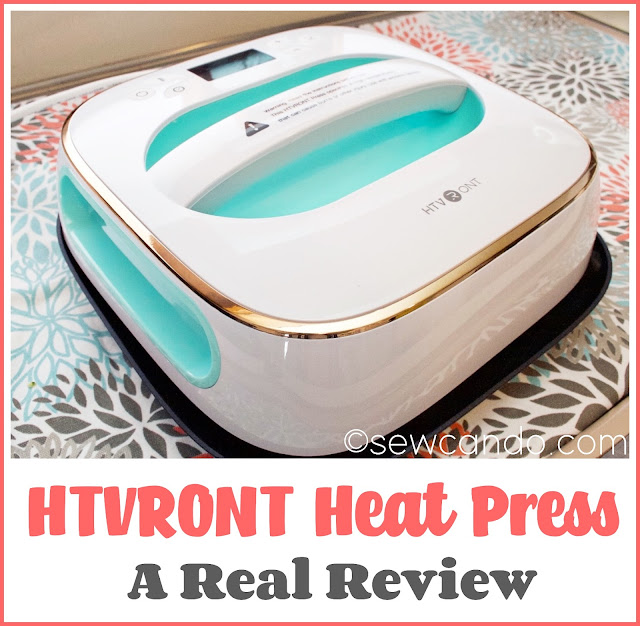
Product Review: HTVRONT Heat Press


It's been a while since I had a fun craft product review to share, so today I'm sharing my experience with a new product I've recently tried out: the HTVRONT Heat Press.

HTVRONT (which stands for Heat Transfer Vinyl, Really outstanding, Never temporary) is a heat transfer & adhesive vinyl supplier.  They reached out to me and asked me if I'd be interested in trying out their new Heat Press machine and doing a product review.  

I'd done an extensive review of the Cricut Easy Press several years ago, and have done a number of HTV projects over the years.  I was curious to see how this machine would do, since I hadn't heard of it before.  FYI, I was not financial compensated, just received a press to try out, so the opinions here are completely my own, based on my own experiences.    

In case you aren't familiar with this sort of tool, a heat press is for iron-on and sublimation craft applications. Using heat transfer vinyl (HTV), you can press your own custom shirts, bags, pillows, wood, etc.  When paired with a cutting machine for cutting the design, it's a quick & easy way to customize just about anything and is definitely a beginner-level kind of craft.  

In the past, if you wanted to use iron-on vinyl, the options were either using a normal household iron or to buy a commercial heat press.  Basic irons don't always adhere the vinyl very well - it tends to peels off in spots after a number of washes. Regular, commercial-style heat presses can be big and bulky for home use and are pretty expensive.  A few years back Cricut came out with an Easy Press, a smaller, sleeker machine designed for home use, but it was still a fairly pricey option and it has stayed at that price, about $150, for the 9"x9" size since (and $199 for a 10"x12" size).  The HTVRONT version currently retails for just $105.

So let's look at the HTVRONT Heat Press:  
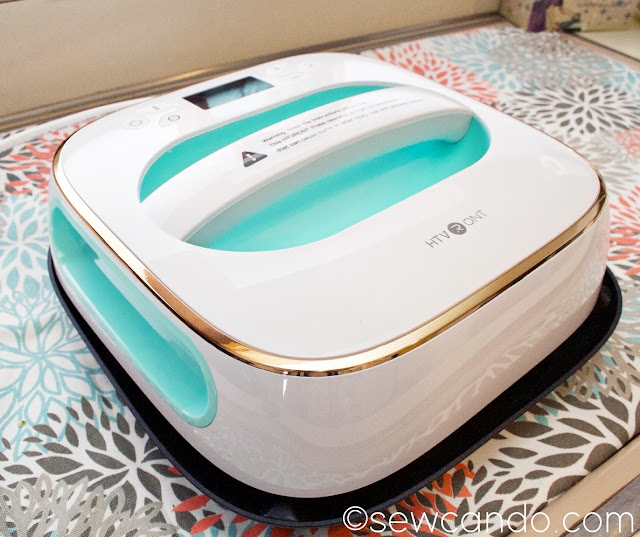

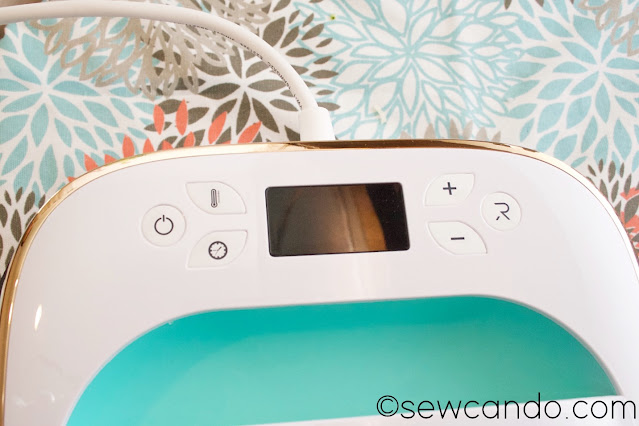
It has easy push button settings for temperature and time.
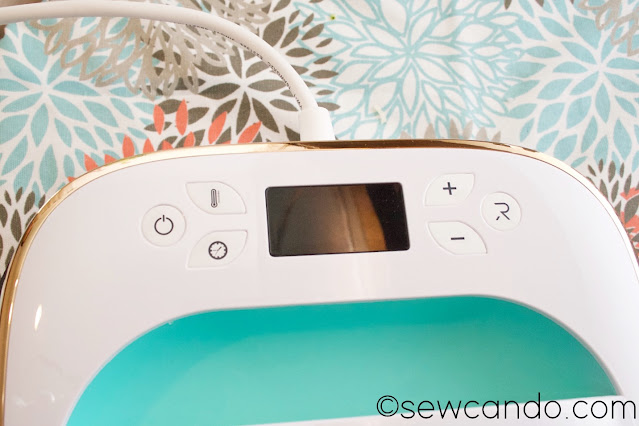

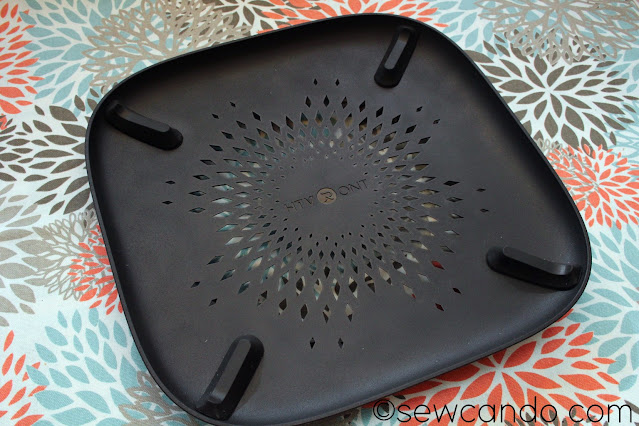
It's also got a heat resistant safety base and automatic shut off after 15 minutes of inactivity.

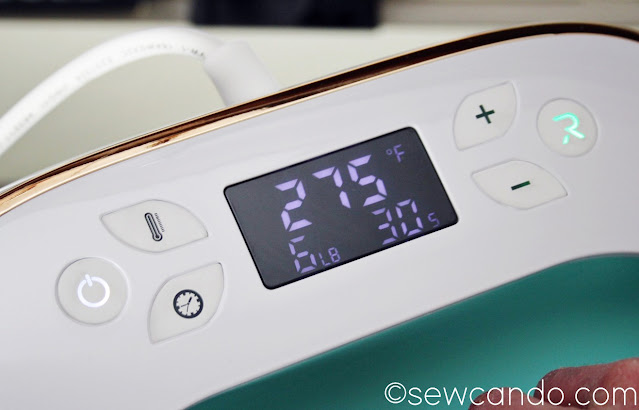
It also has a pressure display with the temperature and time settings so you can adjust your pressure based on your materials, which is a feature not seen on the Easy Press:

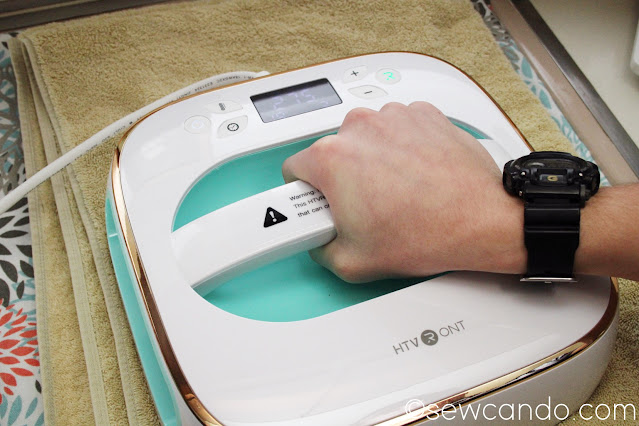
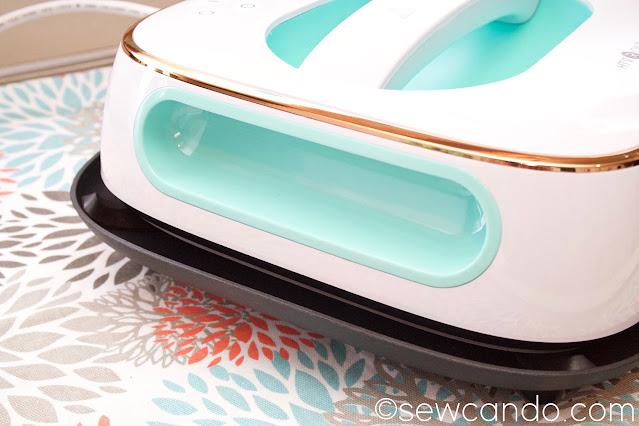
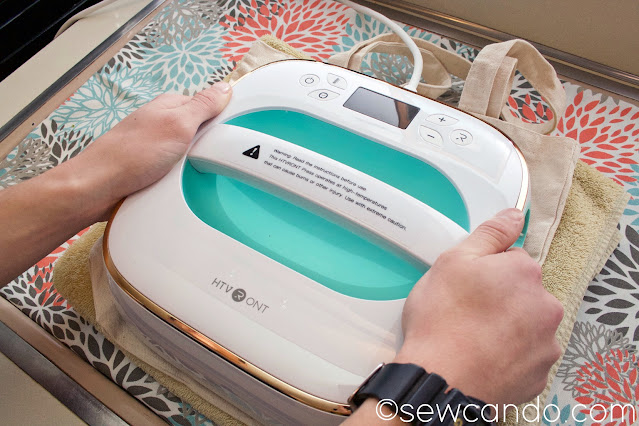
It also has two ways of applying pressure - either holding onto the top handle with one hand:


or by using the side handles for two hands, which is another innovation.  

Does it really work?

I was really pleased with the results I got.  The HTVRONT Heat Press performed just as described and my finished items were just as nice as previous ones I'd done with my other press.  


The Pros:

- The size is great.  It's versatile 10"x10".  I like that it's a bit bigger than my old press, so doing designs scaled for my teens/husband are a bit easier.

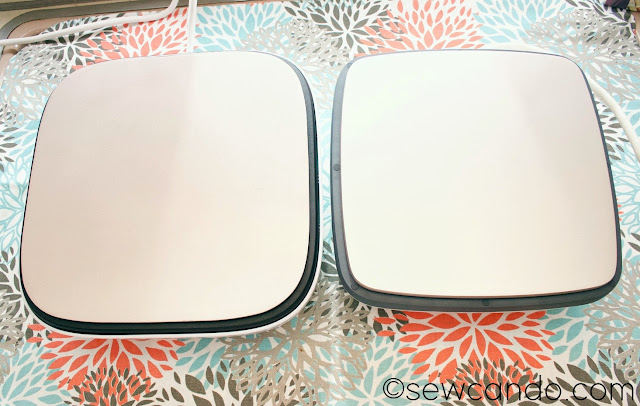

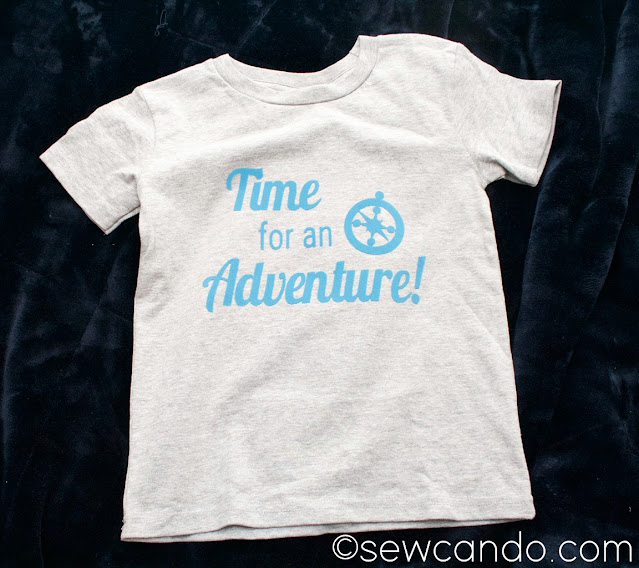
- It heats up pretty fast and evenly.  Within seconds it was up to temperature and in less than a minute my designs were fused:
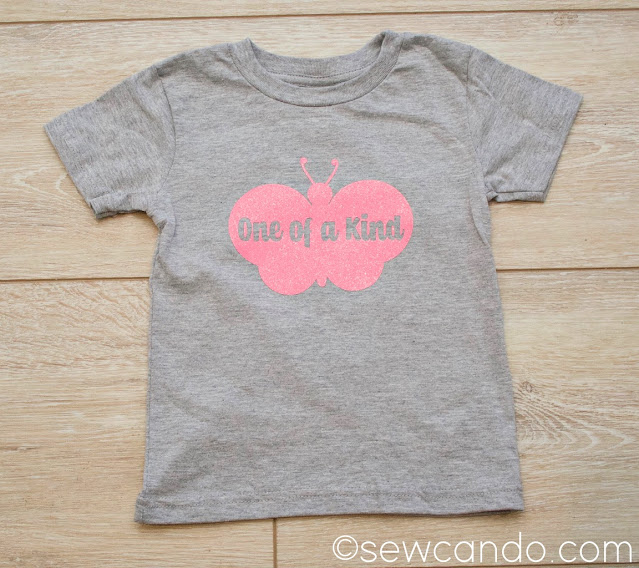

- The button settings for temperature and timer are super simple and make sure you get an even fuse everywhere at the same time.  The company says their temperatures are more accurate than similar products.  I followed the same times & temps I've used in the past for fusing different types of HTV and they adhered well every time.


- I also liked the dual options for applying pressure and being able to see just how much pressure I was actually producing when I was working.  

And it comes with a handy storage bag to keep it clean and dust-free when not in use.  That was a nice bonus feature. 


I used several kinds of HTV and it did a good job with them all.


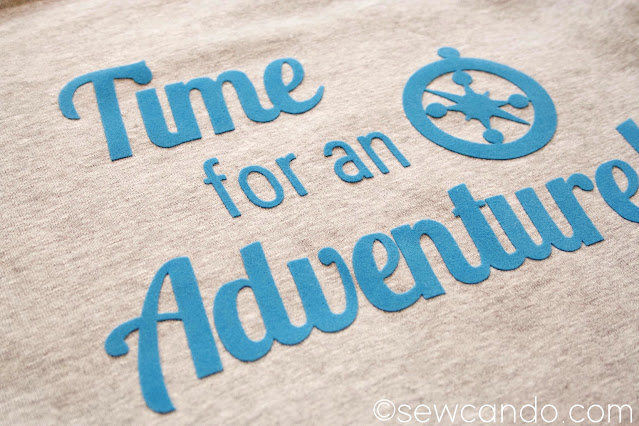
My key personal test was with flocked HTV.  I LOVE using it - it's thicker, with more dimension and a fuzzy texture.  It's not as common as the smooth and glitter types though, so I've had to trial & error getting a good result in the past.  I used my  295F, 30 sec front/15 sec back "recipe for success" and this press turned out perfectly:

- Even after washing (delicate, inside out and line drying), the designs have stayed put.  No lifting or peeling like I'd had in the past with iron fused heat transfer projects. 

The Cons:

- Like the Cricut version, the cord is positioned at the center of the top when it seems like it makes more sense to be at the bottom.  I don't have an outlet in front of my workspace, so I have to move the cord out of my way or turn the press upside down when I'm pressing, which is a little challenging.  


- There's no temperature/material guide included.  They do have one on their site but you have to search around a bit to find it and it's not clear if those settings are for their particular brand of HTV or more universal.  There are several links to various sections with project ideas, free files, tutorials & tips, but you have to sift through a lot of content to find basics, and since this product is new, a lot of the how-to's show using an iron rather than this press.  More tips for using this particular model and better categorizing would help a lot.  I went with my past experience to figure out settings for what I was using, but it would be trickier for someone totally new to figure out.


Is it worth buying?

Personally, I think this model is a good buy.  It works just as well as the famous maker brand, but offers some extra inches and bonus features, is a fraction of the price and carries a 1yr warranty.  And with the $ saved on the price of the press, you can snap up lots of great HTV to use with it!  They've also got a sale and product bundle giveaway currently going here, so you can get a good deal on them as well.  


I was not financially compensated for this post.  I received a Heat Press from HTVRONT to review.  All other items referenced were purchased by me.  The opinions are completely my own, based on my honest experiences.  

Wednesday, May 5, 2021

Craft It Out: Thermoplastic Pellets


One of my goals for this blog in 2021 is to try new crafty stuff out on my own dime.  Testing out products I've never used before, techniques that are new to me, etc. and doing it with my 11yr old daughter as a sidekick to see how kid-friendly things are.  I figure as we learn, and do a bit of trial & error, that might help other crafters too.  So today I'm jumping right in to my first Craft It Out segment with Thermoplastic Pellets

I bought a bag of these at a Maker Faire many years ago.  At the time they were advertised as being great for prototyping maker-y stuff, but I thought maybe I could craft some stuff with them.  I got them home and promptly forgot about them.  Then when I was looking for something recently I saw the bag at the back of a drawer & thought it was about time I finally gave them a go.

So, what are Thermoplastic Pellets?  Non-toxic, lightweight polyester plastic that comes in pellet form that, when heated, is moldable like putty to be used in all sorts of ways.  There are lots of brand names out there, but they all work pretty much the same way.  


What can you make with Thermoplastic pellets?  What's cool about them is how infinite the uses are.  Literally anything you can dream up that could be made with plastic - jewelry, craft projects, props or costume pieces, custom parts, artwork, ergonomic handles, game pieces or even repair tools & toys with them.


How do you mold with Thermoplastic pellets?  You can sculpt with your hands like you would with clay or you can use a mold to get your shape.  Just make sure said molds are heat resistant - metal or silicone seem to work best.  


How does it work?  Like the name says, you have to heat the pellets (to around 150F) get them to melt and become a pliable putty.  I tried a couple of the recommended heating techniques with mixed results.

What seemed like the easiest method, just pouring some pellets into a mold and popping it in the oven was a total hassle.  It took FOREVER for the pellets to melt.  As in 4 times as long as recommended.  One limitation of thermoplastic is you don't want to overheat it, so just turning up the temperature isn't really an option.


After a long while the pellets finally did melt and turn clear.


But gravity meant they slumped down and left these streaky "wings".  I felt like yes, this was "minimal effort", but took way too long & with not ideal results.  
Oven method? It's a NO from me.


Next I tried the hot water method.  I used an electric kettle with a digital temperature setting to get my water to just above 150F, then poured it into a Pyrex bowl that I had on an electric mug warmer to keep the water at temperature.  
Hot water method:  YES!!


Once all the beads were clear, I swirled them to stick together with a metal awl to get them out of the water.  


Then we began to knead it to get the moldable putty consistency.  I'll be honest, this part was so cool to see & feel - it was hard to believe this was the same stuff that was hard white plastic pellets just minutes before:


At this point we learned that you have to work really fast because the consistency gets stiffer and harder to shape fully.  We pressed some into our silicone molds like this:


There were a few times we had to return our plastic to the hot water to soften it up, but just a few seconds gets it back to the right consistency.  Another hot water technique recommend a water-filled pan on an electric griddle (which we didn't have), which would probably be best if you're doing a lot at once.


Some we rolled out flat like dough, then used metal cookie cutters to cut out shapes.  We also rolled a few into balls.  Since it doesn't stick to stainless steel or wood while warm, you can use a wooden skewer to make holes, which is how we crafted a few beads and buttons:


To cool them down fast you can stick everything in a pan of ice water and they'll harden up in a minute.  You can tell they're done when they are completely white again:


Reusability for the win!  One of the best features of thermoplastic is that it can be remolded again if things don't turn out.  And we had quite a few that didn't look great as we were getting the hang of things and weren't moving fast enough!  Just stick it back in the warm water and wait for it to turn clear to try again.  This was a big plus.  You can also use an x-acto knife or Dremel tool to remove excess bits of plastic from designs (and chuck those scraps back in the hot water to reuse too!). 

What about coloring?  I saw a number of videos that showed how to knead in alcohol inks or pigment pellets to color the plastic completely.  I didn't have any of those on hand so I couldn't try them, but they sounded do-able - although messy - so gloves would probably be a good idea with that.  Since the plastic starts hardening pretty quickly out of water, you'd also have to be lightning fast to blend it in before having to pop it in the hot water to soften it again to shape.

Painting the exterior is a much easier option.  Basic acrylic craft paint is ideal for that.  
We did ours on freezer paper so nothing would stick:  


I did this robot with acrylic silver metallic paint:


For this butterfly we made into a pendant, we used a metal mini cookie cutter for the shape, skewered a hole and then painted it with matte acrylic paint and then a layer of silver fine glitter paint on top.  


For this cross pendant we used a metal cutter and then painted it with pearlized acrylic paint:


We're planning to glue magnets to the backs of the robot, puffy heart & penguin.  Now that we're more seasoned with what set-up works best & how the pellets work, I think we'll try doing more free form shapes & look for some interesting molds...maybe even have the kids design their own custom game pieces.  


 One bag can make LOTS of things and clearly from the fact ours was more than 5 yrs old, it doesn't have an expiration date, so it's pretty economical.  The only real limits seem to be getting imaginative with using them.  We're still brainstorming more things to create and maybe come up with some new takes on technique/use.  I'll share our findings when we do!


Tuesday, March 3, 2020

St. Patrick's Day Craft Supplies Giveaway!


How about a chance to win some new craft supplies for St. Patrick's Day?  I thought it would be fun to do a festive holiday craft supply giveaway with goodies from my shop to celebrate the occasion.

The winner will receive these Erin Go BraghCeltic Creations themed button and flat back charm sets:


They're great for all sorts of projects.  Use them with my tutorial to make some fun St. Patrick's Day Hairbands:


And a set of these festive Saint Patrick glass cabochons:  


They're really cool because they've got a domed, dimensional design and an easy to glue on flat back.


 Glue them to magnets, key chains or jewelry findings, make bookmarks, scrapbook projects & more.  

Last year I added a metal medallion setting and laser cut wood piece to make this holiday decoration:


I also paired some with the other buttons & charms to make some festive Celebration Candles:


I'm also including a set of Amber & Emerald Green Bubble Ball Glass Bead Charms.  These crystal filed mini glass baubles have loops at the top for fun & easy jewelry making, decor projects or wine glass/bag charms.


And for something wearable, I'm also giving away my Little Leprechaun Mini Top Hat PDF Pattern:


It's a quick sew that can be made with fleece or felt.  It's really cute on babies, but also ideal for kids and adults too:

Little Leprechaun Mini Top Hat Headband PDF Pattern image 4

Since the holiday is coming up, and I want to be able to send this prize out with enough time, it's only open through 11:59pm EST March 6, so gets those entries in soon for a chance to win this goody bag of supplies!


a Rafflecopter giveaway

LinkWithin

Related Posts with Thumbnails