Showing posts with label St. Patrick's Day. Show all posts

Thursday, March 9, 2023

My DIY St. Patrick's Day Preschool Unit

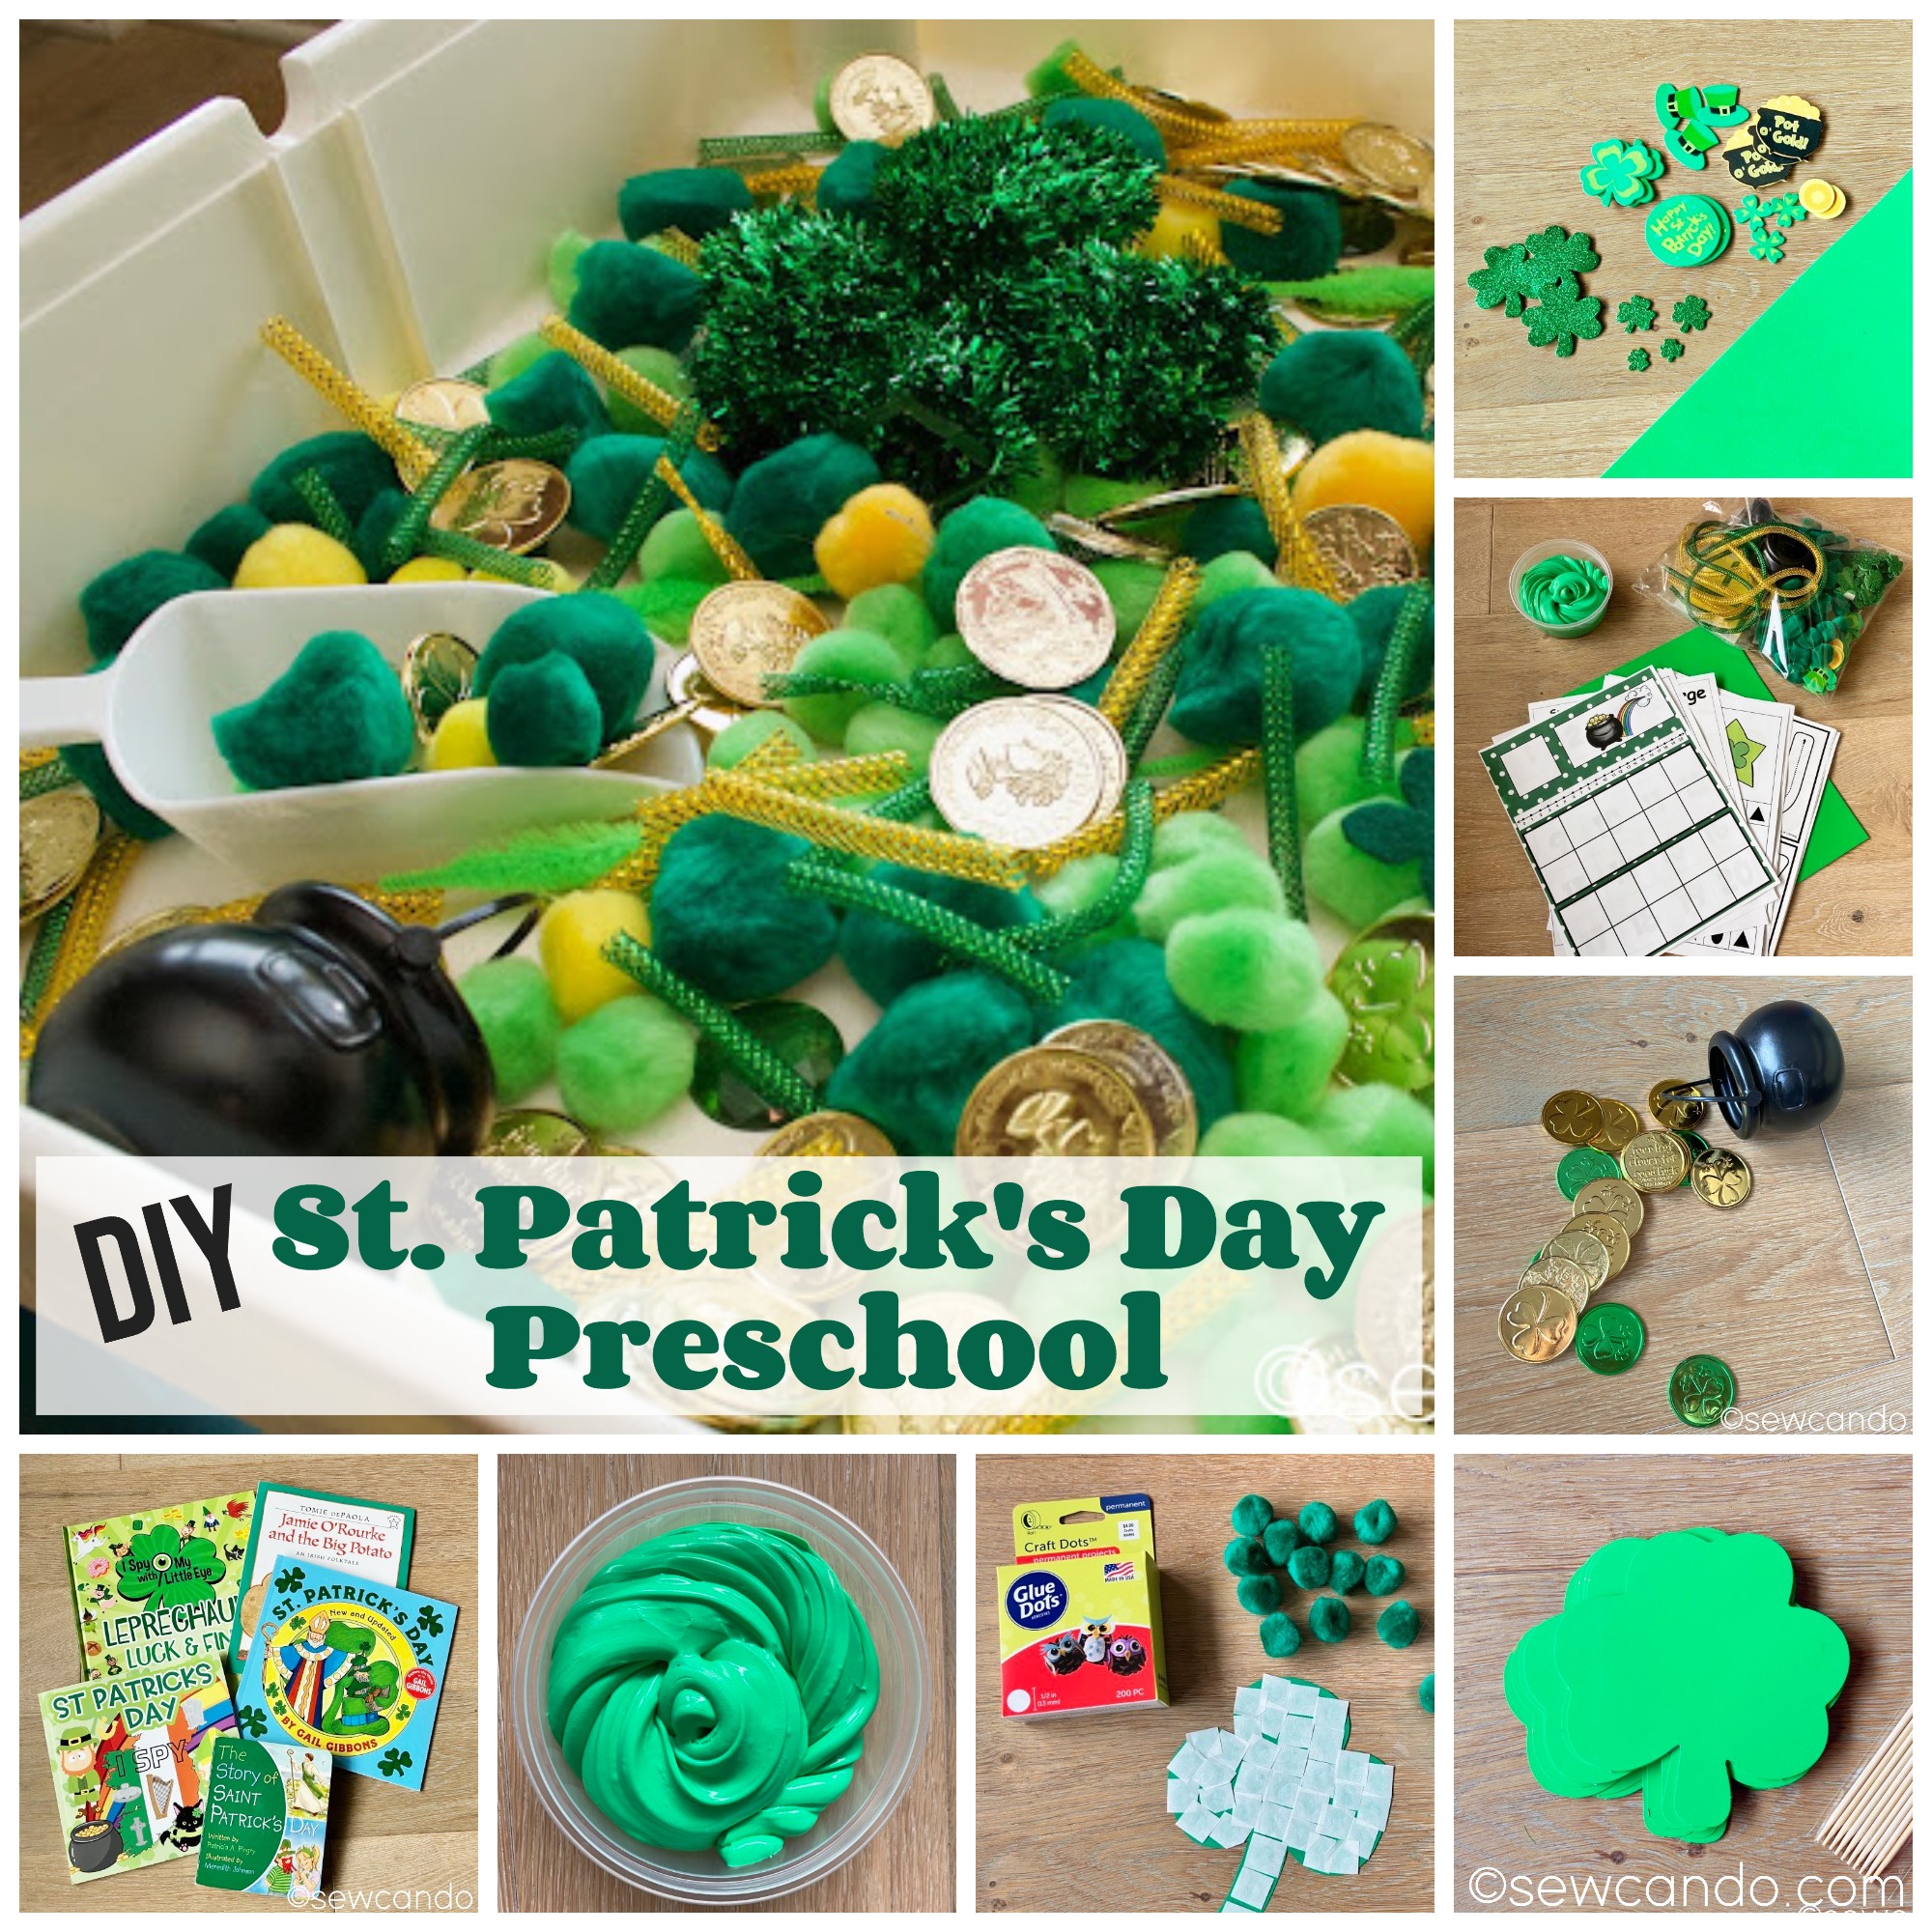
I put together this fun preschool unit for Saint Patrick's Day and shipped a set over to our toddler nephew who lives several states away, so he could do "preschool across the miles" with us.  Not sure if it'll be us moms or the kids will enjoy it more, but I wanted to share all the goodies I compiled so others could join in too!

I used a bunch of printables (some free, some purchased) from Pre-K Printable Fun, ABC's of Literacy, Gift of Curiosity, Simple Everyday Mom and Preschool Play & Learn.  I laminate most so we can keep reusing them and they hold up to my 3yr old's "I can wreck anything with these" hands.


I found this FABULOUS butter slime recipe that all our smalls just love.  The consistency is like taffy, but it doesn't stick to things and is very easy to make.  Better than play dough because it doesn't crumble or dry out if it's stored airtight and is easy to roll out & shape.  I made it with green air dry clay and used a green apple scented activator to theme it for St. Patrick's Day:


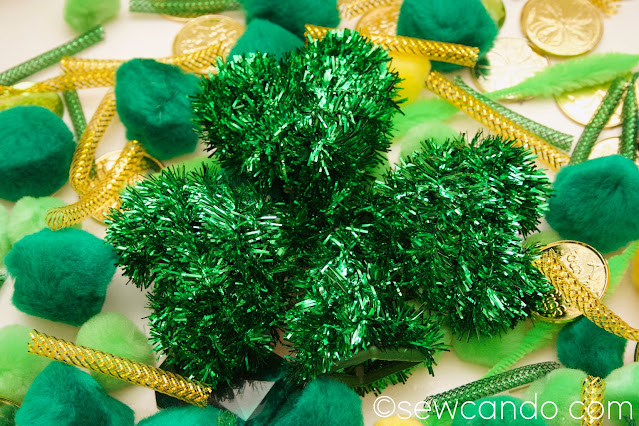
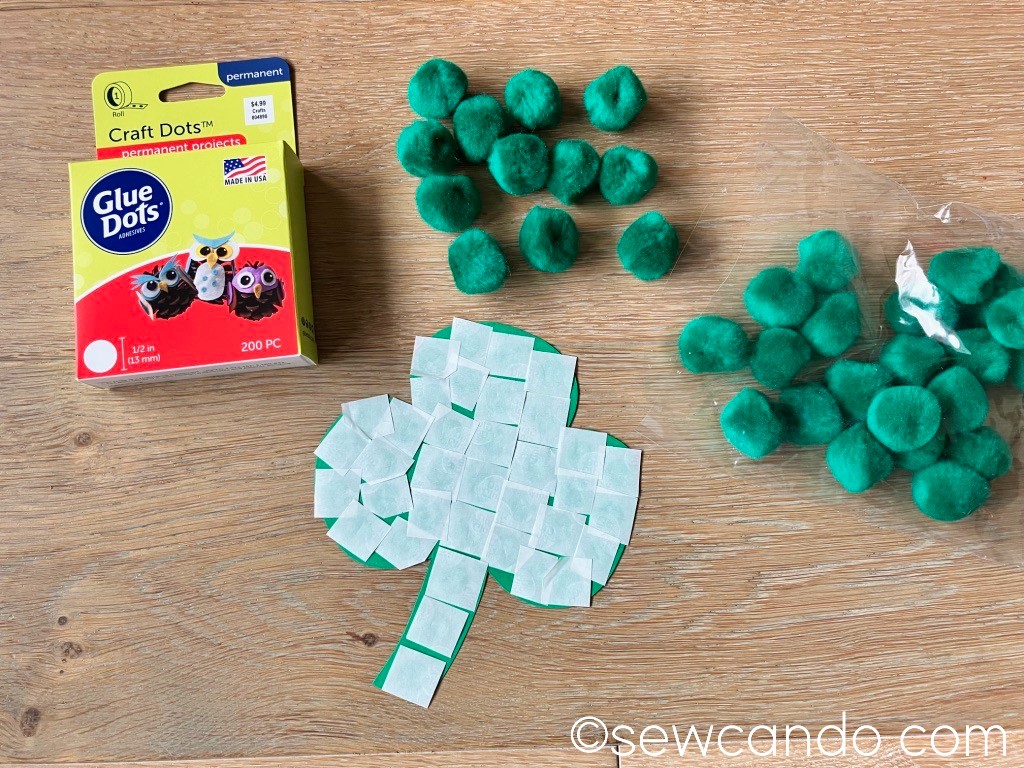
I cut some shamrock shapes from card stock and stuck glue dots all over them so the kids could peel off the bits of paper and stick pom poms to make some plush shamrocks:


I got some bags of holiday themed foam stickers and glittery foam shamrocks for them to add to some foam craft sheets (all found at Hobby Lobby) that can be cut into wreaths or ornaments or photo frames:


Some shamrock scratch art cards from Hobby Lobby too, since they are fun and non-messy:


I found this adorable wind-up St. Patrick foam craft kit on Amazon.  It is SO hard to find actual saint-themed projects for the holiday so this sucked me in as soon as I saw it.  He's even got a snake!! I didn't need a dozen of them, but this wasn't a project I could easily DIY given the wind-up mechanism and detailing.  I also figured it'll be fun enough to do again next year with the extra ones:


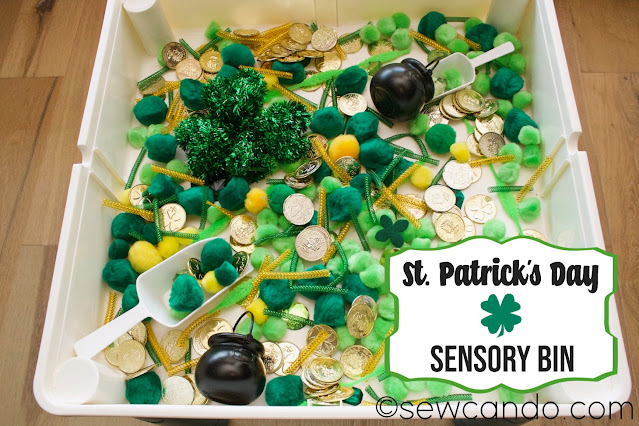
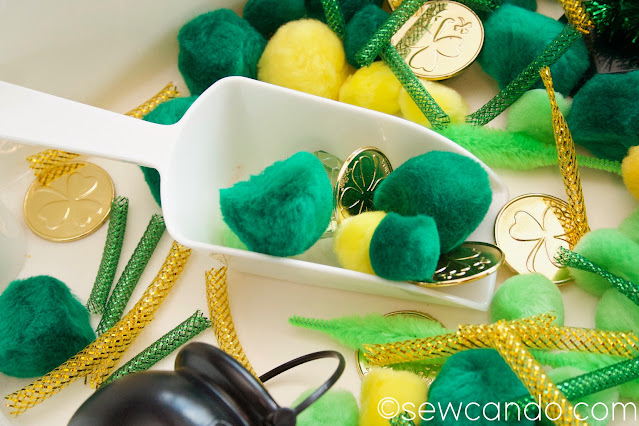
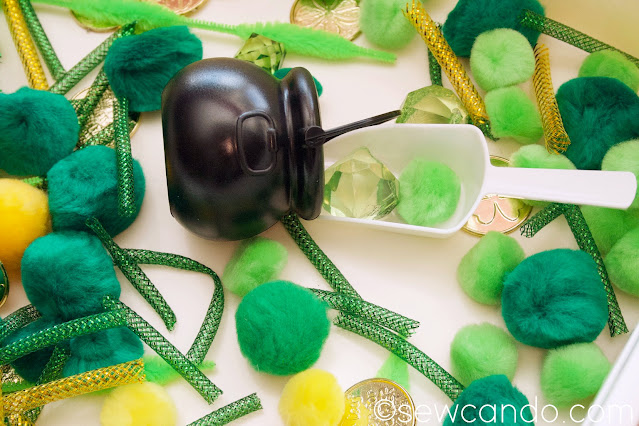
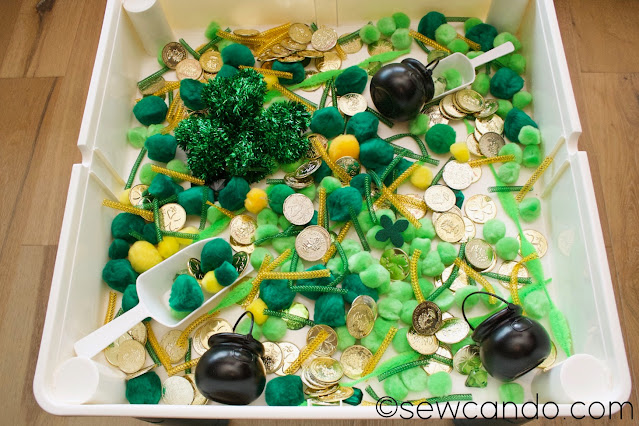
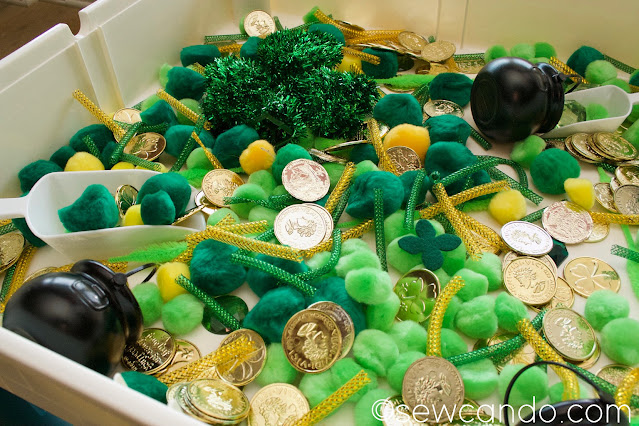
Coins and plastic pots of gold from the dollar store to use for counting/markers for the activity cards and adding...


with cut up some bits of the deco mesh rope, extra pom poms & some plastic scoops to do a St. Patrick's Day sensory bin:


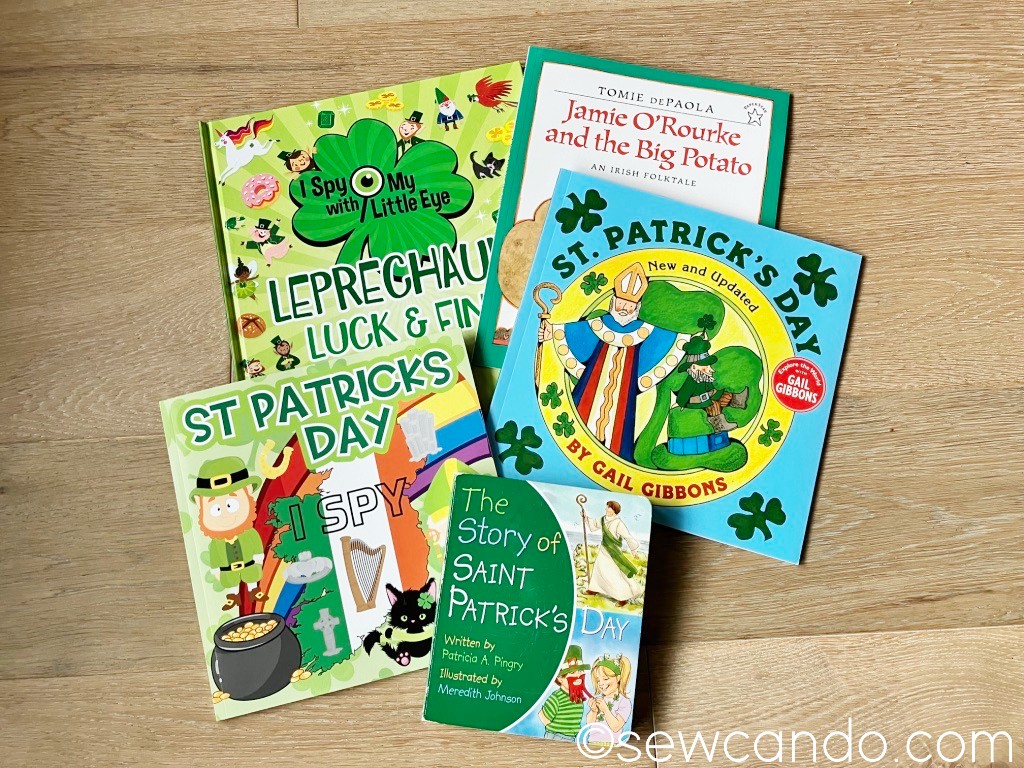
I also found a nice assortment of books on Amazon that looked fun and educational (and reasonably priced).  I sent one to my nephew and got all these for my smalls.  I especially liked having some that share the real info about St. Patrick and was able to get a few in board book format so my 3yr old can't destroy them easily either.


I'm really excited for our holiday unit and having my nephew experience it with us hundreds of miles away.  I hope these ideas help keep other toddler busy too!


Thursday, March 17, 2022

Thrifty St. Patrick's Day Sensory Bin Fun


We're celebrating Saint Patrick's Day's day with two toddlers, so I thought it would be fun to make a holiday themed sensory bin for them to play in.  I honestly don't know who's more excited about it, them or me!  I also made it pretty economical too, so fun time didn't have to cost more than a few bucks!

My littlest two had a blast with the No Mess Winter Sensory Bin I made earlier this year using this handy table with storage space.  That was our bin again this time.


The goal of a sensory bin is to have lots of interesting shapes, textures & colors little ones can explore & play with.  For me a key element is that it's not uber-messy or edible stuff.  My 2yr old daughter has a wicked throwing arm so I don't need rice, dried beans or the like flung all over the house!  

Most of my supplies were dollar and craft store finds so it was pretty economical - especially since I can reuse a lot of them for other bin themes and crafts.  The bulk of the filler was various sized green & yellow pom poms, plastic gold coins and some green jumbo plastic jewels I'd bought years ago for a treasure chest for my now big kids:


I found some green & gold deco mesh rope (the kind used for DIY wreaths) and cut 2-3inch sized pieces of it to add some extra bling and texture. 


I got an inexpensive set of plastic scoops for them to use in it:
 

As well as some black plastic cauldron pots (5 for $1.25 at the dollar store!) to dump the goodies in.  I plan to reuse these for Halloween and maybe for a storybook themed one down the road (I'm thinking Strega Nona or Stone Soup):


I also got this tinsel shamrock (dollar store again) to add in:


I even threw in a single felt four leaf clover for them to "search" for:


I made sure there was enough to make the bin look full, but not so much that sticking their hands in it would cause overflow:


I think in total it was around $10-15 for all my filler goodies and when we've exhausted play with this theme (their attention with these bins averages about 2 weeks of daily play), I can stick everything in sandwich bags to use for later bins & projects.


☘️ Happy Saint Patrick's Day!! ☘️


Tuesday, March 15, 2022

Fun & Festive Heat Transfer Vinyl St. Patrick's Day Shirts


Be ready to wear your green and feel festive this Saint Patrick's Day with some quick & easy DIY Heat Transfer Vinyl St. Patrick's Day shirts.  I've made it even easier by offering the design files for both of them!

There's something for the little (or big) rascals:

And a whimsical search & find themed Shamrock of Shamrocks design.  

Can you find the 4 leaf clover?

As I've mentioned before, I'm a big fan of "holiday" themed wearables that you can still wear well after the actual day is over and these fit the bill for that too.

I kicked it up a notch too by using some specialty types of HTV: my personal favorite type of HTV, flocked, and one I'd never used before, holographic sparkle.  This was an eleventh hr project idea so I had to grab what was available locally at a craft chain store brand rather than order the heat transfer vinyl online, which is what I usually do.  I find the online ones are always more economical and higher quality than the big box stuff.  I wasn't sure how these would turn out so it was a bit of a gamble.

 Now, how to make them!

Materials:
- Heat transfer vinyl.  I used flocked and holographic glitter types from The Paper Studio (Hobby Lobby brand)
- Blank Shirt (unwashed)
- Cutting machine (I used my 6yr old Cricut Explore)
- Heat Press (I used my new HTVRONT Press - see the review HERE) or Iron
- My FREE St. Patricks Day designs below
 

 Here are the FREE designs I whipped up.  Just right click to save each png.  


Using Cricut Design Space I turned my designs into cut files and sized them to fit my 2T & 3T sized shirts (I made them 6 and 7 inches wide, respectively).  

Then mirrored them before cutting:


 It took about a minute each to cut them out.  My real issue was each was the start of a new roll of HTV so they curled something fierce.  Since you cut them face down, the vinyl's bend was going upward, which was a real issue.  Since these specialty types aren't as floppy as smooth HTV, even using a brayer wouldn't smooth them down.  So I did some masking tape along the top edge to keep them flat on the mat, which worked great: 

On the one with lettering, I weeded out the letters,  remembering to leave the center bits of the "e's, a's, o & g".  Then it was press time!!  It's key to check the fabric composition and type of HTV being used to make sure you get the settings right.  I read previously that it's best not to wash the shirts first - having that factory sizing in them helps HTV adhere better.  Some sites say otherwise, but I've found it helps.  

These shirts were both cotton poly blends.  I always press mine on a folded fluffy towel too.

The shirts got a 5 second preheat with the press and then I put the heat transfer vinyl on.  FYI, if you're new to using htv, you leave the carrier sheet on.  Some people even use a Teflon sheet between that & the press, but I've never needed it for the things I've done so far.  For the flocked I used my usual formula of 295F, 30 seconds front/15 seconds on back and peeling when cool, which worked perfectly.  

The holographic glitter was a different story.  The instructions inside the roll listed glitter, foil, shimmer and regular temperatures, but nothing for that particular type.  Searches online were also pretty vague.  Why would you make a product, but not explain how to use it??  

I followed one suggestion to do 330 for 30 seconds/15 seconds and cool peel.  When I started to peel away the carrier, the edges of most of the shamrocks were lifting with it.  I did another 30 seconds on the front and 10 more on the back, but it still was lifting on some.  I raised the temperature to 340 and did 20 seconds and then they seemed to stay.  I find it's usually ok to have to repress when this kind of thing happens, but you have to be careful not to go too long or too hot when re-pressing or it'll melt the htv and then it won't stick at all. 


We'll see when I wash it how well they actually adhered.  This brand seemed more brittle & plastic-y in both types compared to others I've used, so I think the quality of the HTV probably had more to do with it than the type itself.  Which was a bit annoying since it cost almost twice as much as brands found online!  The place my heat press is from, HTVRONT, is having a sale on their HTV right now and you can get rolls that are more than double the length of the stuff I got at the local chain and are STILL cheaper than what I bought!!  You can see for yourself HERE.  I'm going to try some of theirs out soon to see how it compares to the kinds I've already used and share my results when I do.

For HTV clothing care, I wait 24hrs before washing and always wash them inside out, on cold, delicate and line dry to keep the transfers nice.  I've had some shirts like this last for ages by doing all that and since I want my 3yr old's shirt to be wearable for my 2yr old next year, it's worth the extra care.  Now my littlest cuties have some fun attire that was reasonable in time & price for the upcoming holiday - and you can too!


Tuesday, March 8, 2022

Easy Wood Bead St. Patrick's Day Wreaths


It's that weird time of year when winter decor seems out of place, but it's still too early for spring stuff, isn't it?  I still love the snowmen burlap wreaths I made earlier this year...


but it feels like it's time to put them away.  I'd gotten some wood bead wreaths to do up for spring, but that's still a few weeks away, so I decided to do them up in a temporary way for St. Patrick's Day to keep some door decor going:


These are super simple and relatively inexpensive to do:


Which is key when you've got double doors like we do:


They've got the festive flair of the upcoming holiday:


but they'll also be easy to take apart so I can do a spring version later and I can still keep all these elements to use again too:


Materials:
- Wood bead wreaths (I got mine from Hobby Lobby)
- Large wood shamrock shape (mine were from the Dollar Tree)
- Smaller wood shapes/words (mine were from Jo-Ann Stores)
- 1 yd per wreath of large burlap ribbon (mine was 6 inch wide)
- Acrylic paint
- Twine & hot glue


I started by painted my shamrocks with acrylic paint.  I wasn't sure I had kelly green at home so I impulse bought some at the dollar store.  It was awful.  Super thin and didn't cover well.  Luckily, I found some in my stash that was the Martha Stewart kind that was a close shade of green and covered with that.


When dry, I restrung them shamrocks with twine, attaching them to my wreaths with a lark's knot so they wouldn't twist, but lay flat.


I also made sure the lengths of my twine centered them well on my wreaths:


I scrounged by stash and found some 6 inch burlap ribbon and cut a 1yd length piece for each wreath.  I cut a 4 inch piece off each to use for my bow center.


I laid out each larger piece of ribbon and folded it into thirds, so the tails overlapped.  The full width was about 13 inches.


I cinched each bow in the center and tied it with twine:


I took my small burlap piece and folded it four times to make a narrow strip:


I wrapped the strip around the center of each bow and hot glued it closed at the back and then hot glued each bow to the top of each wreath.


The wreaths still seemed too plain.  Also, I only realized once I got them home that the heart details on each shamrock were a bit crooked.  Not surprising for dollar store stuff, but kinda noticeable for something right at eye level.  My stash saved me again, since I had some leftover unfinished wooden shapes from previous projects.  One was a four leaf clover:


The other said Family.  By gluing those to the centers, they camouflaged the asymmetry and also added some nice detail that went with the unfinished wood beads:


 Then my wreaths were ready to hang and add some St. Patrick's Day cheer to our front doors!


LinkWithin

Related Posts with Thumbnails