Showing posts with label Cricut Explore. Show all posts

Wednesday, February 10, 2021

Easy Love My Mom Valentine's Day Heat Transfer Shirts


Need a last minute idea for Valentine's Day?  How about this cute little heat transfer to make a holiday shirt or bag?  I've got you covered with this holiday heat transfer project.  It even shows Mom some extra ❤️:


I literally just dreamed it up and made it yesterday, so that's why it's pretty simple.  Sometimes projects need to be quick & easy so you can enjoy the actual occasion rather than be caught up in the project making part.  It occurred to me around mid-day that this Valentine's Day will be the first one for my little nephew. I wanted to send him a little something to celebrate that, but  obviously it being just days away I needed to hurry.  And use what I happened to have on hand in the house.  No challenges, right?  LOL.  That's how I tend to roll....

Thankfully I had some sheets of red heat transfer vinyl left from some previous Christmas projects and a blank 18 month sized t-shirt I never got around to embellishing for my almost 3yr old (luckily said nephew is big for his age).  Added bonus was that I found I had a blank 2T long sleeved tee in my stash too and my little guy is on the small side, so I was able to make one for him too!


 These worked out ideally.  I'm a big fan of "holiday" themed wearables that you can still wear well after the actual day is over and these definitely tick that box too.  YAY!!!

 Now, how to make them

Materials:
- Heat transfer vinyl
- Shirt, bag or other fabric item (unwashed)
- Cutting machine (I used my 6yr old Cricut Explore)
- Cricut Easy Press or Iron
- My FREE Mom Heart design below
 

 Here's my FREE design for the I Love Mom Heart.  Just right click to save the jpeg.  You could use it as a graphic or printable too;)


Using Cricut Design Space I turned my design into a cut file (making cut lines around the Mom part as well as the outer edges) and sized it to fit baby/toddler sized shirts (about 4 inches high by 6.5 inches wide).  Then mirrored it before cutting:


 It took just seconds to cut them both out:


Weeding out just the Mom part - remembering to leave the center of the "O":


Press time!!  It's key to check the fabric composition to make sure you get the settings right.  And don't wash the shirts first - having that factory sizing in them helps htv adhere better.  These were both cotton poly blends and this was basic htv, so the Cricut Heat Guide recommended 330 degrees.  I always press mine on a folded fluffy towel too - I didn't get good results using the special heat press mat in the past.


I wanted my design to be centered, but you could get creative with placement or angling.  The shirts got a 5 second preheat with the press and then I put the heat transfer vinyl on.  FYI, if you're new to using htv, you leave the carrier sheet on.


30 seconds on the front, 15 seconds on the back and then wait until cool to peel the carrier sheet off.  One of them wasn't fully adhered around one of the letter edges so I gave it another 15 second on the front and 5 more on the back.  Just don't go too long when re-pressing or it'll melt the htv. 


Wait 24hrs before washing and always wash on cold, delicate and line dry to keep the transfer nice.  I've had some shirts like this last for years and dozens of washes by doing all that, so it's worth it.  I can't wait to see my nephew and my little guy wearing these.  He's my sister's first baby, so it makes it extra special that it's Mom-themed.


I've also got these other fun shirt Valentine's Day tutorials using Heat Transfer Vinyl:


and this sweet Love Bug Applique too:

Happy Valentine's Day!



Wednesday, November 11, 2020

Easy Ribbon Thanksgiving Turkey Art


 It's hard to believe, but Thanksgiving is right around the corner.  Since time to craft is short around here, I wanted to make something festive, but also VERY easy.  

Enter my Easy Ribbon Thanksgiving Art.


 Using basic supplies, it's simple to make this fun decorative project to celebrate the holiday.  By layering a card stock "window" over a ribbon filled shadowbox frame, there's an interesting dimensional effect:


Using an assortment of ribbons give interesting detail & texture too:


And while I used fall themed ribbons because I had them on hand, you could pick whatever colors & designs you want.  Then it can match any decor!


Hang it on the wall or prop it on a mantle or shelf.  And the best bit is it can easily be dismantled, so you can reuse everything for a different projects at a later date.  


   I always feel like poor Thanksgiving gets short changed when it comes to holiday crafts.  Loads of Halloween & Christmas ideas abound, but unless it's recipes, Thanksgiving gets less attention.  Maybe because it seems a little harder to get creative about.  I've been craft blogging for over a decade, but I've only made a couple of specifically turkey day holiday projects:


 But that has changed this year!  

Now, let's get to how to make this festive Thanksgiving decoration in next to no time...


Materials:
- 12in x 12in unfinished wood shadowbox (mine was from Michael's)
- 1 inch thick craft foam (or foam floor mat)
- Assorted 1.5 in wide ribbons
- Wood tint (I used Folk Art Home Decor in Grey)
- 12in x 12in card stock
- Dressmaker's pins (basic silver flathead pins)
- Cricut Explore (or similar cutting machine)


I started by brushing the grey wood tint onto my unfinished frame.  This color seems to go with everything.  Two coats does the job & it dries super fast too.  


Can I just say, how much I LOVE this stuff?  I've had this jar forever, but it's just as good as the day I bought it. I've used it on a bunch of projects and always loved the results:


 For my interior base I cut up an EVA foam floor mat - the kind they sell for kid's rooms and garages - with an exact-o knife to fit my frame (12in x 12in).  We had a bunch in the house from past projects, so it made the most sense to use that, but I know craft stores sell styrofoam squares in that size for a ready-cut option.  Upholstery foam would probably work too.

Of course I didn't take a pic of it because I jumped right into the next bit - cutting 8 strips of my various 1.5in ribbons to be 15 inches long and laid them in an order I liked over the foam. 


 Again, I was using ribbons already in my stash (waste not, want not!). The burlap looked a bit plain on its own, so I jazzed those strips up by overlaying some narrower decorative ribbons on top of them:


It added a bit of extra dimension and texture which I liked:


I wrapped the ribbons around the sides of the foam and anchored them there with the pins.  This made it really quick & easy to secure them:


Then I carefully laid the foam into the frame.  It fits snuggly so there was no need to attach it with glue or anything.


Turkey time!  I found a free clip art turkey silhouette:

I imported that into Cricut Design Space and removed the background to make a simple cut file.


I sized this guy to be 9 inches high, which seemed perfect to fit the 12 in square frame.  


I cut him out of the card stock with my Cricut Explore and popped the center out:


I inserted the outer piece into my frame.  I put pins in the corners to hold it in place.  A few glue dots would probably work too. Then I added some decorative gourds & candles around it.  Presto - my ribbon turkey tableau was done: 


It felt nice to be able to make a little something to decorate for Thanksgiving this year and, apart from the shadowbox, I already had all the supplies here at home so it was thrifty too.  I may do versions for other holidays going forward and just swap them out in the frame.  Being able to make fun things despite a tight time & cash crafting budget is well worth it.  And since it comes together so quickly, there's time for more projects left too!!


Wednesday, October 14, 2020

Quick & Easy Little Pumpkin Baby and Toddler Shirt


We're in the holiday home run season folks.  3 months in 3 holidays.  Yikes!  It can be a challenge to find time to craft and not feel like the relevant time frame is over the second you've made it.  I especially feel like that about holiday themed wearables.
 
I love cute kid's Halloween outfits, but with 5 kiddies, it seems like a waste to buy stuff with a 1 month or less wear time.  Especially with my two smalls who are less than 2 years apart.  I can't justify making/buying stuff for my 2 yr old boy, then chucking it and for something similar but "girly" for my 8 month old daughter the next year.  Longevity in kid's wear is key people!

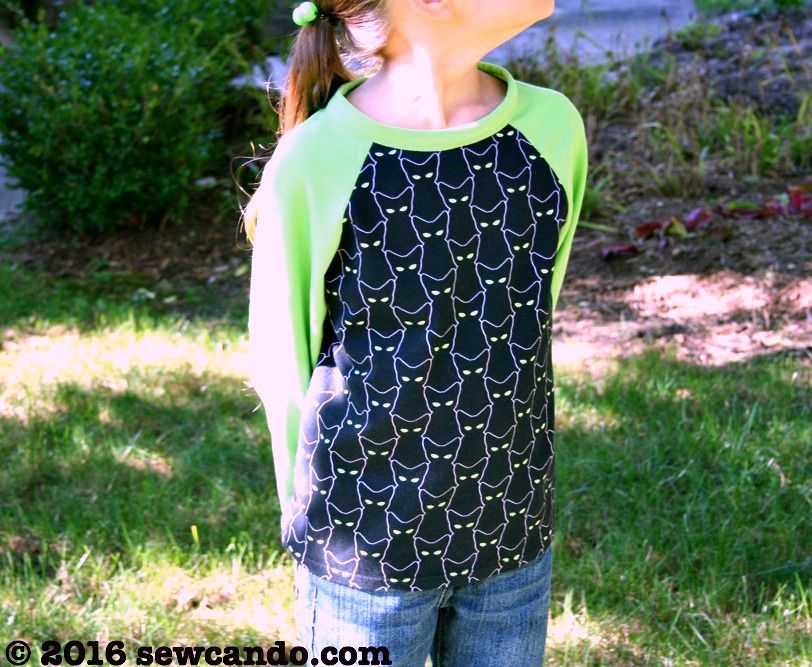
A few years back I made these spooky cat raglan shirts for my 3 big kids and they've gotten tons of wear as they've been handed down from one to the other to the other:


Yet, I realized I didn't have anything Halloween-y for my toddler (which happens when there's an 8 yr gap between two of the kids).  Baby girl is sporting his too small pumpkin face onesie this year.  Already being nearly mid-October, I wanted to use stuff I had at home rather than spend $.  I also needed to make sure it would work for my little lady to wear next year.  Mission accomplished:
 

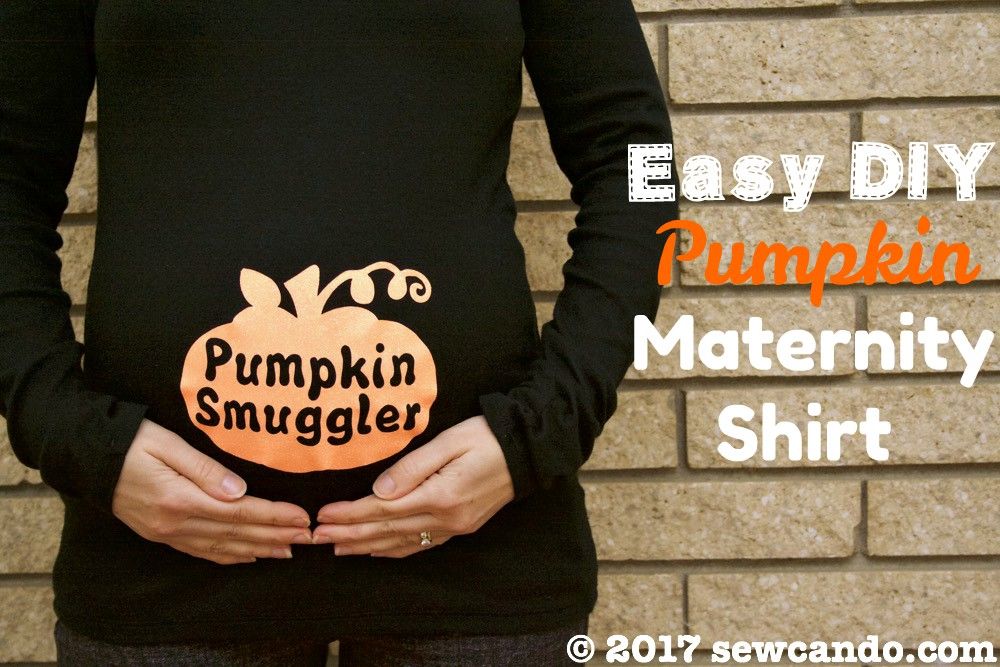
This project was a little nod to the heat transfer DIY Pumpkin Maternity Shirt I made (and sported the past few Halloweens):


I used the same pumpkin file, fonts and leftover orange glitter heat transfer vinyl.  The design is cute for boys or girls so it'll be just as cute on my sweet girl next year as it is on my little guy now.   


I couldn't find a cheap basic black shirt in his size ('rona restrictions make shopping is such a hassle these days), so I scrounged his closet and found an olive green onesie that still fits well.  


Materials:
- Onesie or t-shirt
- Heat transfer material (mine is the glitter variety)
- Cutting machine or exact-o and patience.  
- Cricut EasyPress (or iron)
 
I used a pumpkin silhouette image found online and opened it in Cricut Design Space then turned it into a cut file there.  
I added the Mommy's Little Pumpkin text in free fonts (Bubblegun and Milkshake) that are nice and thick, so ideal for cut files. You can right click to save my file to cut your own.  
 
I sized it at 5 inches by 5 inches in Cricut Design Space to be the perfect size for a 24 month sized top/onesie.  It also needs to be mirrored before cutting since the material is cut face down on the mat.  


Since the details are pretty small, I used a weeding tool to get all the tiny bits out.  The letters need to be removed for the shirt to peek through inside the pumpkin, but you need to keep the tiny bits inside the "o", "e" and "l" in place.   
 

It ends up looking like this on the carrier sheet:


I've gotten a lot of use out of my Cricut Easy Press the past couple years (you can get my full, unbiased review of it here) & this was no exception.  I used the recommended settings from Cricut for my EasyPress model & the glitter material: 340 degrees for 30 seconds followed by 15 seconds on the backside and waiting until cool to peel.  I always use a thick towel underneath for best results.


By using green rather than traditional black as the background color, it's still Halloween-y, but also more generally fall, so wearing it in September and November won't look weird.  


Thanks to that happy accident, I figured out how to make it wearable for about 3 months rather than 3 weeks!! And it'll be perfect for the entire season on baby girl next year.


Not bad for $0.  Even my small fry guy agrees!!


LinkWithin

Related Posts with Thumbnails