Showing posts with label silicone beads. Show all posts

Friday, December 10, 2021

Festive Wood Bead Ornaments


Make some simple, yet lovely bead ornaments in just minutes using wood beads and a few basic craft supplies!  They make wonderful Christmas tree decor and gift toppers.  My beads had inspiring word designs too, so they've got a sweet seasonal message as well.

I was inspired by a round bead ornament tutorial from Kippi At Home, but made some design additions and decided to do a vertical version too.  These are so quick & easy to make, they're the perfect holiday project for busy people and no crafting skills needed!

Materials:

- 16mm Wood Beads (I used these word beads from my shop: Blessed and Faith, Hope Love)

- Coordinating solid color beads in 12 or 15mm size.  Mine were 12mm white & gold silicone beads

- Florist wire, baker's twine or satin cord

- 1 inch Jingle bells

- Mini wired greenery or Satin mini leaf trim 


To make these sweet round ornaments I used 8 of my Blessed wood beads and 8 solid color 12mm beads for each one:


I strung them in alternating order along a 14 inch piece of florist wire: 


Once all beads were strung I pulled the tail end back through the first bead so the wire ends crossed inside it:


Then I wrapped each tail around the the main wire on either side of the first bead a few times and trimmed off the excess and tucked the open ends into the neighboring beads:


Next I wrapped the mini wired greenery around to go in between the beads and did the same finishing with the tails.


Last, I cut a 12 inch piece of baker's twine and a jingle bell for each one:


 Folded the twin in half and pulled the folded end through the bell:


 Then wrapped the twine around the ornament and pulled through into a lark's knot and tied the open ends together.


I went with classic white and gold accents, but these wooden beads look great with any color combination:


To do the icicle style ornaments, I used one each of Faith, Hope and Love wood beads and 3 solid red 15mm beads per ornament.  


 I cut a 14 inch length of baker's twine and strung the jingle bell to the center:


Then strung the beads through both tail ends.  Sometimes thicker twine or cord can be tricky to pull through bead holes, so I used some thin wire as a way to needle them through easily:


I knotted the twine just above the top bead and then again a few inches away to make a hanging loop.


Within minutes, some lovely little ornaments are ready to spread messages of inspiration.

Merry Christmas!



Wednesday, November 18, 2020

Easy Baby Friendly Silicone Statement Necklace

Sometimes something small can have a big impact.  That's definitely the case with statement necklaces.  They can turn a basic top into a whole fashion look, which is a big plus for those of us without the time, budget or ability to style ourselves up on the regular.  Some days I'm lucky I've run a brush through my hair... 

The challenge these days is that I can't wear most necklaces since my smallest will yank on it with a mini grip of iron AND put it in her mouth.  Or my 2 yr old will gross it up with food covered fingers or something else similar.  Both reasons have already limited my clothing wardrobe, so throw out the jewelry and things are pretty blah looking most of the time.  Enter the perfect solution, this DIY'd Silicone Statement Necklace.


This necklace looks fancy, but is so easy to do.  You don't need any real jewelry making expertise.  It's a basic design pattern, but the different sized beads in different colors makes it a lot more interesting.  Using silicone beads makes a necklace like this ideal for so many reasons: 


- Totally safe for kids to touch and put their mouth on 

- Great for those with allergies since it's food safe silicone

- Easy to keep clean since you can wash it

- No worries about weird chemicals or alloys like in cheap metals or painted beads

- Inexpensive to make 


I saw a photo of a similar necklace when I was doing a search for silicone beads, but there was no tutorial. The photo source was from a foreign handmade craft marketplace where the shop that made them (Jelly Beads) was no longer operating.  So I did what any good crafter does, I tried to figure out how to make one myself.  And it worked!  So now I'm sharing the fun so you can too.


 Materials:

- (4) 9mm Grey silicone beads

- (6) 15mm Fuchsia silicone beads

- (4) 15mm Apricot silicone beads

- (4) 12mm Navy silicone beads

- (2) 19mm Navy silicone beads

- (3) 19mm Turquoise silicone beads

- (1) Safety clasp

- 2 yd cuts of matching colored 1.5mm nylon cord


It should go without saying, but I'm gonna say it anyway, this is obviously a necklace for an adult or child over 5yrs.  It's safe for a baby to chew on while you're wearing it because the beads are food grade silicone, but obviously it's not meant as a toy or to leave with an unattended baby.  Safety first folks!

Now let's get started....

 
Separate the beads by color so it's easy to order them when stringing.  You can use whatever colors you want, but I'm referring to my specific ones throughout so it's easier to see the stringing pattern.
 
 
Knot the two cord strands together 10 inches from one end and string (1) 9mm grey bead on both cords.  Then string (1) 12mm navy on each cord, followed by (1) 15mm apricot on the top cord and (1) 15mm fuchsia on the bottom cord.
 
 
Turn the apricot bead sideways and thread the bottom cord through it from right to left so the cords are crossed inside the bead, then pulling the cords tight to bring the beads together.

    
Now string a 15mm fuchsia on the new top cord, a 19mm turquoise on the bottom one and add another 15mm apricot with cords crossing, pulling the cords to remove slack after each crossover step:
 
 
Next string a 15mm fuchsia on the new top cord, a 9mm grey on the bottom one, followed by a 19mm navy and add the last 19mm turquoise with cords crossing:
 
 
Halfway done!  String a 15mm fuchsia on the new top cord, the last 19mm navy on the bottom one followed by another 9mm grey then the last 15mm apricot with cords crossing:
 
  
To finish string a 12mm navy on the new top cord, the last 15mm fuchsia on the bottom one, then the remaining 12mm navy. Make sure the cord is evenly "snug" along the entire necklace.  Lastly, thread the last 9mm grey on both cords and knot.
 
 
I used a safety clasp as my closure, but technically any would do.  Hold the necklace up to decide how high you want it before knotting the ends since that determined the necklace length.  Then, for the safety clasp, you just thread the cord ends through the hole, double knot, cut off the remaining ends and side the clasps to cover the knots.  I also run a lighter under the cut ends to fuse them to the knot for a bit of extra security.


This was so quick & fun to make I want to do a bunch more in different color patterns.  All together, the materials only cost about $10 so it's pretty budget friendly.  I've also got some other designs in the works since I'm now addicted to making stuff with these beads.  And I'm now looking a bit more styled, which is a good feeling too! 


Wednesday, October 21, 2020

Little Halloween Silicone Teether Toy

 
This year will be the first Halloween for my smallest pumpkin and my littlest nephew.  They're too little for trick or treating and both have teeth coming in, so I decided to make them something they could still "taste" for the occasion: a  
Silicone Halloween Teether Toy.

Who wouldn't want a colorful bat, spooky ghost,

 
or a jolly pumpkin to nibble on when those itchy gums are getting them down?
 
 
It goes right onto all our favorite things like the stroller belly bar, playmat bar, activity tray...
 
 
..and car seat handle.  It's been great for keeping the smalls busy on the go and adding a little Halloween festivity to the everyday.

 
I fell in love with making silicone teethers and pacifier clips when my 2yr old was a baby and I've gotten into it again this go round.  I shared some of the other cute ones I made & tips I've learned here


I find it a really enjoyable craft, pretty inexpensive and super practical.  They're fun for little hands to grab, comforting for those drooly, need-to-chew gums, incredibly easy to clean and very hard wearing.  The ones from my 2 yr old are still like brand new.  And because food grade silicone is so durable, once they outgrow the teether phase, the beads can be reused to make jewelry, key chains or DIY hairbands like the ones I've made below.  
Extra long life for crafted holiday items = win to me!


There are a lot of variations in materials and techniques for silicone teether toys out there.  Some is good, some a bit questionable.  I'm sharing the key bits I've learned that help get consistent and safer results.

Quick Disclaimer: I make mine for personal use and am not affiliated with any suppliers mentioned.  Obviously small objects and beads can present a choking hazard to young children, so this type of toy is intended for supervised use only.  I only use them attached to the car seat, stroller, high chair or activity center while someone is watching baby.   

Materials:
- Silicone pendant teether
- (5) 15mm round silicone beads
- (2) silicone focal beads
- 1 yd 1.5mm wide satin cord
- Breakaway safety clasp
Tools: Lighter, Scissors, ruler, silicone mat, 
large upholstery/crafting needle, silicone thimble
 
I buy my supplies from a number of sources, but since I'm using them to make things for little ones, I always make sure they have safety certification, silicone items are graded food safe and everything is CPSIA compliant.  I bought the cute pumpkin pendant, bat & ghost focal beads from My Pretty Posh Princess and my cord, breakaway clasp & round beads from Cara & Co.  
 
Also keep in mind that selling handmade teething items for babies requires further safety testing of the final item (which differs from country to country).  It is NOT as simple as just buying a bunch of beads, stringing them cutely and listing them as baby items on Etsy, despite countless people doing just that.  It's always a good idea to check when buying items like this from small time sellers.   
 
 
I folded my cord in half and slipped it through the hole in my pendant toy using a lark's head knot (as shown) and then did an overhand knot (which will end up inside the first bead):

 
I used (5) 15mm round and (2) focal beads for my toy strand.  Laying them out in advance to make sure the order looks good before stringing is always a smart move.  If choosing different sized beads it's also good to make sure the full length of the finished teether will be 22cm (8.6inches) or less, not including the clasp bit, to avoid being a strangulation hazard.

 
I heated up the ends of my satin cord with a lighter and then pressed them flat with my silicone mat & thimble so it would be easier to thread both ends on my upholstery needle. 


The bead hole can be very snug when it comes to threading two cords through, so using this kind of needle really helps.  I pulled the bead down firmly to make sure it covered my overhand knot.
 
 
Then I did an overhand with an extra pass through just above the bead & pulled the cords tight.  A square knot or surgeon's knot would also be good options:

 
I repeated this between all the beads, and with a knot inside each bead, to keep things strong & secure.
 
 
After the last knot above the top bead, I threaded the ends of my breakaway clasp on the two cords.  Then made overhand knots on each, 2 inches from the bead strand's last knot, so it would easily fit on the various belly bars and handles of our stroller, car seat, etc.  I cut the excess cord and heated up the little stub of the raw end with the lighter and pressed it into the knot to fuse it and slipped the clasp ends over them.
  

Then I thoroughly washed the teethers before being used and then we were ready for some Halloween teething fun.  Now everyone in our house gets a little seasonal treat this year! 


Sew Can Do waives all responsibility and liability from the use of teethers made following the information in this post.   Readers are responsible for making sure that teethers meet the appropriate safety requirements for their country/region and understand that by using suggestions from the above post, that they assumes any and all responsibility & liability for the use of the toys made.


Wednesday, July 31, 2019

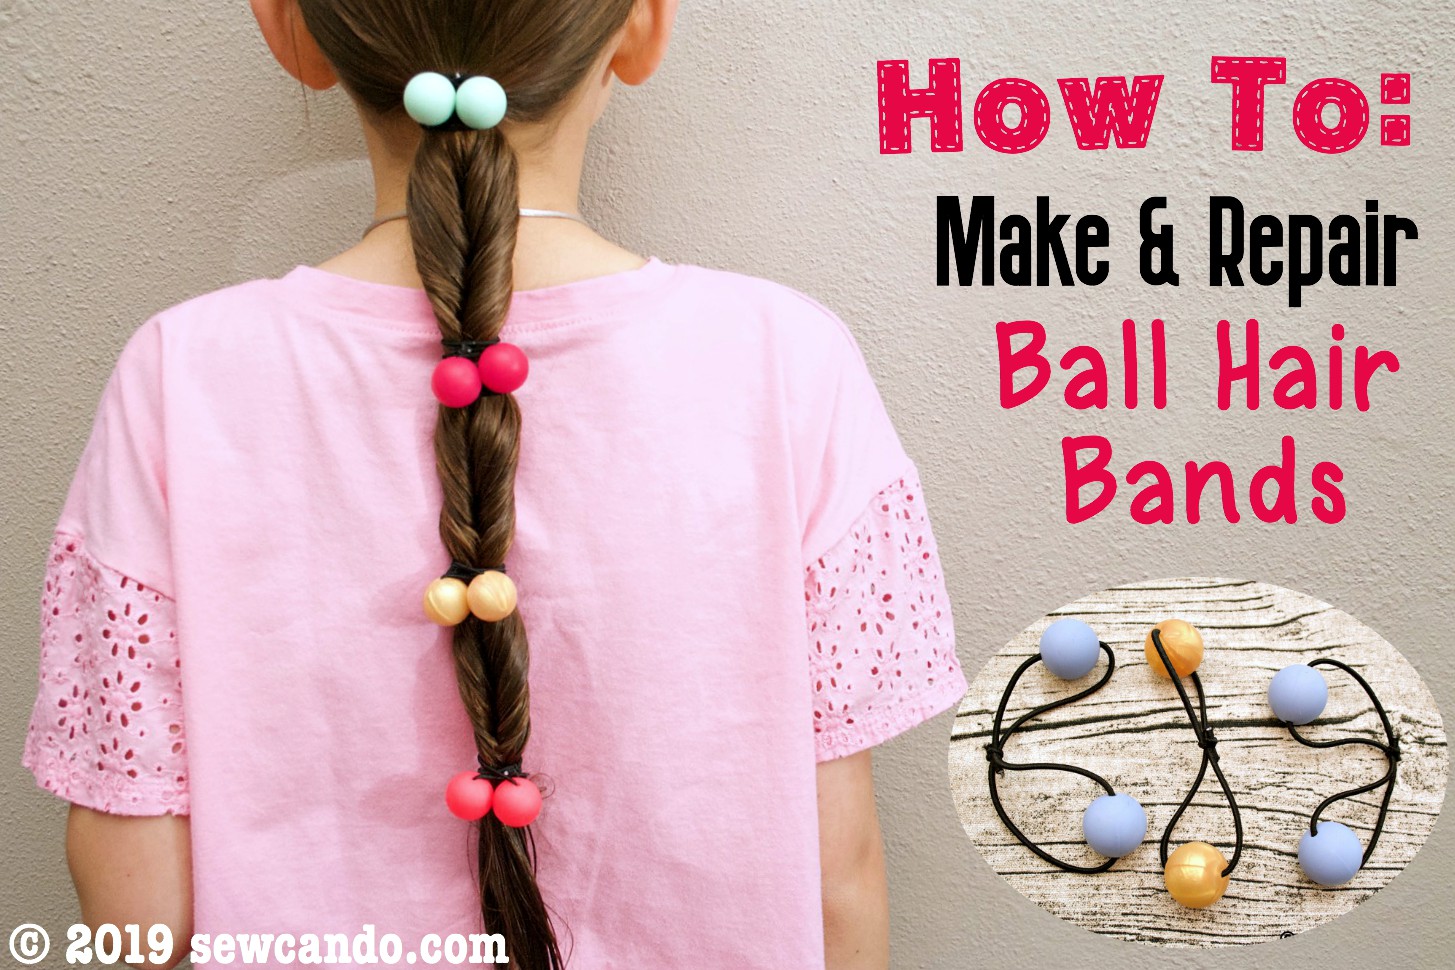
How To Make & Repair Ball Hair Bands (aka Ballies)


Hair ballies, ball hair bands, whatever you call them, these are the hair bands I loved in childhood.  All 3 of us girls wore ponytails and braids with these growing up.  They were so much easier to use, prettier and more comfortable than plain elastic hairbands and they always stayed in place.  I love using them on my own very thick-haired daughter now.  


The challenge is finding them.  When I was a kid every drug store had big packages with lots of colors and sizes available.  It's taken me some serious online & beauty supply store searching to find any the past couple of years and the selection & quality has been pretty limited.  The few I'd found were pretty wimpy and fall apart quickly.


I grew tired of having the elastic stretch out like this:


Or having them just come apart after a couple of months of wear.  The ones I had as a kid lasted for decades, but the ones today don't make it past a few months!


I figured there HAD to be a way to reuse the beads to make new ones and came up with this technique.  After months of using them, I can say my DIY'd hair ballies really hold up well - way better than the factory made versions. 


And I also figured out how to make the perfect hair ballies from scratch, using silicone beads.  These are perfectly sized, really durable and can be made in tons of colors.  They're the same kind that I used to make my silicone baby teethers.  


I used the 19mm size since we wanted to make hair bands that were for "big girl" ponytails, but the smaller 12 or 15mm would be ideal for smaller size hair bands. 


It's also very easy so anyone can do it.  I was able to make a bunch in all sorts of colors to match my daughter's outfits:


Now I'm sharing how to do it!


Materials:
- 2mm Elastic Cord (found in most craft stores)
- Plastic balls from hair bands or silicone beads
- Ruler
- Scissors

Cut a piece of elastic cord that's 12 inches long (25.4mm):


String on two beads and arrange them so the balls are 4 inches apart.  Cross the open ends of the elastic.  Fold the top strand of the elastic over the lower end and bring it down under the middle of the other side.


It helps to weigh down the balls or have someone hold them in place to keep things from shifting around.  It will look like this:


Bring the open ends upward and tie in a basic knot.


Knot again, pulling very tightly.


Snip the law ends close to the knot and the band is done. 


It literally takes less than a minute to make one, so you can make a bunch in no time.  Bring on the ponytails!


LinkWithin

Related Posts with Thumbnails