Showing posts with label Christmas decor. Show all posts

Friday, December 15, 2023

My Leave the Light On Fabric House for the Holidays

In better-late-than-never news, I finally have a moment to share one of the few holiday projects I had time to make this year.  In normal circumstances, I spend the season making a number of decor & wearables, but this year it's felt like everything has been preventing me from getting into my craft room (including getting hit with another virus this week as soon as I'd expected some down time...when will it end?!?).  So I was extra grateful to have the time a little while back to make this sweet little light up fabric house.

I used the Aunties Two Leave the Light on Pattern to make it.  Full disclosure, I actually purchased the pattern to carry in my shop.  I thought it was so cute and loved that it also came with a bonus pattern to make a mini ornament version:


There weren't a lot of "beauty shots" really showing the finished house in full and I also like to test out specialty patterns to see how they are to sew up, so I picked out some Christmas-y fabrics and set to making one for myself.

This fabric house is nice & sturdy thanks to good stabilization.


It's fully lined and opens up to put in battery powered tea lights or fairy lights:


By using template plastic or vellum paper for the windows, it gives off a soft glow:


Overall, the directions are really good.  I also liked that the designer offers some YouTube videos to show how to assembly some of the more complicated steps, like how to bind the windows.  The techniques used were easier than I expected, which was helpful since I'm not sewing as often these days:


The roof and sides are supposed to have a clapboard effect to be scrap-friendly.  The one variation I made was to only do the clapboard on the roof, since I wanted to showcase the pine tree print of the fabric on the sides.  The fabric collection I used was Comfort & Joy by Create Joy Project, which I also carry in my shop.  By using the teal color ways, I can keep my little house out long after Christmas for an extended decor season.  After putting the time into making it, I wanted to maximize its use!


I would make this again and definitely will do some of the ornaments since those are even quicker to put together.  If I can find a little time, I might try to do some to give as gifts this year.  I also could see doing another version in the future with a gingerbread motif, so I'm going to keep this pattern in my holiday sewing stash.  


I just love when goodies I find for my shop end up being great finds for my own stash too!

Wednesday, December 14, 2022

Burlap-style Deco Mesh Christmas Wreaths


I know I'm probably late to the party with this project, but I finally made some deco mesh style wreaths.  I'm so happy with how they turned out I had to share them!  We get some rough winters around here, so it seemed like it was time to make some really durable (and affordable) door wreaths for the holiday season.  Ones that won't easily blow off or get worn out.  I also had some pretty Christmas ribbons & themed mdf cutouts I'd gotten for my shop that I really wanted to use myself, so this seemed like the perfect project.

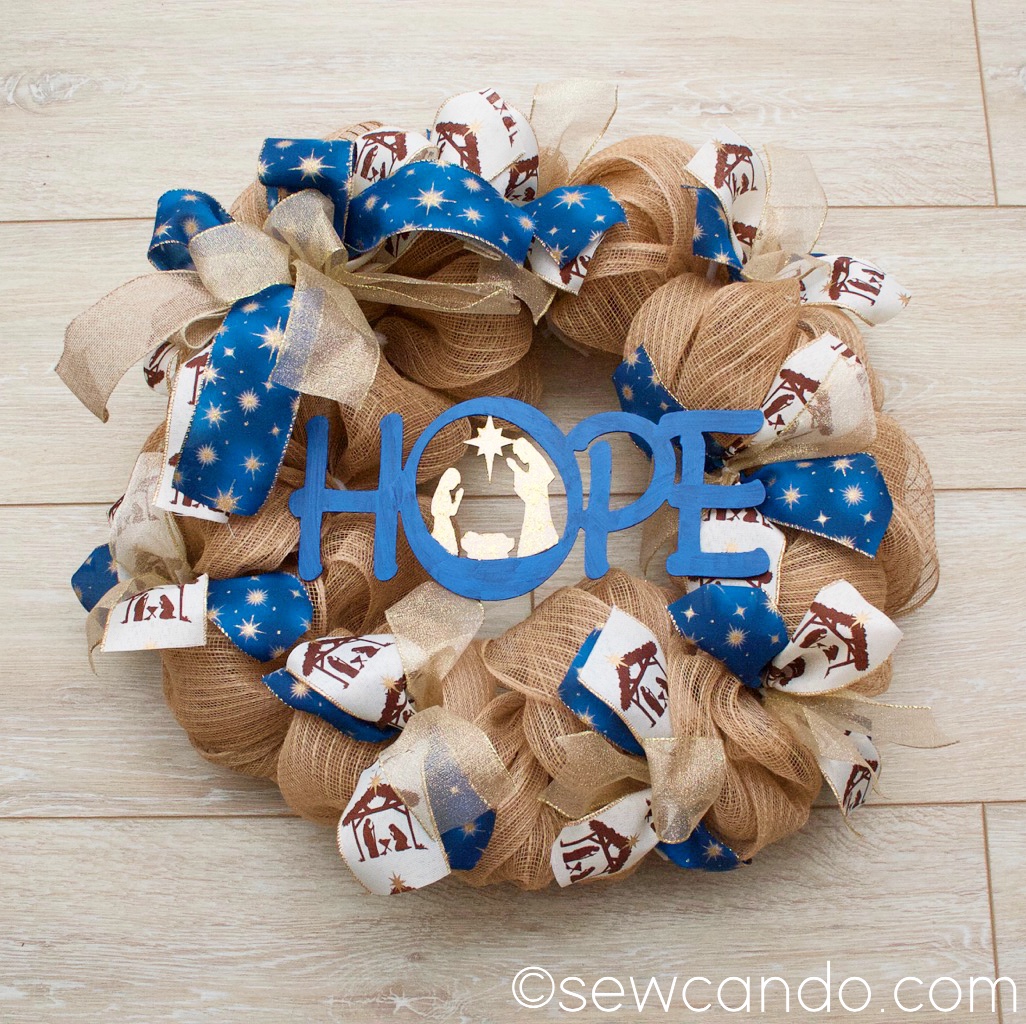
I made a pair for our double front doors:


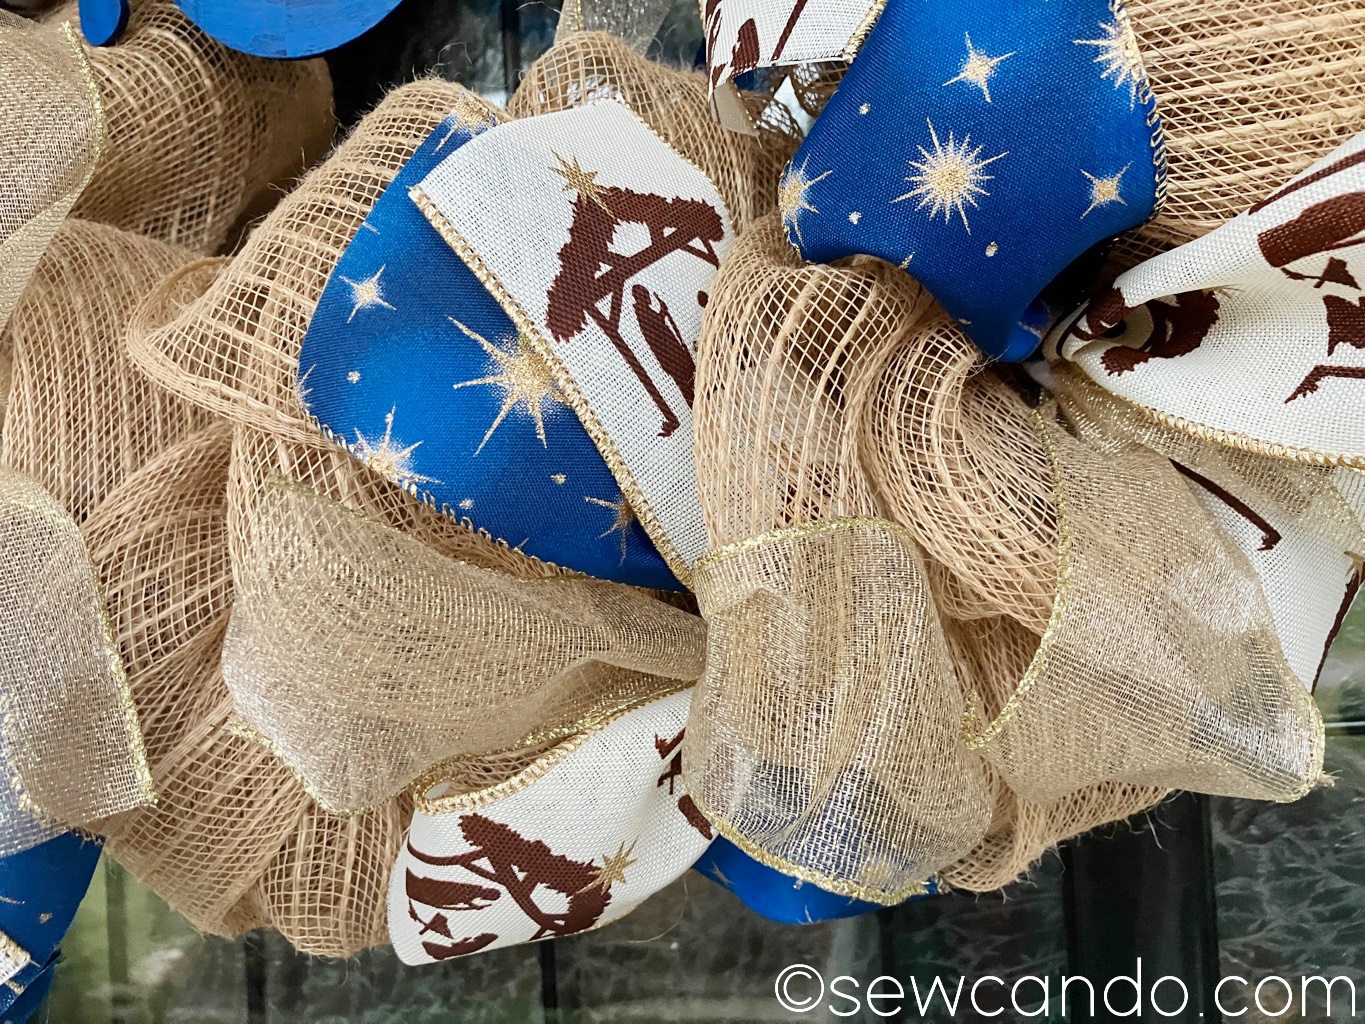
I wanted the highlight the sweet Nativity design of the ribbon & wreath center wood cuts and at the same time have the bright blue of the starry ribbon to stand out against the neutrals of the gold & burlap. 


If you're short on time, but want to make a beautiful wreath, this is a quick & easy way to get results.

Materials:
- 20in metal wreath forms (I used these)
- 10yd rolls of 21in wide poly jute deco mesh (I used these)
- 3 different 2.5in wide wired ribbon (I used Nativity, Navy Gold Stars & Gold value roll from Hobby Lobby)
- chenille stems (aka pipe cleaners)
- hot glue gun
- MDF cutout shapes (Hope & Joy)
- Acrylic craft paint & brushes
- Fishing line & upholstery needle

To do the poof-style mesh wreath base, I used this fantastic tutorial from Dave's Wreaths and Things.  It's easy to follow and worked out exactly as he instructed, so I wasn't going to reinvent the wheel by trying to do any step-by-step photos.  I got the poly jute style because I wanted it to look like burlap but be more durable and not be too floppy to shape.  They turned out nice & full and I didn't have to fiddle around trying to shape them:  


I used a great tutorial from Michelle Smith Creations to strategically add in the ribbon embellishments and make a nice full bow.


I used acrylic craft paints to paint my unfinished Joy & Hope signs.  To get the color just right to match my ribbon, I layered a few shades of royal & navy blue with some broad brushstrokes: 


Then I painted the little Nativity scenes in each one with some metallic gold acrylic and a layer of gold glitter to add a little sparkle to go with the sparkle of my other ribbons.


The center signage being cutout letters, rather than a big circle or rectangle, meant using her technique of attaching a central sign to the wreath wouldn't really work for me, so I got out an upholstery needle and some fishing line and attached it to the back of the wreath form and then looped it around the edges of the outer letters to really anchor it on, but not be super obvious to the eye.


I didn't have time this year to get really spectacular with the rest of our porch decorations (I also need to keep room free for my giant bin of outgoing stuff), but I think they look nice with our potted trees.  Next year I might make more goodies to team with my wreath theme, but for now, it's making Christmas brighter at our front door:)


Friday, December 10, 2021

Festive Wood Bead Ornaments


Make some simple, yet lovely bead ornaments in just minutes using wood beads and a few basic craft supplies!  They make wonderful Christmas tree decor and gift toppers.  My beads had inspiring word designs too, so they've got a sweet seasonal message as well.

I was inspired by a round bead ornament tutorial from Kippi At Home, but made some design additions and decided to do a vertical version too.  These are so quick & easy to make, they're the perfect holiday project for busy people and no crafting skills needed!

Materials:

- 16mm Wood Beads (I used these word beads from my shop: Blessed and Faith, Hope Love)

- Coordinating solid color beads in 12 or 15mm size.  Mine were 12mm white & gold silicone beads

- Florist wire, baker's twine or satin cord

- 1 inch Jingle bells

- Mini wired greenery or Satin mini leaf trim 


To make these sweet round ornaments I used 8 of my Blessed wood beads and 8 solid color 12mm beads for each one:


I strung them in alternating order along a 14 inch piece of florist wire: 


Once all beads were strung I pulled the tail end back through the first bead so the wire ends crossed inside it:


Then I wrapped each tail around the the main wire on either side of the first bead a few times and trimmed off the excess and tucked the open ends into the neighboring beads:


Next I wrapped the mini wired greenery around to go in between the beads and did the same finishing with the tails.


Last, I cut a 12 inch piece of baker's twine and a jingle bell for each one:


 Folded the twin in half and pulled the folded end through the bell:


 Then wrapped the twine around the ornament and pulled through into a lark's knot and tied the open ends together.


I went with classic white and gold accents, but these wooden beads look great with any color combination:


To do the icicle style ornaments, I used one each of Faith, Hope and Love wood beads and 3 solid red 15mm beads per ornament.  


 I cut a 14 inch length of baker's twine and strung the jingle bell to the center:


Then strung the beads through both tail ends.  Sometimes thicker twine or cord can be tricky to pull through bead holes, so I used some thin wire as a way to needle them through easily:


I knotted the twine just above the top bead and then again a few inches away to make a hanging loop.


Within minutes, some lovely little ornaments are ready to spread messages of inspiration.

Merry Christmas!


Wednesday, December 8, 2021

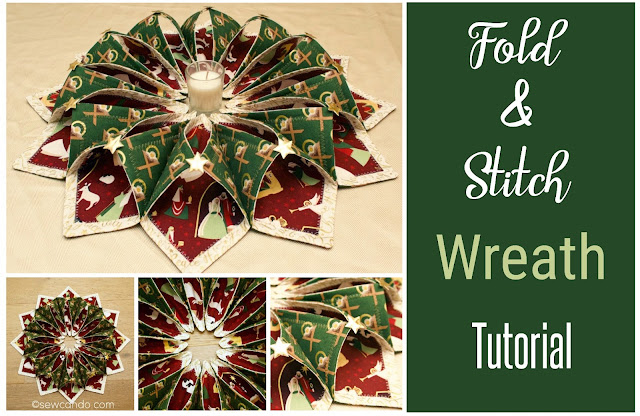
Fold & Stitch Wreath Tutorial


Make a gorgeous fabric wreath for the holidays to celebrate the season!  This versatile project is simple to sew and can be used in two ways.  As a hanging wreath: 


Or a stunning table centerpiece:


The folds of the fabric squares create a stunning dimensional effect:


Despite looking intricate and complicated to make, it has a surprisingly simple construction.  This wreath is made up of stabilized squares of fabric stitched together.  If you can sew basic squares, you can make it!  It's the ideal project for showcasing a number of fabrics, but doesn't uses much yardage.  

My version was inspired by a wreath image of the original Fold'n Stitch Wreath Pattern by Poorhouse Quilt Designs (which includes templates, extra tips & tricks, plus hanging sleeve option, available here).  Mine is done slightly differently, with a smaller center, and uses fusible fleece/batting to stabilize it.  I'm sharing how I made it right here! 

Materials:
- 3/4yd cotton backing fabric (I used Oh Holy Night Manger Green)
- 3/4yd cotton front fabric (I used Oh Holy Night Words Linen)
- 1/2yd cotton topper fabric (I used Oh Holy Night Nativity Mulberry)
- 1/2 yd fusible fleece
- 1/2 yd paper backed fusible
Optional: 1/2 yd of cut-apart trim or 12 beads or buttons for detailing.  I used this Metallic Gold Cutout Star Trim
- Rotary cutter/shears, ruler/yard stick, iron, zipper foot, pins, clips, disappearing marker, hand sewing needle

If you're using non-directional fabric prints, you can use your ruler to measure the width & lengths across the fabrics easily to cut squares quickly.  If you're using directional prints like ours, they'll need to be cut as diamonds so the designs will face outward around the entire wreath.  We find making card stock squares in each of the square sizes first makes this much easier since precision is key. 
  

Cut the following fabric squares:

- (12) 7 inch squares from backing fabric 
- (12) 7 inch squares from front fabric
- (12) 5 inch squares from topper fabric 
- (12) 6 inch squares from fusible fleece or batting


Center the fusible fleece on the wrong side of each backing fabric square and fuse with iron:


Take front fabric squares and, using a ruler and rotary cutter, cut a 2 inch "X" at the center of each square.


With right sides facing (and print directions matching), stitch front and backing fabrics together, using a 1/2 inch seam allowance so that the stitching borders the fusible fleece:


Trim down seam allowance and clip corners and then pull right side out through the X opening on the fronts, making sure all corners are nicely pointed and press flat.


Lay paper backed fusible paper side down on ironing surface.  Place topper fabric squares on top, right side up.  Lay a piece of parchment paper on top and iron according to product directions to adhere the fusible to the wrong sides of the topper squares.  When cool, peel the paper backing off and cut out topper squares 


Center each topper square right side up over each front side of fabric square, matching directions of fabric prints, and fuse together with iron, using a press cloth between fabrics and iron:


Stitch around topper edge with a decorative stitch, like a wide zig-zag, that goes off the edge of the topper fabric: 


Repeat with all twelve squares:


From the top point of each square, measure 1 inch over to the right and mark.  From the right side point measure down 3 inches and mark.  Place ruler along marking points and draw a line.  This will be the stitch line to attach them all together in a moment:


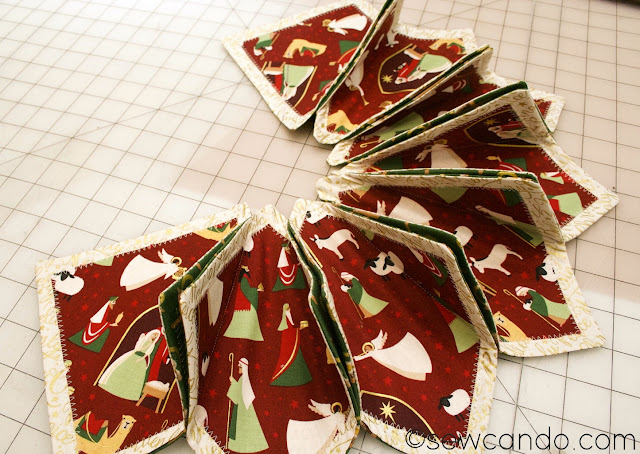
Take two squares and place them together with back sides facing, matching print directions and clip on right side as shown.  Stitch down along the marked line of the top square.  Open so both attached squares are facing up and repeat this step with the 2nd of the attached squares now being the top one and adding a new one underneath it (back sides facing) and repeating stitching along the marked line of the top one.  


Repeat this square-by-square and you will see the wreath start to form.  Stitch the last square to the first to close the wreath.


Bring the side points of each individual square together and hand stitch to create the dimensional shape:


The next step is optional, but adds a beautiful detail.  Attach beads, buttons or trim on top of each point around the wreath by hand sewing - or - do what we did and use something like this metallic gold cut out star trim and cut 12 individual shapes apart:


Then hot glue each one to the wreath:


How to display it is up to you.  Add a votive or single taper candle to create a beautiful centerpiece or sew on a metal sawtooth hanger or ribbon loop or other mounting method to hang it as a lovely wreath. 


LinkWithin

Related Posts with Thumbnails