Showing posts with label Ornaments. Show all posts

Thursday, December 1, 2022

Easy Folded Fabric Ornaments Tutorial


Make some show stopping ornaments to decorate the tree, or to give as beautiful gifts, using just a little bit of fabric, ribbon & embellishments and this folded fabric technique.


  I made these ornaments as a holiday project for my shop to feature fabrics & embellishments I carry there.  The original tutorial I found for this was at Think Crafts.  It's quite good and shows several design options - some using all ribbon and some with many more rows of folds.  I found this version to be the quickest & easiest, but made some of my own design tweaks and added more details in the steps to make it even easier! 


These are a great holiday craft for when you're short on time.  I actually made mine while watching tv in the evenings (since having open containers with hundred of pins out with my toddlers during the day would be a disaster).  


Both sides can be decorated too:


I used a mix of fabrics & supplies from our shop and some beautiful trims from Sugar Pink Boutique, a fellow Christian-owned small business owned by my good friend Jennifer.


Materials:

- (2) 1/2yd or FQ coordinating cotton fabrics
- (2-3) 1yd coordinating 3/8in wide ribbons/trims
- 3in Styrofoam balls
- Straight pins 
- Flatbacks
- Hot glue gun
- Ruler, rotary cutter
- Optional, but recommended: thimble
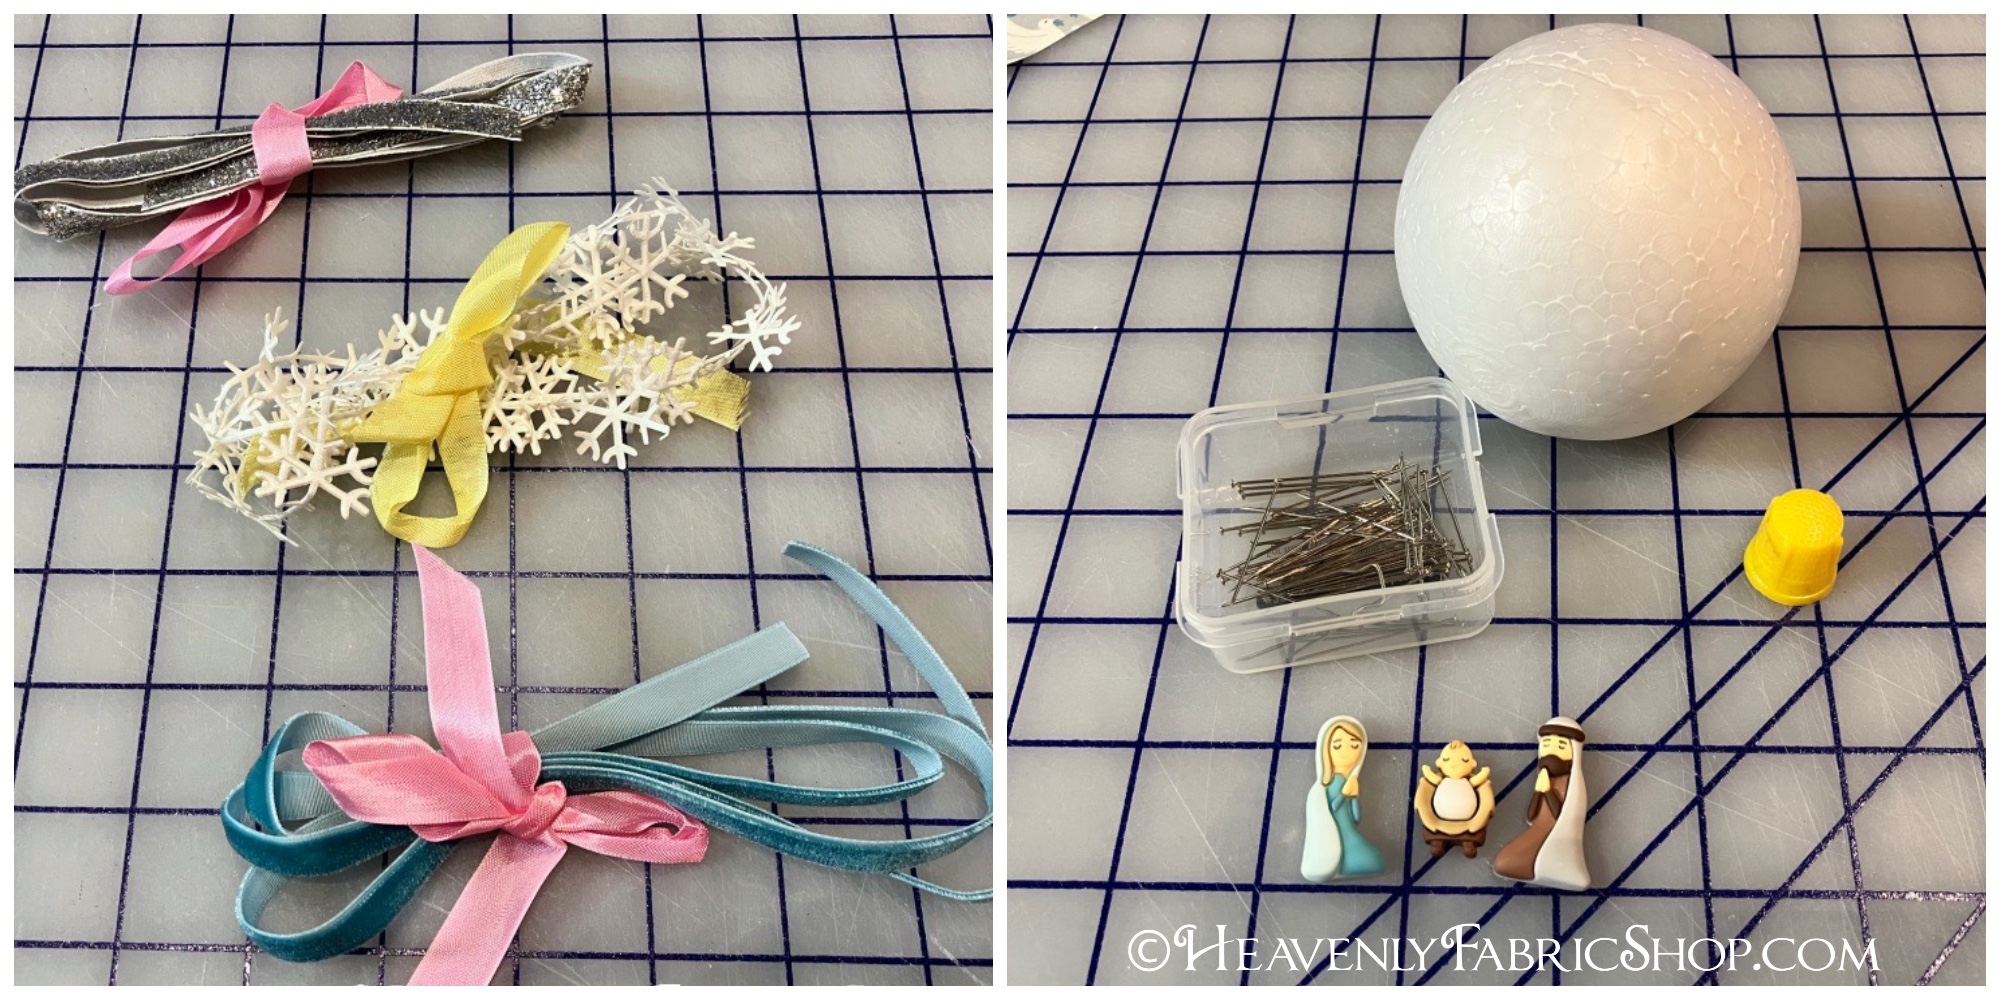

To make the exact ornaments shown here see the links below:


You can make 2-4 ornaments, respectively, depending on if you use fat quarters or 1/2yds.  The cut amounts specified below will make one ornament.

Start by cutting out (2) 3in squares and (16) 2.5in squares from the main fabric that will be your ornament's center.  Fussy cut if desired.  Also cut a single 2.5in high x 11in wide strip.
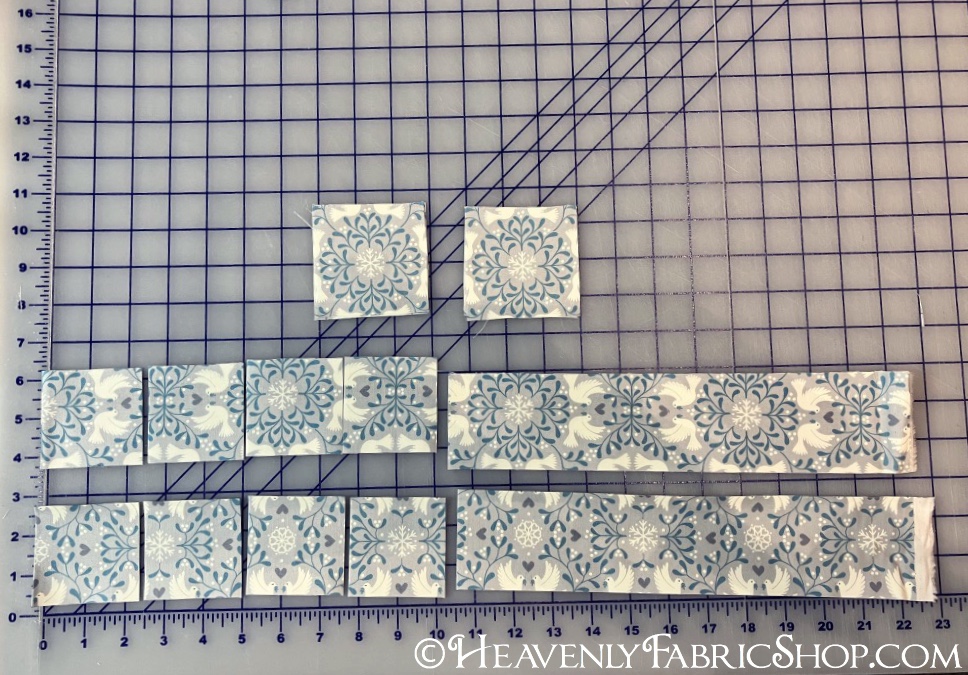

Cut (16) 2.5in squares from the second accent fabric:


Find the center of one side of the styrofoam ball (usually there is a small circle or marking that makes this easier) and place center of one of the 3in squares over it.  Pin into ball at corners of fabric square.  
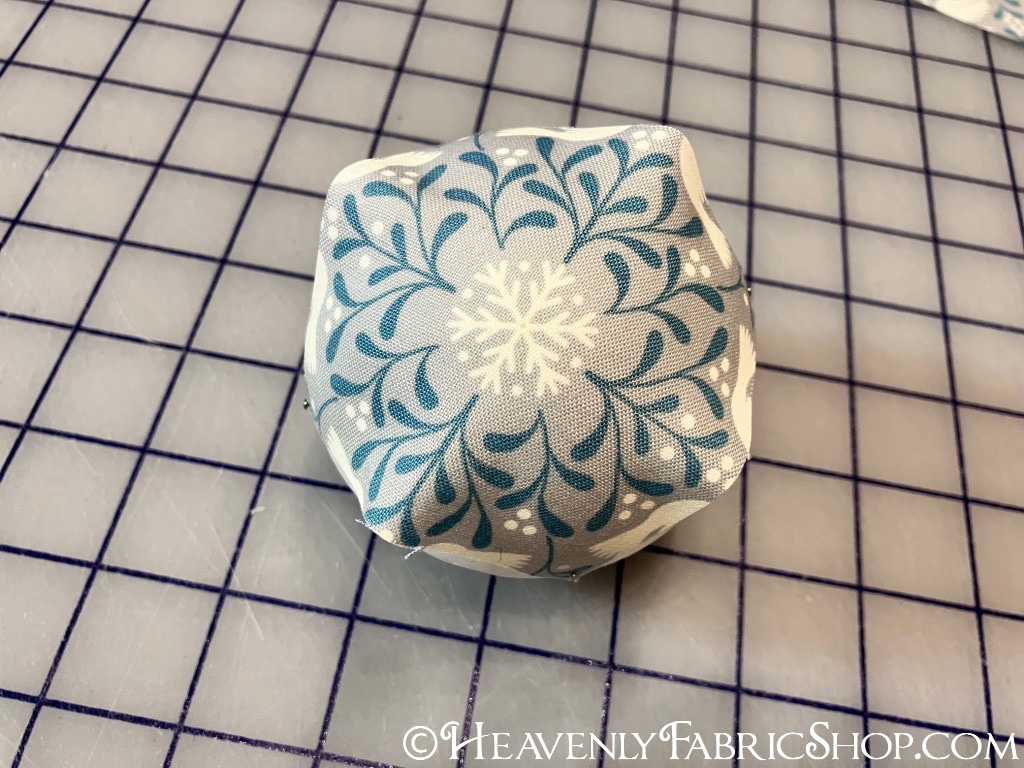

Take a 2.5in accent square of fabric and fold it into quarters, creasing it with your fingers, so when it is opened it's easy to find the center and place a pin through it on the wrong side of the fabric: 


On each side of the already pinned 3in square, find the center of that side and insert the pin about 1/2in inward from the raw edge.  Fold the fabric downward:
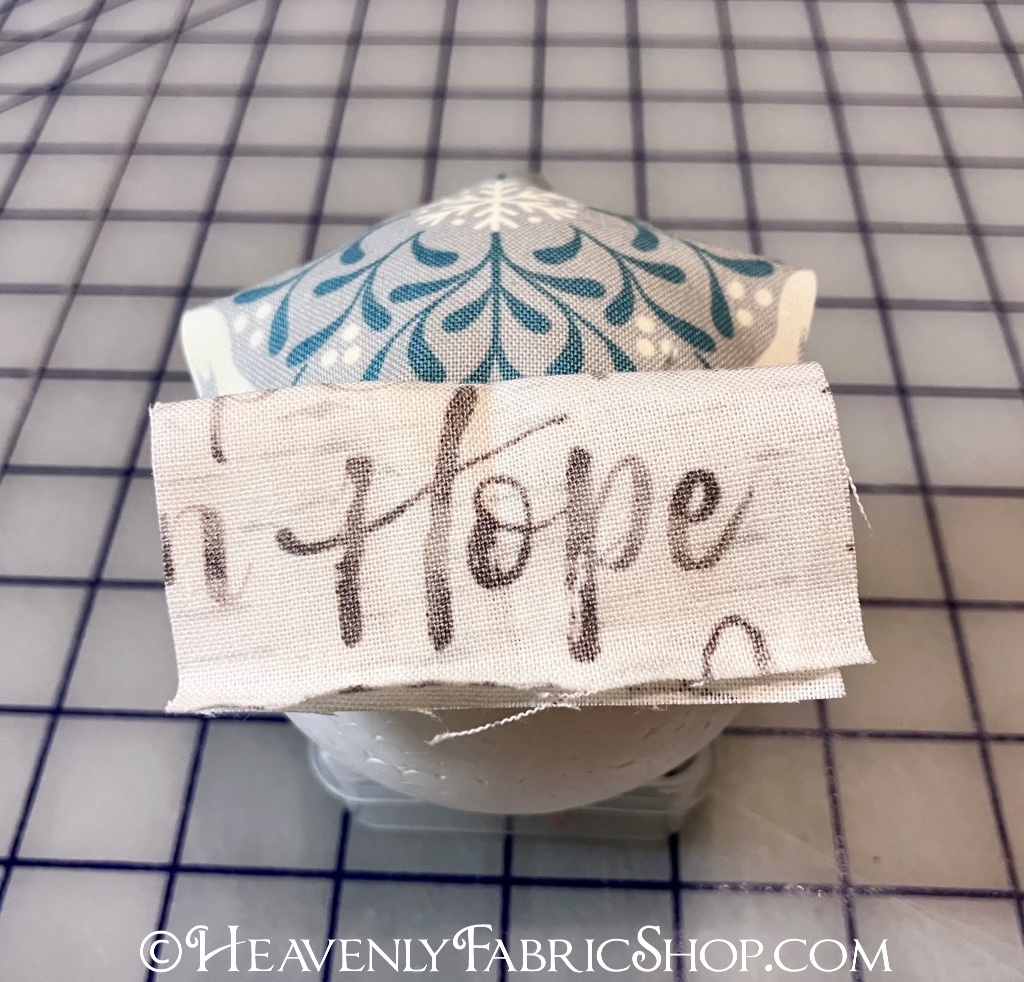

Then bring the top corners downward to meet at the center and pin in place to create a point:


 Once all four sides are done it will look like this:


 Take remaining four squares and place those between the points to create a second overlapping row.  Pin the lower corners of these triangles if desired.  It's a little easier with them "smoothed down", but uses more pins.
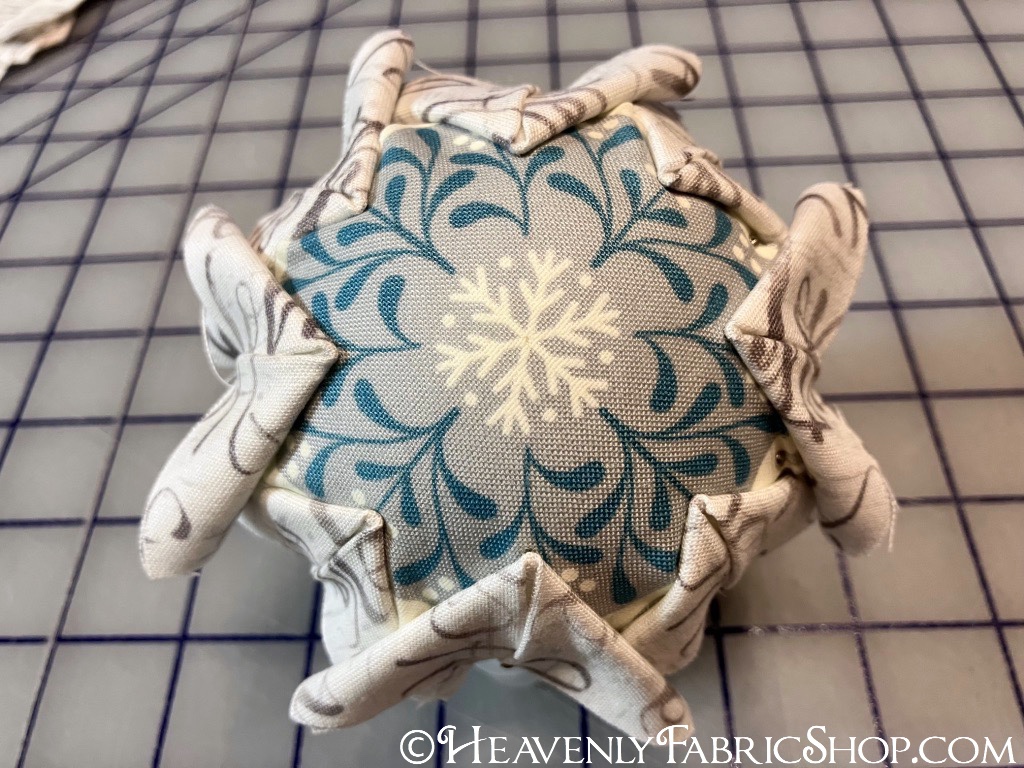

 Repeat the previous two steps with the main fabric squares to complete one side:


 The result will be this lovely tiered fold effect:


 Do the same on the other side of the ball, trying to line up the placement of the folds to mirror the original side:


Take the long fabric strip and double fold.  Wrap around the center (to hide the raw edges of the folded squares), overlapping the short ends at the top of the ornament. Fold under the raw edge and pin into place.


Cut an 11in piece of 3/8in wide ribbon or trim and center over the strip.  We used a velvet ribbon to add texture:


To decorate the top and add a hanging loop, Cut a 8in piece of trim (we used metallic velvet here) center it at the top.  Cut a second piece and overlap ends to make a loop and pin through the center of both to create a bow.
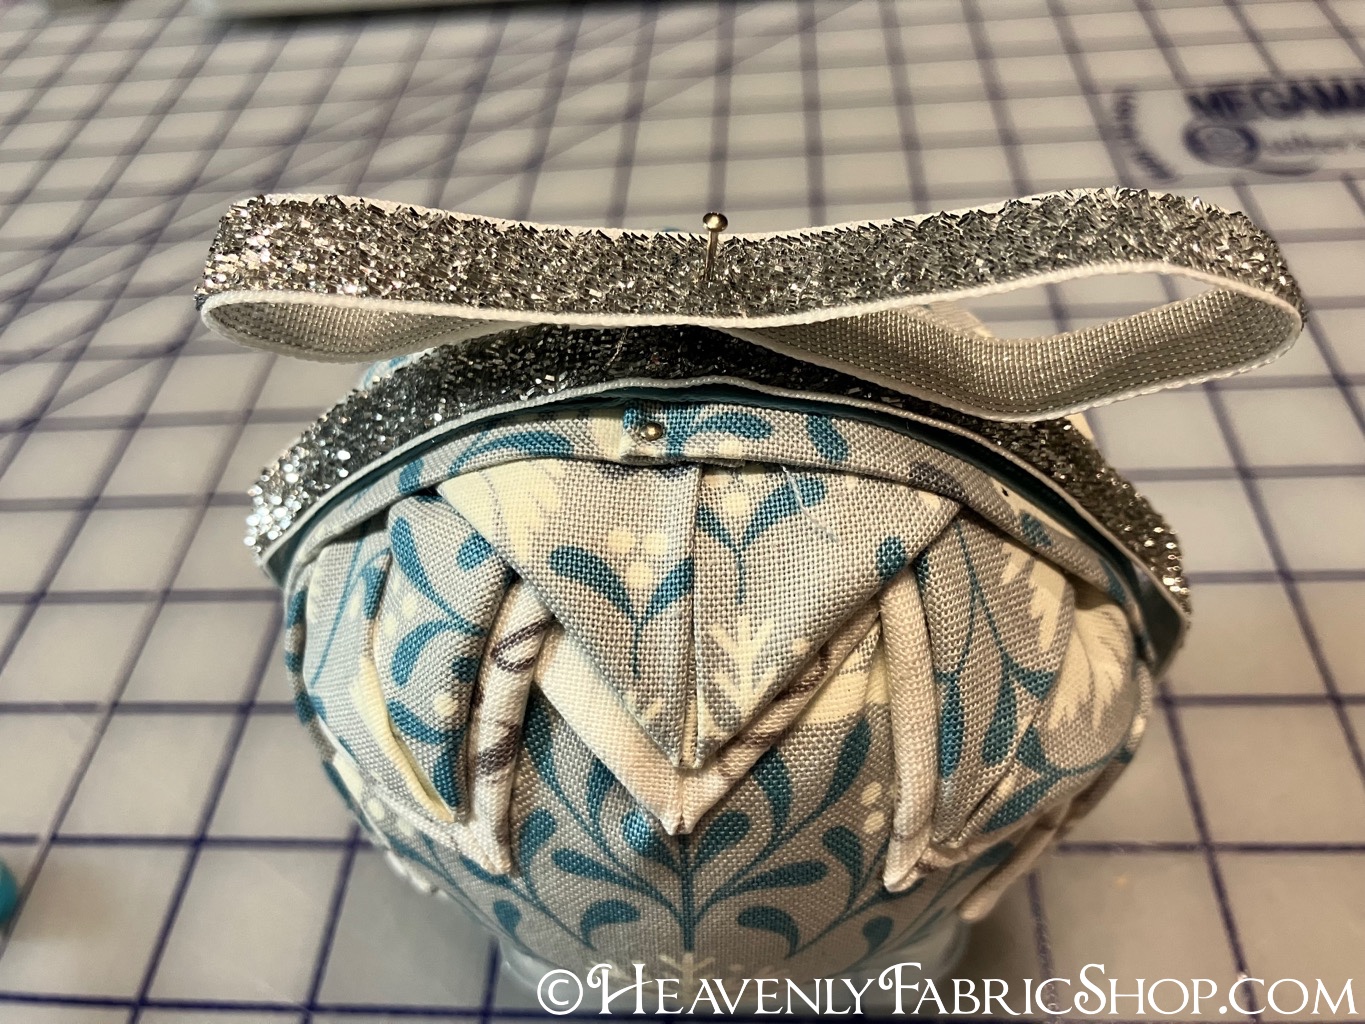

Cut a 7in piece of trim to make the hanging loop and a 6in piece from another trim to create a second bow loop.  Overlap as shown and pin into first bow.
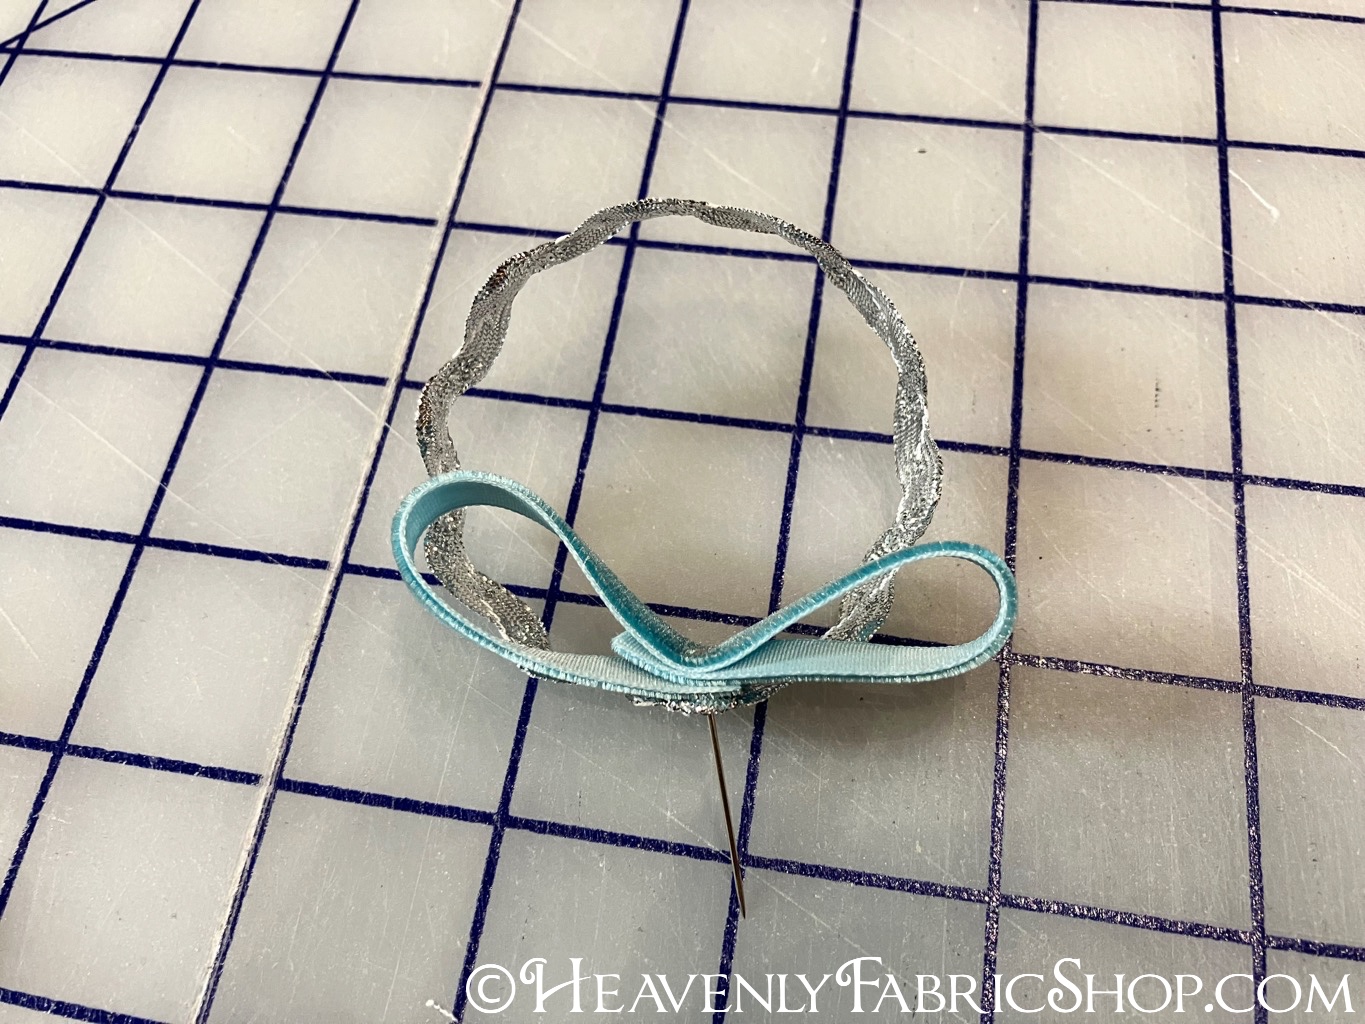

Hot glue embellishments to ornament center and to center of bow to finish.  These are so fun to make & a great way to create one-of-a-kind ornaments to treasure year after year:


Merry Christmas!


Friday, December 10, 2021

Festive Wood Bead Ornaments


Make some simple, yet lovely bead ornaments in just minutes using wood beads and a few basic craft supplies!  They make wonderful Christmas tree decor and gift toppers.  My beads had inspiring word designs too, so they've got a sweet seasonal message as well.

I was inspired by a round bead ornament tutorial from Kippi At Home, but made some design additions and decided to do a vertical version too.  These are so quick & easy to make, they're the perfect holiday project for busy people and no crafting skills needed!

Materials:

- 16mm Wood Beads (I used these word beads from my shop: Blessed and Faith, Hope Love)

- Coordinating solid color beads in 12 or 15mm size.  Mine were 12mm white & gold silicone beads

- Florist wire, baker's twine or satin cord

- 1 inch Jingle bells

- Mini wired greenery or Satin mini leaf trim 


To make these sweet round ornaments I used 8 of my Blessed wood beads and 8 solid color 12mm beads for each one:


I strung them in alternating order along a 14 inch piece of florist wire: 


Once all beads were strung I pulled the tail end back through the first bead so the wire ends crossed inside it:


Then I wrapped each tail around the the main wire on either side of the first bead a few times and trimmed off the excess and tucked the open ends into the neighboring beads:


Next I wrapped the mini wired greenery around to go in between the beads and did the same finishing with the tails.


Last, I cut a 12 inch piece of baker's twine and a jingle bell for each one:


 Folded the twin in half and pulled the folded end through the bell:


 Then wrapped the twine around the ornament and pulled through into a lark's knot and tied the open ends together.


I went with classic white and gold accents, but these wooden beads look great with any color combination:


To do the icicle style ornaments, I used one each of Faith, Hope and Love wood beads and 3 solid red 15mm beads per ornament.  


 I cut a 14 inch length of baker's twine and strung the jingle bell to the center:


Then strung the beads through both tail ends.  Sometimes thicker twine or cord can be tricky to pull through bead holes, so I used some thin wire as a way to needle them through easily:


I knotted the twine just above the top bead and then again a few inches away to make a hanging loop.


Within minutes, some lovely little ornaments are ready to spread messages of inspiration.

Merry Christmas!


Wednesday, December 16, 2020

Easy DIY Faux Gingerbread Men Ornaments


This little project is one I've been waiting to do all year: 

Faux Gingerbread Men Ornaments!


It's a simple DIY, but so much fun and they look super cute on the Christmas tree.  This year being so challenging, I needed a rewarding holiday craft and this was definitely it.  And as delicious as these "cookies" look, there are no calories;)


Materials:

- Cork tiles (1/4 inch is ideal)

- Gingerbread man cookie cutter or template

- Spackle w/pastry bag+tips or Whipple Creme

- Decorative faux candies, small beads or polymer canes

- 1/8 inch wide satin ribbon


I started with cutting my cork tiles.  I wanted the finer type of cork so it would look more like an actual cookie.  I already had a nice big gingerbread man cookie cutter to use as my template.


I'd planned to trace and cut them with an x-acto knife, one at a time, but my lovely husband made things much easier by cutting them in stacks on his band saw.  I had a dozen identical "cookies" in 5 minutes.


I've used spackle for faux frosting, with great results on my glitter houses, in the past:


But with two under 3yrs milling about my house this Christmas (making my living room a labyrinth of gates around the tree, fireplace, etc.), I wanted to make sure everything on was non-toxic, just in case a grabby little hand got hold of one.  So I found this fun kid-safe stuff called Whipple Creme.  It's actually a toy line of fake desserts for older kids to decorate - it comes in a pastry bag, with a star tip, and works just like the real thing.  I bought mine on eBay to get the best price (where 2 were the same price as just 1 on Amazon).


You just knead it a bit before opening and it's good to go and hardens as it dries just like royal icing.  The only downside was no straight tip and I needed to be able to do more than just big star shapes, so I double bagged it with one of my own pastry tips over the opening to do the squiggles on the arms and legs.  My decorating skills are pretty minimal, but I like to think that them all being a little less than perfect just makes them seem more real.


For the eyes I used a product called Beads in A Bottle by Tulip that I had left from a bunch of other projects (see those here).  It's a kind of puff paint, but stays nice & rounded (and happened to be in my stash), so it was the best option to do licorice style eyes and mouth.


I also had some of these mini polymer clay canes for my "candy" embellishments.


  You just cut them with a razor blade to the desired thickness and glue them on.  


 They're meant for manicure nail art, but I've used them for lots of other projects over the years (see them HERE).  


The decorating was just like you would do with real cookies - on a cookie sheet covered with parchment paper.  I also got the husband to drill holes in the tops to make them easy to hang.


I used tweezers to nestle some of the clay pieces into the faux frosting.


The only downside was the Whipple directions oddly didn't say how long it took to dry, so I guessed and gave them 24hrs before I added some 1/8 inch ribbon loops to hang them.


I'm pretty happy with how they turned out and feel like it would be fun to make more of these with my bigger kids.  After all, there iss still time before Christmas and I've got an unused bag of Whipple Creme left...I'm also feeling a strong desire to make some actual cookies, since I'm highly suggestible when it comes to treats;)


LinkWithin

Related Posts with Thumbnails