Showing posts with label Christmas crafts. Show all posts

Friday, December 15, 2023

My Leave the Light On Fabric House for the Holidays

In better-late-than-never news, I finally have a moment to share one of the few holiday projects I had time to make this year.  In normal circumstances, I spend the season making a number of decor & wearables, but this year it's felt like everything has been preventing me from getting into my craft room (including getting hit with another virus this week as soon as I'd expected some down time...when will it end?!?).  So I was extra grateful to have the time a little while back to make this sweet little light up fabric house.

I used the Aunties Two Leave the Light on Pattern to make it.  Full disclosure, I actually purchased the pattern to carry in my shop.  I thought it was so cute and loved that it also came with a bonus pattern to make a mini ornament version:


There weren't a lot of "beauty shots" really showing the finished house in full and I also like to test out specialty patterns to see how they are to sew up, so I picked out some Christmas-y fabrics and set to making one for myself.

This fabric house is nice & sturdy thanks to good stabilization.


It's fully lined and opens up to put in battery powered tea lights or fairy lights:


By using template plastic or vellum paper for the windows, it gives off a soft glow:


Overall, the directions are really good.  I also liked that the designer offers some YouTube videos to show how to assembly some of the more complicated steps, like how to bind the windows.  The techniques used were easier than I expected, which was helpful since I'm not sewing as often these days:


The roof and sides are supposed to have a clapboard effect to be scrap-friendly.  The one variation I made was to only do the clapboard on the roof, since I wanted to showcase the pine tree print of the fabric on the sides.  The fabric collection I used was Comfort & Joy by Create Joy Project, which I also carry in my shop.  By using the teal color ways, I can keep my little house out long after Christmas for an extended decor season.  After putting the time into making it, I wanted to maximize its use!


I would make this again and definitely will do some of the ornaments since those are even quicker to put together.  If I can find a little time, I might try to do some to give as gifts this year.  I also could see doing another version in the future with a gingerbread motif, so I'm going to keep this pattern in my holiday sewing stash.  


I just love when goodies I find for my shop end up being great finds for my own stash too!

Wednesday, December 21, 2022

Merry Christmas Bozo: A Holiday Heat Transfer Tale


I know today's project title sounds strange, but I promise the story about it is worth it!  I last minute made this heat transfer shirt for my 4yr old as a special surprise:


It's a direct quote from him about the character pictured with it.  Yes, he's wishing a squirrel Merry Christmas.  And yes, he's calling him a bozo.

Backstory: In October we had a bunch of pretty pumpkins out on our front porch as part of our festive decorations.  After a while we noticed a few small chunks taken out of one of the "fairy tale" varieties.  Days went by and more small chunks.  A week went by and it was looking pretty beat up.  We figured something about it must have been appealing to a bird or chipmunk so we tossed it out.  The rest were untouched so it must have just been something about that one, right?

The next day a couple had small bite marks and a large classic pumpkin had a giant hole in it.  The porch was also sprayed with pumpkin innards and seeds.  Like someone had blown it up with a stick of dynamite like in a cartoon.  I didn't think to take a photo at the time, but it was a MASSIVE mess.  About 15min later I spied this guy through the glass in the door (it looks like there are 3 of him, but it's the effect of the cuts in my door's glass):


Yep, it was a squirrel.  A giant, chubby, almost-as-big-as-a-cat squirrel.  Eating seeds out of a pumpkin.  In two decades of putting pumpkins out, we've never had any bitten into, let alone torn apart and chowed on!  Then I saw him in action :


It seemed crazy!  He was carving it by eating!  So my 4yr old pranced over and began dancing a little jig to a spontaneous song he made up for the squirrel, "Bozo, bozo, you are a bozo!" in a sort of school-yard nah-nah tone while peering at him through the glass.  Squirrel didn't care - he kept eating.  But as soon as he left we tossed all the remaining pumpkins out and washed the mess away, so I'm sure he was disappointed when he came back and his buffet was gone.

We haven't seen him since, but he came up in conversation last week.  Not missing a beat, my little guy commented in a disgruntled tone "Merry Christmas Bozo." and I knew I had to immortalize it into a shirt.

I found a free silhouette image of a squirrel and another of a Santa hat and combined them using iPiccy.  

I imported it into Cricut Design Space to make a cut file and adding the wording and cut them out.  The words with plain heat transfer vinyl and the squirrel in flocked.


I applied them with my heat press (more on the ones I use here and here).  Since I was using two different kinds, I did them in phases.  The flocked was first at 295 degrees for 30sec front/15sec back.


  Then I did the lettering on 330 degrees for the same time, carefully not overlapping the press on anything.  I peeled when cool and our inside joke Christmas shirt was born:


Everyone in the house is now in love with this shirt.  My teens are now requesting them.  Maybe next year it should become a family Christmas photo....;)

Wednesday, December 14, 2022

Burlap-style Deco Mesh Christmas Wreaths


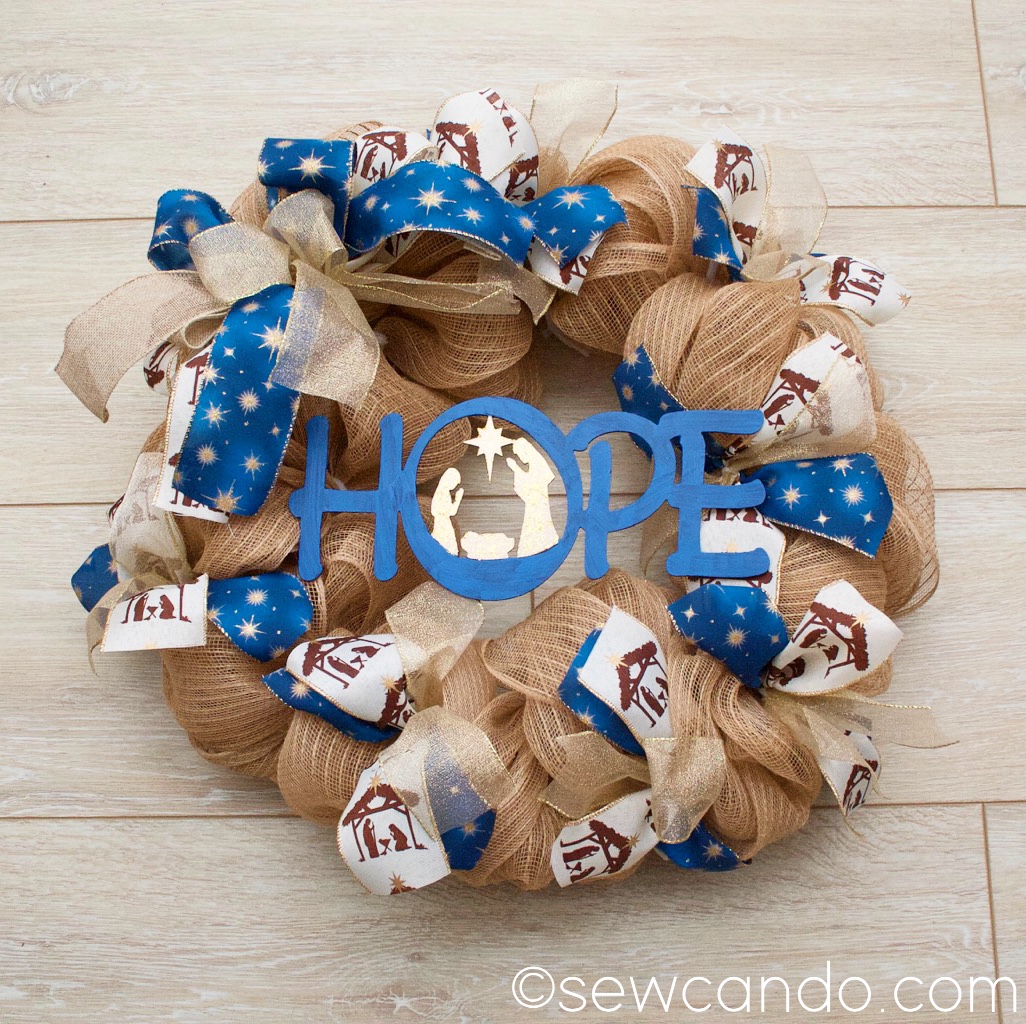
I know I'm probably late to the party with this project, but I finally made some deco mesh style wreaths.  I'm so happy with how they turned out I had to share them!  We get some rough winters around here, so it seemed like it was time to make some really durable (and affordable) door wreaths for the holiday season.  Ones that won't easily blow off or get worn out.  I also had some pretty Christmas ribbons & themed mdf cutouts I'd gotten for my shop that I really wanted to use myself, so this seemed like the perfect project.

I made a pair for our double front doors:


I wanted the highlight the sweet Nativity design of the ribbon & wreath center wood cuts and at the same time have the bright blue of the starry ribbon to stand out against the neutrals of the gold & burlap. 


If you're short on time, but want to make a beautiful wreath, this is a quick & easy way to get results.

Materials:
- 20in metal wreath forms (I used these)
- 10yd rolls of 21in wide poly jute deco mesh (I used these)
- 3 different 2.5in wide wired ribbon (I used Nativity, Navy Gold Stars & Gold value roll from Hobby Lobby)
- chenille stems (aka pipe cleaners)
- hot glue gun
- MDF cutout shapes (Hope & Joy)
- Acrylic craft paint & brushes
- Fishing line & upholstery needle

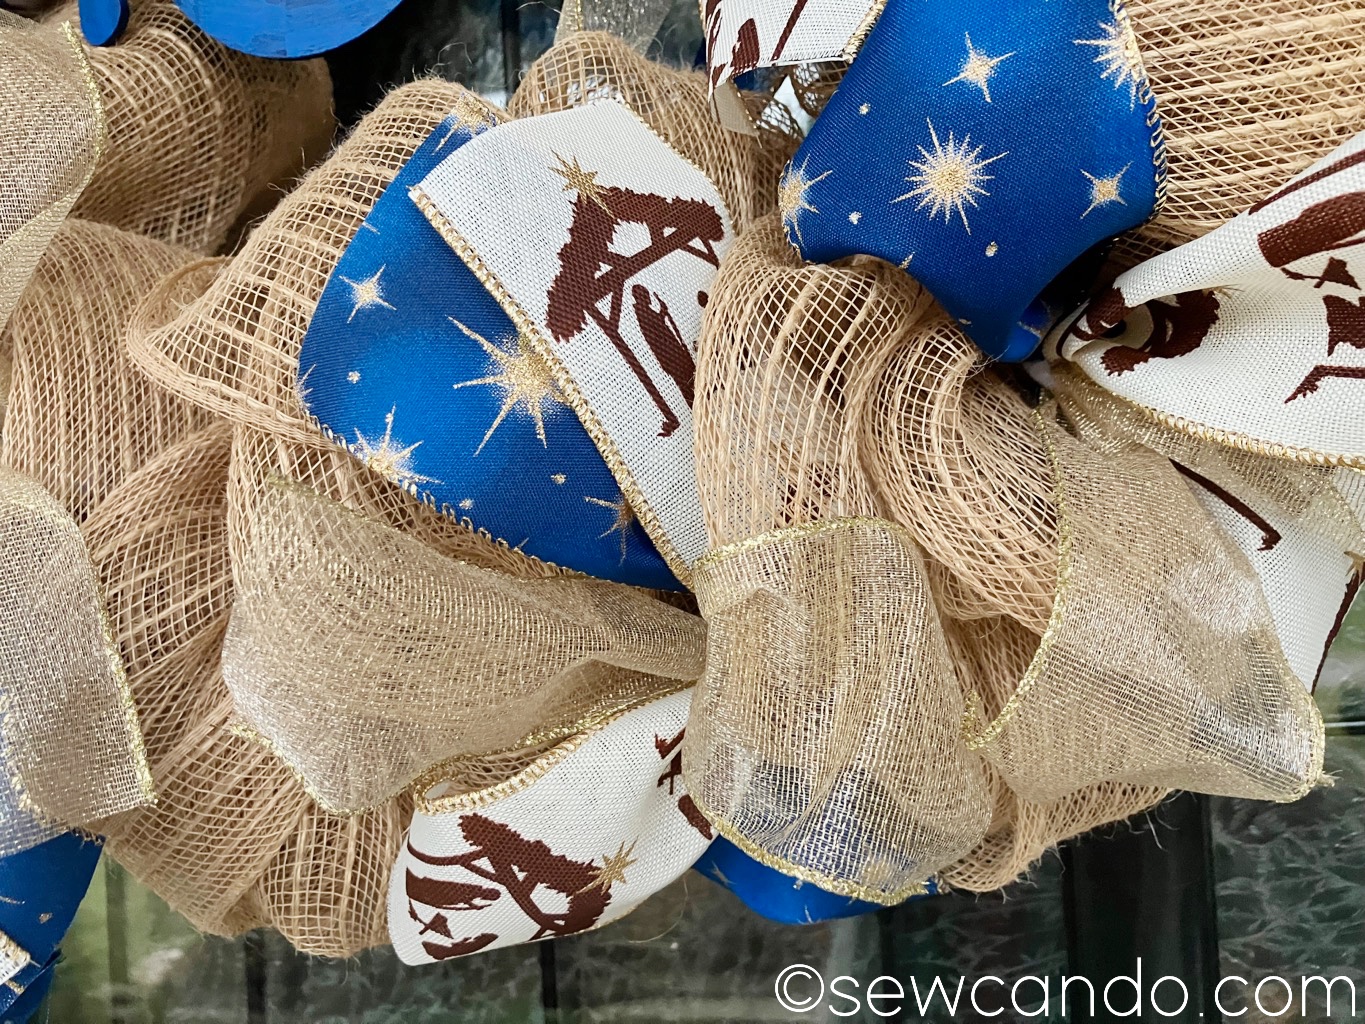
To do the poof-style mesh wreath base, I used this fantastic tutorial from Dave's Wreaths and Things.  It's easy to follow and worked out exactly as he instructed, so I wasn't going to reinvent the wheel by trying to do any step-by-step photos.  I got the poly jute style because I wanted it to look like burlap but be more durable and not be too floppy to shape.  They turned out nice & full and I didn't have to fiddle around trying to shape them:  


I used a great tutorial from Michelle Smith Creations to strategically add in the ribbon embellishments and make a nice full bow.


I used acrylic craft paints to paint my unfinished Joy & Hope signs.  To get the color just right to match my ribbon, I layered a few shades of royal & navy blue with some broad brushstrokes: 


Then I painted the little Nativity scenes in each one with some metallic gold acrylic and a layer of gold glitter to add a little sparkle to go with the sparkle of my other ribbons.


The center signage being cutout letters, rather than a big circle or rectangle, meant using her technique of attaching a central sign to the wreath wouldn't really work for me, so I got out an upholstery needle and some fishing line and attached it to the back of the wreath form and then looped it around the edges of the outer letters to really anchor it on, but not be super obvious to the eye.


I didn't have time this year to get really spectacular with the rest of our porch decorations (I also need to keep room free for my giant bin of outgoing stuff), but I think they look nice with our potted trees.  Next year I might make more goodies to team with my wreath theme, but for now, it's making Christmas brighter at our front door:)


Wednesday, December 7, 2022

Making Snow Globe Mason Jars


This easy DIY makes a sweet gift handmade item that is sure to delight!  Fill the jars with cocoa or cookie mix, candies, nuts or potpourri.  They make a lovely gift or sweet little decoration that can be enjoyed year after year.  The Nativity looks so heavenly nestled in the snow:


  I fell in love with this project idea last year when I discovered a tutorial for making them to gift hot cocoa mix in over at Dream A Little Bigger.  Unfortunately I ran out of time to make any so it had to wait until now.  Several of the suggested products used there are no longer available, so I found some ideal substitutes to make them work and am sharing my findings so you can too:)


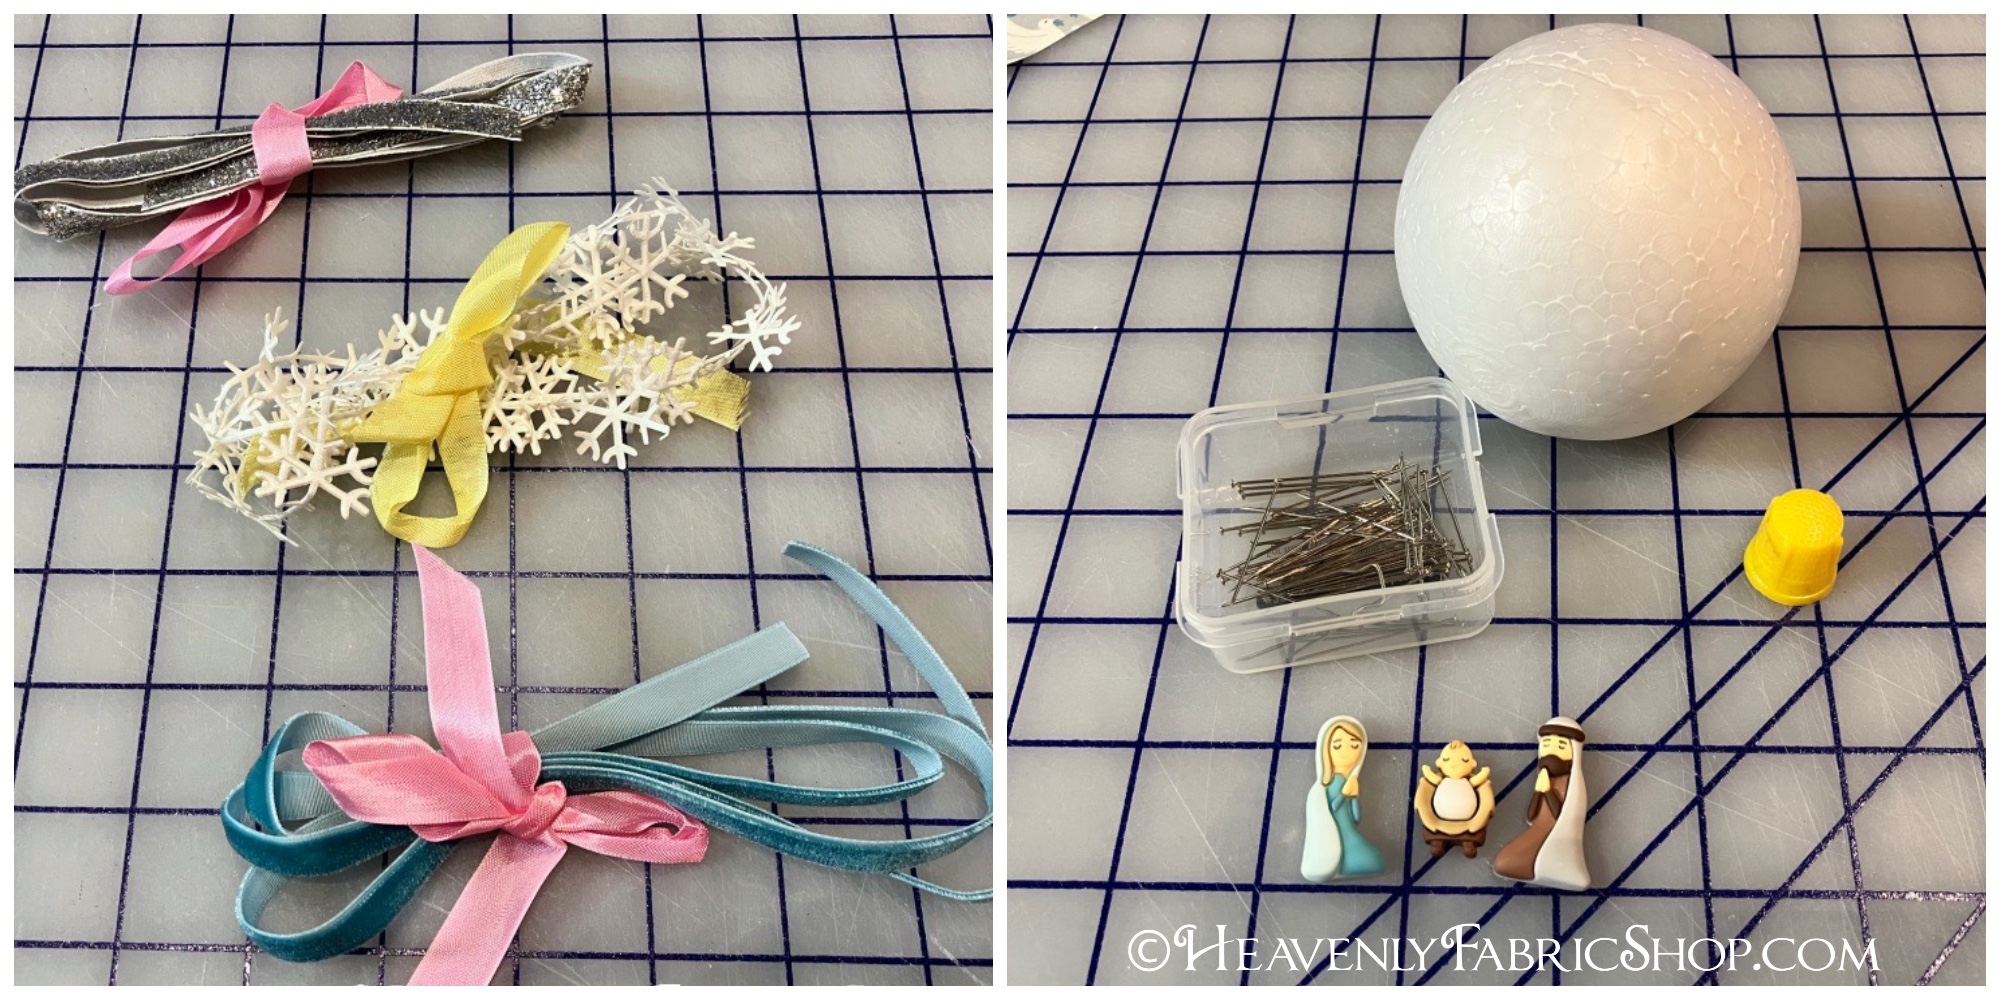
To make them I used a mix of some winter mini decorations, as well as some Nativity-themed flat backs & buttons from my shop and some pretty trims from my friend Jennifer's shop: Sugar Pink Boutique.


Materials:
- Mason jars (I used standard 8oz)
- Hot glue gun
- Ruler, rotary cutter, wire cutters

* It's a lot easier to start with solid white lids, but if you only have access to the metal ring kind, glue the seal to the ring and then paint white before starting.


Begin by hot gluing the central flat backs or buttons onto the jar lid at the center.  I used A Child Is Born & Three Wise Men Flat Backs from my shop for these.  Make sure items chosen will all fit under the dome (no taller than 1 1/8in).  I had to trim down my tree a bit at the base.


Carefully use the wire cutters to clip off the hanging circle of one of the ornament halves.  It's ok if it's not perfect - the ribbon will cover this up.


Put just under a tablespoon's worth of the artificial snow in the globe half:


Carefully put the jar lid over the globe and firmly hold together.  Run a thin line of hot glue around the edges to adhere them together.  I smoothed it as I went with a silicone finger protector (but a silicone hot pad or spatula edge would work too).  Check the edge to make sure there are no gaps (add a little more glue if needed).


Use ribbon & trim to dress things up and cover the seam edge just made.  An easy way is to use a wide trim with a decorative edge, like this 1.5in wide velvet center crochet ribbon.  Just hot glue it around the lid edge and overlap the ends at the back.


The crochet edge makes a pretty little fence around the scene.  I added a topper 3/8in wide trim of metallic silver velvet to add a little extra bling that doesn't shed:


For a different finish, I used 1/2in wide grosgrain ribbon, baby pom pom and some metallic satin tree trim on my Three Wise Men version:


Glue on the 1/2in wide ribbon first, making sure the top edge overs the seam of the snow globe, then glue the pom pom trim over the lower edge (which will camouflage any of the lid that was showing).


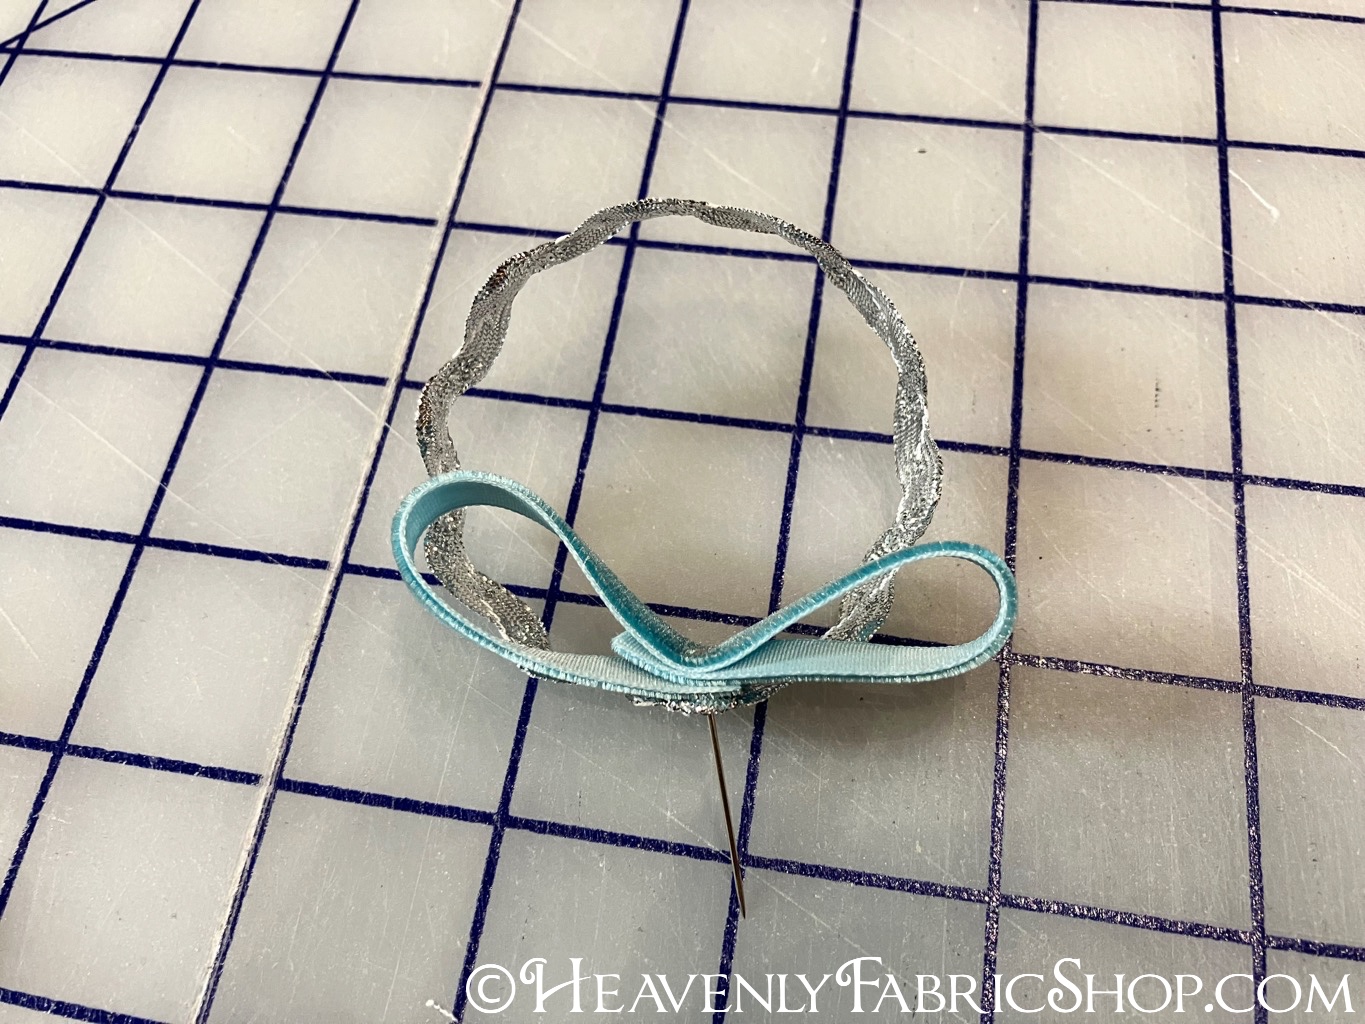
Then add the satin trim just above the top of the pom pom:


After making a few, it starts to go pretty fast and it's a lot of fun to make a variety of versions by using different figures and trims.


Add your favorite fillings: holiday mixes, candies, potpourri, etc. and they're ready to gift.  Enjoy seeing your recipients faces lit up when they receive them!  


Thursday, December 1, 2022

Easy Folded Fabric Ornaments Tutorial


Make some show stopping ornaments to decorate the tree, or to give as beautiful gifts, using just a little bit of fabric, ribbon & embellishments and this folded fabric technique.


  I made these ornaments as a holiday project for my shop to feature fabrics & embellishments I carry there.  The original tutorial I found for this was at Think Crafts.  It's quite good and shows several design options - some using all ribbon and some with many more rows of folds.  I found this version to be the quickest & easiest, but made some of my own design tweaks and added more details in the steps to make it even easier! 


These are a great holiday craft for when you're short on time.  I actually made mine while watching tv in the evenings (since having open containers with hundred of pins out with my toddlers during the day would be a disaster).  


Both sides can be decorated too:


I used a mix of fabrics & supplies from our shop and some beautiful trims from Sugar Pink Boutique, a fellow Christian-owned small business owned by my good friend Jennifer.


Materials:

- (2) 1/2yd or FQ coordinating cotton fabrics
- (2-3) 1yd coordinating 3/8in wide ribbons/trims
- 3in Styrofoam balls
- Straight pins 
- Flatbacks
- Hot glue gun
- Ruler, rotary cutter
- Optional, but recommended: thimble


To make the exact ornaments shown here see the links below:


You can make 2-4 ornaments, respectively, depending on if you use fat quarters or 1/2yds.  The cut amounts specified below will make one ornament.

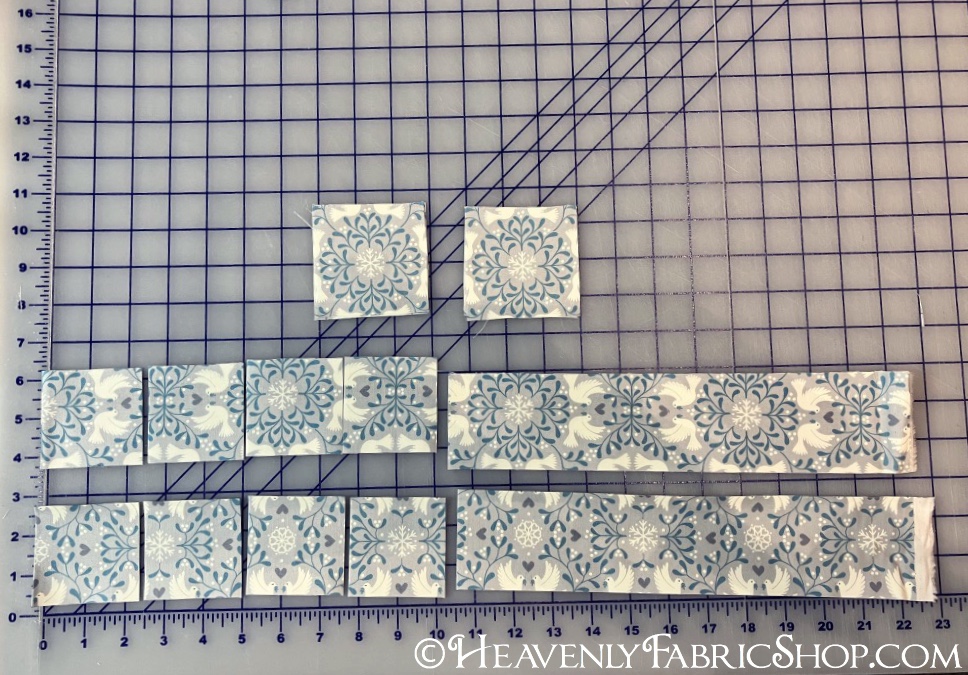
Start by cutting out (2) 3in squares and (16) 2.5in squares from the main fabric that will be your ornament's center.  Fussy cut if desired.  Also cut a single 2.5in high x 11in wide strip.


Cut (16) 2.5in squares from the second accent fabric:


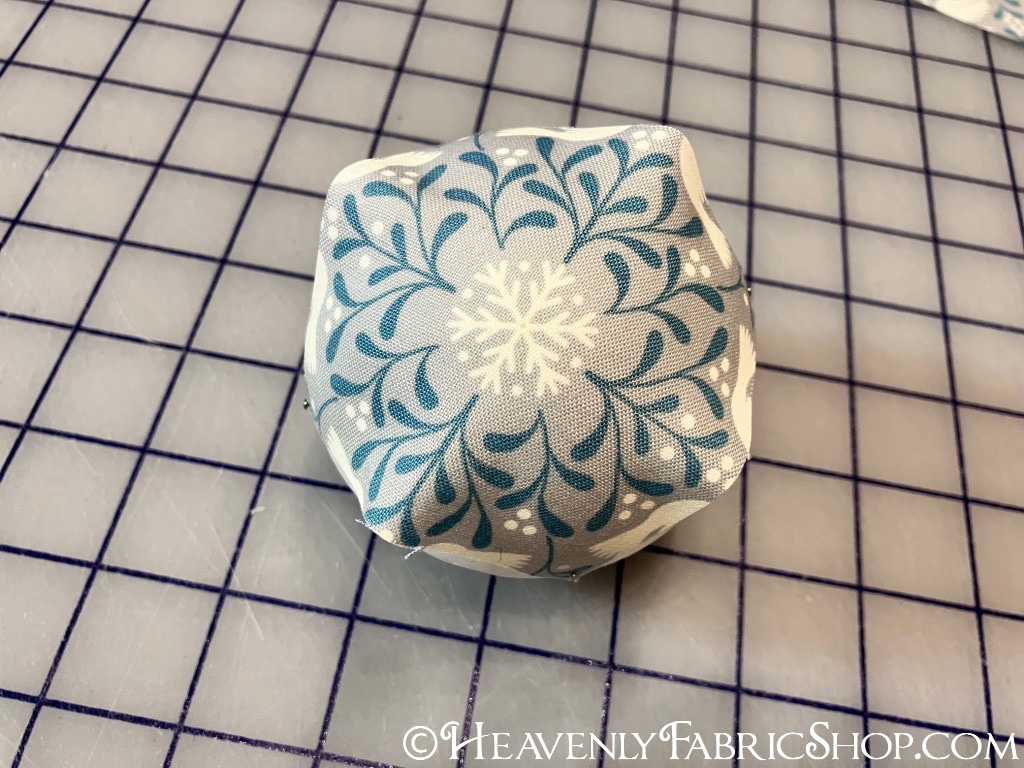
Find the center of one side of the styrofoam ball (usually there is a small circle or marking that makes this easier) and place center of one of the 3in squares over it.  Pin into ball at corners of fabric square.  


Take a 2.5in accent square of fabric and fold it into quarters, creasing it with your fingers, so when it is opened it's easy to find the center and place a pin through it on the wrong side of the fabric: 


On each side of the already pinned 3in square, find the center of that side and insert the pin about 1/2in inward from the raw edge.  Fold the fabric downward:


Then bring the top corners downward to meet at the center and pin in place to create a point:


 Once all four sides are done it will look like this:


 Take remaining four squares and place those between the points to create a second overlapping row.  Pin the lower corners of these triangles if desired.  It's a little easier with them "smoothed down", but uses more pins.


 Repeat the previous two steps with the main fabric squares to complete one side:


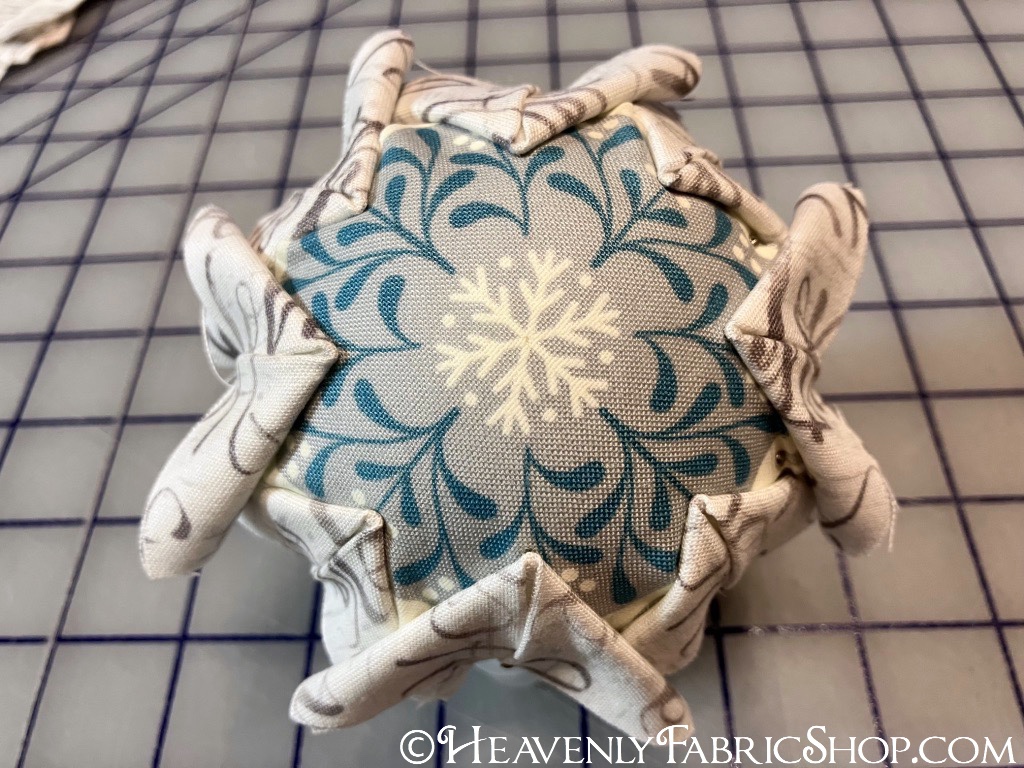
 The result will be this lovely tiered fold effect:


 Do the same on the other side of the ball, trying to line up the placement of the folds to mirror the original side:


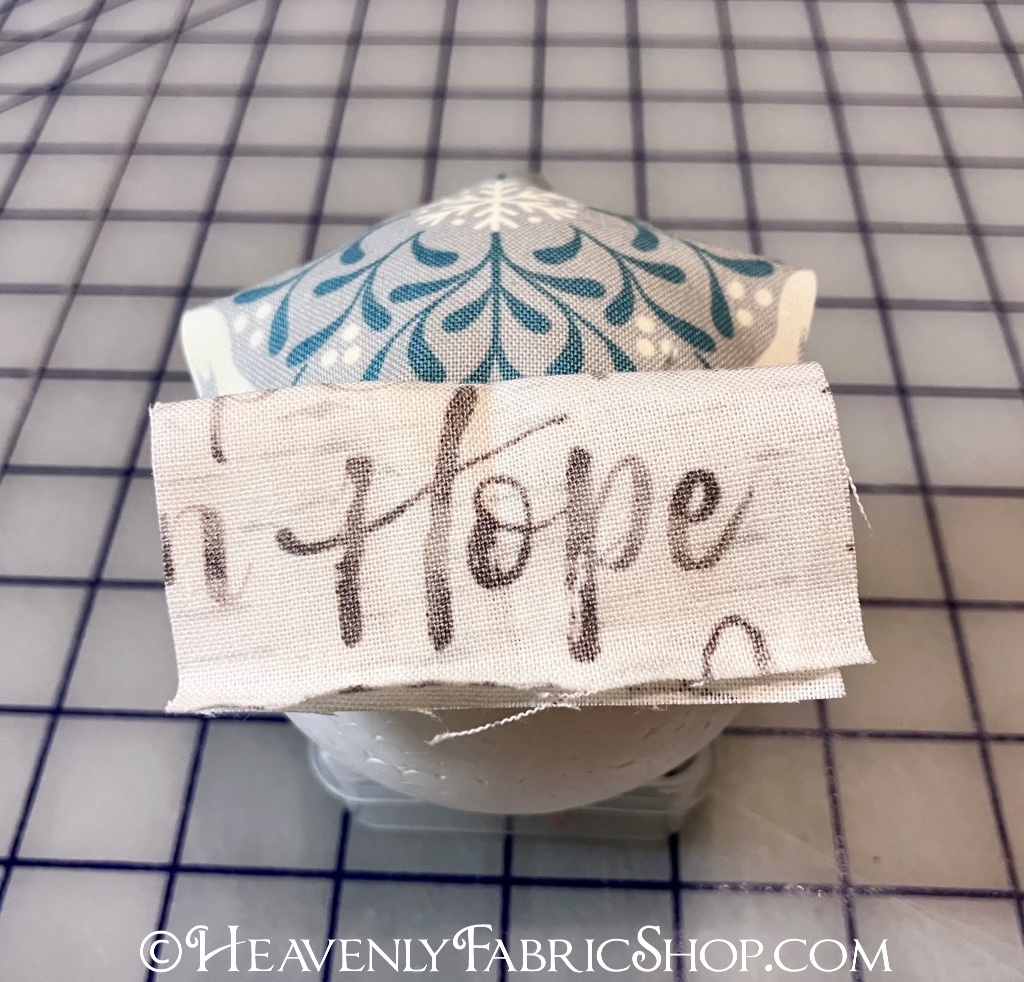
Take the long fabric strip and double fold.  Wrap around the center (to hide the raw edges of the folded squares), overlapping the short ends at the top of the ornament. Fold under the raw edge and pin into place.


Cut an 11in piece of 3/8in wide ribbon or trim and center over the strip.  We used a velvet ribbon to add texture:


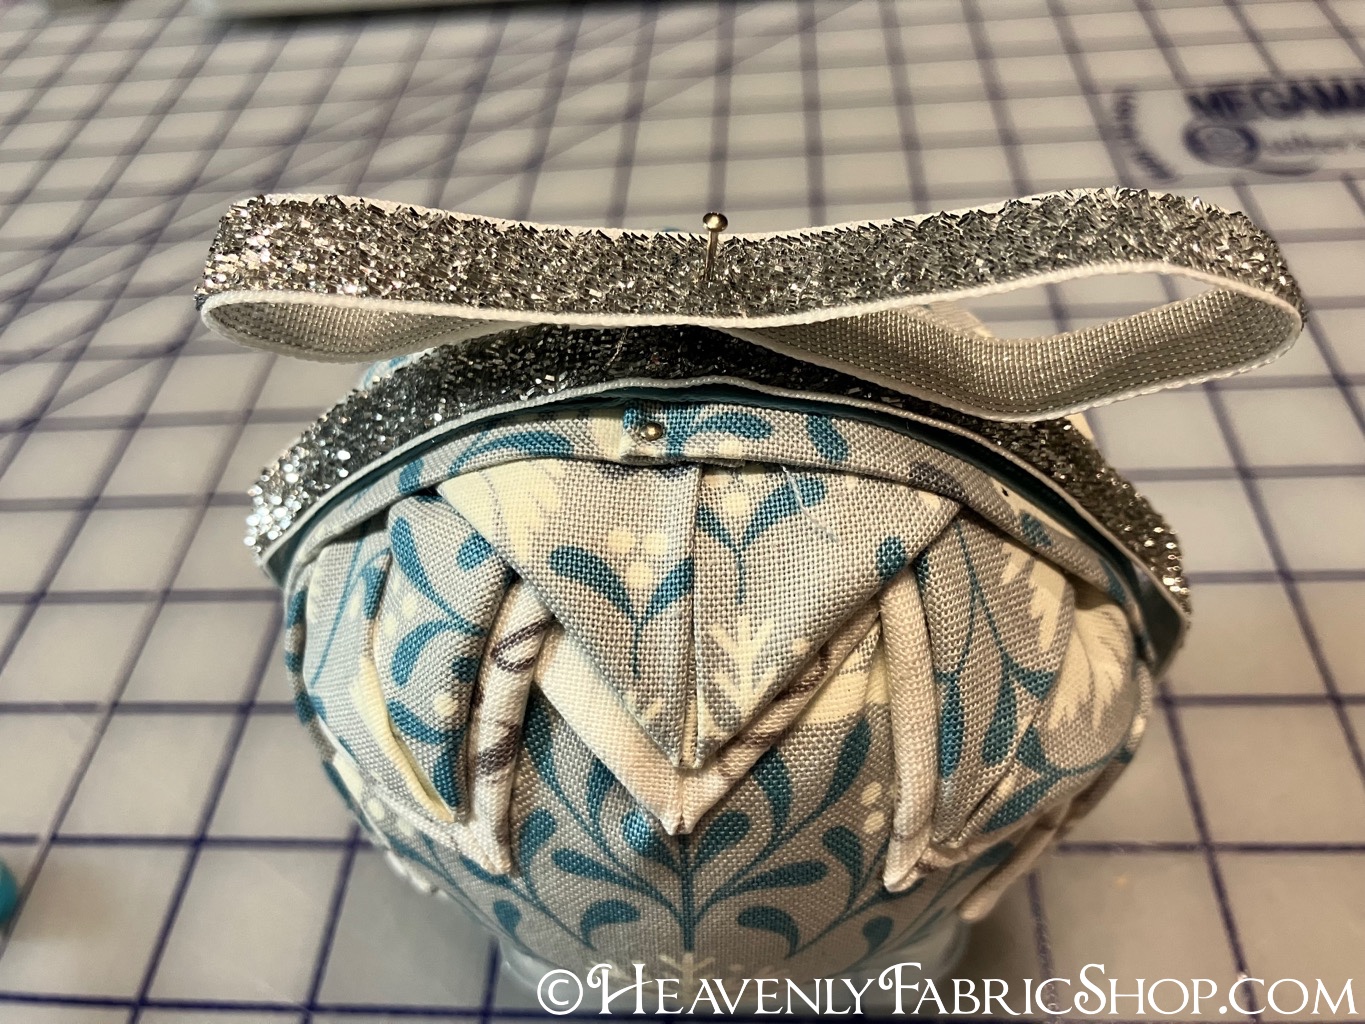
To decorate the top and add a hanging loop, Cut a 8in piece of trim (we used metallic velvet here) center it at the top.  Cut a second piece and overlap ends to make a loop and pin through the center of both to create a bow.


Cut a 7in piece of trim to make the hanging loop and a 6in piece from another trim to create a second bow loop.  Overlap as shown and pin into first bow.


Hot glue embellishments to ornament center and to center of bow to finish.  These are so fun to make & a great way to create one-of-a-kind ornaments to treasure year after year:


Merry Christmas!


LinkWithin

Related Posts with Thumbnails