Showing posts with label Christmas Fabrics. Show all posts

Wednesday, August 9, 2023

Finally Sewing Again: Making A Table Topper Quilt


After a really long time not feeling creative, or having time to do anything crafty, I'm slowly finding some free moments and a bit of inclination to tackle things.  Truthfully speaking, most days I'm exhausted from dealing with my big kids, corralling my toddlers and keeping my shop running, but the crafting spark hasn't totally gone out!  

What pushed me to start sewing again was needing a sample project for my shop (so this post kind of ends up being a bit of an "advertorial", but more because this really is what I'm making right now - not because I want to get all sales-y on ya!).  

I've just started carrying digital quilt patterns, which is great for getting customers sewing asap, but one design didn't have a finished project photo or digital mock-up to go with it.  Kind of hard to sell an item without an image of it, right?  So I decided to use fabrics from a new Christmas collection I got in (called Comfort & Joy) to make this sample table topper quilt:


To be honest, I'd been a bit nervous to start it.  I've been a self-taught sewer of bags, clothes, home decor and literally every other fabric project for years, but I'm not really a quilter.  I've only made a handful of basic quilts and since I'd not sewn anything in months I was a little apprehensive of my rusty skills making a go of it.  Add the fact that two of the fabrics I was using were directional, I needed to take a little extra time to make sure I had them cut with the pine trees and text facing the right ways:


I do have to say it came together pretty quickly.  The design is the Guiding Star Table Topper Digital Quilt Pattern.  The instructions are very straightforward so a beginner quilter like me can easily make it.  It features an 8 inch focal square, so I fussy cut from my text print fabric to make a nice holiday phrase block:


The one modification I made was to make the back self-binding rather than doing a separate backing piece and binding edge.  


It saved me a bunch of time and made it easier to get a nice even binding edge on the front.  I used this handy how-to for getting nice mitered corners with a self binding, since it had been so long since I'd done them last: 


This little quilt can be used as a table topper, wall hanging finished or as a center for making a larger quilt.  


I feel confident enough to do another one (or more) and possibly piecing them to make a larger quilt, so I'm pleased I could get back in the sewing saddle and test drive a new pattern at the same time.  Plus, I've got a nice, new, Christmas-y item already sewn up early.  Boy, does it feel good to be ahead on a project for a change!


Thursday, December 1, 2022

Easy Folded Fabric Ornaments Tutorial


Make some show stopping ornaments to decorate the tree, or to give as beautiful gifts, using just a little bit of fabric, ribbon & embellishments and this folded fabric technique.


  I made these ornaments as a holiday project for my shop to feature fabrics & embellishments I carry there.  The original tutorial I found for this was at Think Crafts.  It's quite good and shows several design options - some using all ribbon and some with many more rows of folds.  I found this version to be the quickest & easiest, but made some of my own design tweaks and added more details in the steps to make it even easier! 


These are a great holiday craft for when you're short on time.  I actually made mine while watching tv in the evenings (since having open containers with hundred of pins out with my toddlers during the day would be a disaster).  


Both sides can be decorated too:


I used a mix of fabrics & supplies from our shop and some beautiful trims from Sugar Pink Boutique, a fellow Christian-owned small business owned by my good friend Jennifer.


Materials:

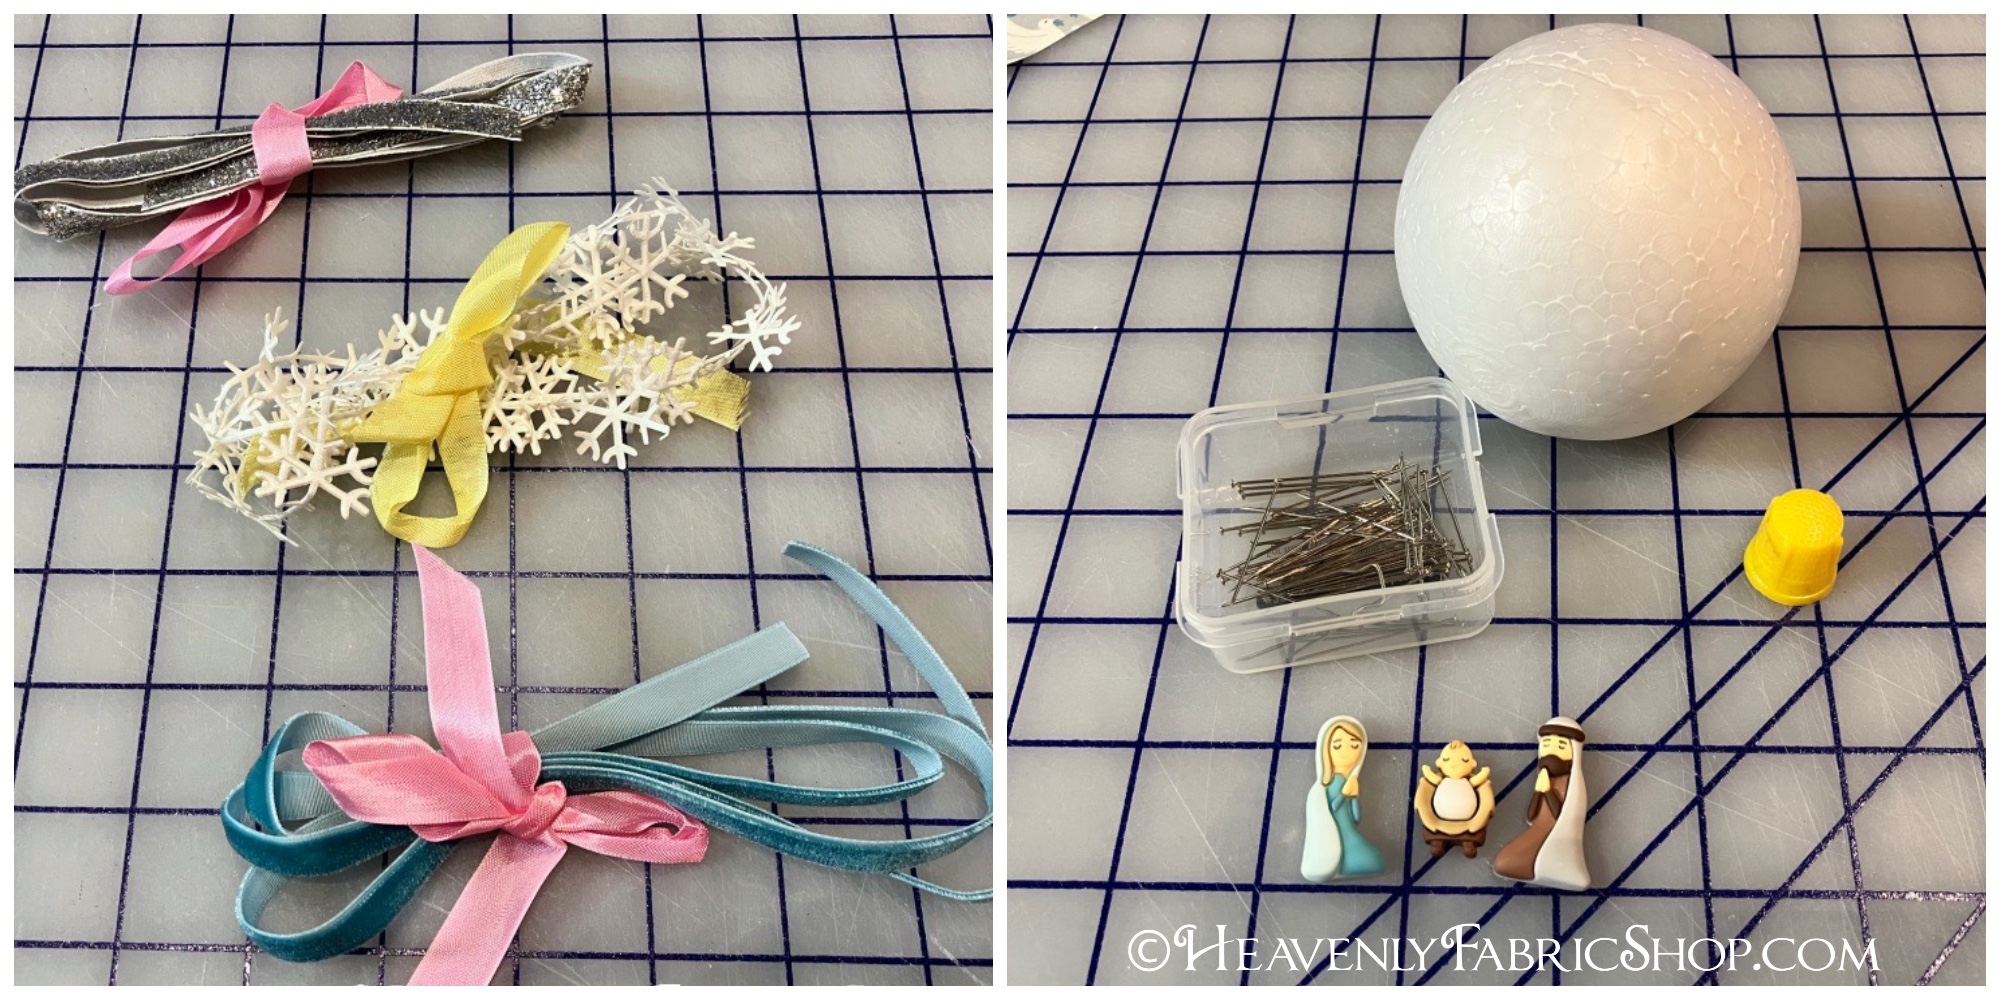
- (2) 1/2yd or FQ coordinating cotton fabrics
- (2-3) 1yd coordinating 3/8in wide ribbons/trims
- 3in Styrofoam balls
- Straight pins 
- Flatbacks
- Hot glue gun
- Ruler, rotary cutter
- Optional, but recommended: thimble


To make the exact ornaments shown here see the links below:


You can make 2-4 ornaments, respectively, depending on if you use fat quarters or 1/2yds.  The cut amounts specified below will make one ornament.

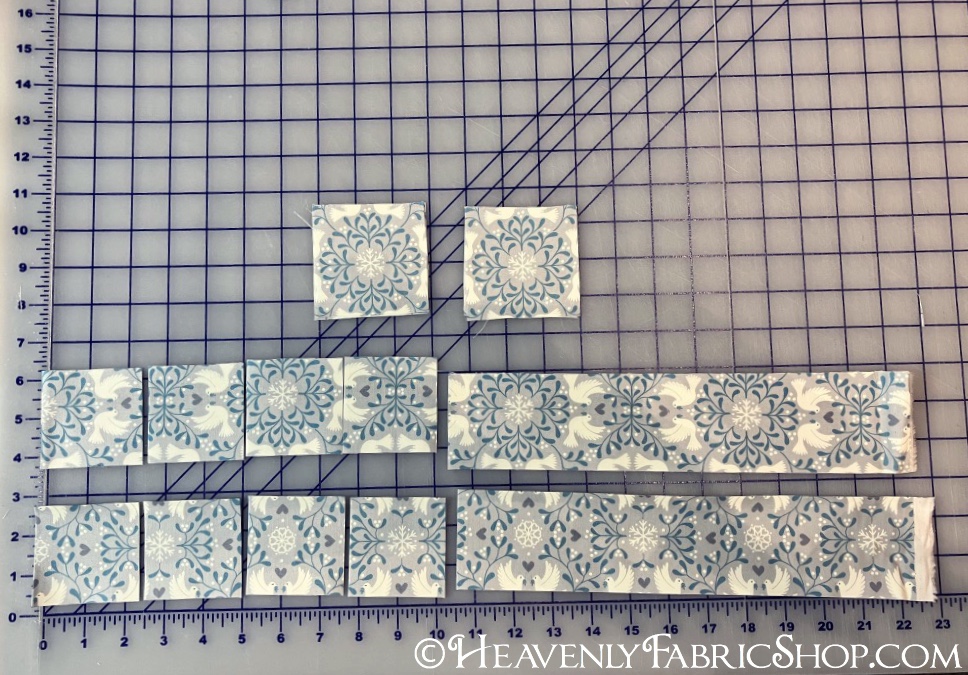
Start by cutting out (2) 3in squares and (16) 2.5in squares from the main fabric that will be your ornament's center.  Fussy cut if desired.  Also cut a single 2.5in high x 11in wide strip.


Cut (16) 2.5in squares from the second accent fabric:


Find the center of one side of the styrofoam ball (usually there is a small circle or marking that makes this easier) and place center of one of the 3in squares over it.  Pin into ball at corners of fabric square.  


Take a 2.5in accent square of fabric and fold it into quarters, creasing it with your fingers, so when it is opened it's easy to find the center and place a pin through it on the wrong side of the fabric: 


On each side of the already pinned 3in square, find the center of that side and insert the pin about 1/2in inward from the raw edge.  Fold the fabric downward:


Then bring the top corners downward to meet at the center and pin in place to create a point:


 Once all four sides are done it will look like this:


 Take remaining four squares and place those between the points to create a second overlapping row.  Pin the lower corners of these triangles if desired.  It's a little easier with them "smoothed down", but uses more pins.


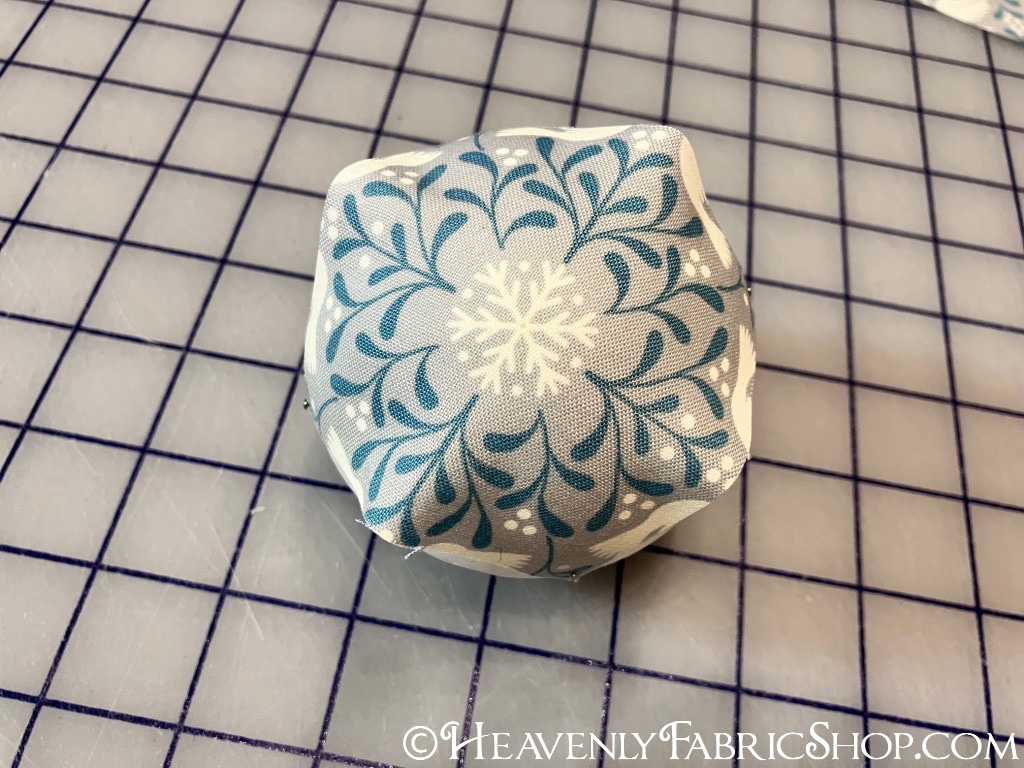
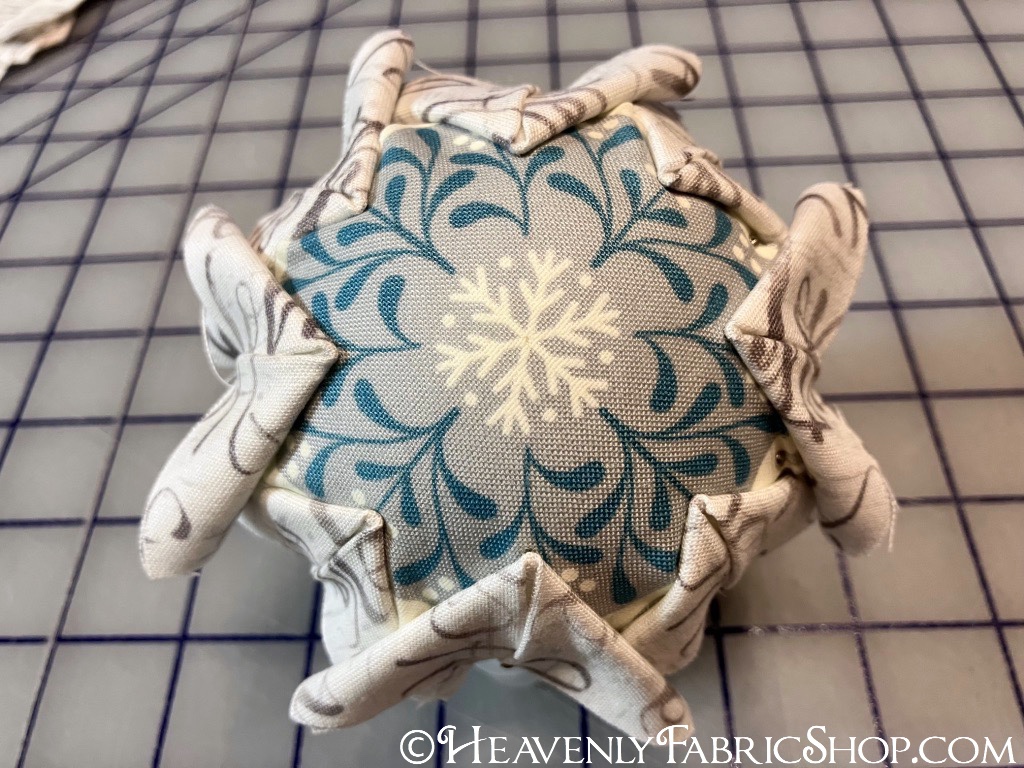
 Repeat the previous two steps with the main fabric squares to complete one side:


 The result will be this lovely tiered fold effect:


 Do the same on the other side of the ball, trying to line up the placement of the folds to mirror the original side:


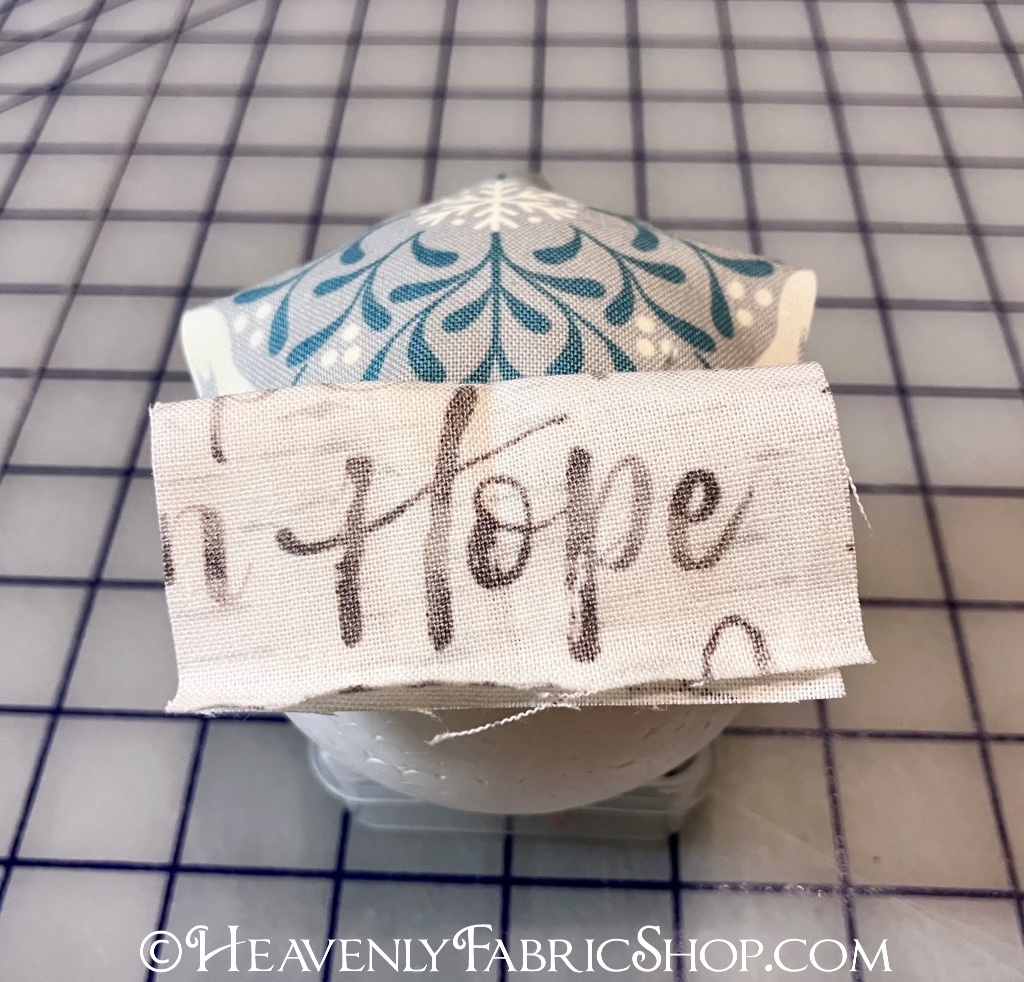
Take the long fabric strip and double fold.  Wrap around the center (to hide the raw edges of the folded squares), overlapping the short ends at the top of the ornament. Fold under the raw edge and pin into place.


Cut an 11in piece of 3/8in wide ribbon or trim and center over the strip.  We used a velvet ribbon to add texture:


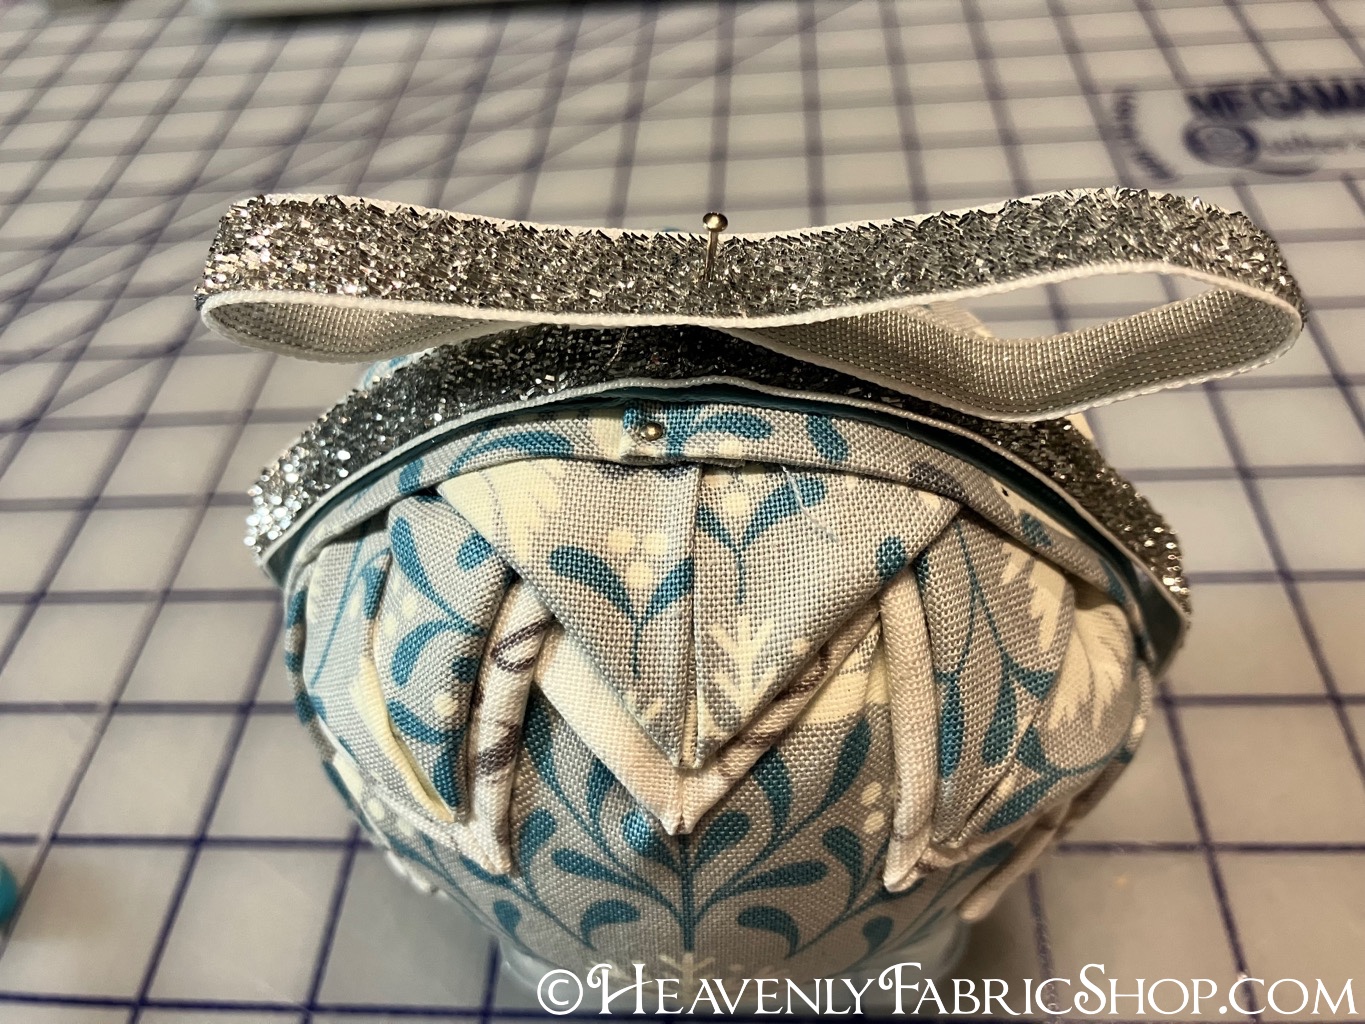
To decorate the top and add a hanging loop, Cut a 8in piece of trim (we used metallic velvet here) center it at the top.  Cut a second piece and overlap ends to make a loop and pin through the center of both to create a bow.


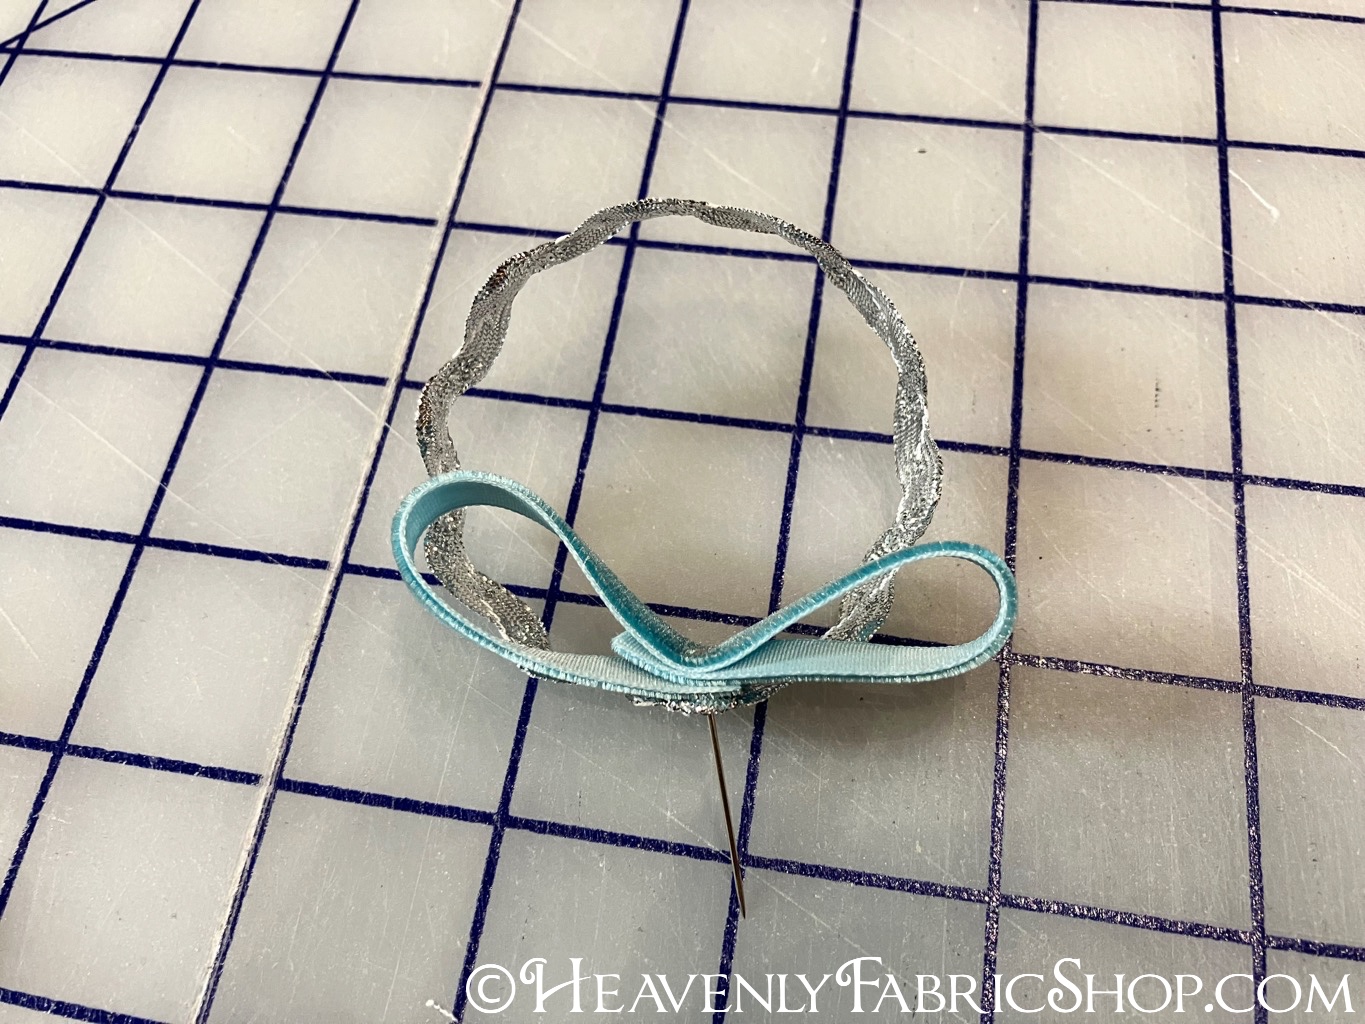
Cut a 7in piece of trim to make the hanging loop and a 6in piece from another trim to create a second bow loop.  Overlap as shown and pin into first bow.


Hot glue embellishments to ornament center and to center of bow to finish.  These are so fun to make & a great way to create one-of-a-kind ornaments to treasure year after year:


Merry Christmas!


Wednesday, December 15, 2021

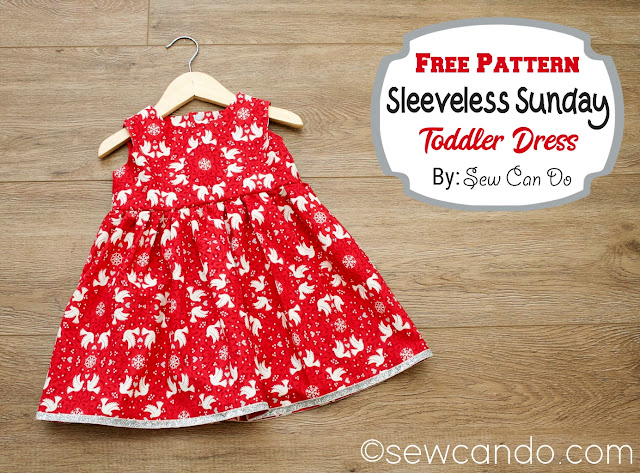
FREE Pattern: Sleeveless Sunday Toddler Girl's Dress


Make a versatile sleeveless dress that is nice enough for special events & church on Sunday, yet still casual for everyday with my 
FREE PDF pattern Sleeveless Sunday Toddler Girl's Dress!


I originally created this pattern in girl's size 8-10 and 10-14 versions and they've been wildly popular.  It's been incredible seeing all the dresses people have made with them!  This style dress, in those sizes, is hard to find in stores.  Same goes with patterns.  And lots of these big girls have little sisters (like mine does), or other relations, that would look sweet in a matching version.  While there are dresses like this in toddler sizes, many patterns have lots of fiddly, complicated assembly details or take ages to sew.  And store bought versions are kind of pricey for something so small.  

This pattern is easy and it's also FREE, 
so you can make beautiful dresses for very little $$!  

The bodice is fully lined to give a nice finish.  


The snaps along the back center add a little detail and make it easy to wear too.


And there's a a nice full skirt for pretty girl twirls:)

It's the perfect year round dress style too.  Sleeveless for warm weather, or pair with tights and a little sweater (or a long sleeved top/onesie underneath) to work just as well in cooler weather.


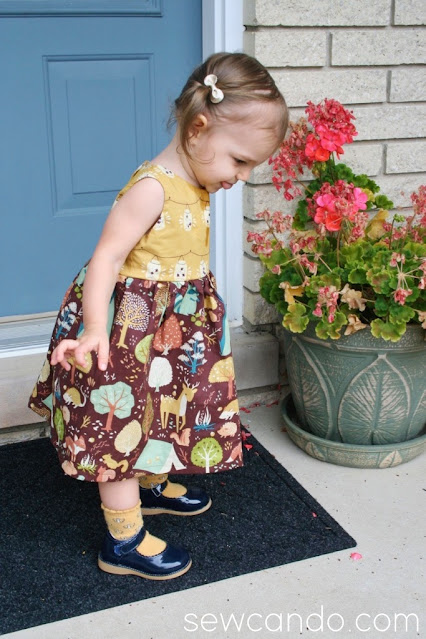
My test version was made with some lovely fall themed fabrics from the Fort Firefly collection: 


For this one I used this sweet print called Scandi Dove Hygge Glow Red (available in my shop) to make it the ultimate dress for the Christmas, but still very wearable through the rest of the winter season.  


Added bonus, this fabric also glows in the dark.  How cool is that!?!


This pattern sews up quick, so you can have a dress ready in next to no time - very handy during the busy holiday season.  Now we have some cute dresses for every season and the ability to do some matching little & big sister versions!

And it's easy to modify with decorative buttons down the front or trim the hem with some pretty ribbon like this:


Using this design and cotton quilting fabric, it's easy to make a beautiful, durable dress, in whatever print you want, for under $15.

Sizing: My FREE pattern is for US girl sizes 12mos-2T.   My pattern is US girl size 12-18 months if you use 1/2 inch seam allowances, shorten the bodice by 1/2 inch and the hem by 1 1/2inches.  It's a 24mos/2T if you use a 1/4 inch seam allowance and the measurements below.  My daughter is an average sized 22 month old and the 24mos/2T version has plenty of growth room.

If you need a bigger sizes, try my Sleeveless Sunday Dress Pattern, which fits most girls US 8-10 or Sleeveless Sunday Tween Dress Pattern which fits most girls US 10-14.  As my littlest lady grows, sizes in between the toddler & these will follow!


Materials:
- 1 yds cotton woven fabric (1 1/4 yds if self lining)
- 1/4 yd cotton woven fabric (only needed if using lining fabric)
- Lightweight fusible stabilizer 
- 3-4 snap sets (or buttons)
- My FREE PDF Sleeveless Sunday Toddler Dress Pattern
Notions: Iron, yard stick, rotary cutter/shears, pins, tailor's marking pen or chalk

Optional: 1.5yds of 3/8in or 1/2in wide ribbon (I used this metallic velvet trim)

Printing the Pattern:  Click HERE to download my PDF bodice pattern.  Print at 100% (actual size) no scaling.  Measure with the test square to make sure the scale is correct.  Cut out pattern pieces.


Start by cutting out the bodice front and back pieces from the outer and lining fabric. Transfer all markings.  For the skirt portion, cut two rectangles that are 14 inches long by 28 inches wide.  Mark the top center points of both rectangle pieces.

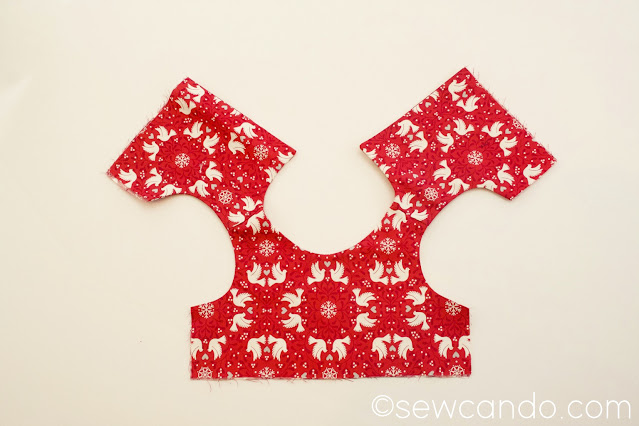
Start with the bodice.  With right sides facing, pin together the front bodice outer and lining around the neckline and the arm scythe.

Stitch together using a 1/4 inch seam allowance.  Do the same on the back bodice pieces, also stitching down the straight center sides. Trim down the seam allowances of all the seams.
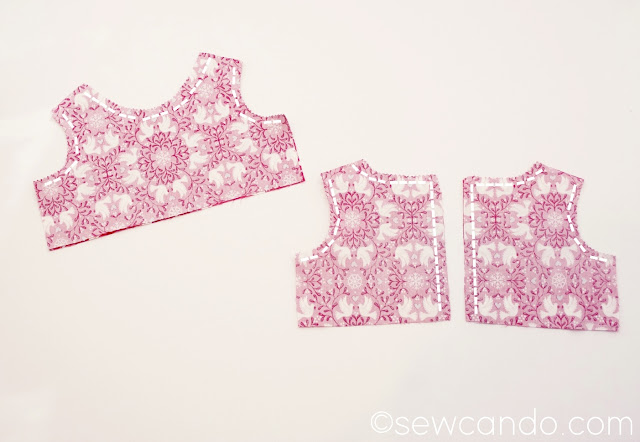

Cut two pieces of fusible stabilizer that are 1 inch wide by 8 inches long and fuse to the wrong side of the back pieces, just next to the newly sewn straight side seams.  This will be to stabilize where the snaps/buttons will be.  


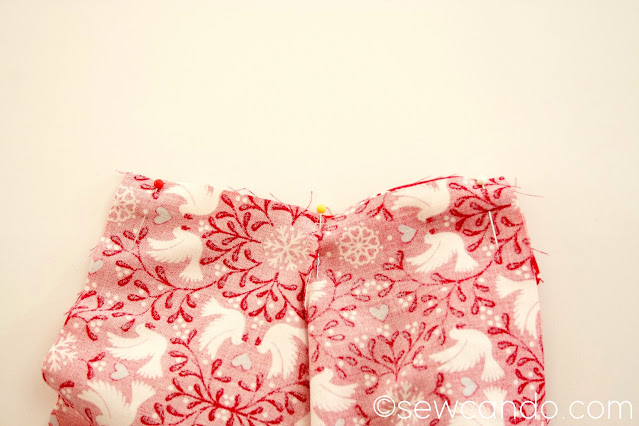
Turn the front bodice piece right side out and press around the seam to get them nice and flat.  Insert the shoulder sections into each of the shoulder sections of the back bodice pieces, matching up the fabrics and seams.  

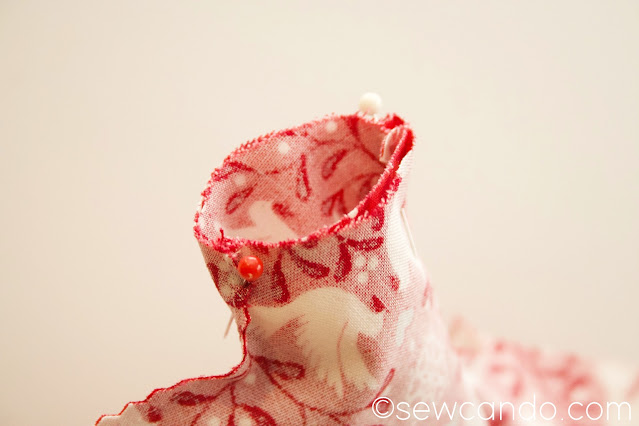
Pin so that each shoulder will be a little tube.  Stitch all the way around.  


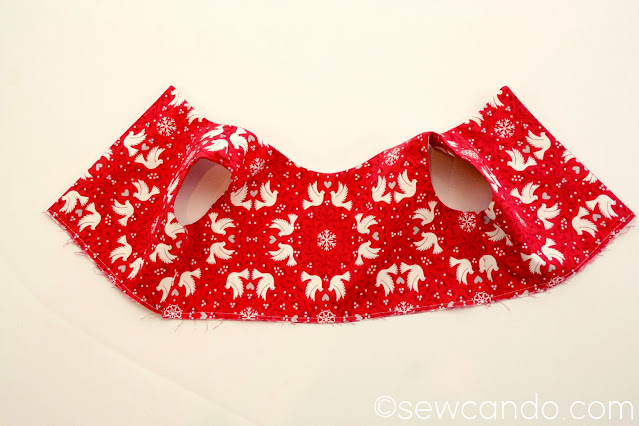
Turn right side out and press entire bodice flat.

Now, take the open sides and match up the raw edges and, with right sides facing, sew across from the outer to the lining on each side of the bodice. Trim seam allowance.  

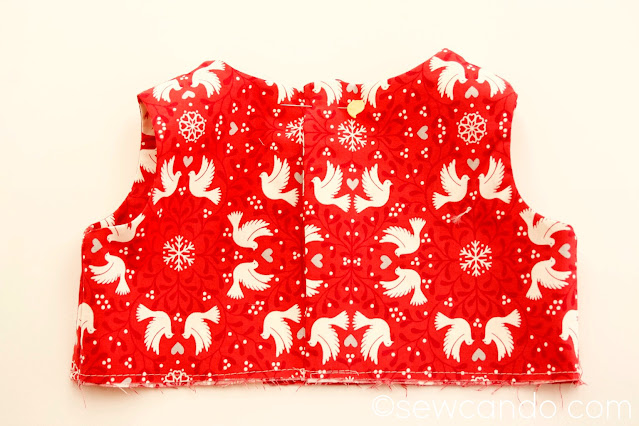
Turn right side out and press layers flat.  If doing button closure, do button holes now.

Overlap the back center of the bodice by 1 inch and baste layers together along the bottom.  Mark the bodice front and back centers.  Set aside.

With right sides facing, pin the short sides of the skirt rectangles together and stitch both sides.  To easily gather the skirt, with fabric still turned wrong side out, baste from one side seam to the other and then repeat on the other side, leaving few inch tails on both ends.

Pull up the bobbin threads and spread gathers evenly.  
Insert bodice, right side out, into the skirt, matching up the raw edges at center markings and side seams.  Adjust gathering as needed and pin.  Stitch together with a 1/2 inch seam allowance.  Serge or zig-zag over the raw edges.


Try on to determine desired length of hem and finish as desired.  I preferred double folding the hem up 5/8 in (for 1 1/4in total) and then topstitching.  
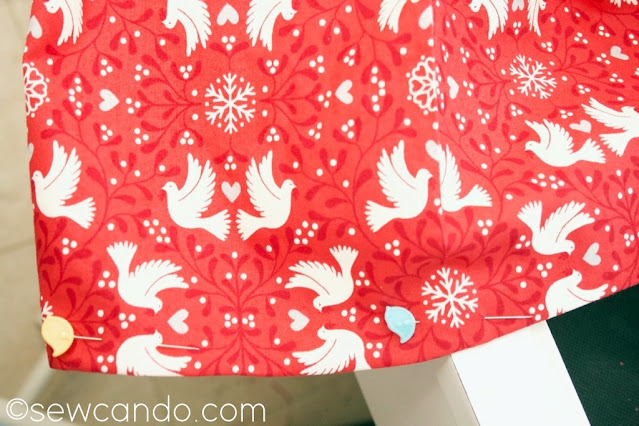
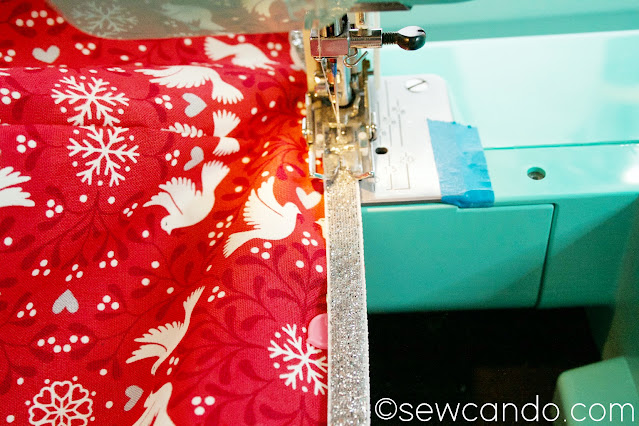
For a little extra detail I added some 3/8in wide metallic silver velvet ribbon to the hem edge and used a triple zig-zag stitch to secure it.  This ribbon is great because it looks like glitter but is actually metallic thread and totally washable, so no shedding and loads of sparkle.  Yay!  I bought a bunch to use to decorate other wearables and it was very easy to sew with, so I'm excited to do more with it.
Lastly, set the snaps along markings, or as desired, and enjoy your little one's pretty new dress!


Merry Christmas!!

LinkWithin

Related Posts with Thumbnails