Showing posts with label free pattern. Show all posts

Wednesday, February 1, 2023

A Moment of Feeling Craft Store Famous


I'll be the first to admit there hasn't been a whole lotta crafting going on chez Sew Can Do recently.  Business & family needs have made crafting a lower priority since my fabric shop and dueling toddlers burst onto the scene, but many moons ago I was crafting like crazy.  I used to do a good bit of professional pattern designing for brands and publications back in the day too, like this April Showers Quilt Pattern I created as a freelance designer for Pellon about a decade ago.  I did a number of projects for them and this one was for National Quilting Month (which is March):


I was at my local Hobby Lobby last weekend with my entire entourage of 5 kids & husband, finally getting supplies for some new crafts I'm aiming to tackle soon.  And when I went to grab a package of Wonder-Under I and discovered this very project front & center on it:


 It was a huge surprise to see my creation (and the photo of it I took in my foyer) right there in the notions department at a huge chain store!  This project has been a PDF download on their website for a long time and made the rounds on their social media when I first designed it, but having it on the front of an actual product package felt a little surreal.  


Seeing my little quilt has stood the test of time (being 10yrs+ after it was designed) was really amazing too. 


You can get the free pdf pattern HERE.  If I were making this again I'd probably try doing a pastel version or use some small prints with rain-themed designs like clouds, rain coats, boots, umbrellas...maybe even frogs to really bring out the "April Showers" theme!  If anyone wants to try it, I'd LOVE to see how it turns out:)  


Thursday, October 13, 2022

Free Little Owl Toddler Top/Baby Dress Pattern


Everything old is new again, or so the saying goes, right?  It blows my mind that it's been over 10yrs since I originally made this little pattern.  


I was still relatively new to sewing back then and did this as a jumper-style dress for my then new baby girl.  Who is now thirteen.  Wow does time fly!  The roomy fit worked well from about 3mos-12mos as a little dress.  I saved it for my next daughter who was born in 2020.  I found it at the back of the closet recently and I was thrilled to discover it also make a perfect toddler top for her size now 2T body, so this really is a grow-with-me DIY item!


It's a relatively simple sew - just 4 pieces to cut out.  Totally easy to whip up in an hour or two with basic sewing skills.  Not bad for an item that can be worn for 2yrs and then passed down to another kid!


You can use any woven fabric and it only takes 1/2yd.  I had this adorable corduroy:


And it looks so cute from the front and the back:


 Just excuse the ancient, so-so quality step-by-step photos (taken before I had a decent camera or any photo editing skills).  They're basic, but I think they do the general how-to job.

Materials:
- 1/2yd woven fabric (cotton, corduroy, etc)
- 1/2yd double fold bias tape
- 2 snaps
Notions: Iron, pins, tailor's marking pen or chalk 


Printing the Pattern:  Print at 100% (actual size) no scaling.  

Cutting: Front body (1 cut on fold), Back body (1 cut on fold), Front collar (cut 2), Back collar (cut 2)

Mark all pieces with front and back notations and start & stop points of collar.  Put the front and back pieces together with right sides facing and pin along side seams.  Stitch with a 3/8in seam allowance.  To easily keep the raw edges from fraying I trim them with pinking shears, but you could serge them too.  Press seams open. 


 Encase the raw edge of the underarms in bias tape and stitch in place:


 With right sides facing, put together the flat short end of a front and a back piece of the collar and stitch together.  Do the same with the remaining pair and press seams open.  When complete, that seam will go over one shoulder and the open end will go over the other.


 Pin those collars together (again right sides facing) and stitch together starting on the outside at one marking point and stitching all along the inside and back over the other end as shown:


Trim the seam allowance down and clip around the curves to make it easy to turn right side out.  Press the flat.  Then take the raw opening edges and press those under, toward the wrong side of the collar fabric.  Insert the raw edge neckline of the top's front and back in the collar openings and pin together.  Top stitch close to the folded edge, making sure you sandwich the top between the collar's inside and outside edges. Go all the way around the entire collar edge to attach everything together on the front and the back.


Fold the hem up 1/2in and fold again and stitch in place.  Attach the snaps and the shoulder opening.  Back then I didn't have a snap press so I did the old hammer & setting tool:


It's been really rewarding seeing this little item get a second life and for so long.  It seemed like a good one to pass onto others here so they can enjoy making some too!  Happy sewing:)


Wednesday, December 15, 2021

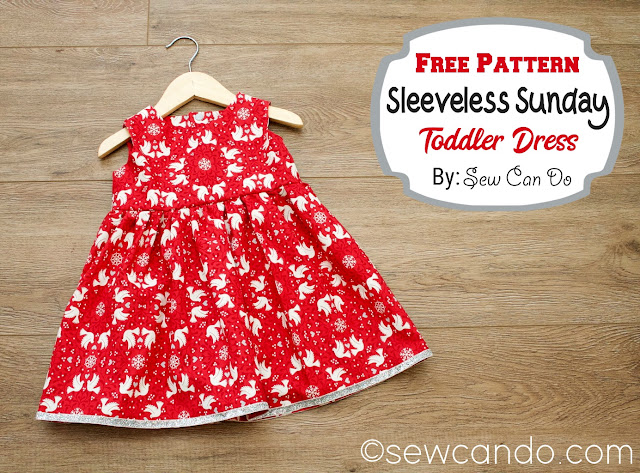
FREE Pattern: Sleeveless Sunday Toddler Girl's Dress


Make a versatile sleeveless dress that is nice enough for special events & church on Sunday, yet still casual for everyday with my 
FREE PDF pattern Sleeveless Sunday Toddler Girl's Dress!


I originally created this pattern in girl's size 8-10 and 10-14 versions and they've been wildly popular.  It's been incredible seeing all the dresses people have made with them!  This style dress, in those sizes, is hard to find in stores.  Same goes with patterns.  And lots of these big girls have little sisters (like mine does), or other relations, that would look sweet in a matching version.  While there are dresses like this in toddler sizes, many patterns have lots of fiddly, complicated assembly details or take ages to sew.  And store bought versions are kind of pricey for something so small.  

This pattern is easy and it's also FREE, 
so you can make beautiful dresses for very little $$!  

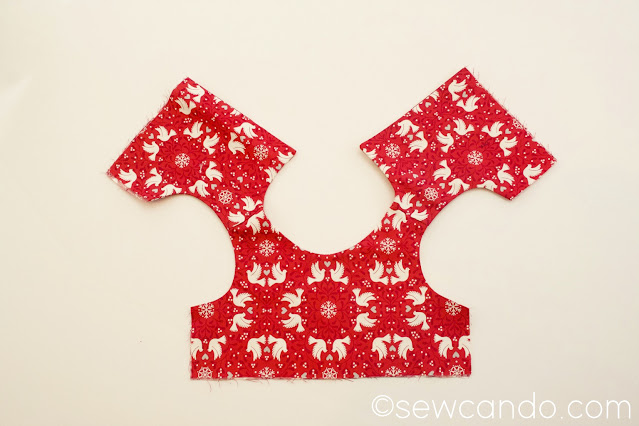
The bodice is fully lined to give a nice finish.  


The snaps along the back center add a little detail and make it easy to wear too.


And there's a a nice full skirt for pretty girl twirls:)

It's the perfect year round dress style too.  Sleeveless for warm weather, or pair with tights and a little sweater (or a long sleeved top/onesie underneath) to work just as well in cooler weather.


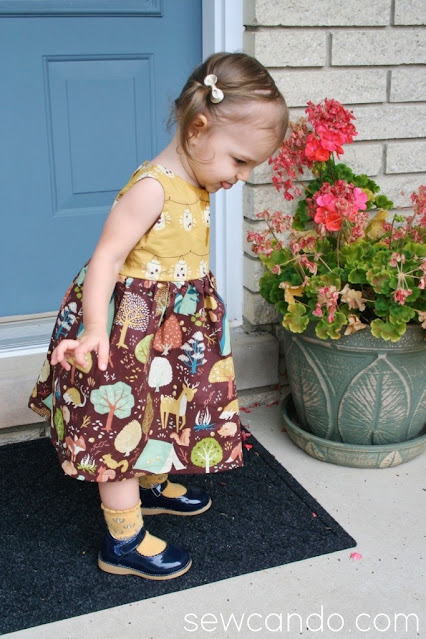
My test version was made with some lovely fall themed fabrics from the Fort Firefly collection: 


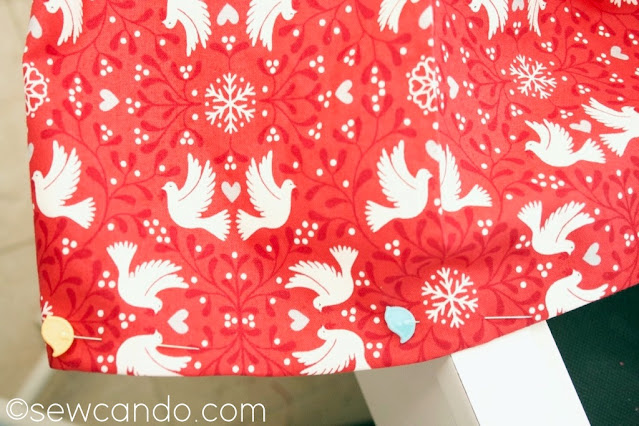
For this one I used this sweet print called Scandi Dove Hygge Glow Red (available in my shop) to make it the ultimate dress for the Christmas, but still very wearable through the rest of the winter season.  


Added bonus, this fabric also glows in the dark.  How cool is that!?!


This pattern sews up quick, so you can have a dress ready in next to no time - very handy during the busy holiday season.  Now we have some cute dresses for every season and the ability to do some matching little & big sister versions!

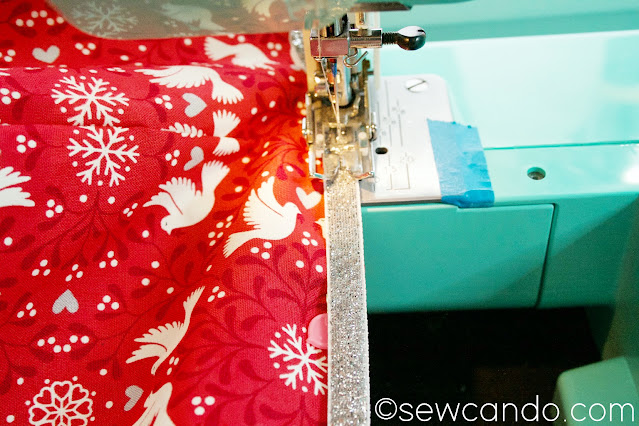
And it's easy to modify with decorative buttons down the front or trim the hem with some pretty ribbon like this:


Using this design and cotton quilting fabric, it's easy to make a beautiful, durable dress, in whatever print you want, for under $15.

Sizing: My FREE pattern is for US girl sizes 12mos-2T.   My pattern is US girl size 12-18 months if you use 1/2 inch seam allowances, shorten the bodice by 1/2 inch and the hem by 1 1/2inches.  It's a 24mos/2T if you use a 1/4 inch seam allowance and the measurements below.  My daughter is an average sized 22 month old and the 24mos/2T version has plenty of growth room.

If you need a bigger sizes, try my Sleeveless Sunday Dress Pattern, which fits most girls US 8-10 or Sleeveless Sunday Tween Dress Pattern which fits most girls US 10-14.  As my littlest lady grows, sizes in between the toddler & these will follow!


Materials:
- 1 yds cotton woven fabric (1 1/4 yds if self lining)
- 1/4 yd cotton woven fabric (only needed if using lining fabric)
- Lightweight fusible stabilizer 
- 3-4 snap sets (or buttons)
- My FREE PDF Sleeveless Sunday Toddler Dress Pattern
Notions: Iron, yard stick, rotary cutter/shears, pins, tailor's marking pen or chalk

Optional: 1.5yds of 3/8in or 1/2in wide ribbon (I used this metallic velvet trim)

Printing the Pattern:  Click HERE to download my PDF bodice pattern.  Print at 100% (actual size) no scaling.  Measure with the test square to make sure the scale is correct.  Cut out pattern pieces.


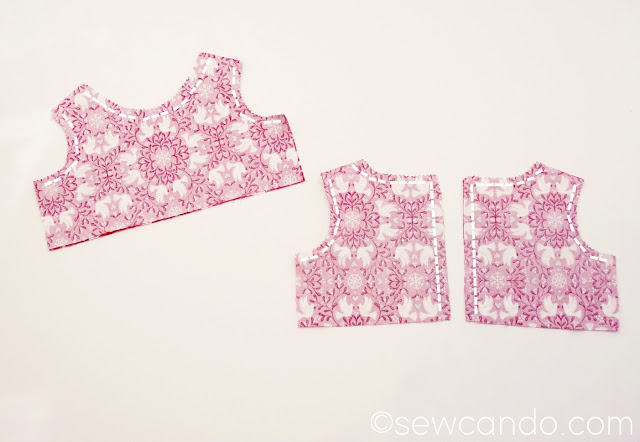
Start by cutting out the bodice front and back pieces from the outer and lining fabric. Transfer all markings.  For the skirt portion, cut two rectangles that are 14 inches long by 28 inches wide.  Mark the top center points of both rectangle pieces.

Start with the bodice.  With right sides facing, pin together the front bodice outer and lining around the neckline and the arm scythe.

Stitch together using a 1/4 inch seam allowance.  Do the same on the back bodice pieces, also stitching down the straight center sides. Trim down the seam allowances of all the seams.


Cut two pieces of fusible stabilizer that are 1 inch wide by 8 inches long and fuse to the wrong side of the back pieces, just next to the newly sewn straight side seams.  This will be to stabilize where the snaps/buttons will be.  


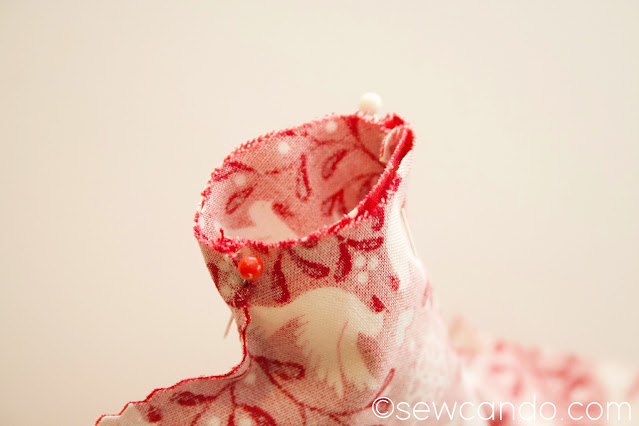
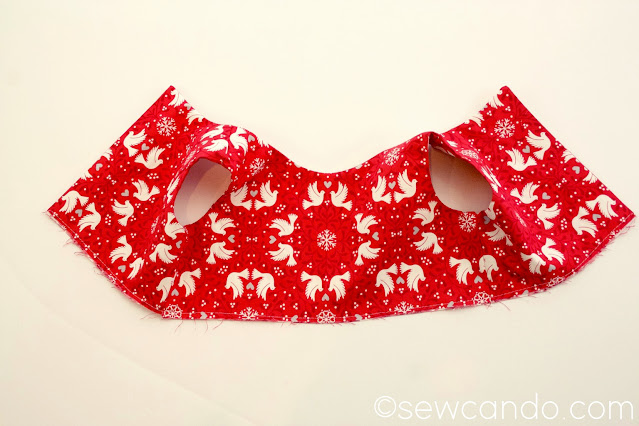
Turn the front bodice piece right side out and press around the seam to get them nice and flat.  Insert the shoulder sections into each of the shoulder sections of the back bodice pieces, matching up the fabrics and seams.  

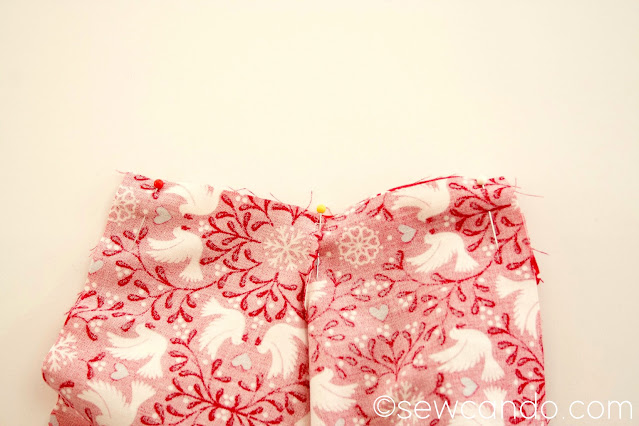
Pin so that each shoulder will be a little tube.  Stitch all the way around.  


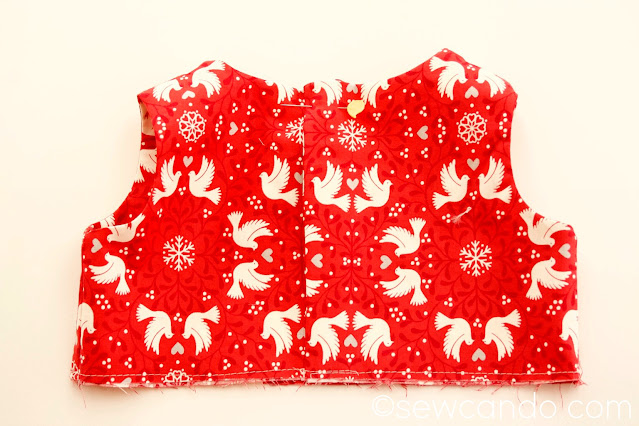
Turn right side out and press entire bodice flat.

Now, take the open sides and match up the raw edges and, with right sides facing, sew across from the outer to the lining on each side of the bodice. Trim seam allowance.  

Turn right side out and press layers flat.  If doing button closure, do button holes now.

Overlap the back center of the bodice by 1 inch and baste layers together along the bottom.  Mark the bodice front and back centers.  Set aside.

With right sides facing, pin the short sides of the skirt rectangles together and stitch both sides.  To easily gather the skirt, with fabric still turned wrong side out, baste from one side seam to the other and then repeat on the other side, leaving few inch tails on both ends.

Pull up the bobbin threads and spread gathers evenly.  
Insert bodice, right side out, into the skirt, matching up the raw edges at center markings and side seams.  Adjust gathering as needed and pin.  Stitch together with a 1/2 inch seam allowance.  Serge or zig-zag over the raw edges.


Try on to determine desired length of hem and finish as desired.  I preferred double folding the hem up 5/8 in (for 1 1/4in total) and then topstitching.  

For a little extra detail I added some 3/8in wide metallic silver velvet ribbon to the hem edge and used a triple zig-zag stitch to secure it.  This ribbon is great because it looks like glitter but is actually metallic thread and totally washable, so no shedding and loads of sparkle.  Yay!  I bought a bunch to use to decorate other wearables and it was very easy to sew with, so I'm excited to do more with it.

Lastly, set the snaps along markings, or as desired, and enjoy your little one's pretty new dress!


Merry Christmas!!

Wednesday, November 17, 2021

Nativity Gnome Family FREE PDF Pattern


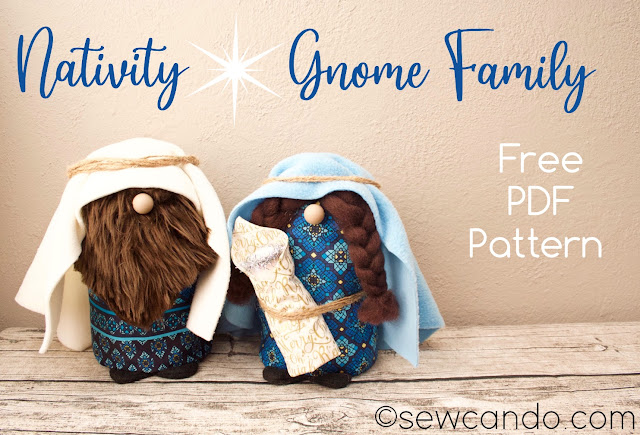
Gnomes are very popular this upcoming Christmas season and what better way to enjoy them than by creating a sweet gnome Holy Family?  I've designed this FREE PDF Pattern and tutorial for making a Joseph, Mary & Jesus gnome softie set to display for the holidays.  So cute & festive, they bring a smile to everyone.

Joseph is stoic with his full beard and humble headdress:


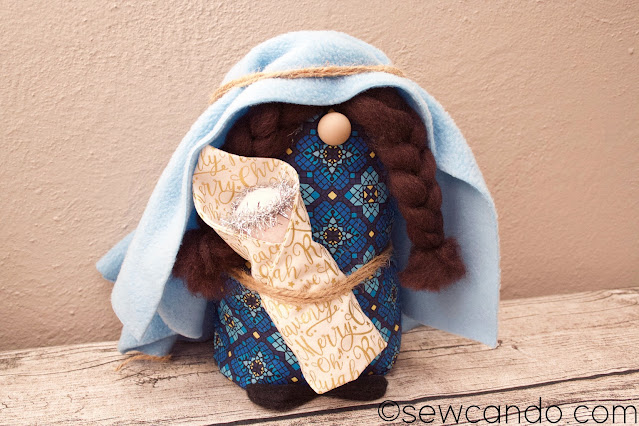
Mary has soft wooly braids and wears classic shades of blue:


And sweet Baby Jesus, with his shining halo, is wrapped in a swaddling full of words that rejoice in his birth:


Use a range of fabrics & materials to make each one unique!  They are even weighted to stand freely to easily pose wherever you desire.  They appeal to all ages and are wonderful ways to share the meaning of Christmas with everyone who sees them.  

I used a mix of faux fur, wool roving, fleece and quilting cotton for ours, including some metallic Oh Holy Night Words and blue stained glass style Rebirth Tile and Stripe fabrics from my shop to make them extra Christmas-y, but you could use any fabrics to make the bodies. 


I found faux fur gives Joseph's beard great texture and detail, but you could also use wool roving, yarn or minky.


Now, Let's Make Some Holy Family Gnomes!

Materials:

- 1/2yd cotton fabric each for Mary & Joseph (we used Rebirth Tile and Rebirth Stripe)

- (2) 8 inch squares of cotton fabric (we used Oh Holy Night Words Linen) for the swaddling

- (2) 18in w x 16in h pieces of fleece or felt for headdresses

- (2) 4in w x 3in h pieces of fabric for feet

- 5 inch square piece of faux fur for Joseph's beard

- 12 inches wool roving for Mary's hair

- 5 inch square scrap of skin tone fleece or knit fabric for Baby Jesus

- Jute twine or satin cord

- Metallic cord or mini tinsel for halo

- 1 inch diameter wooden or plastic ball

- (2) 19mm round beads or 1 inch pom poms

- Bag of poly fill stuffing

- Bag of plastic poly pellets 

- Cardboard

- Hand sewing needle

- Hot glue gun

- My FREE Christmas Gnome PDF Pattern

Note: If you are making these to give to children as toys, rather than for the intended display purposes, I strongly suggest that all components used be fabric and stitched into place, rather than glued.  For safety I'd also recommend forgoing any potential choke hazards like poly pellets and beads.

Start by downloading and printing my FREE PDF Pattern.  Print pages to actual size (no scaling) and cut out pieces.

With cotton fabrics folded, cut the following pieces for each gnome figure, according to pattern directions: (2) Body, (1) Bottom, (2) Inner pillow:


With right sides facing, stitch together the sides of the body front and back with a 3/8in seam allowance.  Stitch around the pillow, but leave a two inch gap for turning.  Trim down seam allowances and turn pillow right side out. 


Measure 2 cups of poly pellets and pour into the pillow.  Using a pitcher or funnel makes this quick & easy:


Stitch pillow closed and cut feet pieces and inside base from cardboard:


With a 1/4 inch seam allowance stitch around the curved edges of the feet, leaving the bottom open.  Trim down seams and turn right side out.


Find the center of the bottom front of each figure and baste the raw edges of the feet there.


Pin and stitch the fabric bottom to the body, trimming down seams afterwards.


Turn right side out and run a basting stitch along the top raw edge:


Insert the cardboard base inside and cover with weighted pillow, then stuff with poly fil.  Don't stuff Mary all the way to the top, so she will be slightly shorter than Joseph.  Pull lower threads up to closeup up the top and knot.


For Joseph: cut beard from faux fur (plush minky or fleece could also be used) using pattern piece.  


Find the front center of the gnome figure and measure about 2 inches from the top and hot glue beard into place:


From fleece or felt cut a 18in w x 16in h piece to make the headdress:


Place on top of head so that it slightly covers the top of the beard by about 1/2 inch.  Fold front sides forward and hot glue folds down.  Trim lower edge of headdress into a curve to length desired.


Add large headed pins around the head and wrap twine or ribbon around the head just under them, hot gluing into place every few inches.  Hand stitch bead or pom pom nose just under the top edge of the headdress.


For Mary: Take 12 inch long piece of wool roving or bundle of yarn and stitch at middle, onto the body about 2 inches from opening.  Braid both sides.


Cut a 18in w x 16in h rectangle of blue fleece or felt for the veil and drape head to overlap about an inch from top edge of braids.  Fold, glue and add twine wrapping as done with Joseph.  Hand stitch bead nose on just under center point of braids.


For Baby Jesus: Cut two 8 inch squares from fabric for swaddle, a scrap of fleece or knit for the body and small wooden ball for the head.  Note: Since the Oh Holy Night Words swaddle fabric is directional, I cut it on the diagonal as a diamond shape rather than straight across as a square so the wording would not be upside down when finished. 


Put ball at center of body fabric and tie underneath, pulling fabric taut, then trimming down bottom edges to be about 3 inches long.


With right sides facing, stitch together fabric squares, leaving a two inch gap for turning.  Turn right side out and press flat.  Lay Baby Jesus as shown, fold up bottom and the cross sides over to complete the swaddle.


Hot glue or hand stitch swaddle closed.  Cut and glue on a small piece of tinsel ribbon for the halo.


Position baby facing out at the middle of Mary's body and tie together with twine:


Now the gnome Holy Family is complete.  Add to your mantle, shelf or table for a sweet & soft Nativity display this Christmas season.


LinkWithin

Related Posts with Thumbnails