Showing posts with label Cakes. Show all posts

Wednesday, August 1, 2018

Nailed It The Home Version aka Crafting Even Big Kids Love To Do


One of my big goals this summer has been to do more creative projects & crafts with my big kids.  For years I've done loads of things for them, but not a lot of crafting with all 3 of them.  Part of the challenge is finding something everyone wants to do.  My 8 yr old daughter loves just about every arts & crafts genre, but try finding something for her plus two boys age 12 & 15.  Not a long list.  Until now.  We found a craft that they ALL love doing:  Nailed It @ Home.


Recently we discovered a contest show on Netflix called Nailed It.  The premise is 3 bakers compete to pull off some amazing themed baking challenges, but the twist is they are all amateurs.  As in real, minimal experience amateurs, not bloggers who are practically professionals.  These are people who forget to put in the eggs despite having a recipe to follow, people who think using 1/2 cup of food dye is totally normal.  People who do not have miraculous decorating skills.  The results take your breath away, but more in shock and surprise than awe.  

It's not a mean-spirited show though, they always try to find positives about the bakers' creations and taste is just as important as looks, so someone always wins (even if it's because they were just the least worst).  And seeing the amazing example bakes is fun too. My kids LOVE it.  They beg to watch it and recently said they wanted to do it themselves.  So we've created our own at-home Nailed It.


We've done it twice now.  I already had a lot of baking gear (that I haven't used in ages, so another good reason to do it) and then we got a bunch of ingredients and decorations.


Our first challenge was making emoji-themed cake pops.  Since we don't have 3 ovens, they had to work together to do the actual cake baking and then each of them worked on their own to mix up cake pops and dip and decorate them.


They really love the judging aspect too.  My husband & I critiqued their work.  How close the details were to the original, how good it tasted, etc.  We were able to give some good feedback on improvements and also focus on their positives too.  Our little guy was our "guest judge", so we held things up for him to get a look.  One cake pop did NOT meet with his approval.  He took one look at it and burst into tears.  A cake pop actually scared a baby.  It may be a first:


Our latest challenge was to re-create one of the show's challenges - this cosmic cupcake:


Image: copyright "Nailed It" by Netflix
Again, they had to work together to make the cupcakes and craft up some buttercream frosting from scratch.  


They were able to use some cake mix and had to find the recipe for the frosting in a cookbook.


We bought some ready-made fondant, but they had to color some of it themselves.


And do all the decoration sculpting.  Like on the show, they each had the option to use a "panic button" to get 3 minutes of help if they got stuck trying to do something.  I let my 8 yr old get a bonus second 3 minutes since she was the littlest.


It was incredible watching them put so much effort into something.  


Everyone took their time and really focused on what they were doing.  They spent an entire afternoon making them.  


Not only did they have a blast doing it, but it was a great learning experience - they had to follow directions, work as a team and individually, problem solve when things didn't go as planned....


They also got to try out lots of tools, techniques and baking materials they'd barely even noticed before.  Developing actual skills too.  When they would ask me to make some elaborate cake they had no idea what went into it.  Now they've got first hand experience and recognize it's not as easy as it looks. There's also a new-found appreciation of the bakers on the show and how difficult their challenges actually are.  The best part is that they enjoy the making more than being proclaimed the winner or getting a prize.  It's been an awesome summer activity and we can't wait for the next round!   


Friday, March 1, 2013

Sew Can Do's YUM Food & Fun Magazine Debut


Today I'm proud to share that I'm in the latest issue of YUM Food & Fun Magazine!!

This quarterly magazine is full of fun, food-related projects & products, recipes and party ideas that are fabulous for kids.  They pack an enormous amount of great content in each issue, so it's a goldmine of goodies for us crafty types.  I'm a contributor to the "Cool Ideas" of the new Spring 2013 issue, currently on newsstands.  


I was asked to share my popular sculptable frosting and some all new spring-themed designs using it:


I also show how to make my "peeptastic" spring chick, plus some handy tips & tricks for making sculpted frosting look awesome.  


It's a really fantastic magazine for anyone who loves food, crafts & kids.  Loads of meal ideas, recipes, things kids can do & more.  I'd say it was awesome even if I wasn't in it! These are just some of the other great things you can find inside:


And they've got lots of good stuff on their website too.  I'm very honored to be part of this issue:)
I Was Featured 
You can find YUM Food & Fun at select Barnes and Noble, Target, Wal-Mart stores and on newsstands.  You can also subscribe to it here.  I hope you'll go check it out!


Tuesday, February 12, 2013

Little Love Cakes: Baking It Cute With Minimal Baking Skills


Pretty, tasty-looking treats are so fun to oogle.  To make?  Well...that depends.  Not all of us are blessed with the skills - or the time and budget to get the fancy details perfect.  But that shouldn't stop us.  I feel like I'm very hit or miss with my decorating skills, but I've figured out a few sure-fire ways to get good enough results to be able to "bake it cute".


Use fun molds.  Shaped cake molds & pans give a cute base to work from with minimal effort.  There are a lot of choices out there too.  To make my sweetheart cottage cakes, I used this mini-house silicone mold (from Wholeport) with basic cake mix:


I just made sure the molds were really greased up and added some extra time to the baking.  The molded details are easier to just trace than trying to free hand designs.


Or if the details don't turn out or the mold is simpler, just go the outline route to define the shape more:


Simple Decorating Gear. There are lots of fancy tools and decorations out there, but for those of us short on time & $$ you can still do big style with a small amount of stuff.  For my Love Cakes I used canned frosting, a Valentine's themed sprinkle set from the grocery store and some cheap, striped cupcake liners from Ikea at Christmastime (remember those from my holiday soap gift sets?).


Think Cheap.  I also go basic with my pastry bags: zip top quart size freezer bags.  Just snipping off the corner and then sticking in the tip assembly is easy & cheap, scoop in some spoonfuls of frosting and you're good to go.  When done, just remove the tips and toss the bag.  Especially handy when short on clean-up time.


Get A Great Tip.  I've found the small round and star shaped tips to be pretty versatile and easy to use, even when you've got no decorating training (ahem me).  Going a little wavy with a star gives nice scalloped shapes like this roof top:


Swirling the same tip on a cupcake and adding some sprinkles/nonpareils looks really nice too.  It's pretty hard to goof-up, so even when you've got kids underfoot or just have a couple of minutes, they'll turn out right.


When In Doubt, Candy It Out.  I'm not so hot at doing tiny details with a pastry bag, so I just do the basics in frosting and then add some colorful candy or shaped sprinkles.  Using them as accents on the roofs and sides of the houses gave them a nice Valentine's feel without worrying I was going to wreck anything at the end.  It must have worked, because I had 3 kids and a husband  leaning over my shoulder waiting to eat these as soon as the pics were taken.  

Do you have any tips, tricks or ways you decorate goodies?  
Share them in the comments!

I'm also sharing this with my FAVE LINK PARTIES.
Click HERE to check them out!

Thursday, May 3, 2012

Felt Woodland Cupcake Wrappers Tutorial by the decorated cookie


Today we have a very special guest tutorial from the fabulous Meaghan of the decorated cookie. She is the master of all things sweet (and the author of the amazing book, Sugarlicious).
We decided to swap our craft hats this week with Meaghan doing a fabric craft and me doing a treat that will be make the perfect project pair.  You've seen my treat, so now see Meaghan's sweet felt idea:

Hello dear Sew Can Do readers!! Thank you to Cheryl for letting me visit again.   I'm usually all about sweets over at my blog. Needles prick me and thread gets tangled in my house, so it's a rare day I go for a piece of fabric. But Cheryl's clever, sculptable frosting figures--a perfect fit for my blog, by the way-- inspired these woodland cupcakes, and her crazy sewing skills push me to take tiny steps into the crafty world of sewing.
  
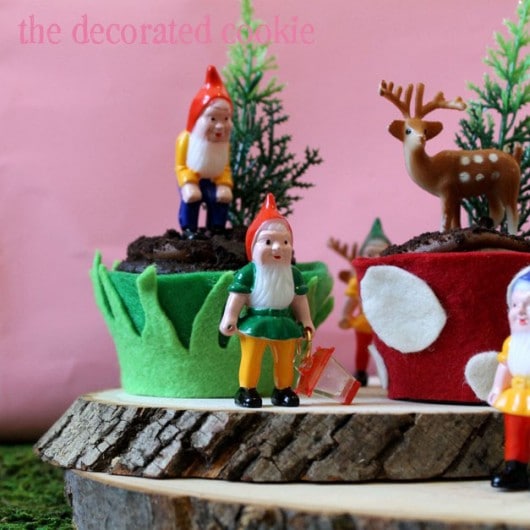
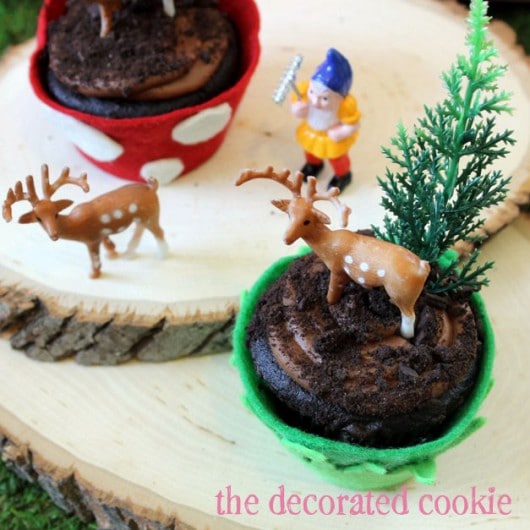
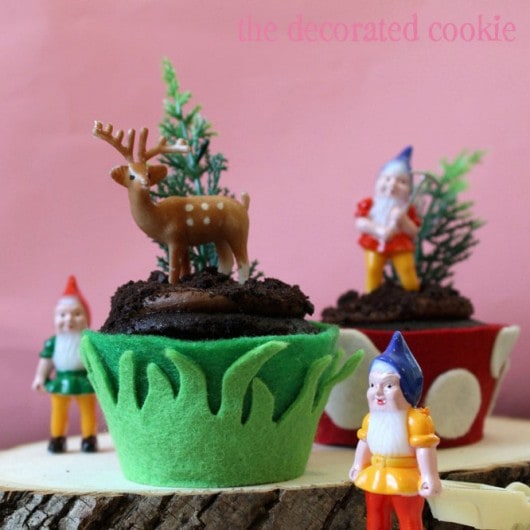
Like many, I find magic in fairies and gnomes and toadstools and forests. When I spotted Cheryl's frosting figures, I immediately pictured a cupcake woodland with her sculptable frosting as toppers. So I pulled out some felt, some glue and scissors and made some wrappers for my woodsy cupcakes. As a stand-in for the edible version, I bought these gnome, deer and evergreen tree cupcake toppers from the Layer Cake Shop. I made chocolate cupcakes, topped with chocolate buttercream and crumbled, chocolate cookies, and popped them in the wrappers.


to make woodland cupcake wrappers
 
you will need*
felt (two shades of green, red and white)
cupcake wrapper template
paper
sharp scissors
glue
cupcake toppers (or, Cheryl's toppers)

 *A good quality, sturdy felt is best for wrappers. I got mine from Wool Felt Central. Because felt can be a pain to glue, a tacky glue is best. For the cupcake wrapper template, there are plenty online (such as HERE at Skip to My Lou), or just copy the one found at the back of Sugarlicious, since I'm assuming you own Sugarlicious.

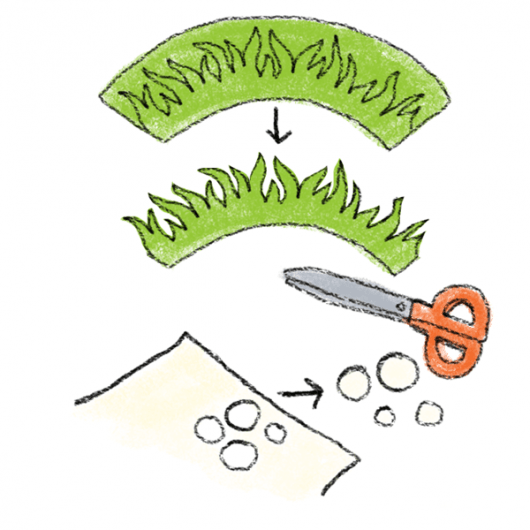
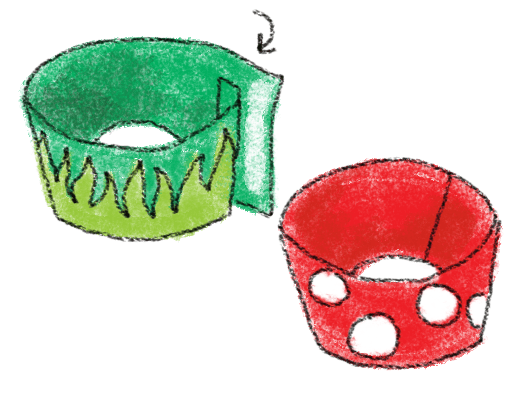
step one: cut out the felt Print or trace the cupcake wrapper template on a piece of paper, cut out and use as a template to cut out felt. Either pin the template to the felt, or use a pencil or sewing pen to trace on the felt. For each grass wrapper, cut out one dark and one light green. For each toadstool wrapper, cut out one red.   
step two: cut out the embellishments For the grass wrappers, take one of the shades of green and cut out grass as shown. For the toadstools, cut out circles in various sizes from white felt.
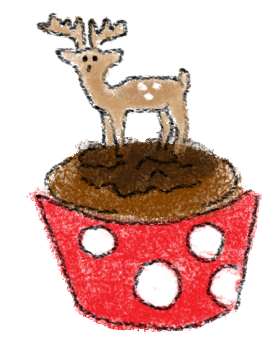
step three: glue it all together Overturn the grass felt and dab glue all over the bottom and each of the blades. Carefully layer over the other shade of green cut-out wrapper and press. Let dry. Glue the white dots on the red cut-out wrapper, and let dry. When dry, dab glue along one end of the wrapper, overlap the other end, press to seal, and let dry completely.
 
step four: add your cupcakes Pop in a frosted cupcake and add your toppers. To make the edible, sculptable frosting toppers, check out Cheryl's guest post from Tuesday or visit Sew Can Do.
   
 Thank you, Cheryl, for letting me visit today!! meaghan 

Thanks for sharing this super sweet idea Meaghan:)


LinkWithin

Related Posts with Thumbnails