Showing posts with label Tasty Treats. Show all posts

Thursday, October 31, 2013

Heathy Halloween Snacks: Corn Muffins, Cheese Ghosts & Ice Screams


Halloween is here!  Since tonight the kids will be getting plenty of treats I wanted to avoid getting sugar happy during the day, but we still need to celebrate.  So I whipped up these healthy snacks so we could be festive and not go into sweets overload:  Cheesy Ghosts & Corn Muffins and Ice Screams.

I adapted a cornbread recipe from my childhood Better Homes and Gardens New Junior Cookbook to make some tasty corn muffins.


1 cup frozen corn
1 cup cornmeal
1 cup flour
1/4 cup sugar
1 Tablespoon baking powder
1 teaspoon salt
2 eggs
1 1/4 cup milk
1/4 vegetable oil

Thaw the corn.  Mix the dry ingredients in a large bowl.  Beat eggs in a small bowl, then stir in the remaining wet items.  Add corn and egg mixture to dry ingredients and stir until blended.


Fill each muffin cup two-thirds full and baked at 425 degrees for 20 minutes.


I used these greaseproof Night of Halloween muffin cups.  They worked great.


To decorate my savory muffins, I used this mini stamp cutter to make some little ghost cheeses:


The stamp pressed in the face details (and made it super easy to remove the cheese from the cutter).  I attached them with toothpicks so they could "float" over the spooky town cups.


And for a healthy Halloween drink, I made some fruity ice cubes by mixing Ribena (blackberry drink concentrate) with water in a fun face silicone mold:


They turned out to be a real scream;)


Now we can enjoy some treats tonight and the kids won't be bouncing off the walls or in a sugar coma before we get started.  I hope everyone has a safe & Happy Halloween!



I'm also sharing this with my FAVE LINK PARTIES.
Click HERE to check them out!

I was not financially compensated for this post.  I selected items from my Sponsor, Wholeport, to use as I desired & review.  The opinions are completely my own based on my experience.   For my complete disclosure policy, click here. 

Friday, June 14, 2013

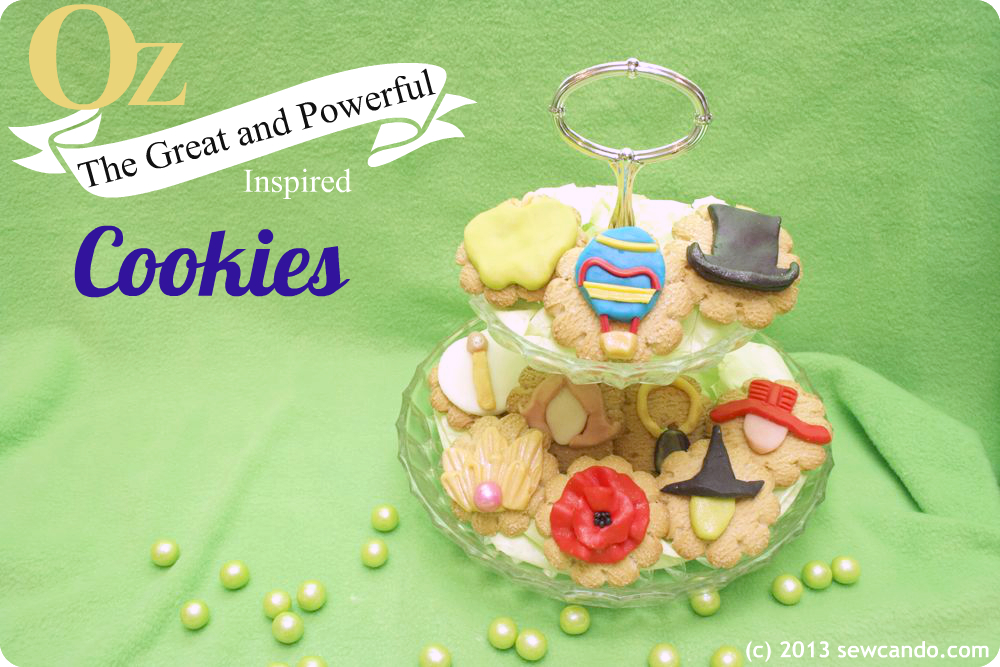
Oz The Great and Powerful Inspired Adventure Cookies


Today I've got a special treat I'm very excited to share: my Oz The Great and Powerful Inspired Adventure Cookies.  I received an advance copy of the Blue Ray Combo pack for Oz the Great and Powerful and was asked to create a project inspired by the movie.  It was a lot of fun because it has all my favorite things - a treat, a fun movie and a crafting challenge rolled into one!


I have to say I was really wowed by the visuals of Oz.  The scenes and effects really were beautifully done and there's an interesting assortment of characters. That made it fun to come up with some sweets that explore the land of Oz.  By using my go-to treat ingredient, modeling chocolate, and a few basic tools, it was easy to sculpt up some of my favorite elements from the movie.  And now you can too!


You'll Need:

- Package of white chocolate wafer melts
- 1/2 cup corn syrup
- 1/2 cup cornstarch
- Flat sugar cookies
- Cookie/fondant cutters (circle, oval/egg, triangle/carrot)
- Rolling pin, butter knife, small paintbrush
- Gel food coloring
- Optional decorations: edible pearl dust, rainbow Twizzlers, pearlized gum balls

To make the easy-to-sculpt modeling chocolate (aka candy clay), melt one bag of chocolate melts in a Pyrex container in the microwave according to package instructions (usually 1 minute on half power).   


It may not look like it's completely melted, but if you stir well it will get smooth.  Fold in 1/2 cup of corn syrup until it starts to come together like a dough ball, then spread out about 1/2in thick on cling wrap covered cookie sheet and cover with more cling wrap.

Let it sit for at least 3 hours to set, then knead with hands until soft like play dough.  Now you're ready to get decorating!  Separate modeling chocolate and make the various colors with a drop or two of the coloring gel.  I did some red, blue, yellow, black, lime green, tan and peach.  Sprinkle some cornstarch onto a smooth work surface and roll out to start modeling.


To make Glinda's crown I used a pointy shaped cutter (a carrot) and then pressed indentations with my paintbrush handle.  After layering several rows, I brushed it with pearl dust to give it some shimmer and finished it with a pearlized gum ball.  


The matching wand was just white circle cut background with rolled out wand of tan and pink shimmered up to make a good witch cookie pair:


To make my Theodora & Wicked Witch, I used an egg shaped cutter for the faces: 


And cut out hat shapes with my butter knife, using a toothpick to add some detail:


The Wizard & his sidekick Finley's hats were also knife cut, but with some rolled pieces added to build them up and a swish of pearl dust to accent them:


Emerald City Witch Evanora's apple was a circle I indented a bit at the top & bottom and added a little rolled stem.  To get the mottled look of her magic necklace I mixed a bit of the green & black together to marble it and then cut out an oval.  Pearl dust on the chain and the enchantment is complete:


My absolute favorite look was the little China Doll.  


She was so cute and the details of her porcelain were a cool effect, so I had to make a cookie for her too, by cutting a bell shape for her peachy hair and outlining the hairline:


Then cutting another little white oval face and putting them together made her complete.


To make a pretty poppy flower I just cut out two circles and pinched them in the center and waved them up a bit.  Rolling a few tiny black circles added the center detail and a few brush strokes of shimmer for a little magic:


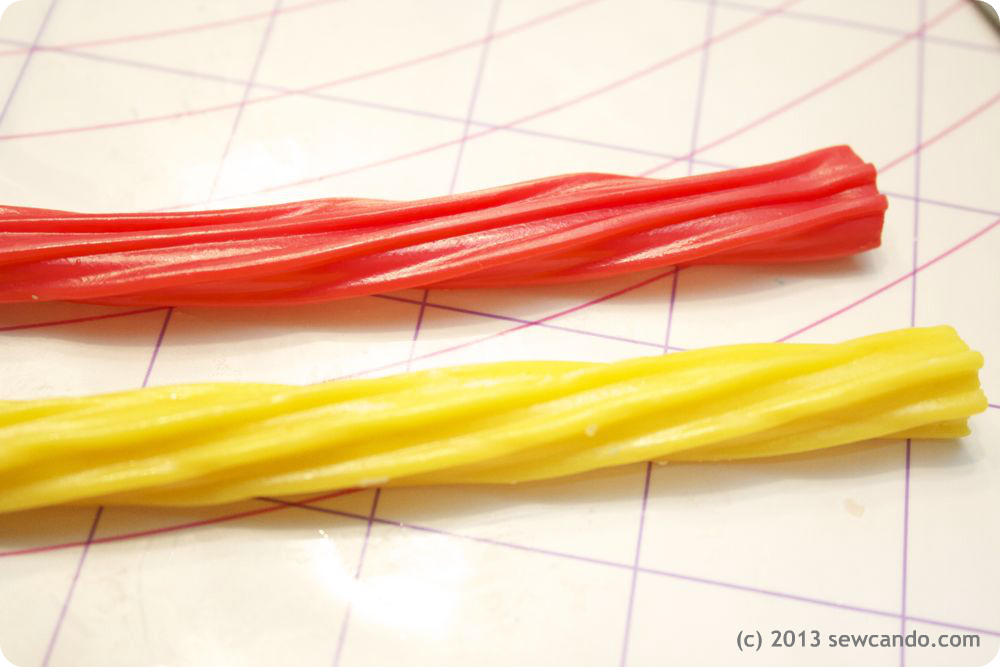
And for Oz's hot air balloon, I cut up some red & yellow Twizzlers into thin strands,


then bent those into stripes & waves and pressed them into place on the balloon:


Our family really enjoyed watching this and the kids could not wait to dig into the cookie characters and take a little edible adventure into Oz.  It definitely makes for a more magical snack!  


Oz the Great and Powerful Blue Ray Combo Pack is out now & there's a Pinterest Sweepstakes too.  Find out more on:


This is a sponsored post written for Disney and Blueprint Social, for which I received compensation.  The opinions are entirely my own, based on my own experience.  For my complete disclosure policy, click here. 

And you can find more fun Oz-themed projects to inspire you here:


Thursday, March 21, 2013

Sweet Sugar Treats Anyone Can Make For Spring!


Earlier this week I shared a sugar-free Easter idea with my Plush Chocolate Bunny, but today is all about using the sweet stuff since I am a total candy addict.  The great thing about these little goodies is they are easy to make, keep for ages and have lots of uses.  

Now let's sugar it up!!

First up are royal icing spring flowers.  They look so lovely & it's easy to make a lot really quickly.  I've piped royal icing on panoramic eggs in Easter's past, but this time I made some little florets. My fab sponsor Wholeport let me try out this cool set of icing tips to make them.  I loved how many different specialty tips were included and that they came with their own case.  No more sifting through baggies trying to find the right one like I used to do!  


A few are extra wide, so I'll need to get a bigger coupler, but several fit the ones I already had and I love the results.  Even though I'm a total no-skill novice, I was able to make some shapes like a decorating boss:


It was really easy too - using an electric mixer, blend 2 cups confectioner's sugar with 3 tbls water and 1 1/2 tbls meringue powder.  Add a drop or two of gel food coloring and you're good to go.  I spooned the icing into a pastry bag (aka ziploc freezer bag with corner cut out) and just held the pastry bag straight down right on top of my waxed paper-covered cookie sheet and squeezed until a nice shape appeared on the paper.  


Then I pulled it up fast and was left with a lovely star, or floret, depending on the tip:


Adding some edible pearls to the centers gave a more polished flower:


Playing around with size and speed of pulling up the bag and gave some different looks too:


I let mine air dry for 24 hours and then they were nice and hard to eat as little treats for Easter or to save for decorating cupcakes & cakes down the road.  2 cups of icing makes LOADS, so I've got a nice shaped icing stash now:)

Next up are sugar shapes.  These look lovely on baked goods, served with tea or just a special treat.


To make them just mix 2 tablespoons of water into 1 cup of granulated sugar and stir until it feels like wet sand:


Turn it out onto a flat surface and then press down with a bowl or cup bottom to form a "piece".


I used my trusty spring fondant cutter set from last year to make the shapes and then slide a pastry cutter underneath so it would be easy to transfer them to a parchment covered cookie sheet without falling apart:


I laid them out on the cookie sheet and baked in the oven on 200 degrees Fahrenheit for 10 minutes.  


I let them cool and then they were nice & hard and ready to decorate with royal icing:


I used some giant candy buttons as the centers on my flowers (using the royal icing as the glue):


And for splitting up a big package of store bought Easter cookies, I made some cute single serving versions with these little treats bags.  I got these from Wholeport too - I love the little message they have on them "Because I want to see your face with a smile".  Just so cute!


And the backs are cute too, since there are matching stickers to seal them up.  This makes sharing Easter treats easier.


Now we're nice & sweet for Easter and the newly arrived spring!


I'm also sharing this project with my FAVE LINK PARTIES.
Click HERE to check them out!

I was not financially compensated for this post and received some of the tools shown to review.  The opinions are completely my own based on my experience.  I am an affiliate of Wholeport.com.  For my complete disclosure policy, click here. 

LinkWithin

Related Posts with Thumbnails