Showing posts with label Shamrock Shirt. Show all posts

Tuesday, March 15, 2022

Fun & Festive Heat Transfer Vinyl St. Patrick's Day Shirts


Be ready to wear your green and feel festive this Saint Patrick's Day with some quick & easy DIY Heat Transfer Vinyl St. Patrick's Day shirts.  I've made it even easier by offering the design files for both of them!

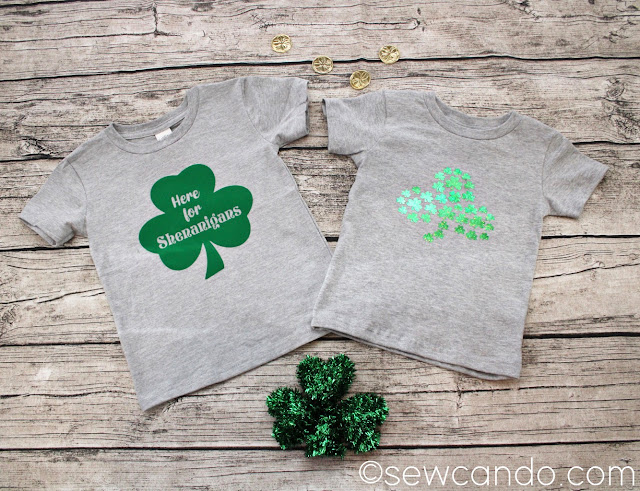
There's something for the little (or big) rascals:

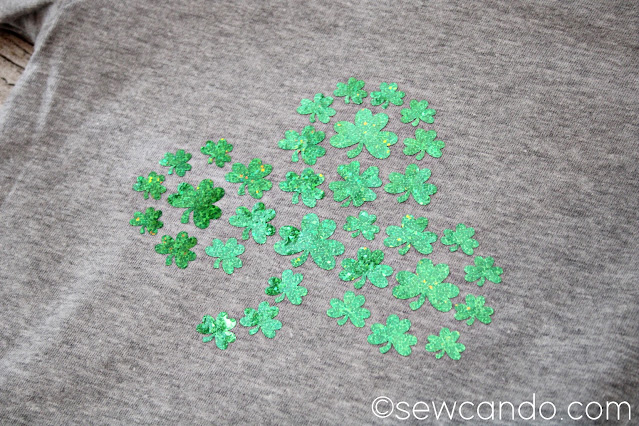
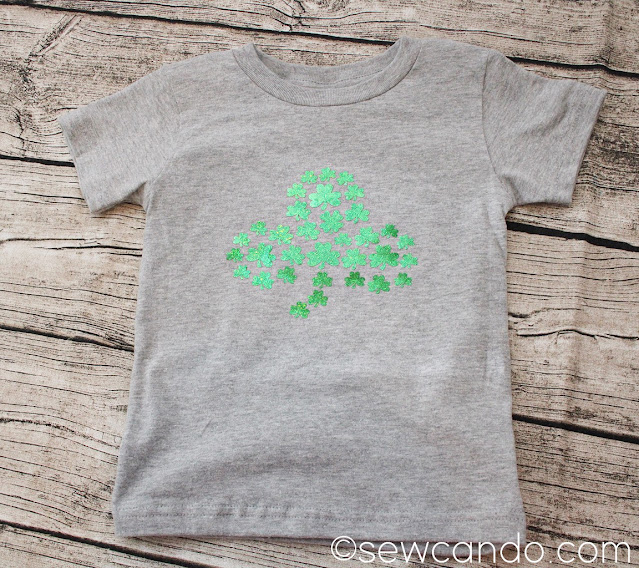
And a whimsical search & find themed Shamrock of Shamrocks design.  

Can you find the 4 leaf clover?

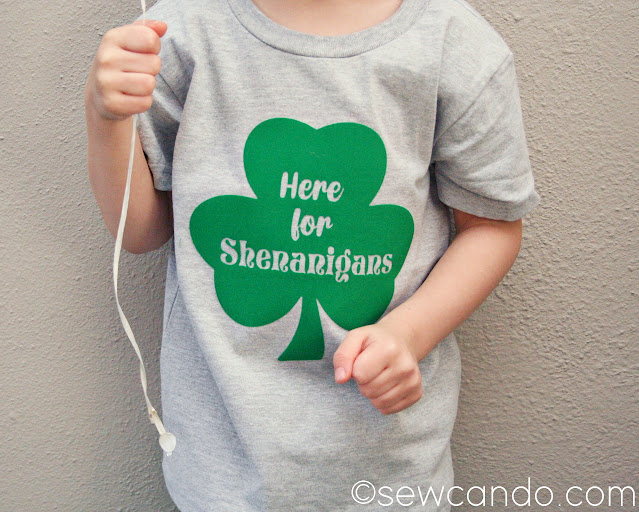
As I've mentioned before, I'm a big fan of "holiday" themed wearables that you can still wear well after the actual day is over and these fit the bill for that too.

I kicked it up a notch too by using some specialty types of HTV: my personal favorite type of HTV, flocked, and one I'd never used before, holographic sparkle.  This was an eleventh hr project idea so I had to grab what was available locally at a craft chain store brand rather than order the heat transfer vinyl online, which is what I usually do.  I find the online ones are always more economical and higher quality than the big box stuff.  I wasn't sure how these would turn out so it was a bit of a gamble.

 Now, how to make them!

Materials:
- Heat transfer vinyl.  I used flocked and holographic glitter types from The Paper Studio (Hobby Lobby brand)
- Blank Shirt (unwashed)
- Cutting machine (I used my 6yr old Cricut Explore)
- Heat Press (I used my new HTVRONT Press - see the review HERE) or Iron
- My FREE St. Patricks Day designs below
 

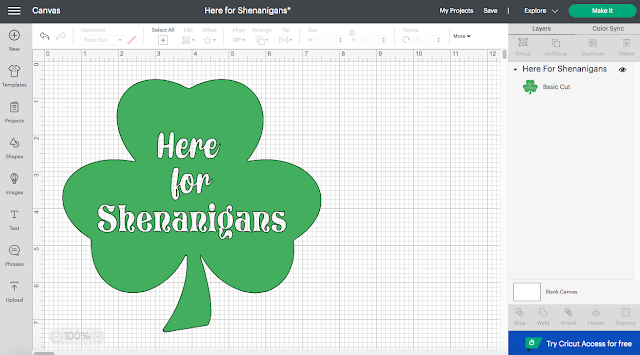
 Here are the FREE designs I whipped up.  Just right click to save each png.  


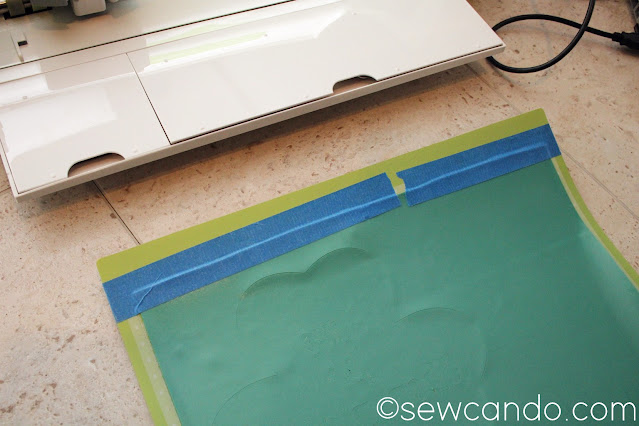
Using Cricut Design Space I turned my designs into cut files and sized them to fit my 2T & 3T sized shirts (I made them 6 and 7 inches wide, respectively).  

Then mirrored them before cutting:


 It took about a minute each to cut them out.  My real issue was each was the start of a new roll of HTV so they curled something fierce.  Since you cut them face down, the vinyl's bend was going upward, which was a real issue.  Since these specialty types aren't as floppy as smooth HTV, even using a brayer wouldn't smooth them down.  So I did some masking tape along the top edge to keep them flat on the mat, which worked great: 

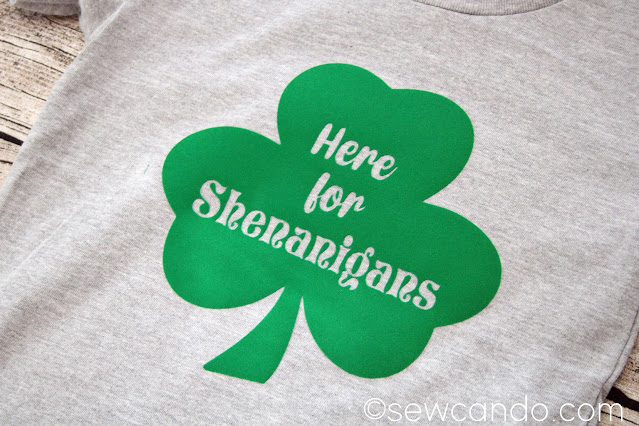
On the one with lettering, I weeded out the letters,  remembering to leave the center bits of the "e's, a's, o & g".  Then it was press time!!  It's key to check the fabric composition and type of HTV being used to make sure you get the settings right.  I read previously that it's best not to wash the shirts first - having that factory sizing in them helps HTV adhere better.  Some sites say otherwise, but I've found it helps.  

These shirts were both cotton poly blends.  I always press mine on a folded fluffy towel too.

The shirts got a 5 second preheat with the press and then I put the heat transfer vinyl on.  FYI, if you're new to using htv, you leave the carrier sheet on.  Some people even use a Teflon sheet between that & the press, but I've never needed it for the things I've done so far.  For the flocked I used my usual formula of 295F, 30 seconds front/15 seconds on back and peeling when cool, which worked perfectly.  

The holographic glitter was a different story.  The instructions inside the roll listed glitter, foil, shimmer and regular temperatures, but nothing for that particular type.  Searches online were also pretty vague.  Why would you make a product, but not explain how to use it??  

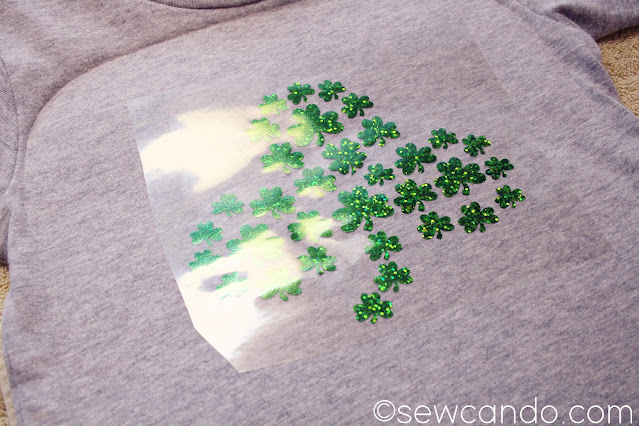
I followed one suggestion to do 330 for 30 seconds/15 seconds and cool peel.  When I started to peel away the carrier, the edges of most of the shamrocks were lifting with it.  I did another 30 seconds on the front and 10 more on the back, but it still was lifting on some.  I raised the temperature to 340 and did 20 seconds and then they seemed to stay.  I find it's usually ok to have to repress when this kind of thing happens, but you have to be careful not to go too long or too hot when re-pressing or it'll melt the htv and then it won't stick at all. 


We'll see when I wash it how well they actually adhered.  This brand seemed more brittle & plastic-y in both types compared to others I've used, so I think the quality of the HTV probably had more to do with it than the type itself.  Which was a bit annoying since it cost almost twice as much as brands found online!  The place my heat press is from, HTVRONT, is having a sale on their HTV right now and you can get rolls that are more than double the length of the stuff I got at the local chain and are STILL cheaper than what I bought!!  You can see for yourself HERE.  I'm going to try some of theirs out soon to see how it compares to the kinds I've already used and share my results when I do.

For HTV clothing care, I wait 24hrs before washing and always wash them inside out, on cold, delicate and line dry to keep the transfers nice.  I've had some shirts like this last for ages by doing all that and since I want my 3yr old's shirt to be wearable for my 2yr old next year, it's worth the extra care.  Now my littlest cuties have some fun attire that was reasonable in time & price for the upcoming holiday - and you can too!


Wednesday, March 11, 2015

Fun St. Patrick's Day Craft Ideas


Confession: I've been so eager for Spring to appear that I've not even thought about St. Patrick's Day projects this year.  I know, I'm a terrible craft blogger...or maybe I'm a genius for not bombarding you with 30 days worth of leprechauns, clovers and everything green covered projects.  I don't know about everyone else, but the constant stream of holiday projects everywhere can really zap my excitement over the occasion.
  
Yet, I don't want to totally neglect the crafty spirit of the holiday, here are a few past tutorials that celebrate green and rainbows St. Patrick's Day-style:

Maximize that Irish clover luck with my Plenty O'Luck Shamrock Shirt: The giant appliqué shamrock is made from loads of smaller clovers for a fun, textured feel: 


Remember my Scented Flower Pot Pincushion from last week?  I used the same flower die to cut these!   And who couldn't use the extra luck from so many four leaf clovers?  


The Rainbow 'Stache Bag.  A roomy, deep tote that shows off a reverse applique (meaning it's sewn under a cut out shape instead of just stitched on top).  The rainbow is made with some bright solids, so even if you're not a mustache fan, you can rock a colorful looking applique with this how-to.


For edible crafts, make some of my Candy Button Clovers. They take minutes to make and add some festive fun:


So whether you go all out with head to toe green, decorate with rainbows or just have a quick nibble of a lucky clover - here are a few projects that'll celebrate the holiday crafty-style;)


Tuesday, March 12, 2013

Past Holiday Projects: The Plenty O'Luck Shamrock Shirt


Lately I've spent most of my time on spring-themed projects, family birthday/wedding commitments and cleaning up our garbage dump lovely home for Easter.  Poor St. Patrick's Day has kind of gotten neglected this year.  When I pulled this shirt out of the closet for my little guy to wear this year it reminded me how much I loved this project, so I thought I'd re-share it.  Everything old is new again, right?  I didn't totally forget you St. Patrick's Day!

I created this shirt especially for my 6yr old son, Declan.  Even though we're not Irish, we gave him a very traditional Irish name, so St. Patrick's Day is a special day for our little guy. Now he's got something special to help celebrate: the Plenty O'Luck Shamrock Shirt.


The applique shamrock is made from smaller shamrocks for a fun, textured feel.  And who couldn't use the extra luck from so many four leaf clovers?  Here's how to make it - 

You'll Need:
- White t-shirt
- Green felt
Sewing Notions (matching thread, pins, shears, sewing machine, ball point needle, disappearing marker)
- Optional: Cuttlebug/die cutter machine & 4 blossom flower die, hand sewing needle

First draw out the shamrock design on the shirt.  I used a glass and traced it with my disappearing marker to make four connecting circles like this:


Next the shamrocks need to be cut.  I cut about 55 shamrocks that were 1.5in in diameter. This can be done by hand, but using a die cutter like my Cuttlebug makes this go A LOT faster.


I used a die for a four petaled flower and just rounded off the tips:


I also hand cut a curved stem out of felt:


Lay out the shamrocks, starting at the outline and layering edges until reaching center, so the shirt can't be seen underneath:

Pin shamrocks into place and add stem, tucking the top end under the clovers:


Stitch the stem into place close to the edges:


Now there are two options for sewing the shamrocks in place with matching colored thread:  
  • Hand sew each one on with a few stitches in the center.  
  • Machine stitched with ball point needle.    


I wanted these to really stay on well, and do it quickly, so I used my machine.  Slide the front of the shirt over the free arm and starting at the outer edge of one side, stitch 3 straight stitches & backstitch over them on each shamrock.


It didn't really take that long and the effect is so worth it.  Doing it this way gives a nice layered look that isn't too "patterned".  I also added a single light green clover in the center for a little extra detail:


Perfect for adding a bit of extra luck to the day!  


I'm also sharing this project with my FAVE LINK PARTIES.
Click HERE to check them out!

LinkWithin

Related Posts with Thumbnails