Showing posts with label My Little Pony. Show all posts

Wednesday, March 18, 2015

Easy Convertible Sleeping Bag Tutorial (With A Hidden Surprise)


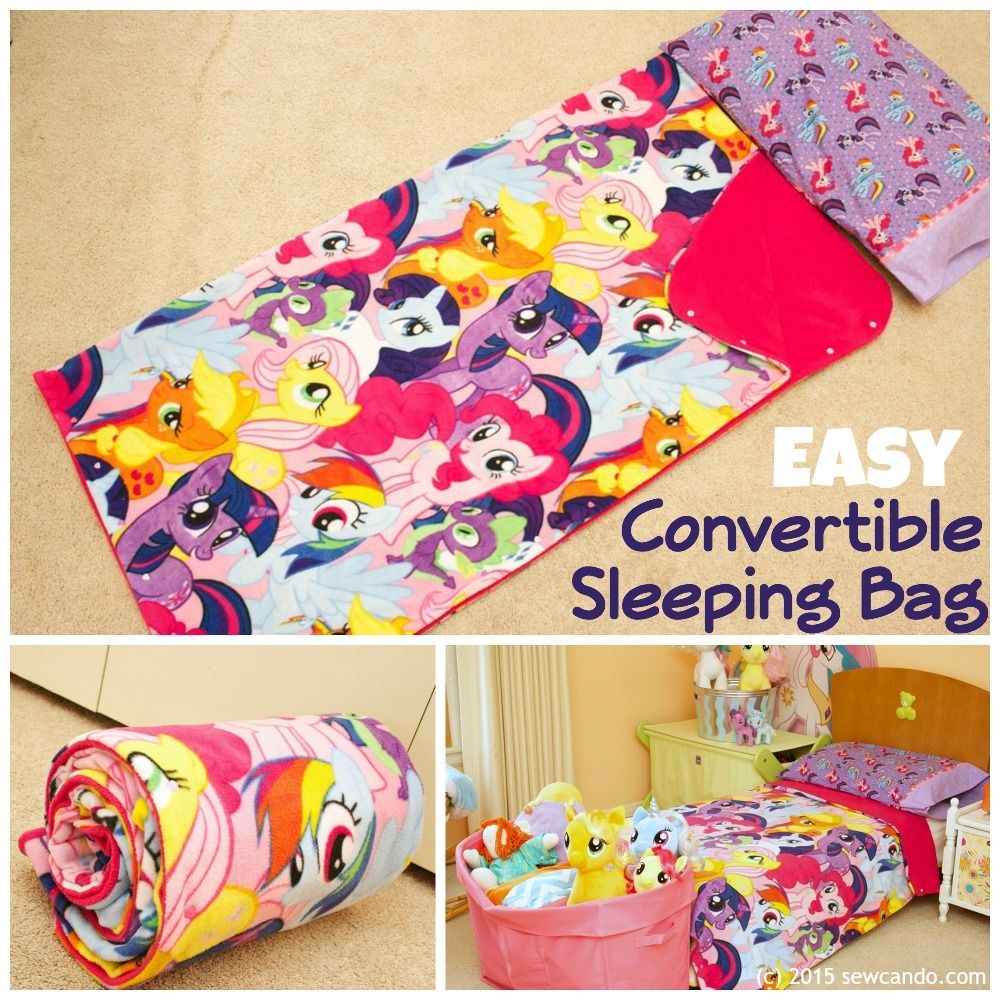
Today I'm sharing a quick project that's simple enough for a beginner to do and is a big hit with the kids: My Easy Convertible Sleeping Bag.


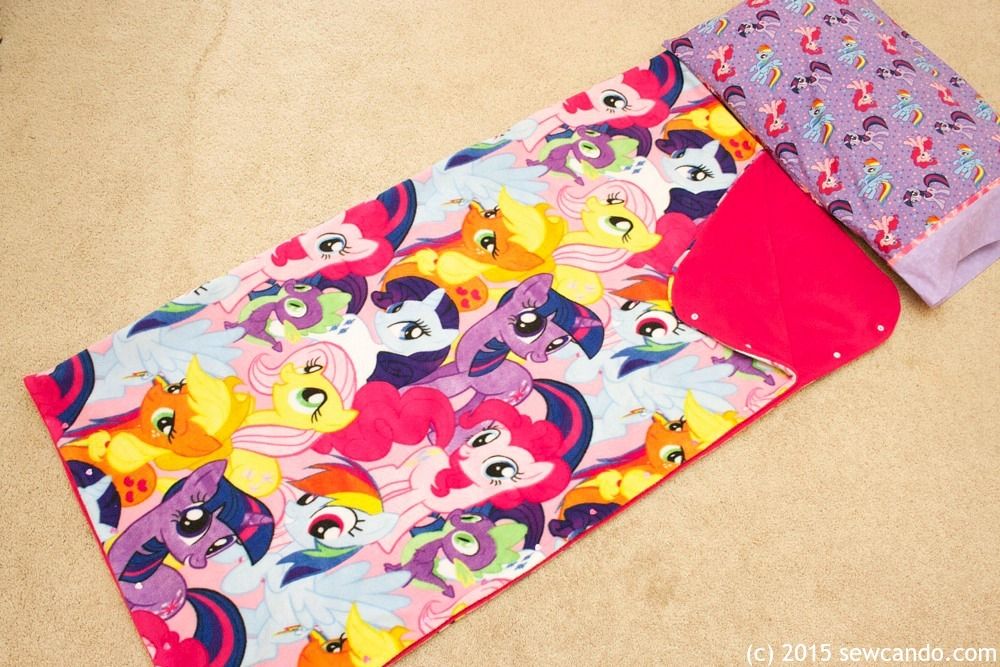
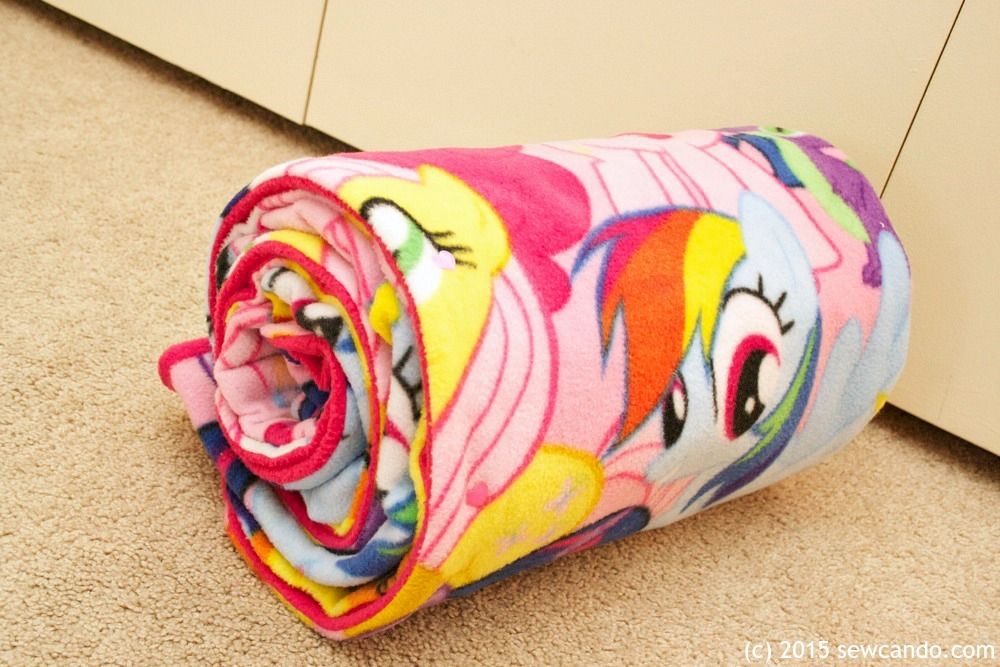
It's just the right size for kids to be comfy, but can also be opened up for a bed-sized blanket thanks to it's snap closures.  No tricky giant zipper to install (or for the kids to get fabric caught in). Converting it from bag to blanket is literally a snap!


Anti-pill fleece makes it cuddly and warm, but not too heavy to roll up small to store:


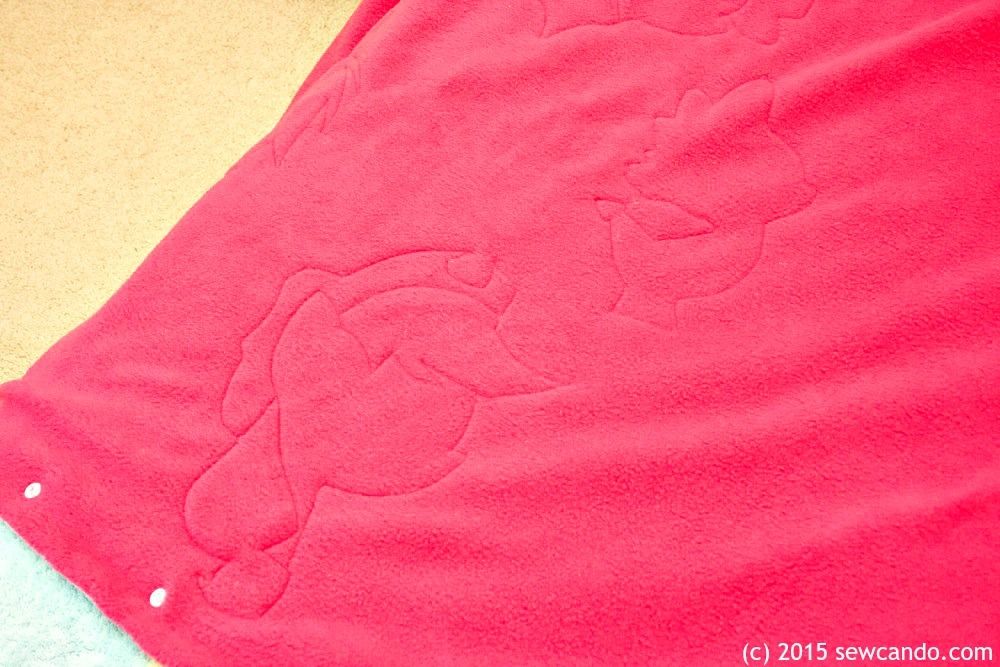
And there's some hidden detailing on the solid side so it's reversible, but not boring:

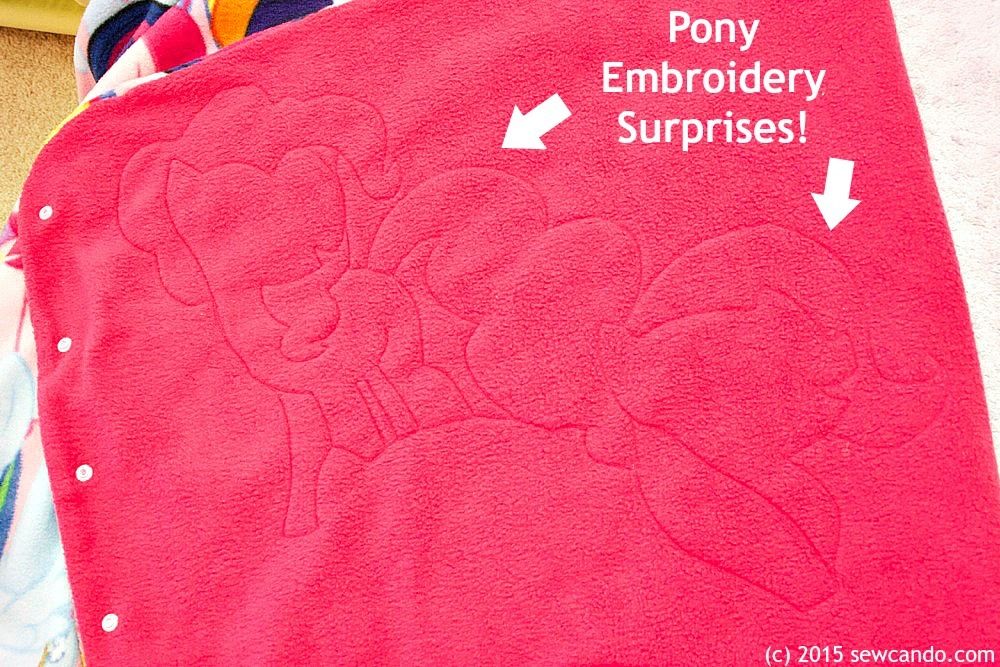
Hey look - It's Pinkie Pie and Fluttershy!

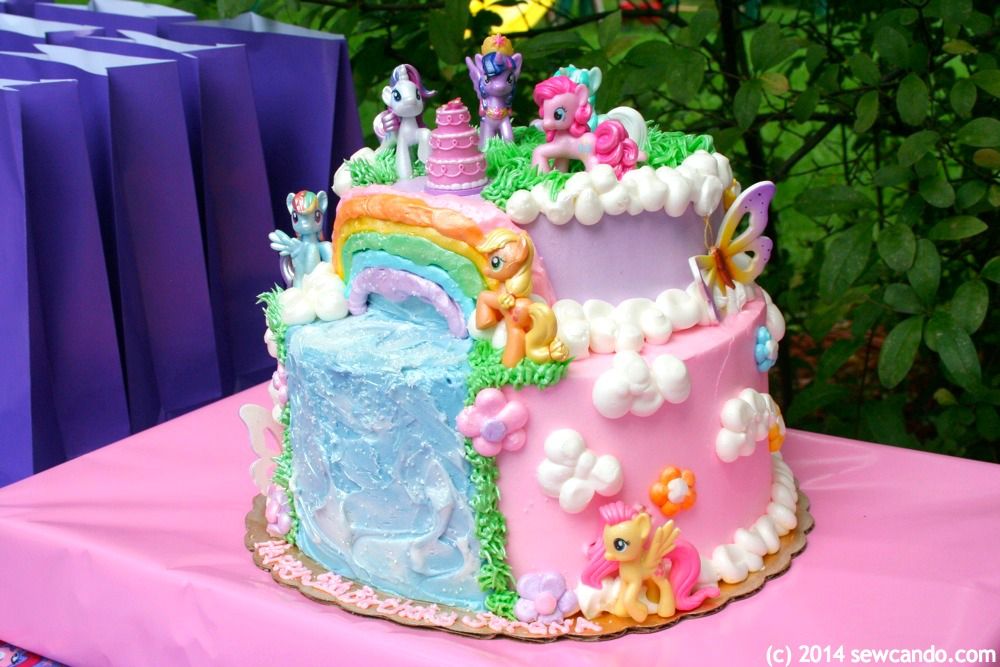
Project Background: I bought this fabric for my My Little Pony fanatic 5 year old.  It had all of the "Mane 6" ponies AND Spike the dragon, so I knew it would be much loved.  Since the print was really large I bought enough to make a blanket, but then I kept postponing doing anything (aka Fabric Hoardingbecause I didn't want it to be just a boring rectangle.  Since I started my fabric hoarding reformation a few months ago, I finally decided it was time to put this to use instead of staring at it on the shelf and just piling more fabric on top of it.


~~Time to Make The Sleeping Bag!~~

Materials:
- 1 1/2 yds of each anti-pill fleece (1 print, 1 solid)
- Pins, rotary cutter, hand sewing needle, matching color thread, pinking shears
- 19 Plastic snap sets + setting tool (I use a snap press)

I started by folding my fabrics in half, widthwise and stacking one on top of the other.  This makes cutting them exactly the same a breeze.  If you wanted a bit of insulation/loft, you could also cut a layer of batting, but since ours is more for snuggling indoors than camping, I left it out.


Then I used a small plate to round off the corners, cutting with my rotary cutter.


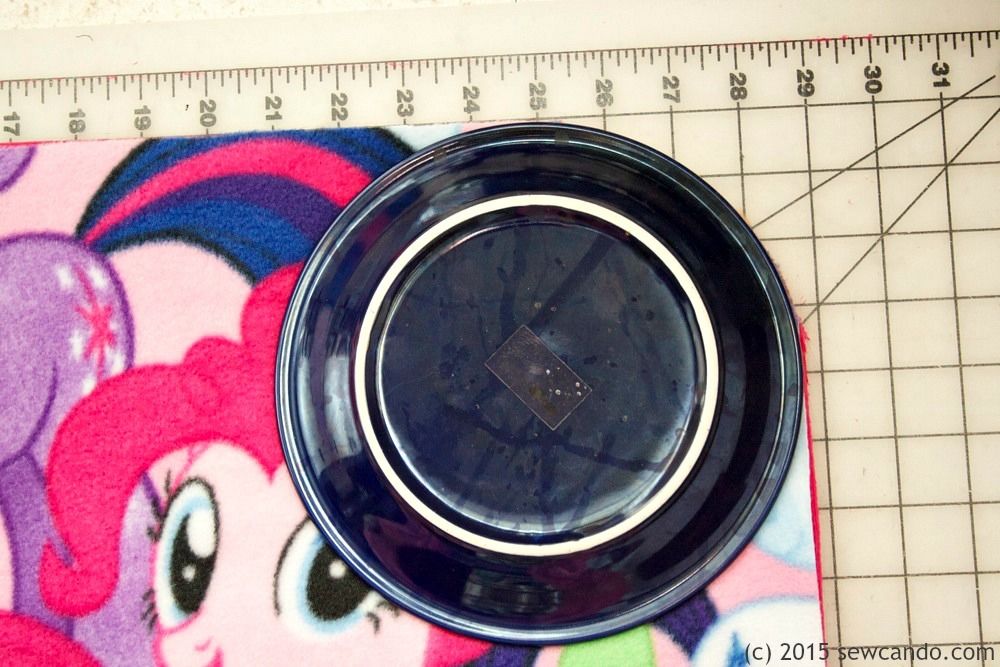
I opened up my fabrics and, with right sides facing, pinned them together all the way around.  Then stitched with a 1/2 inch seam allowance, leaving a 3 inch gap at the bottom edge for turning.  I trimmed the curves with pinking shears close to the stitching:


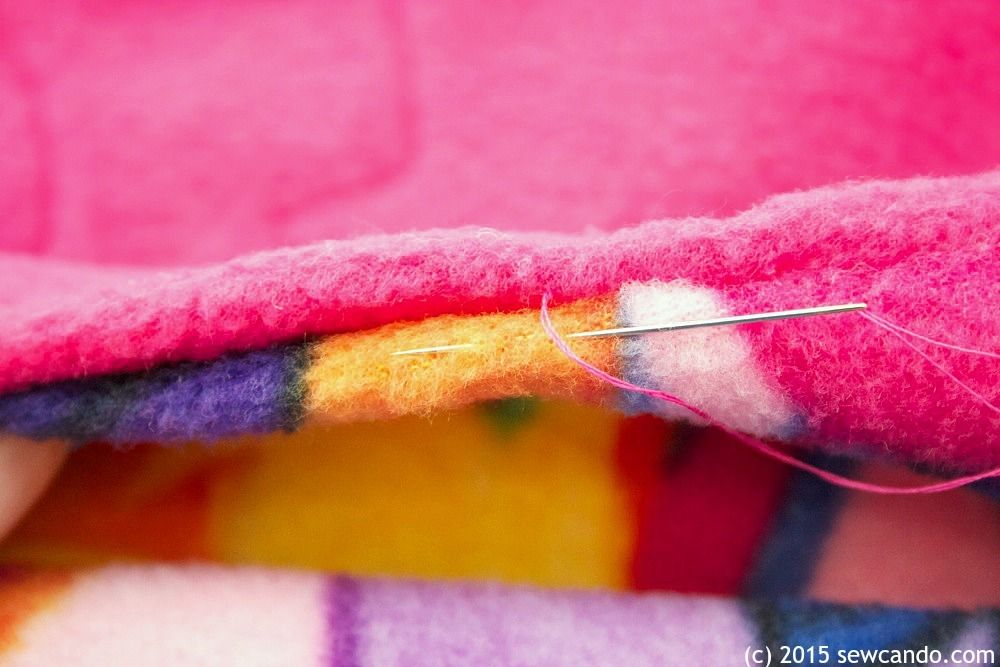
After turning, I slipstitched the gap closed.


Now, the hidden detailing part.  I opened the blanket up so the layers were nice and flat and pinned them together around some of the characters.  


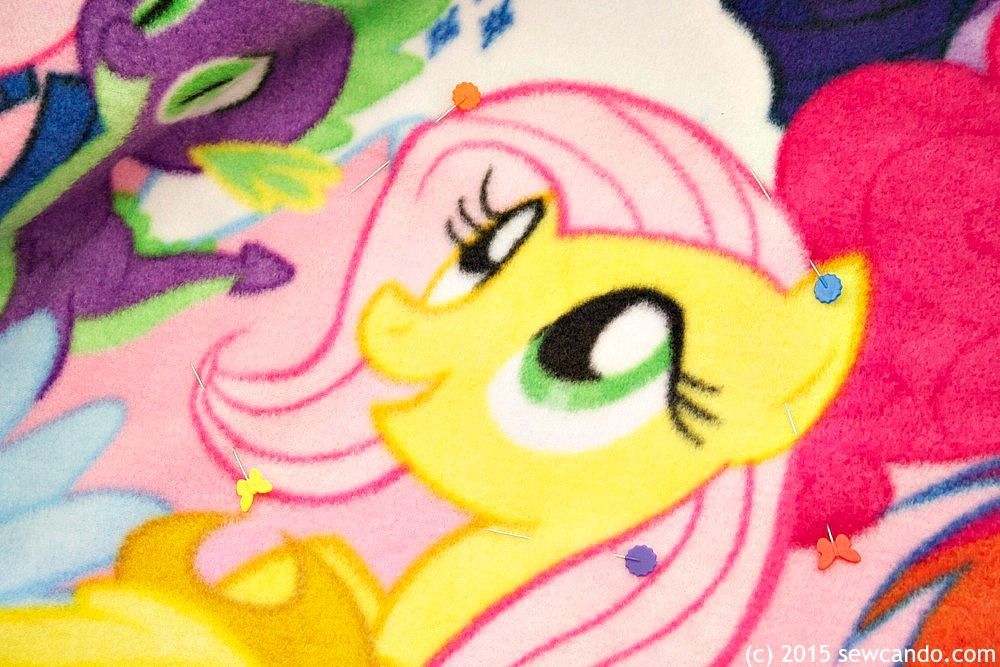
Then I topstitched around the outlines with bobbing thread to match the bottom fabric.  It can be a little tricky turning such a large piece and not bunching the fabric, so the pinning is key.


I did just the silhouette of each of the characters, so on the reverse we had these:


A little Rainbow Dash

It definitely keeps the theme going on the solid side, but in an understated way:


Adding Apple Jack and Spike

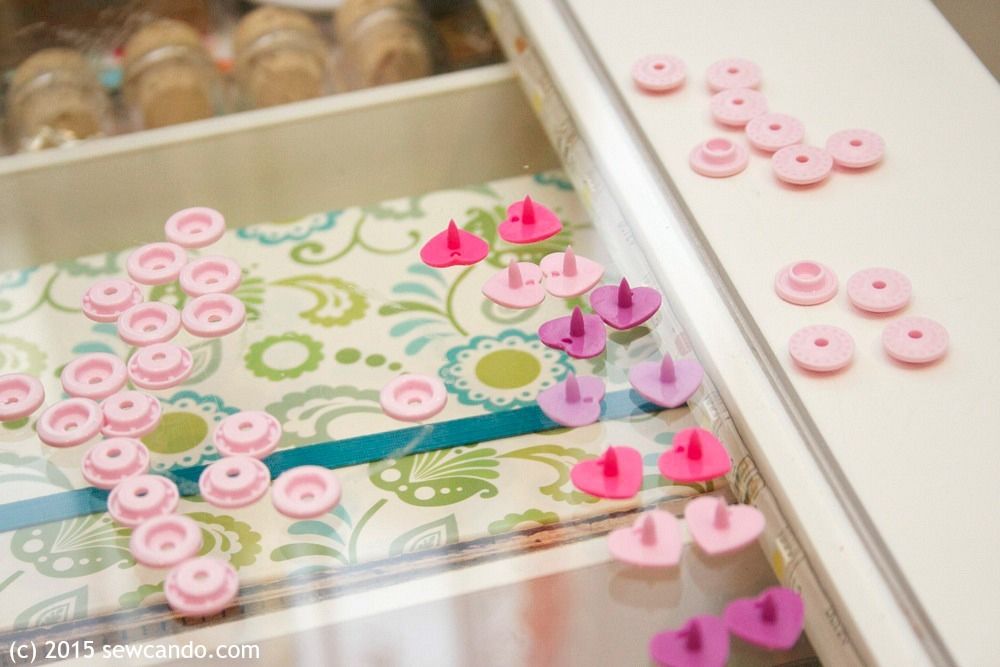
Then it was time to set the snaps.  I folded my sleeping bag in half again and measured 3 inch spacing on the open side and bottom and pinned each spot.  I used some cute heart shaped snaps from an assortment I'd bought a few months back and picked out the colors that were My Little Pony-esque.  I laid them out in pairs for the backs and fronts.  


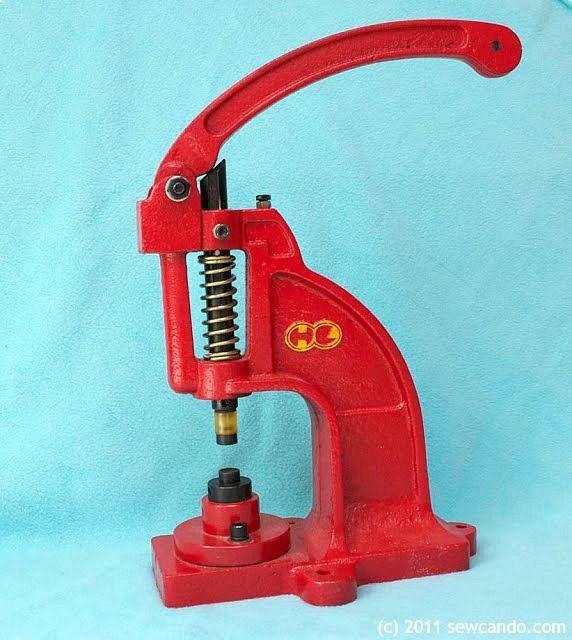
Side note: I used my snap press to set them.  It costs a little more to buy a press (rather than pliers or those kits you hammer in), but if you sew for kids, plastic snaps can become a best friend for easy closures on clothes, cloth diapers, bags, etc. and the press is a lot easier to use.  I've had Big Red here for almost 5 years and have used it loads.  Plus the snaps hold up way better than any others and look super cute.  I've got more info on how to use a snap press in my Crafty Gear 411 post here.  


I alternated the colors for a pretty pattern and set them 1 inch in from the edge:


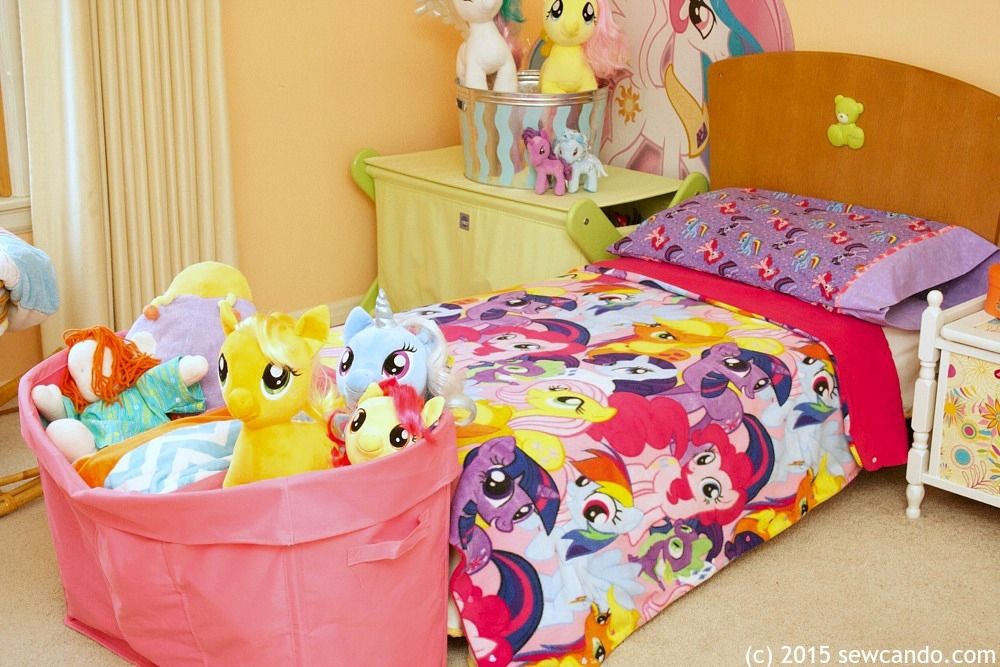
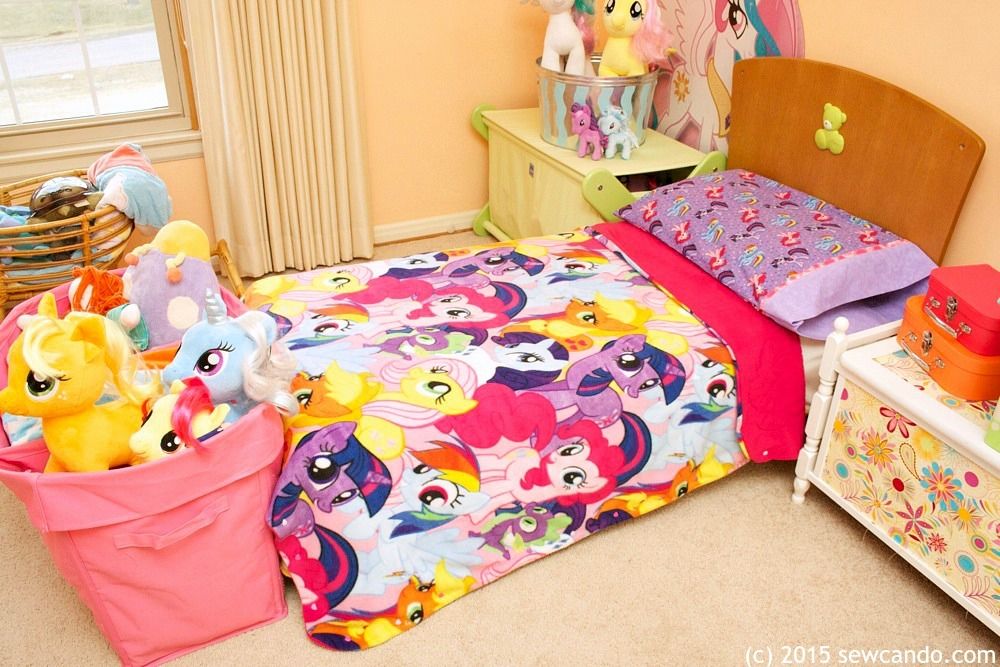
I also decided to make a matching pillowcase with some MLP quilting cotton I'd bought around the same time.  I did not want to start fabric hoarding by characters/prints, which was starting to happen with these, so this was an ideal use 'em up project.


Now my little lady has some fun My Little Pony bedding to cuddle up to every night:


And a fun sleeping bag to relax in the rest of the time:


Thursday, September 11, 2014

Our More Fun, Less To Craft, My Little Pony Party

My daughter recently turned 5 and asked if we could do a My Little Pony theme for her birthday.  To say she's obsessed with My Little Pony is an understatement, so it wasn't a big surprise.  And I'll be honest, I was relieved it was something I could easily find party gear for around our house and at most party supply stores.  For the past 4 years I went into crazy mommy crafter mode for each birthday.  I'd come up with themes that required elaborate DIY'd decorations, fanciful favors, making the cake myself and sewn-by-me matching birthday attire (you can click on any of them to see the level of insanity detail I went to):


Sure the planning was fun and it felt great to say I'd made it all, but it also meant I had to make it all.  And that was exhausting.  Truthfully, kids don't notice - or care - that you spent hours handcrafting an entire party.  Most of the adults attending don't either.  Have some general party decor, a cake & some activities and they're happy.  Usually it's just other crafters who really notice all the small, labor intensive details, so who are you really killing yourself for in DIY-ing a party?  Complete strangers? That's CRAZY.  

So I vowed this year would be fun to put together & not require weeks of preparation. As I mentioned in last week's confessional post, in an effort to be less stressed and more fun, I've been scaling back my crafting & blogging efforts.  Trying to keep things more real life and enjoyable and less of the popular "look at how magazine perfect what I'm doing looks, despite killing myself while pretending it's effortless" blog style. Let's get real - who's got spare time to maintain that faux perfection ?  I know I certainly don't!


Now my "Keep it Fun, Not Crazy" party strategy:

Since ours was just an extended family party, emailing invitations was cheap, easy to send and didn't require my horrible handwriting to be on display (seriously - even when I try to write neatly it looks atrocious and illegible).  I did a quick online search for some My Little Pony images with a transparent background and used those + a free Equestria font download to make this digital invite with PicMonkey in about an hour and for free:   


Decorating-wise, I let the party store do most of the work - there were tons of MLP-themed and matching solid colored paper products.  I didn't spend hours picking stuff out either - just grabbed it all in one go.  I've seen a lot of custom My Little Pony parties online, but kind of scratch my head at why you'd spend hours of time hand-adding pony cutouts or stickers to paper products or pay $$$ for custom printables when there's tons of cute MLP stuff already available for just a couple of bucks at every party place.  Add in a yard of MLP-themed cotton I'd found at Jo-Ann Stores (but hadn't used yet), and we were fine for table decor:


Our big splurge was ordering a couple of themed standees from an online party place.  I was just going to get one, but the husband convinced me to get both Princess Celestia (her fave) and the Canterlot Castle.  I did have a coupon code to keep it reasonable and since the kids play ponies around here on a daily basis, it's not like they'd only get the one-time use.  My daughter actually gasped in awe when she saw them outside.  Since the party, we've flattened the stands on the back so they fit against the wall in her room for double decorating duty.  She loves having them next to her bed.  Tacking the $7 pin-the-cutie-mark game poster to some cardboard on an easel added extra big scale pony flair with minimal price/effort too:


My little miss picked out her ensemble from her already accumulated pony-themed attire. Even her footwear was pony-tastic (the My Little Pony socks were found in the $1 bin at Michael's, shoes we found at Journey's Kidz months ago for under $25):


I'd made her some pony bows last year, so those topped off her all-My Little Pony appearance without me having to put anything new together:


I'd always made her special occasion cakes/cupcakes, so I figured I'd treat us both to the ease and loveliness of a local bakery cake this time around.  It made turning 5 a little more special:  


Cake by Sorella's Bakery, MI

I covered a cardboard box in pink wrapping paper about 15 minutes before the party to make a quick stand for the cake.  This also meant cutting the cake was less messy since I could just toss the paper out after and added the bonus of not getting frosting all over our pony fabric.  I told the bakery we wanted two layers, a rainbow and some flowers & clouds and they came up with this beautiful design.  It was a delicious as it looked too:


I will take credit for the idea of using some of her mini figure collection as pony props on the cake. The bakery sprayed them with a bit of shimmer to make them look more magical and also added some surprise hard sugar butterflies to the sides:


Normally I'd be freaking out about trying to perfectly decorate a cake hours before the party, so it was nice to be able to just unveil it and enjoy how great it tasted.  


I saw this unicorn sprinkle holder on Amazon and thought it would be fun as a decoration and for the kids & cousins to shake on a little extra pony magic to their cake slices.  I justified to myself that getting it would help lure them to act as helpers more often and, by extension, get me to bake more....the jury's still out on if that'll actually happen, but rainbow unicorn looks cute on my baking stuff shelf:


Activity-wise we did a little pin-the-cutie mark on Pinkie Pie (ready to use from the store). Even the adults participated, but for the sake of staying on speaking terms with my relatives I'm not including those pics:


We also did "Guess how many mini figures?".  I have to say I was a little shocked at how many I counted in here...and that we still had more left even when it was full:


I think the MLP piñata was one of the things I liked best.  We found that in the My Little Pony section of the party store with all the other themed paper products.  I was also very relieved it had pull strings at the bottom instead of the usual bat-the-heck out of it until it breaks way to open it. Assault & battery of one of her favorite ponies would have been more traumatizing than entertaining. 


My husband came up with the clever idea of stringing it through some plastic pipe we had in the garage.  He was able to bob it around a bit for the older kids so it was more of a challenge:


The main "crafty bit" I did for the party was to make some pony soaps for the goody bags using the silicone molds from my DIY Soap Painting post.  Melt & pour soap is ideal because it only takes a few minutes to make - I just had to do a few small batches since I only had 2 pony molds.  I didn't do the detail painting this time, but I did represent the colors of the Mane Six ponies Twilight Sparkle, Rainbow Dash, Fluttershy, Pinkie Pie, Apple Jack and Rarity:


The other goodies were easy mints, tattoos and unicorn horn suckers.  Again, bought with the other stuff in my single visit to the party supply store:


And since she's a mega Celestia fan, we got her the new Rainbow Shimmer™ Princess Celestia snowglobe pony as her main gift.  I'd seen this on a My Little Pony fan site from the big NY toy fair earlier this year and thought it was so cool.  There was no estimate on when it would be available in stores, so I was thrilled to find a prototype for sale on eBay.  I'm usually pretty skeptical about that sort of thing being legit, but I just went for it.  It was definitely worth it - even husband & I were wowed by its sparkle + water-filled interior and it was pretty neat to have something before it was even in stores.  We also got the Princess Luna version but I couldn't wrestle both away from her pony pile for quick photo.  


The funny thing is that is party was just as fun as the ones I slaved over and probably cost about the same. Everyone had a great time and the birthday girl loved her party & all her pony presents.  It felt so good to give her a great party AND be able to enjoy it myself for a change!


Friday, October 4, 2013

My Little Pony Unicorn Hats & A Return To Hat Making


Today I thought I'd share what's been keeping my sewing machine busy this Fall: fun new hats!  Last year I decided to take a break from my hat-making business, The Green Hedgehog, because I'd gotten hat burnout from the previous Halloween seasons.  Making hundreds of made to measure hats in a 60 day period, while running a blog, & homeschooling 3 kids, will do that to you!  But after the extended time away, and my kids wanting new hats for themselves, I got the desire to design again over the summer....and came up with my Pink Unicorn Hat


It's made from soft, light pink fleece and has fuzzy off white lined ears, a bright pink mane, and a dimensional swirl horn for added whimsy.  


If I've learned anything from making hats, it's whimsy = win.


My daughter couldn't wait to put it on and was frolicking around in no time.


She really digs horses, unicorns, pegasi and is a major My Little Pony fan.  And I mean MAJOR.  She got into the old school ponies from my sister's old toy stash and has since become obsessed with the current Friendship Is Magic version. She knows them all by name - even the random bit characters.  As a result, the whole family has gotten into 'em and we've all got our favorites.  Mine is Rarity, since she's the pony who sews. So of course I had to make a Rarity Unicorn Hat:


My daughter loves them both, but this one being a specific My Little Pony character means it's her favorite.  She has worn it everywhere - stores, museums, in the car....


She'd even be sleeping in it if I hadn't ruled that out.  She's serious about her pony power.


I added them to my shop in baby through adult sizes, since I know there are MLP fans of all ages out there.  I plan to do a few other pony characters, but they'll have to wait until I've got a bit more time.  At the moment I'm busy making those two, as well as most of my other popular designs:

Little Alien Master, Viking Baby Hairdo, Little Space Vader, Elf/Baby Gnome, Little Wolf, Little Red Riding Hood, Pint-Sized Pirate, Little Gift, Little Leprechaun 

And I've got PDF patterns in a few fan favorite styles for those that want to make their own:


By I'm limiting how many hats I'm making, this year is much more manageable.  Still busy, but this season the hats are making me smile as much as the recipients:)


I'm also sharing this with my FAVE LINK PARTIES.
Click HERE to check them out!

LinkWithin

Related Posts with Thumbnails