Showing posts with label Cotton. Show all posts

Wednesday, November 3, 2021

A Little Dress For Fall


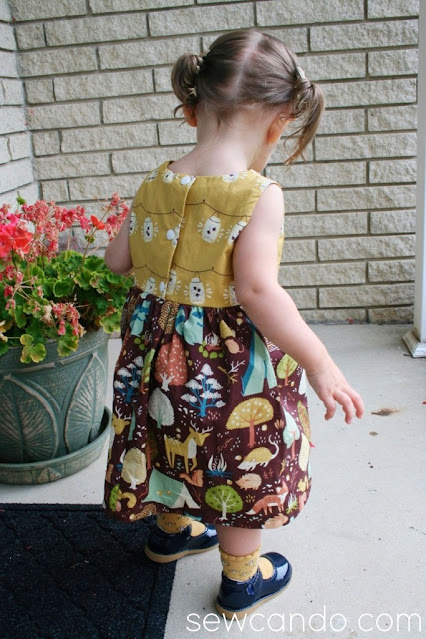
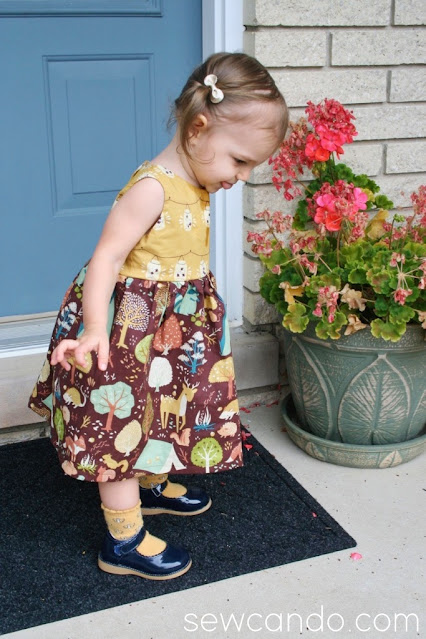
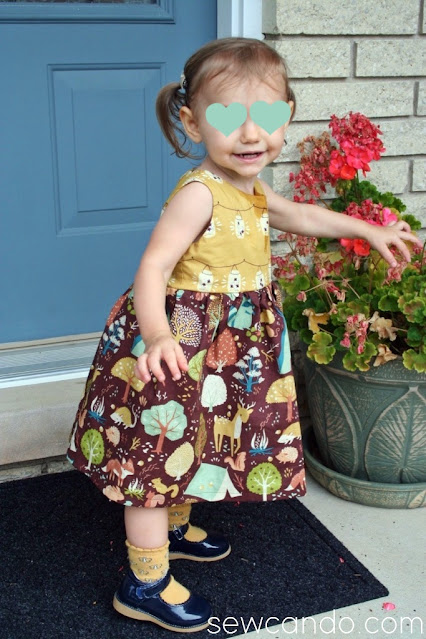
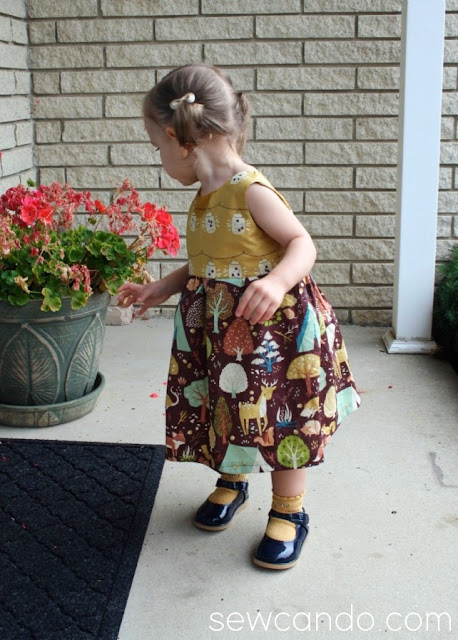
When this season started things were still quite warm outside and the autumn-themed dresses I'd bought for my little lady were still too heavy.  I wanted to make a good layering dress for the in-between weather and came up with this simple one:


It's a littler girl version of my Sleeveless Sunday Dress, which I have free PDF patterns for in size 8-10


  I'd been wanting to make a smaller one so my two girls can have matching dresses and finally got around to mocking one up with these fabrics.


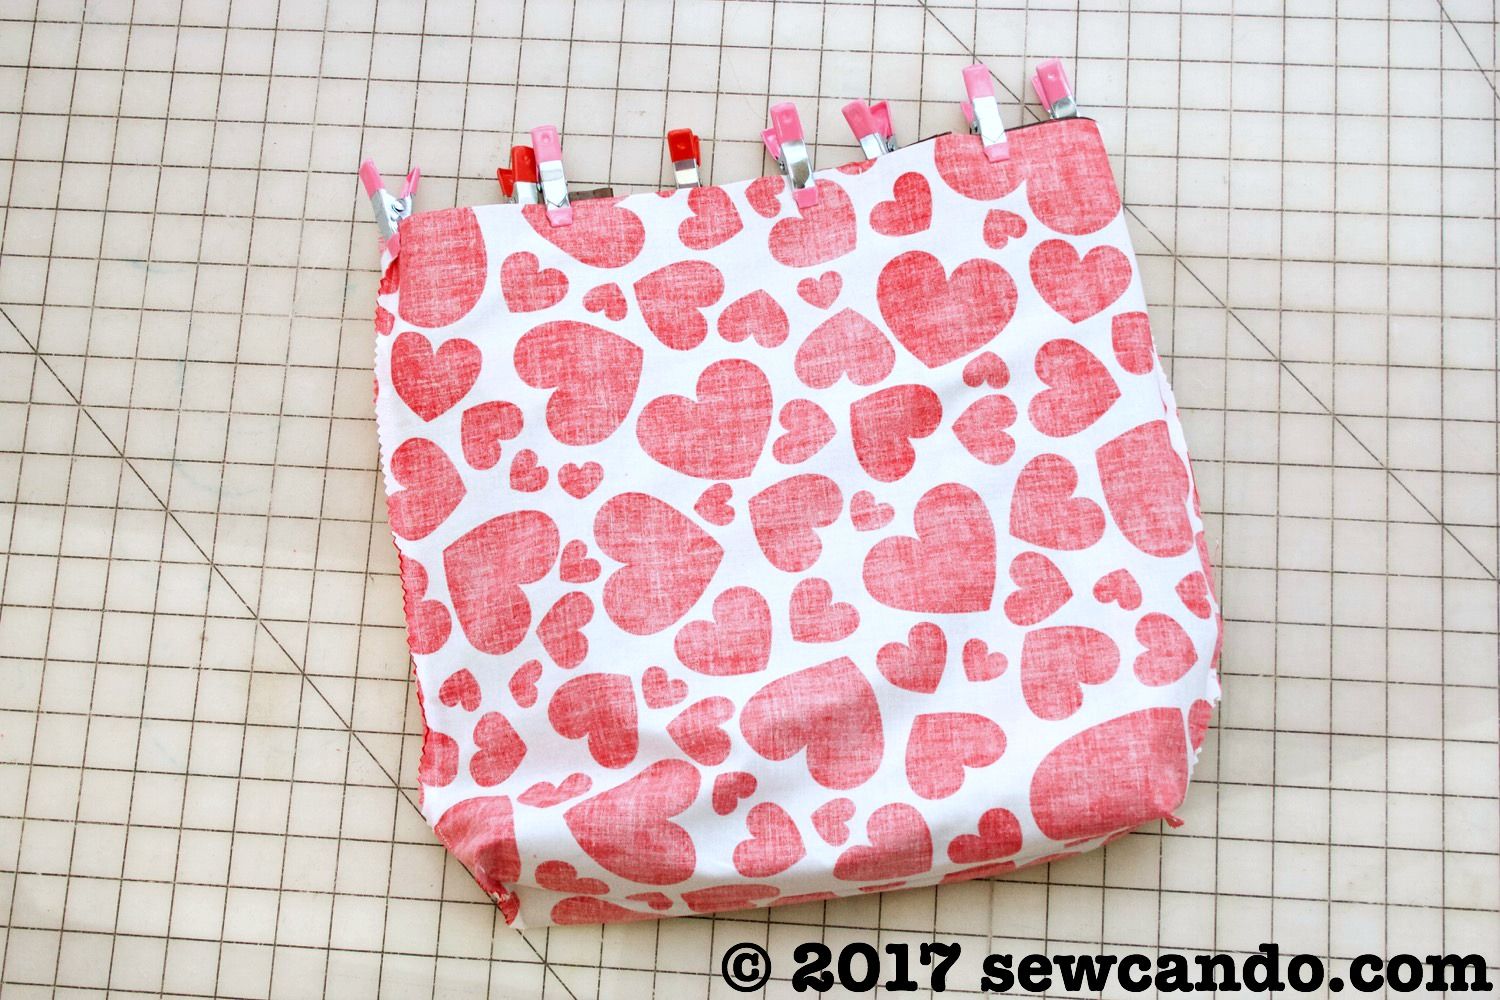
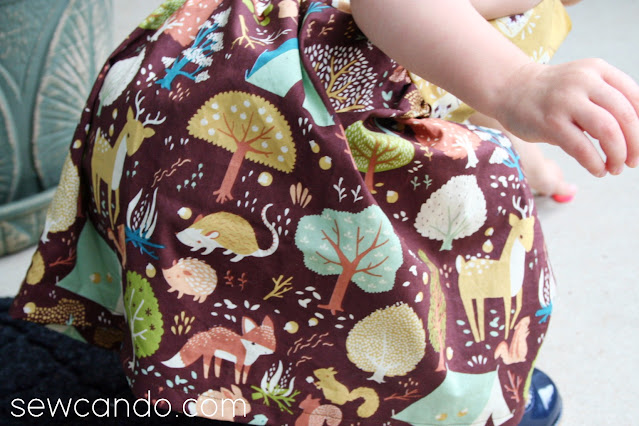
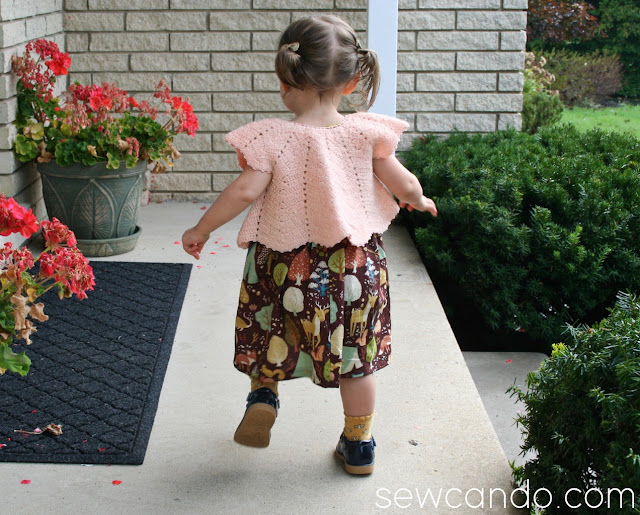
I'd been hoarding this fall-themed organic cotton fabric (Fort Firefly by Birch) for AGES.  I had a selection of these pretty coordinating 1/2yd cuts but could never come up with a good enough project to justify cutting into them.  So they sat on the shelf for many an autumn.  Since this was a small enough sized dress, it meant they finally got used, which is great since they're so cute:


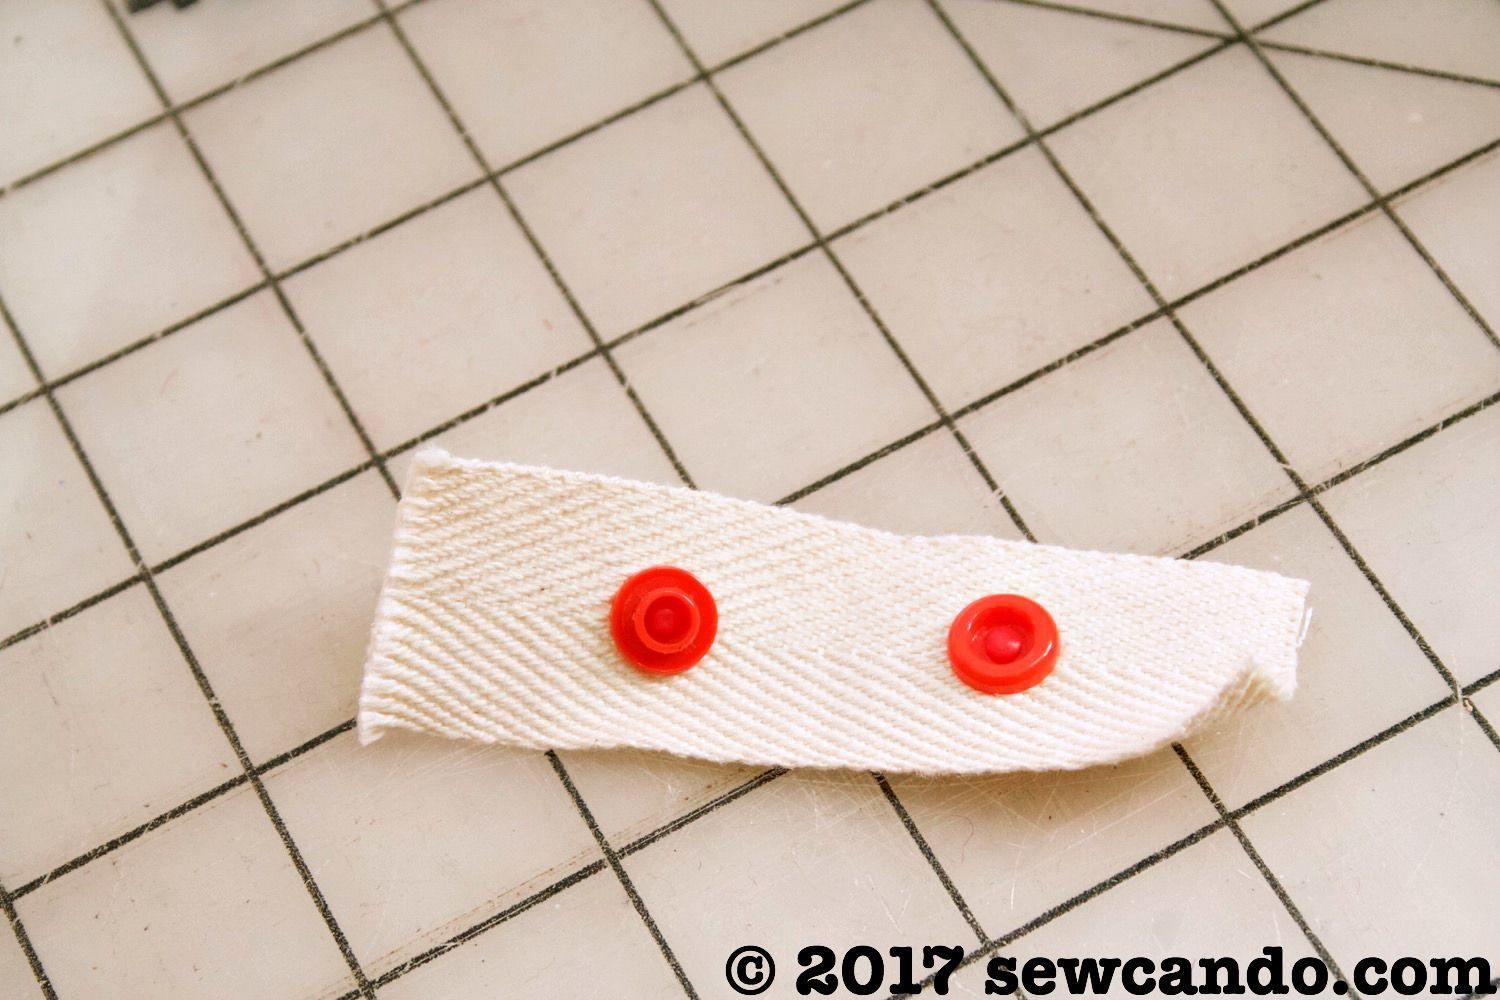
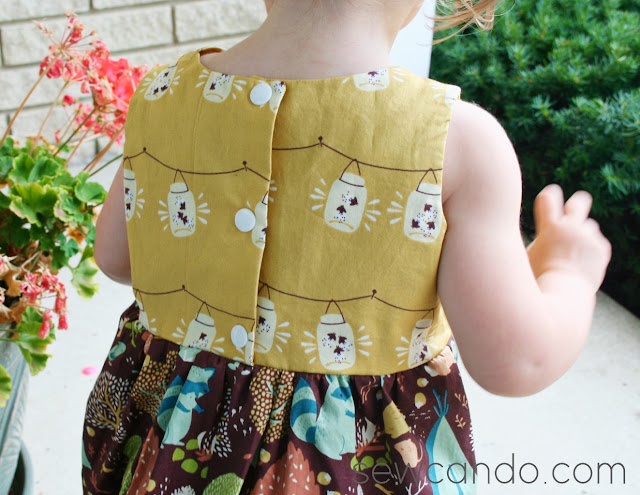
Like my bigger girl versions, this lined bodice dress snaps up the back:


  I paired it with a little crochet sweater I'd found tucked away amongst my great grandmother's things.  She'd made it more than 25 years ago, but had never gifted it to anyone.  She had been an avid crocheter her whole life and had made countless sweaters, hats and blankets for us when we were small.  I'd loved putting them on as a child.  It warmed my heart to see my littlest daughter wearing this one, as though it was meant just for her:


I made the bodice a bit shorter on this toddler size.  


I do plan to offer this as a free PDF pattern like my bigger ones, but this was my test version to make sure the fit was right.  Apart from her drooling all over it just before I took the photos, I was happy with it.


Since I only had 1/2yds of these particular prints, the skirt wasn't as full as I'd originally planned.  I've got a lot more yardage of a Christmas print that I'm planning to use with this pattern to make her holiday dress this year so that version will be fuller and I'll roll out the free pattern with that one:)


Now that the weather is turning colder, I'm pairing it with some cable knit tights and either a long sleeved onesie underneath or a cardigan over it.  A cute little outfit and I finally stash busted a bit.  Hooray!


Wednesday, February 1, 2017

Hearts Aflutter Faux Leather Tote Bag Tutorial


Who can resist the call of colorful hearts & Valentine's Day?It's officially February so I'm ready to share a project that features both!  I know a lot of bloggers start rolling out their themed projects as soon as New Year's is over, but this chick thinks that's way too soon. Besides, my new favorite bag seems much more relevant with the holiday coming up soon. I call it my Hearts Aflutter Pleather Tote Bag.     


So far this year I've been challenging myself to use stuff in my vast stash rather than buying like crazy, so this entire tote was made with what I had on hand.  Either that says I've got way too much stuff or I'm super resourceful.  I'm going to claim the latter;) 

But even buying the materials is pretty inexpensive, since this tote doesn't require a lot of yardage and gets it's whimsical boutique vibe from the contrast of buttery brown faux leather and the colorful textured of felt hearts:


And to keep up with the designer totes out there, mine's got still all the special details, like a coordinating Jessie Steele Sweethearts lining fabric:


and a cute decorative heart tag on the side:


With a roomy interior and inside pockets, it's just the right size for carrying a few books, shopping and my usual purse stuff.  It's literally become my go-to bag and can totally handle the snow blowing around outside too.


It's also a quick sew, so making one can be done in record time.  Come on and see how!

Materials:
- 1/2 yd Faux leather/pleather
- 1/2 yd Cotton (I used Jessie Steele Hearts by Timeless Treasures)
- 1/4yd or 1 sheet each felt in red, hot pink and soft pink
- 1 1/2yds 1 inch wide pleather strapping
- Twill tape for tag
- Plastic heart snap
- Notions: rotary cutter, clips, hand sewing needle, iron, chalk, spray adhesive, heavy duty needle
- Optional: Cutting machine (I used my Cricut Explore)+Heat & Bond paper backed fusible, scrap of twill tape & plastic heart snaps (for decorative tag)

I started by cutting out my felt hearts in 3 sizes and 3 colors.  To make this fast & easy, I used my Cricut Explore machine. In order to cut felt on it, Heat & Bond fusible needs to be ironed onto the back side of the felt.  


After cooled, peeling off the paper reveals a smooth plastic-y backing that makes cutting much easier.


I used some free standard heart shapes in the online Cricut Design Space and proceeded to line them up in my layout so I'd get about six to ten of each color in heights of 1 1/4in, 1 1/2in and 2in to fit on a piece of felt that fit my 12x12in mat.  


Per their cut instructions I used the deep cut blade & felt with backing setting and just peeled them off:


It took minutes to cut all these instead of eternity hand cutting:  


Now it was time to put the bag together.  I grabbed my faux leather & cotton and folded each of them in half, with selvages together.  I cut them so that the folds were on the bottom. 16 inches wide along the fold by 15 inches high.  This works well since the faux leather doesn't have any stretch and this way the cotton won't have any extra give either (which would make it hard to line them up later).  I also cut a 9 inch wide by 6.5 inch rectangle from the cotton for the pocket.  


To save myself having to create straps, I used some by-the-yard pleather strapping I'd bought ages ago that was pretty close in color to my tote faux leather.  It just needed to be cut into the two 26 inch long pieces I needed.  Big time saver!!


Since this bag was going to have some depth I wanted the hearts to only be on the front, not wrapping around the sides a bit, so I drew some lines 2 inches inward around the sides and bottom:


I arranged the hearts so the colors & sizes varied, keeping them just inside my lines.  To hold them in place without pins (which just poke holes in pleather), I used spray fabric adhesive, which worked like a charm.


Using coordinating colored threads, I stitch down the center of each heart to hold it in place.


I also stitched on the edges of each strap, 4 inches inward from the sides:


I wanted the tote to be able to handle some weight, so I double stitched the straps onto the main body for extra security:


Then it was time to switch over to the lining.  I stitched up the pocket by press the top edge 1/4 in under and then folded & pressed it another 1/4in under and stitched it in place.  I pressed the other sides 1/2in under too:


I centered the pocket on my lining fabric, about 3 inches from the top edge and stitched all the sides, then another stitch down the center to split it into two pockets.


Next was stitching up the side seams, leaving a 3 inch gap on one side for turning:


After trimming down the edges, I squared off the bottom corners by 3 inches with a ruler to give the bag depth:


After stitching I trimmed off the excess there:


To make my decorative tag, I cut a 3 1/2in long piece of 1 inch wide twill tape and grabbed some plastic heart snaps from my stash:


I set the snaps an inch apart with the hearts on one side so I could fold it together on the inside:


I sandwiched my tag between my pleather layers on one side about 2 inches from the top:


I repeated what I'd done with the lining - stitching the sides (minus a gap) and squaring off the bottom corners with my main pleather, except using small clips rather than pins:


I flipped my main tote right side out and inserted it into my lining, so their right sides were facing:


I lined up the side seams, clipped, then stitched them together all the way around:


After pulling things right side out and hand-stitching the gap closed and putting the lining into the main tote, I topstitching all the way around the upper edge:


So far I've toted this bag all over town and it's so soft & lovely.  Like a Valentine's gift for myself, but still whimsical enough to use well after the holiday.  I ðŸ’— DIY bags!


Friday, January 13, 2017

Geek Fabric Giveaway & Friday Fabric For Sale Additions!


Want to start the new year off with a chance to win these fun fabrics? 

Last Friday I announced my 2017 resolution to clear up my fabric stash and offer up some fabric gems for sale in my shop each week and for free in sporadic giveaways.  Today I'm kicking off the first stash-busting giveaway for these awesome geek-themed prints:


They're from the coveted & hard to find Geeks Gone Wild collection by Timeless Treasures.  I did a bunch of fun geeky office supplies with some awhile back:


This giveaway bundle includes a 3/4yd cut of this print:


A slightly bigger than 3/8 yd cut of this black & white Space Invaders:


And a slightly bigger than 1/4yd cut of the same print in this vibrant aqua & lime color way:


There's enough to make the items from my office set, including the insulation cup cosy (my previous tutorial can be found here):


And I've also added a bunch of other geeky and whimsical fabrics to my Etsy shop HERE:


Now, ready for a chance to win this geeky fabric bundle?  


a Rafflecopter giveaway

LinkWithin

Related Posts with Thumbnails