Showing posts with label KAMsnaps. Show all posts

Wednesday, November 28, 2018

Winter Wear for Baby: The Funny Dots Cuddle Suit


Things got chilly around here pretty quick this year.  We had snow the week before Thanksgiving and the frigid temps look like they're here to stay.  Time to sew the winter wear!  

Our littlest one is 8 months now so ferrying him in & out inside a carrier car seat isn't an easy feat.  Having to carry him sans seat nixes the "toss a blanket over it" easy option, so I needed something that would work better and not cost a fortune either.  So I made this:


I call it a cuddle suit, but bunting, romper, snow suit, or whatever other name it does by, this is my ideal item for this time of year.  Outerwear in snowy climes is tricky with a bigger than newborn baby.  I know because this is my fourth baby in Michigan.  You want to keep them toasty warm, but they HATE being bundled up in something extra puffy.  They loathe most factory made versions.  Babies get squirmy and whiny instantly in most snowsuits because they overheat fast.  This one however is just perfect.

I did a soft interlock outer so it's not heavy and is still breathable:


With a cuddly minky lining to add warmth that keeps the wind out without adding bulk. Strapping him into a car seat or stroller isn't a wrestling match:


The snap front design is genius.  The whole thing opens right up so you can easily lay baby on it and then just snap it up.  No wrangling required with putting it or taking it off on while baby is wearing shoes, which is another plus.


I used the Funny Dots pattern from the Autumn 4/2009 issue of Ottobre Design.  


I'd made it once before when my now 9 year old was just a few months old.  


Of course, I was a sewing newbie back then and stupidly sewed a stretchy velour lining to a quilting cotton outer which was less than ideal.  I couldn't figure out why things wouldn't line up when I was stitching the seams not realizing one fabric had no give and the other was like a rubber band.  Shaking my head at the idea now.  I also was too scared of snaps then too, so I'd used velcro for the front closures which stuck to everything.  PSA: don't do either of those.  


That first version was done in the smallest 50cm size since my daughter was a newborn, but this time I did the largest 74cm for my 8 month old.  Ottobre Design offers generous sizing so I can see this lasting the whole season.  


I kept it inexpensive by using interlock knit for the outer and minky for the lining that I got at JoAnn Stores.  A yard & a half of each was plenty and came in about $18.50 total and I've got enough left of both to make some soft shoes and a few accessories.  The nice thing is that it works with a variety of other fabrics too - fleece, corduroy, even PUL. It's a great sew because there are just 4 pattern pieces.  No set-in sleeves so very beginner friendly.  You'd think it would be more complicated with the placket front, but it's not.


I will say it looked massive until I tried it on my little guy.  I'd been working on it during naps and had this horrible feeling it was going to be miles too big, but putting it on it's totally true to size.  No matter what he wears underneath.  I also like that the sleeves can be cuffed or worn down, so there's some growth room:


We've been using it for weeks now and it's been great.  He likes wearing it and getting him ready to go out the door is so easy.  Despite the early winter weather, we're off to a good and warm start!


Wednesday, February 15, 2017

Free Pattern Finds: The Snapazoo Soft Toy


As much as I like making my own patterns and dreaming up designs with my imagination, sometimes it's relaxing to just start sewing.  And sometimes there are great ideas already created & ready to sew up, like this Free Pattern Find:  The Snapazoo®  Soft Toy.


Like all my Free Pattern Finds, this is a pattern that doesn't cost a thing, so you can go grab it yourself for FREE!   

The Snapazoo toy is clever design from Ross Miller Studio, Inc. that involves a two sided fabric shape and a boatload of snaps that can be folded and snapped into all sort of things.  Like this teddy bear:


or a little fox:


or a sting ray:  


Or some sort of bird/duck:


I think that's what I love most about this idea - the infinite play options.  It's been around for a while and was even sold as a finished toy years ago, as you can see from some of retro videos on the Snapazoo site.  There are links to different templates and how-to's for making it here.  For personal use only though - commercial selling is prohibited. 

This pattern is best suited for fabrics with some weight & a bit of stretch like heavy knits, minky, felt or fleece.  I used anti-pill fleece for mine.  It's a great way to use up scraps, since it's not very big.   

It's an easy sew, so a good project for a beginner.  Literally, just cut & mark based on the downloadable template:


Then stitch:


Turn right side out and set the snaps according to the instructions:


Plastic snaps are ideal because they are strong and you can get fun with the snap colors if you want.  I just used boring grey for our first one, but I feel like some of the shaped snaps in my stash, like stars or flowers, would look fun too.


There are handy instructions here on how to make various animals with it.  Including this elephant and most of the critters shown earlier in my post:


We had fun just making weird & wonderful creatures too, like this....well, I-don't-know-what:


Definitely a fun Free Pattern Find for us.  My kids love the Snapazoo, what about you??  

Got a freebie pattern find you love? Share it in the comments so we can all try it out!


SaveSaveSaveSaveSaveSaveSaveSave

Wednesday, February 1, 2017

Hearts Aflutter Faux Leather Tote Bag Tutorial


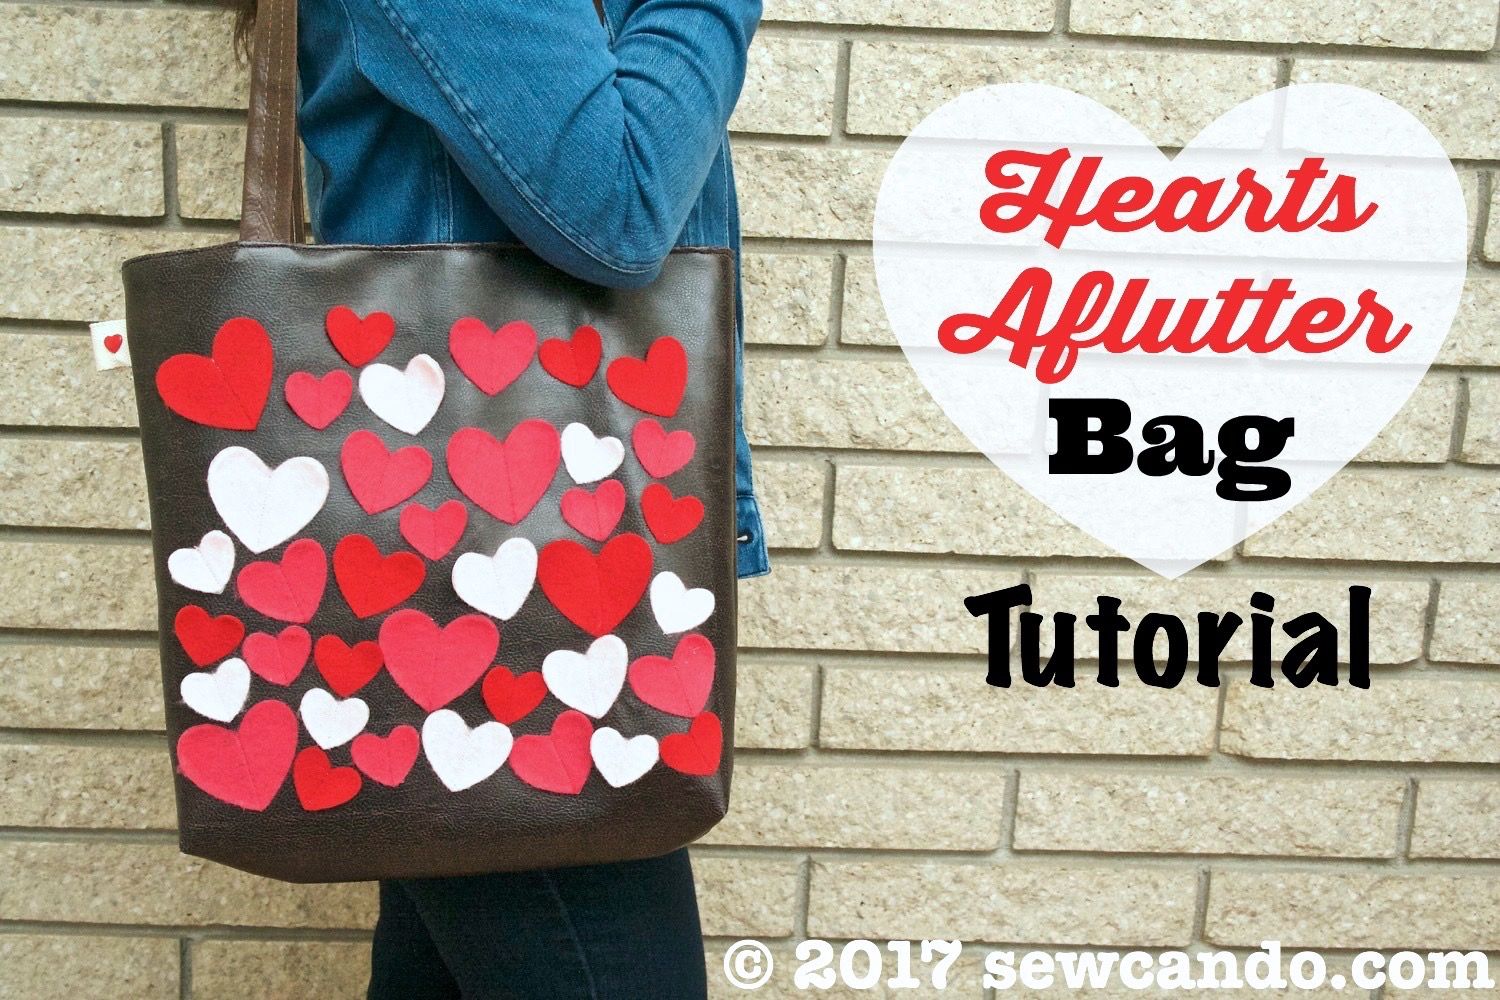
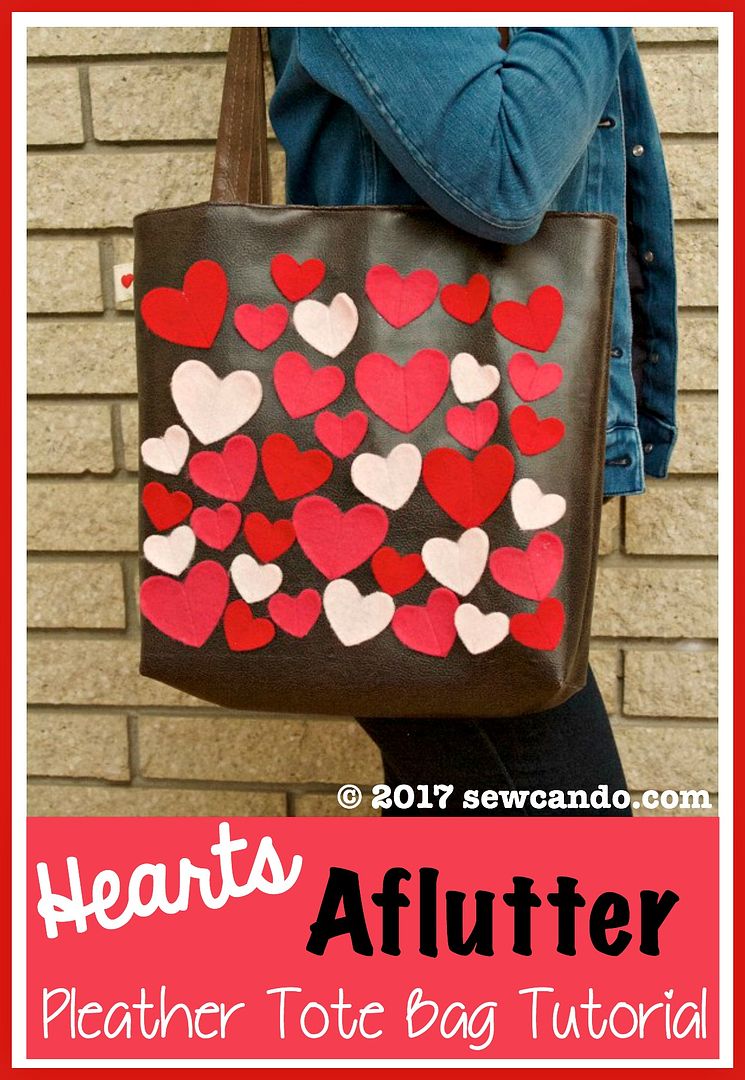
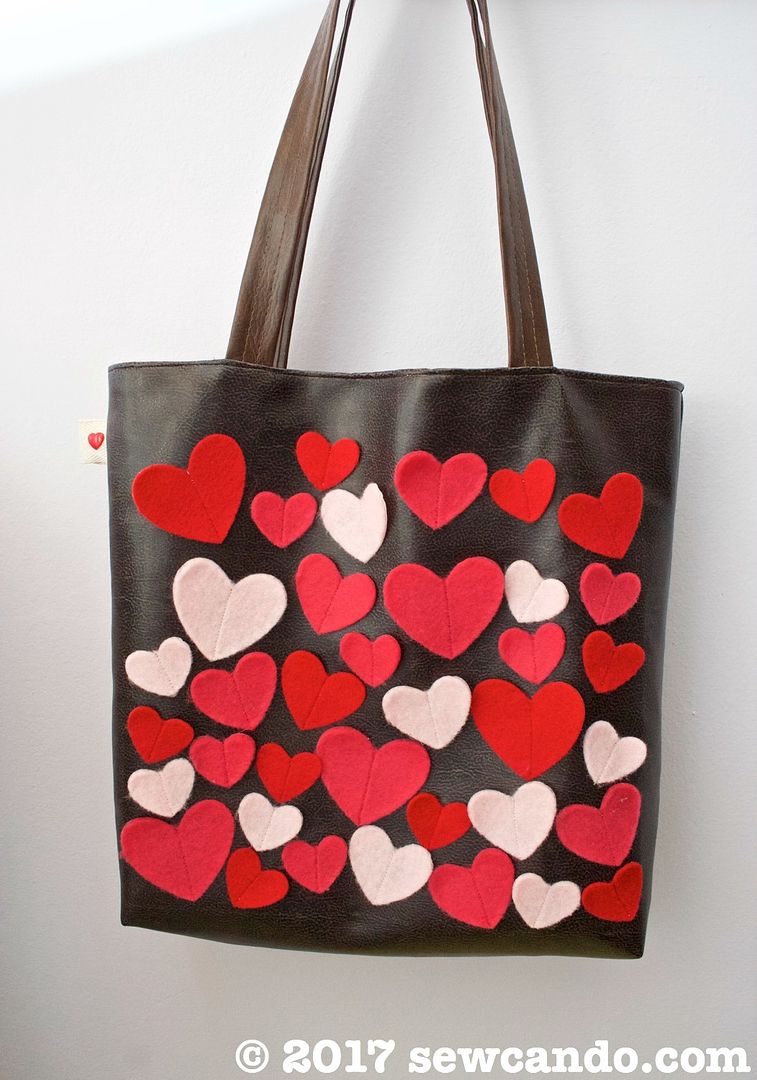
Who can resist the call of colorful hearts & Valentine's Day?It's officially February so I'm ready to share a project that features both!  I know a lot of bloggers start rolling out their themed projects as soon as New Year's is over, but this chick thinks that's way too soon. Besides, my new favorite bag seems much more relevant with the holiday coming up soon. I call it my Hearts Aflutter Pleather Tote Bag.     


So far this year I've been challenging myself to use stuff in my vast stash rather than buying like crazy, so this entire tote was made with what I had on hand.  Either that says I've got way too much stuff or I'm super resourceful.  I'm going to claim the latter;) 

But even buying the materials is pretty inexpensive, since this tote doesn't require a lot of yardage and gets it's whimsical boutique vibe from the contrast of buttery brown faux leather and the colorful textured of felt hearts:


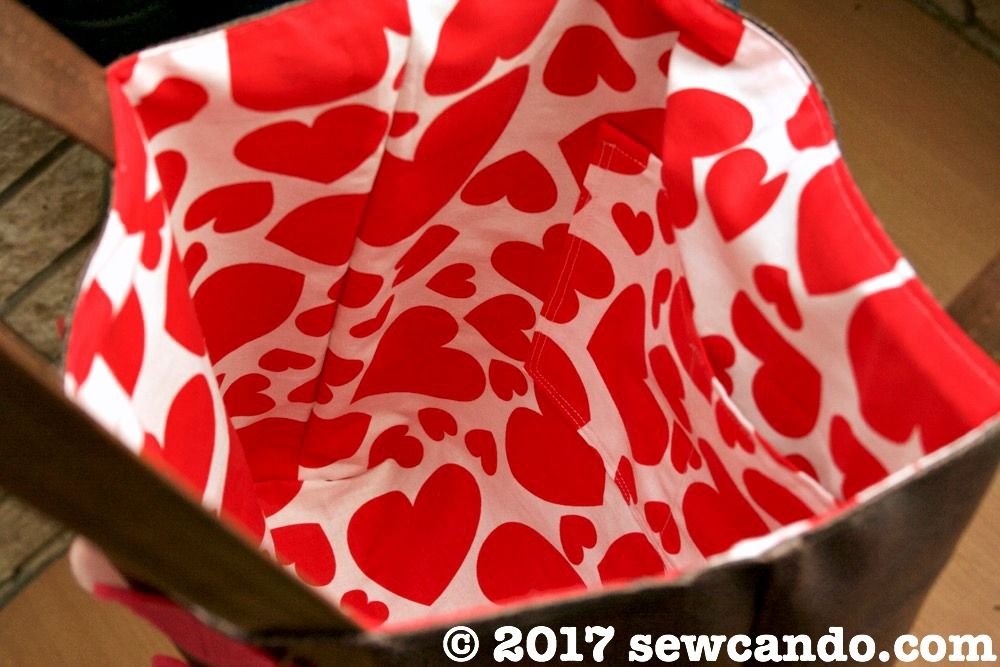
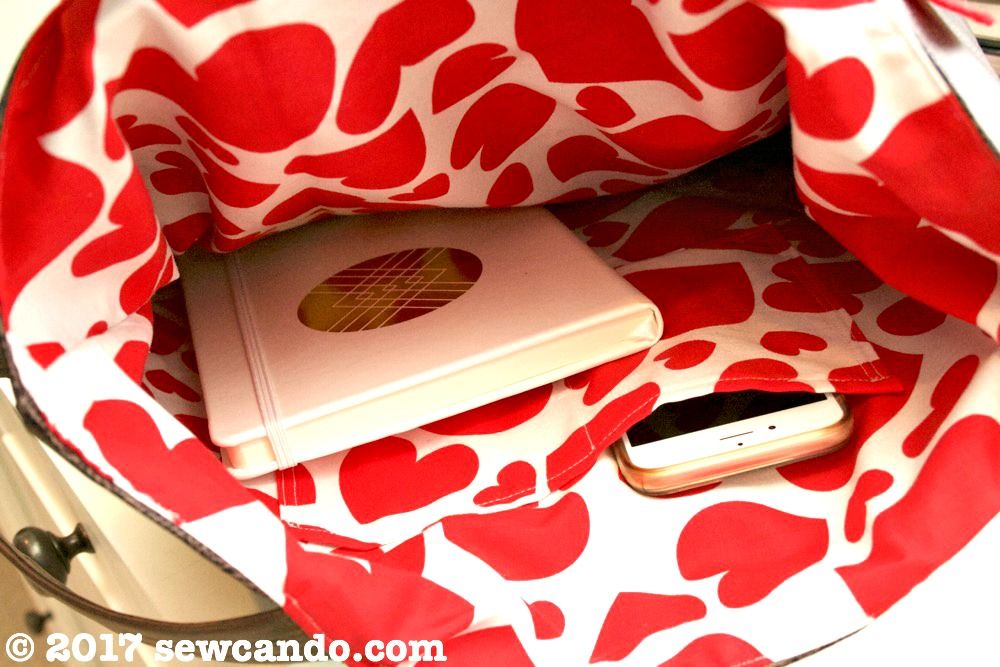
And to keep up with the designer totes out there, mine's got still all the special details, like a coordinating Jessie Steele Sweethearts lining fabric:


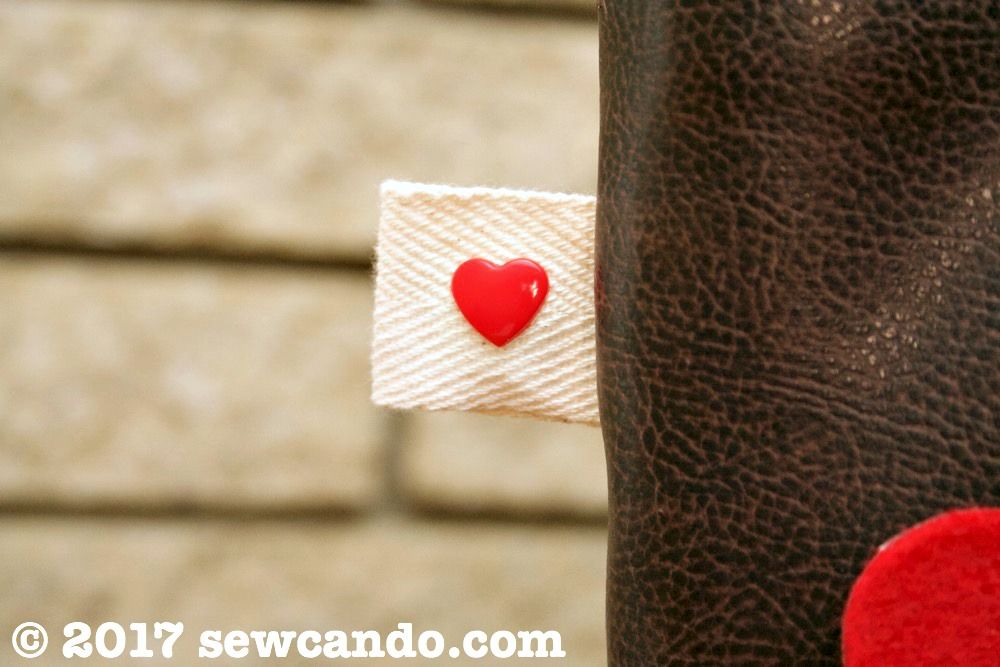
and a cute decorative heart tag on the side:


With a roomy interior and inside pockets, it's just the right size for carrying a few books, shopping and my usual purse stuff.  It's literally become my go-to bag and can totally handle the snow blowing around outside too.


It's also a quick sew, so making one can be done in record time.  Come on and see how!

Materials:
- 1/2 yd Faux leather/pleather
- 1/2 yd Cotton (I used Jessie Steele Hearts by Timeless Treasures)
- 1/4yd or 1 sheet each felt in red, hot pink and soft pink
- 1 1/2yds 1 inch wide pleather strapping
- Twill tape for tag
- Plastic heart snap
- Notions: rotary cutter, clips, hand sewing needle, iron, chalk, spray adhesive, heavy duty needle
- Optional: Cutting machine (I used my Cricut Explore)+Heat & Bond paper backed fusible, scrap of twill tape & plastic heart snaps (for decorative tag)

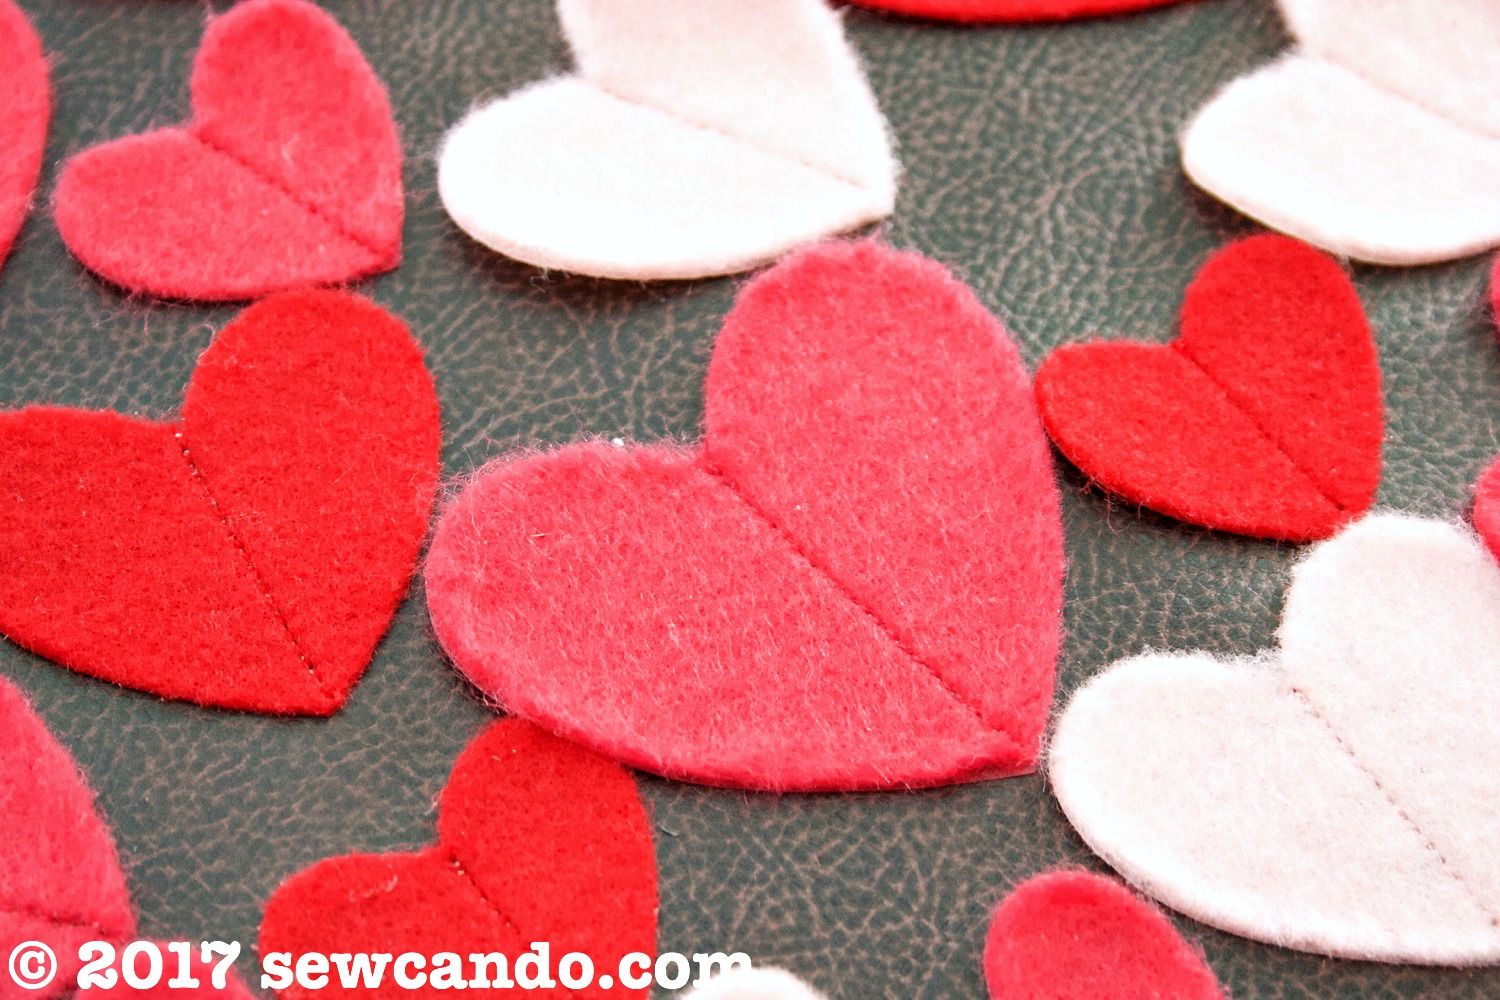
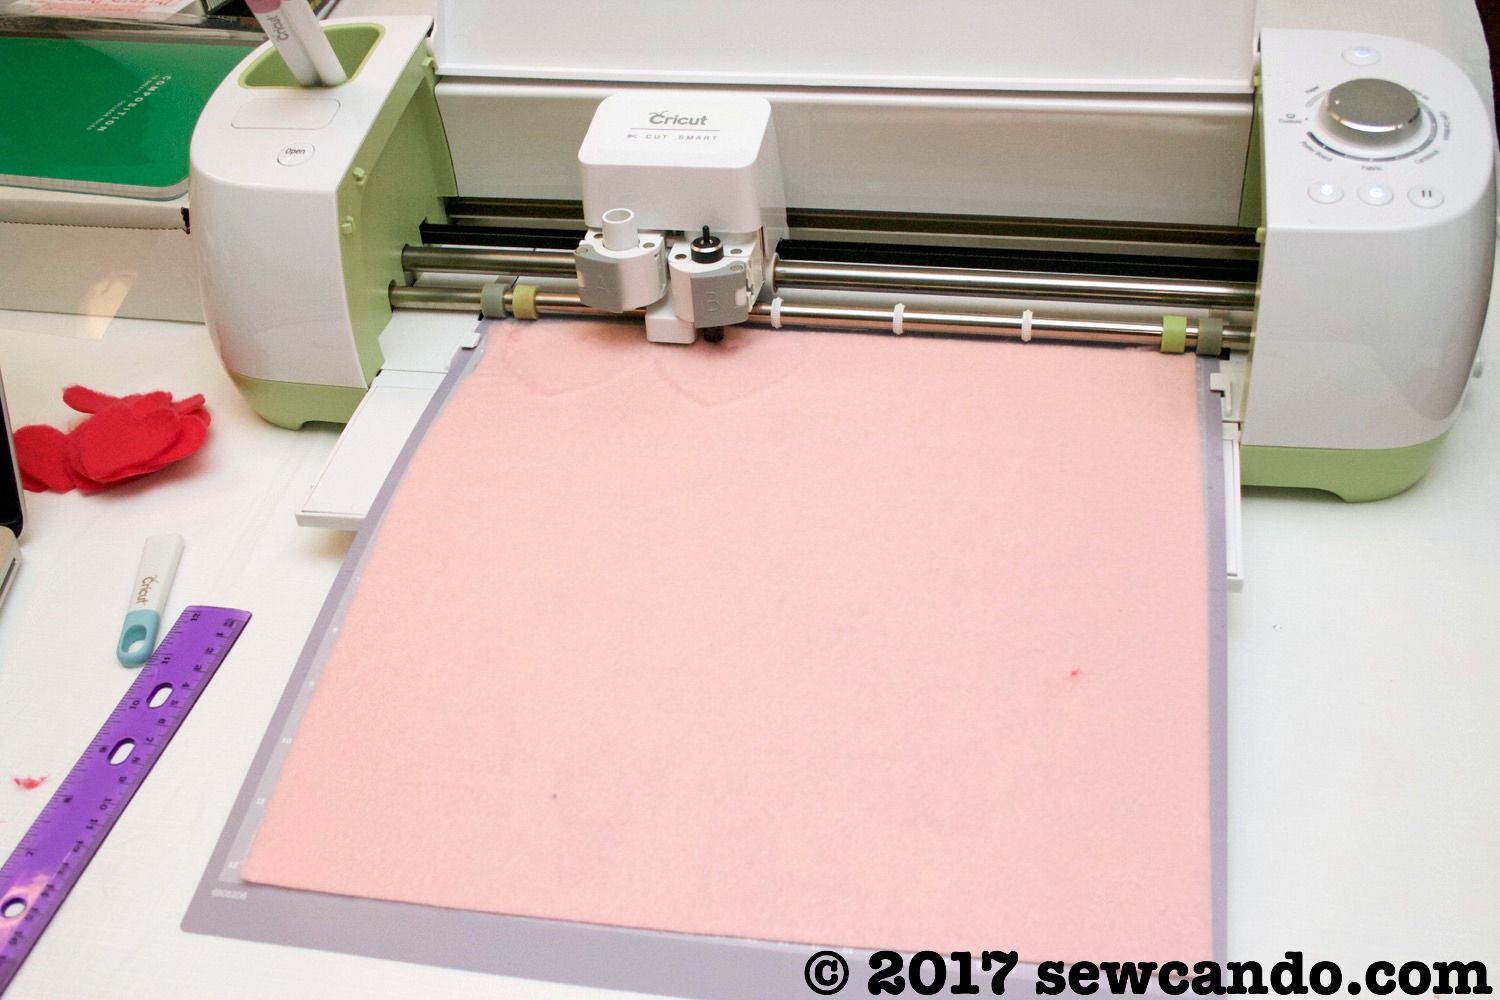
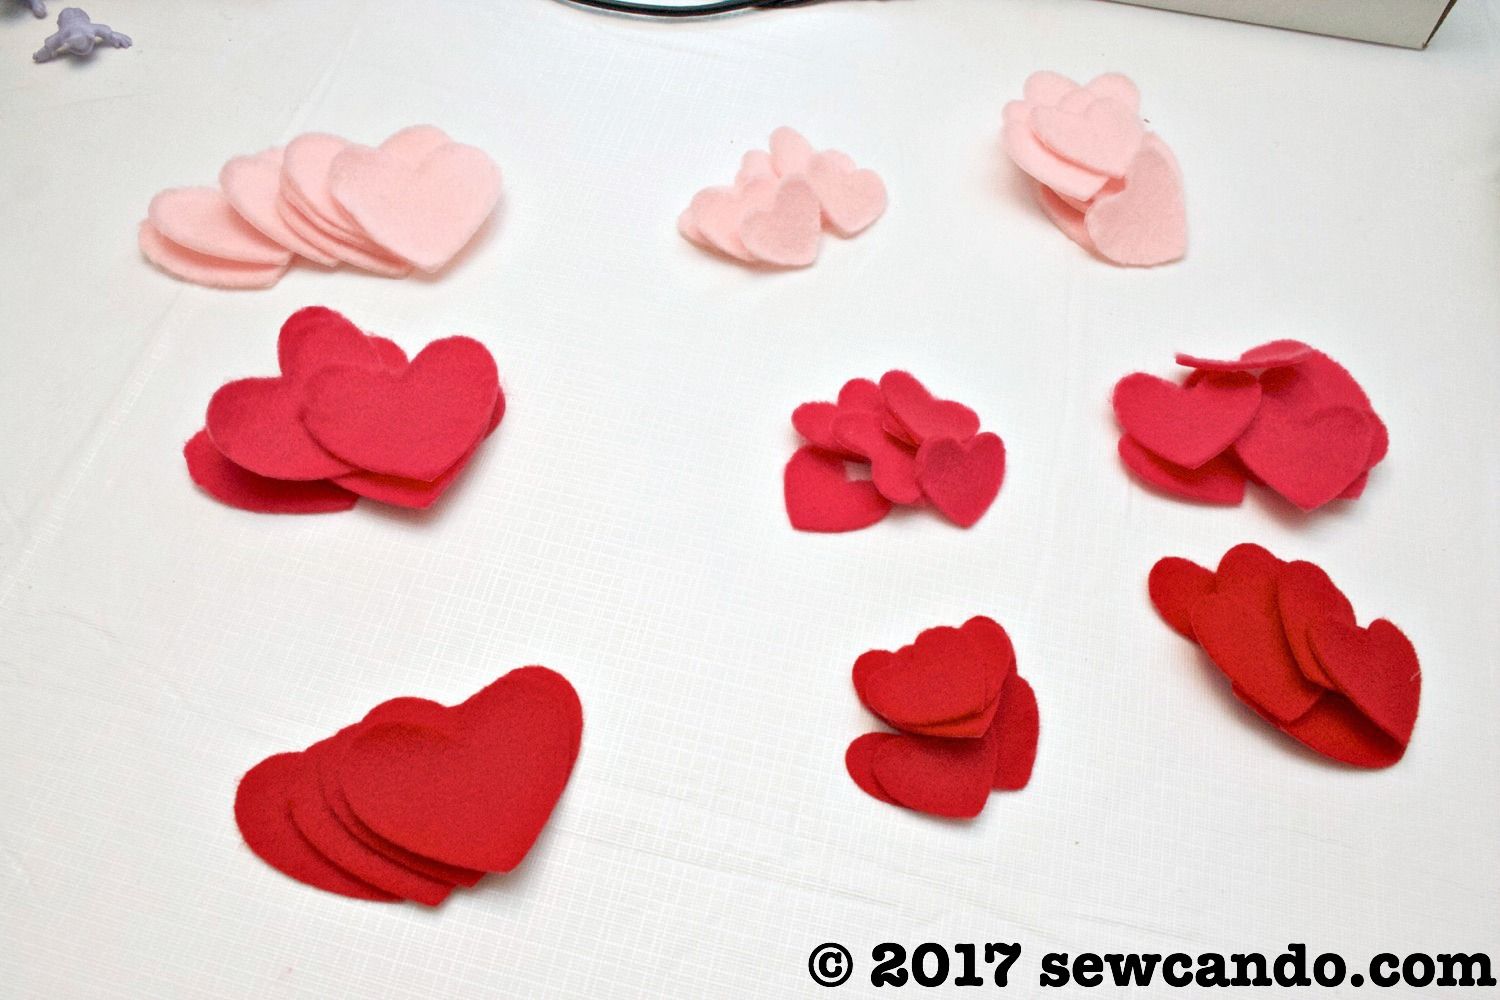
I started by cutting out my felt hearts in 3 sizes and 3 colors.  To make this fast & easy, I used my Cricut Explore machine. In order to cut felt on it, Heat & Bond fusible needs to be ironed onto the back side of the felt.  


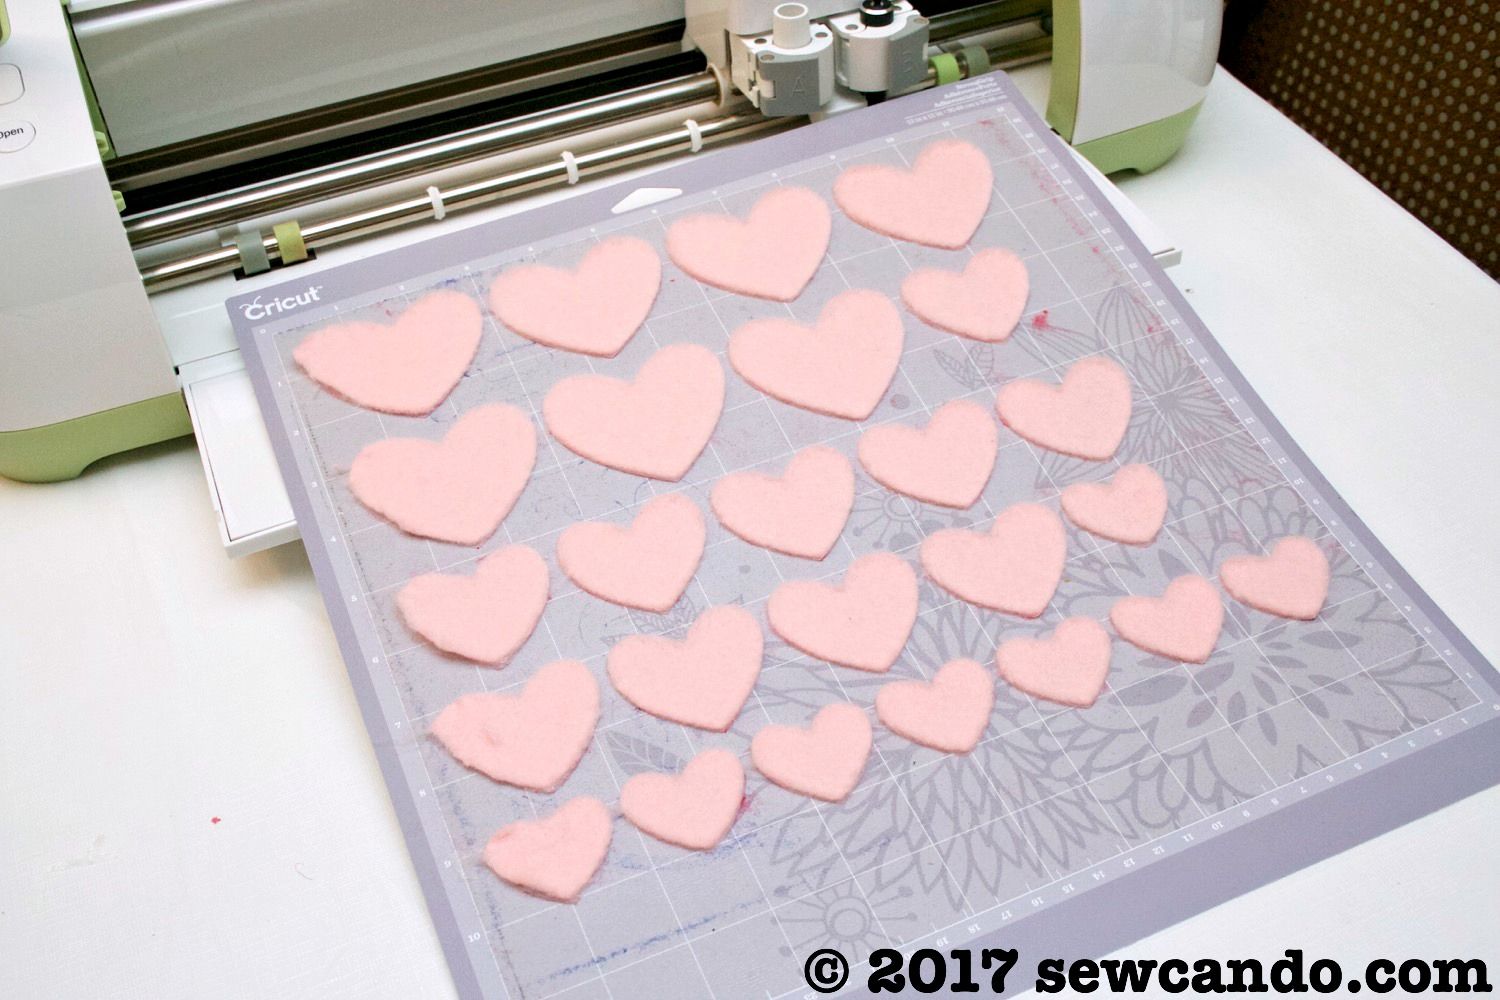
After cooled, peeling off the paper reveals a smooth plastic-y backing that makes cutting much easier.


I used some free standard heart shapes in the online Cricut Design Space and proceeded to line them up in my layout so I'd get about six to ten of each color in heights of 1 1/4in, 1 1/2in and 2in to fit on a piece of felt that fit my 12x12in mat.  


Per their cut instructions I used the deep cut blade & felt with backing setting and just peeled them off:


It took minutes to cut all these instead of eternity hand cutting:  


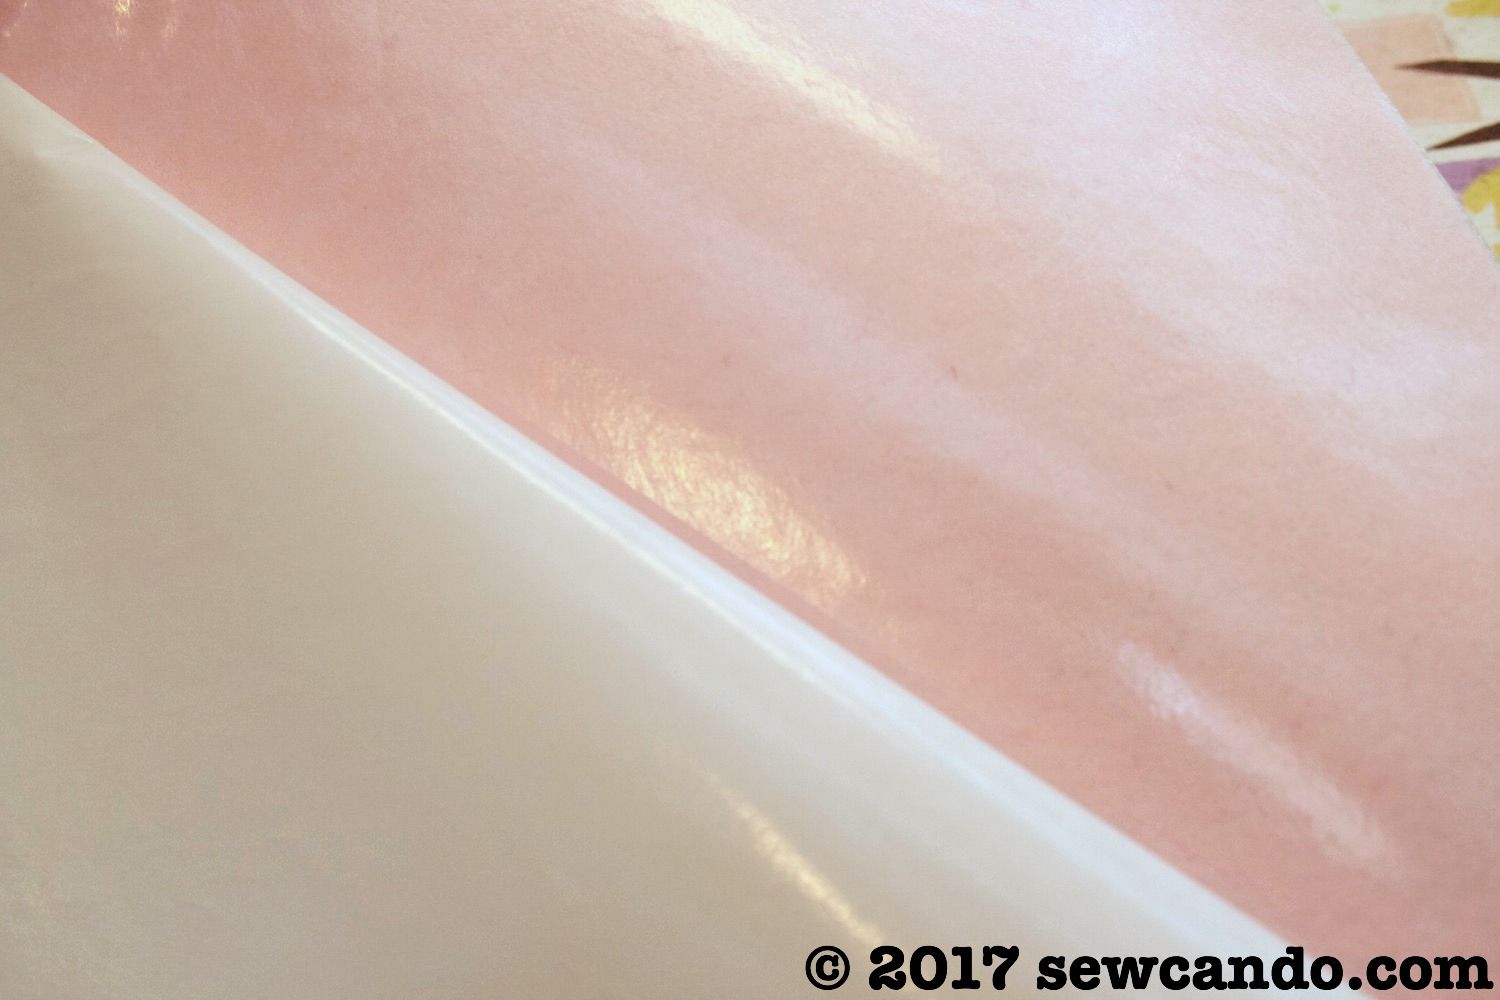
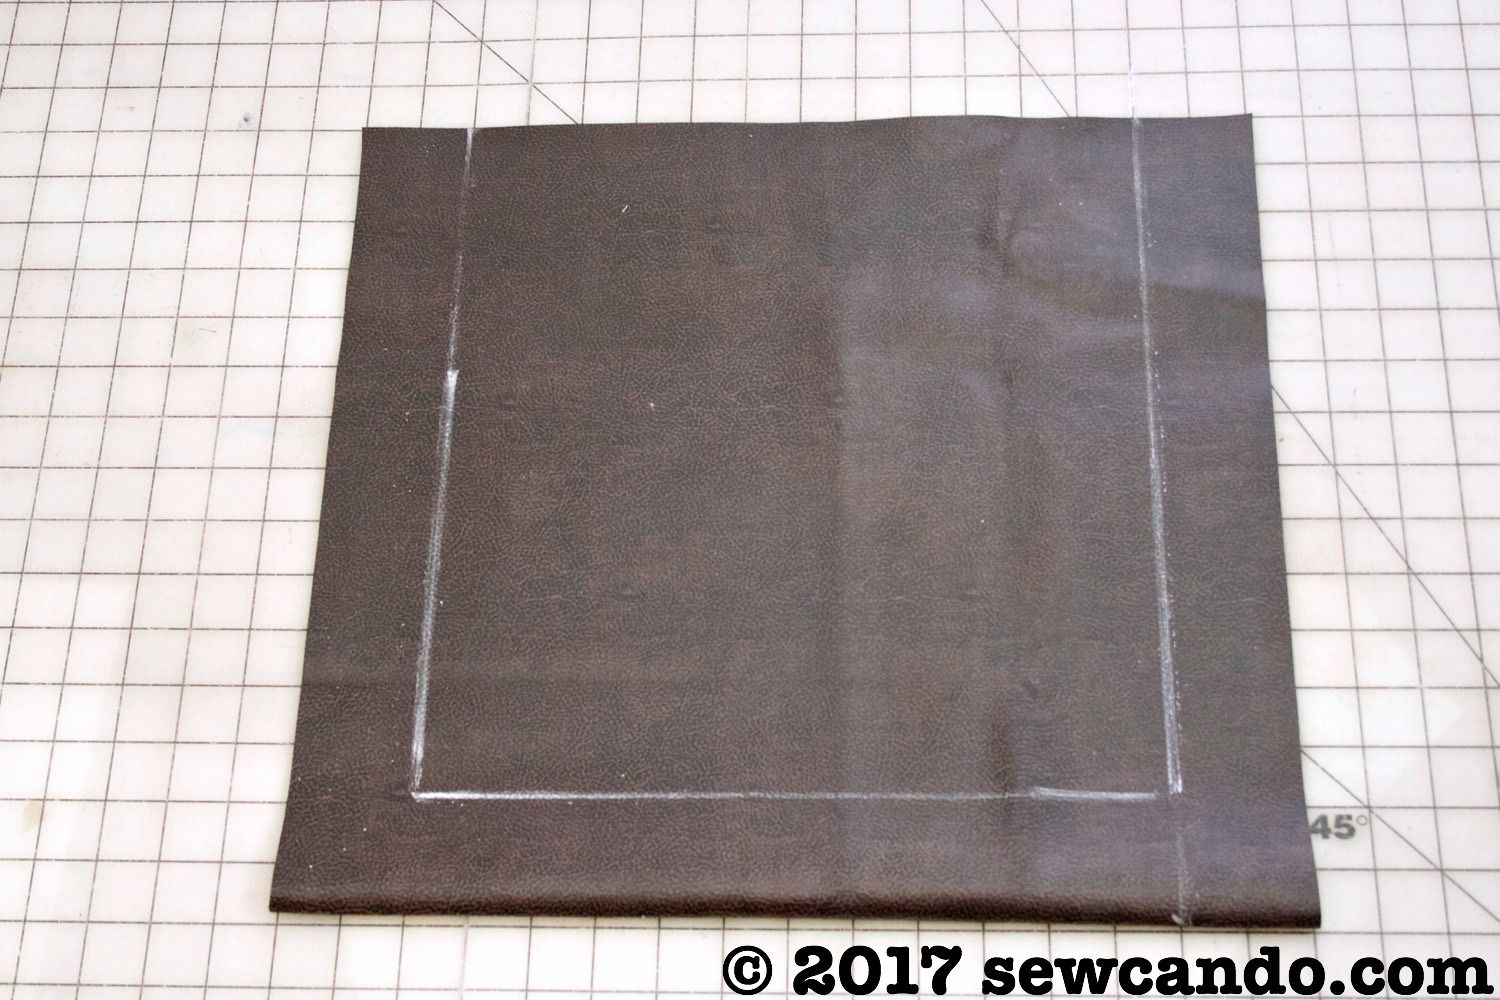
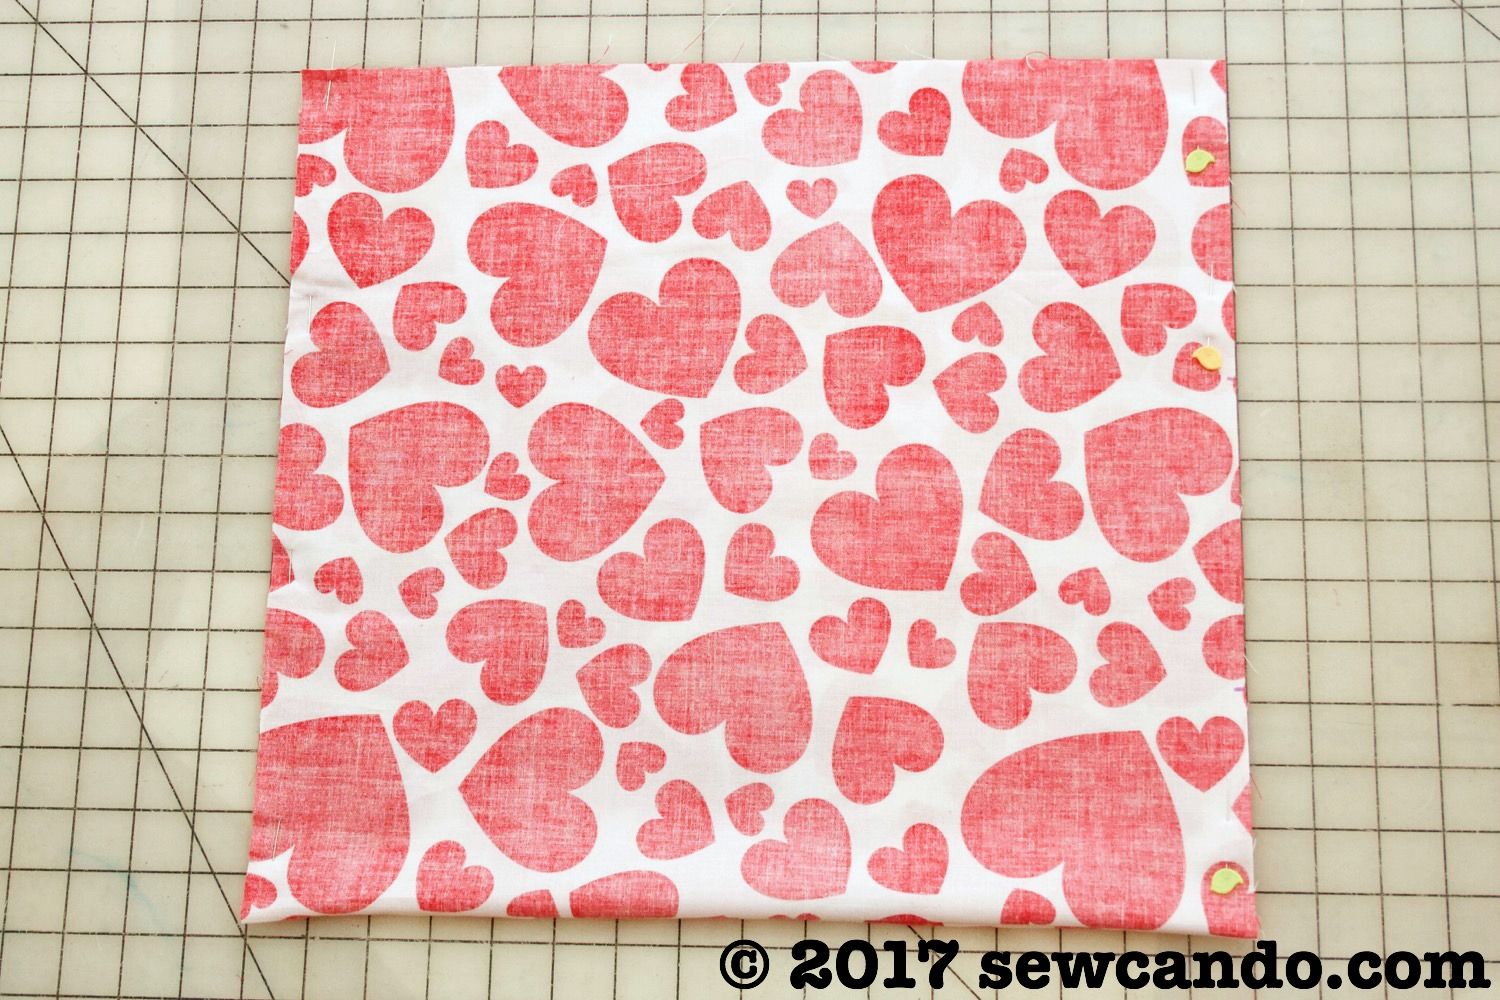
Now it was time to put the bag together.  I grabbed my faux leather & cotton and folded each of them in half, with selvages together.  I cut them so that the folds were on the bottom. 16 inches wide along the fold by 15 inches high.  This works well since the faux leather doesn't have any stretch and this way the cotton won't have any extra give either (which would make it hard to line them up later).  I also cut a 9 inch wide by 6.5 inch rectangle from the cotton for the pocket.  


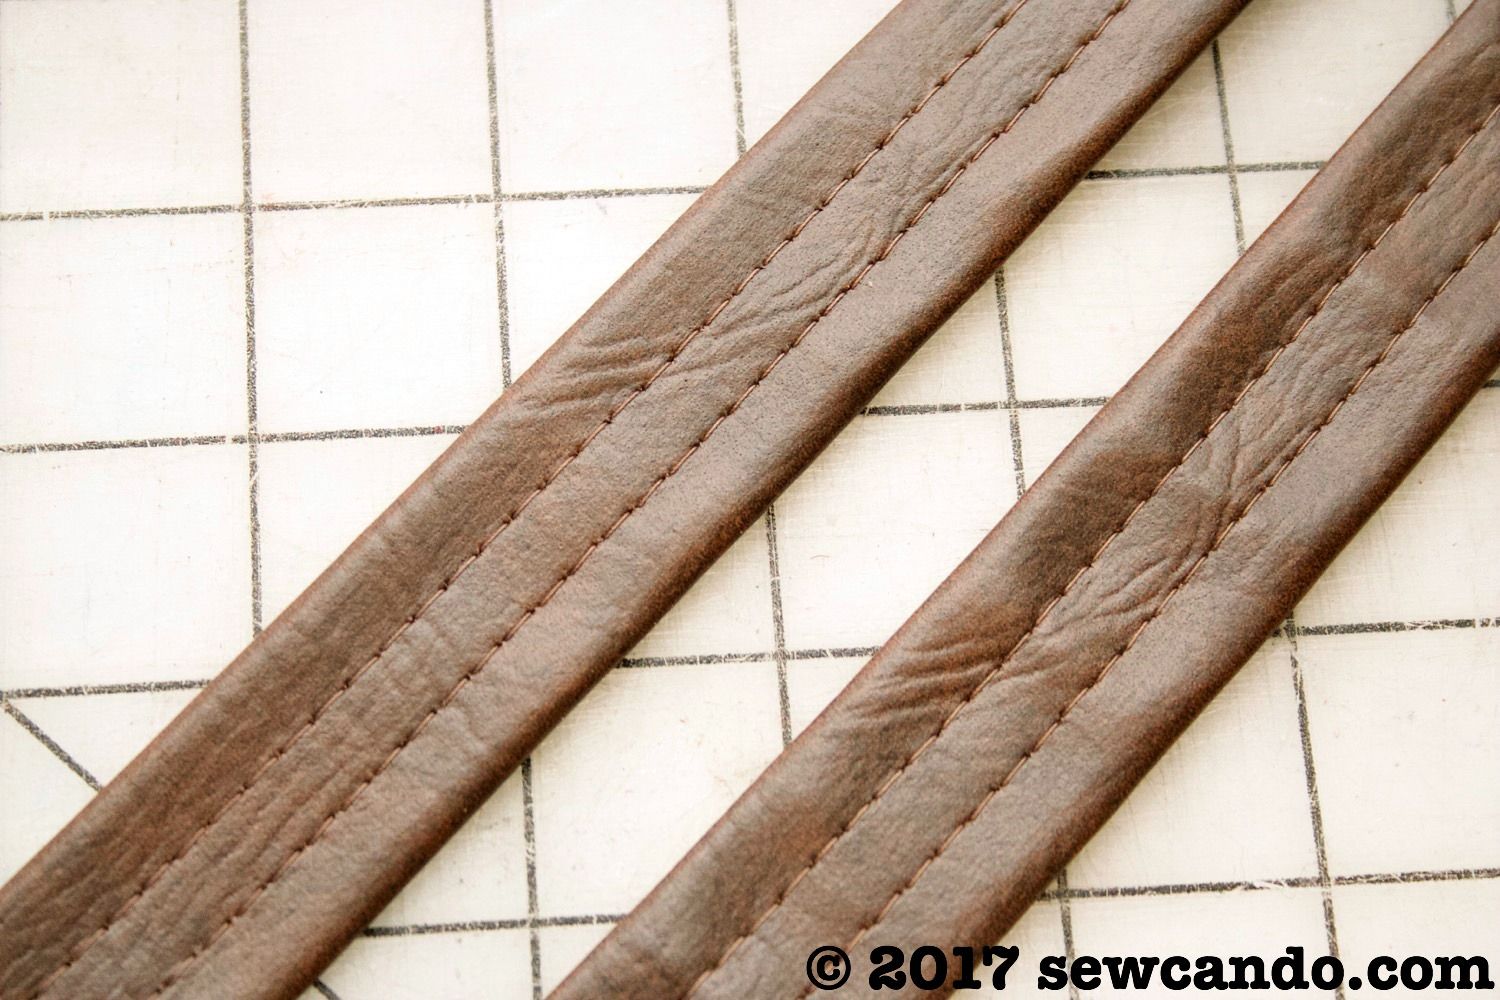
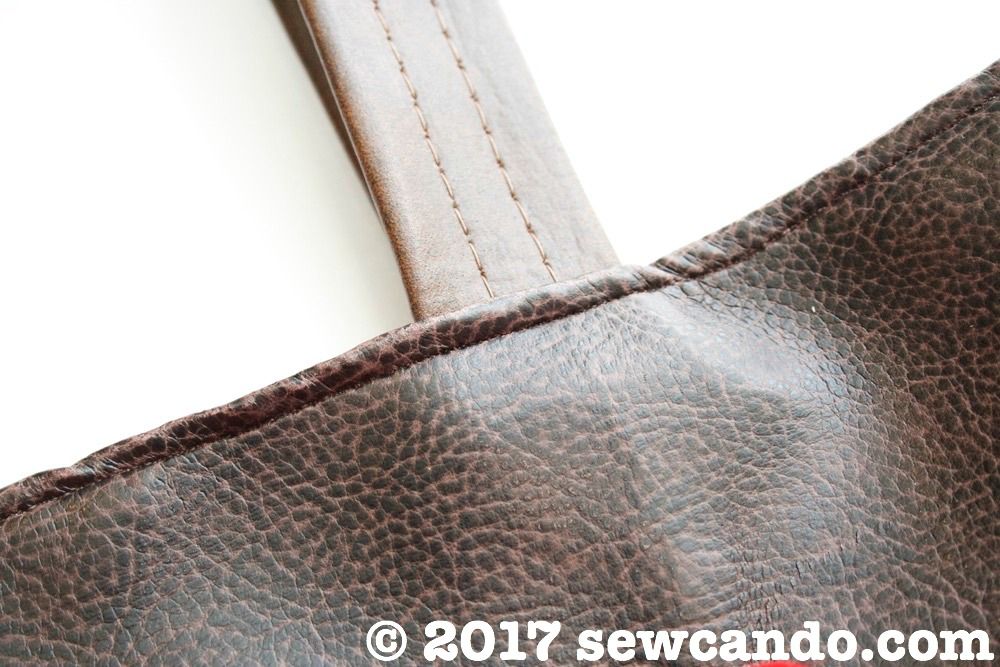
To save myself having to create straps, I used some by-the-yard pleather strapping I'd bought ages ago that was pretty close in color to my tote faux leather.  It just needed to be cut into the two 26 inch long pieces I needed.  Big time saver!!


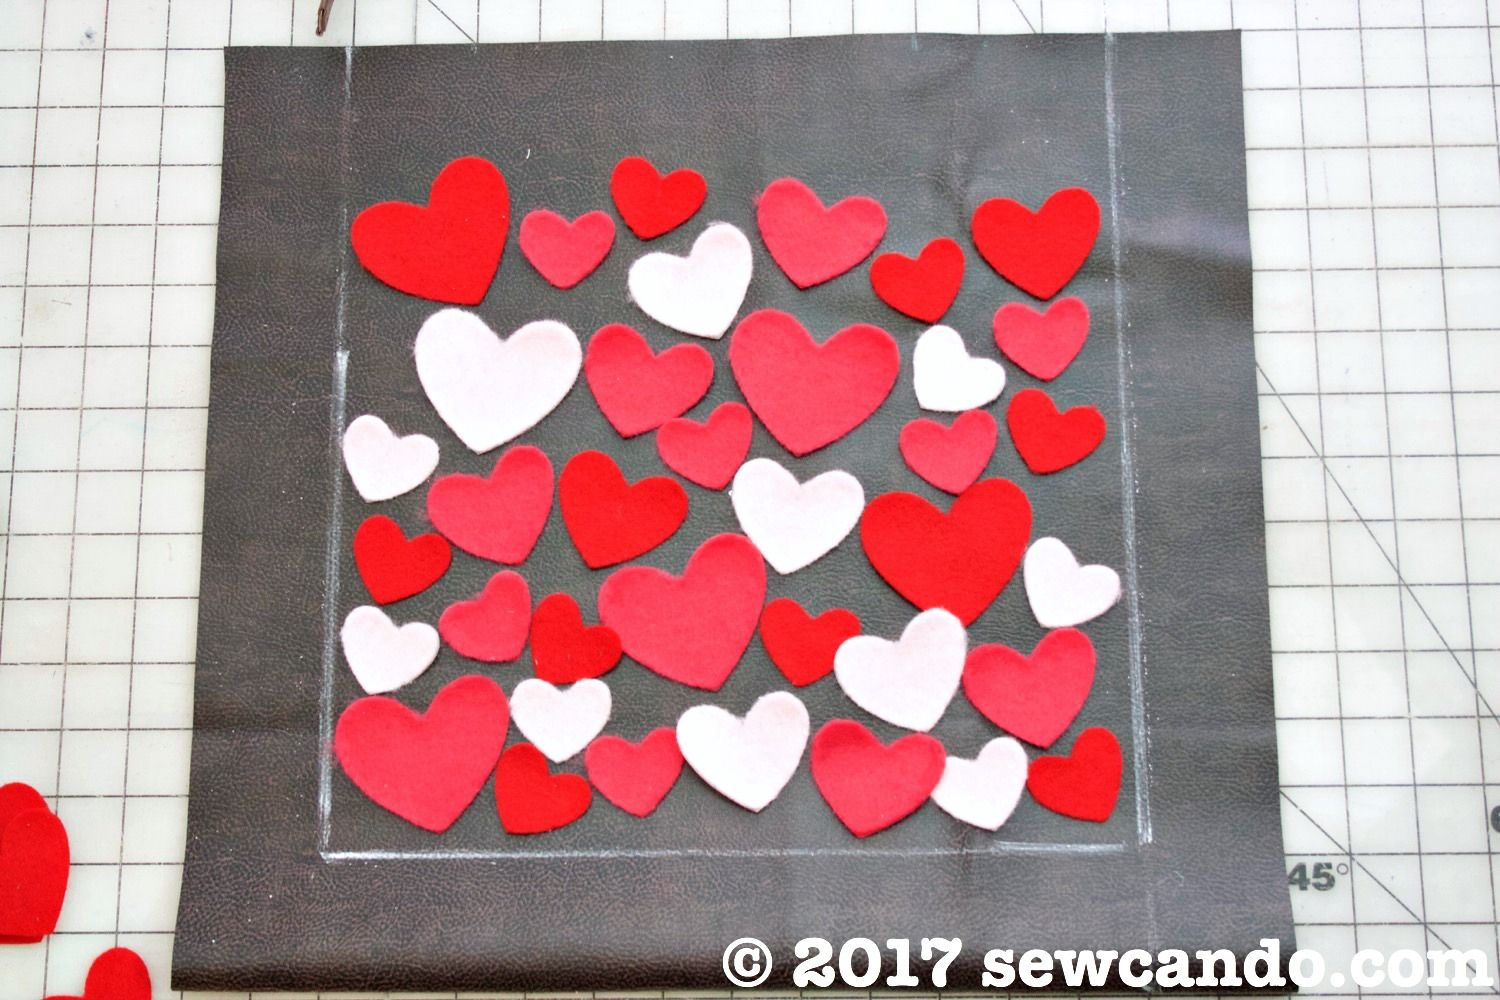
Since this bag was going to have some depth I wanted the hearts to only be on the front, not wrapping around the sides a bit, so I drew some lines 2 inches inward around the sides and bottom:


I arranged the hearts so the colors & sizes varied, keeping them just inside my lines.  To hold them in place without pins (which just poke holes in pleather), I used spray fabric adhesive, which worked like a charm.


Using coordinating colored threads, I stitch down the center of each heart to hold it in place.


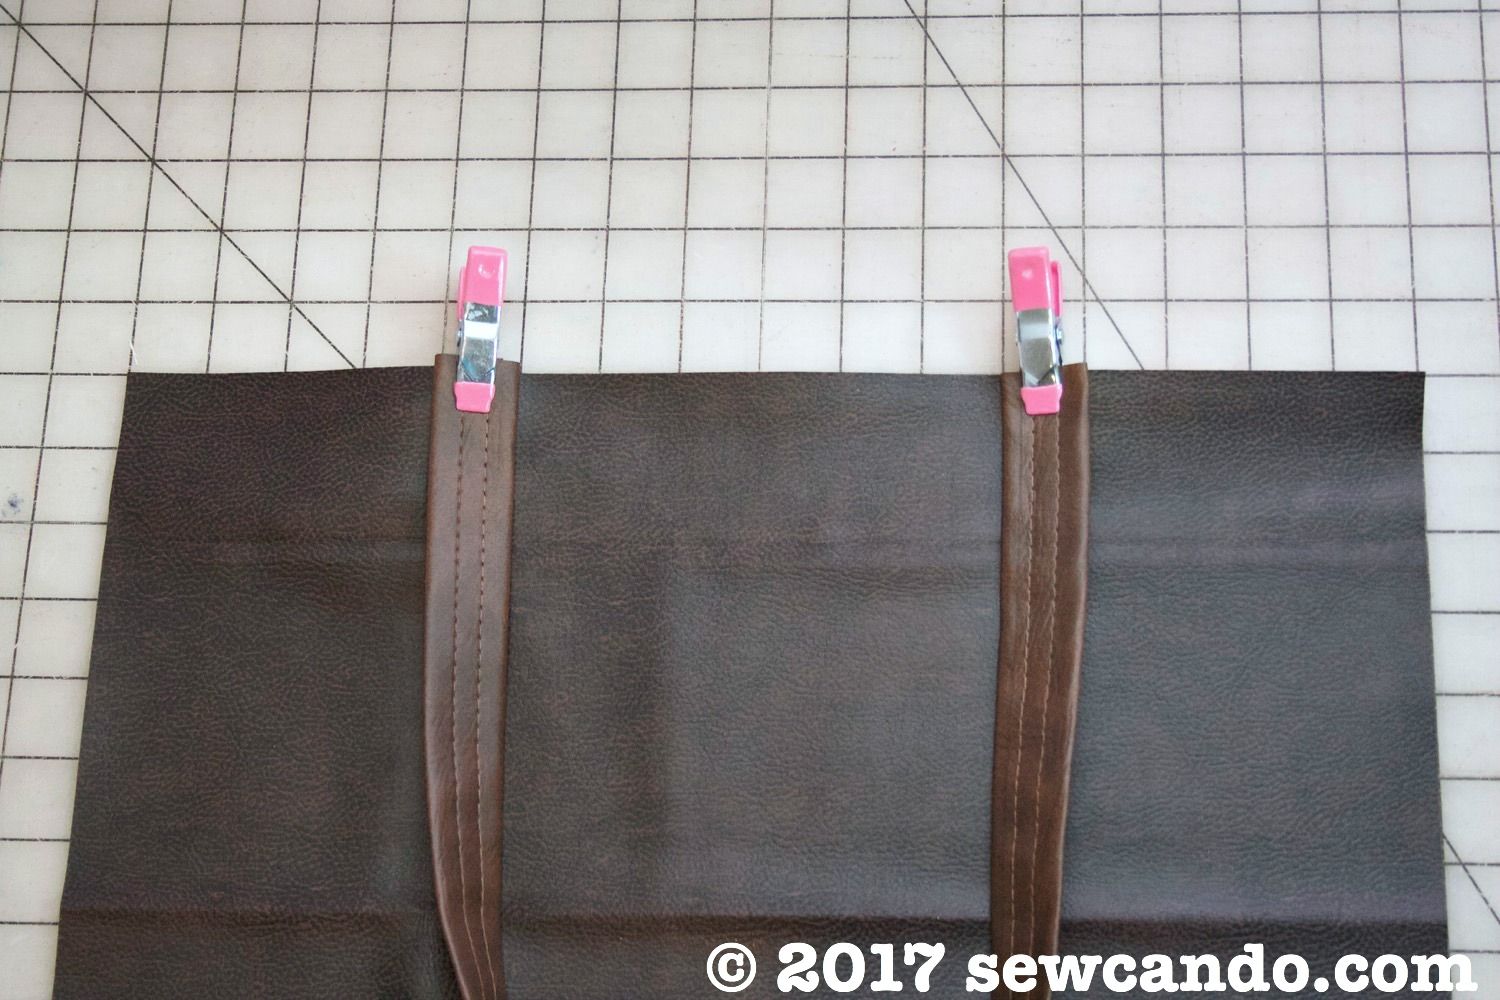
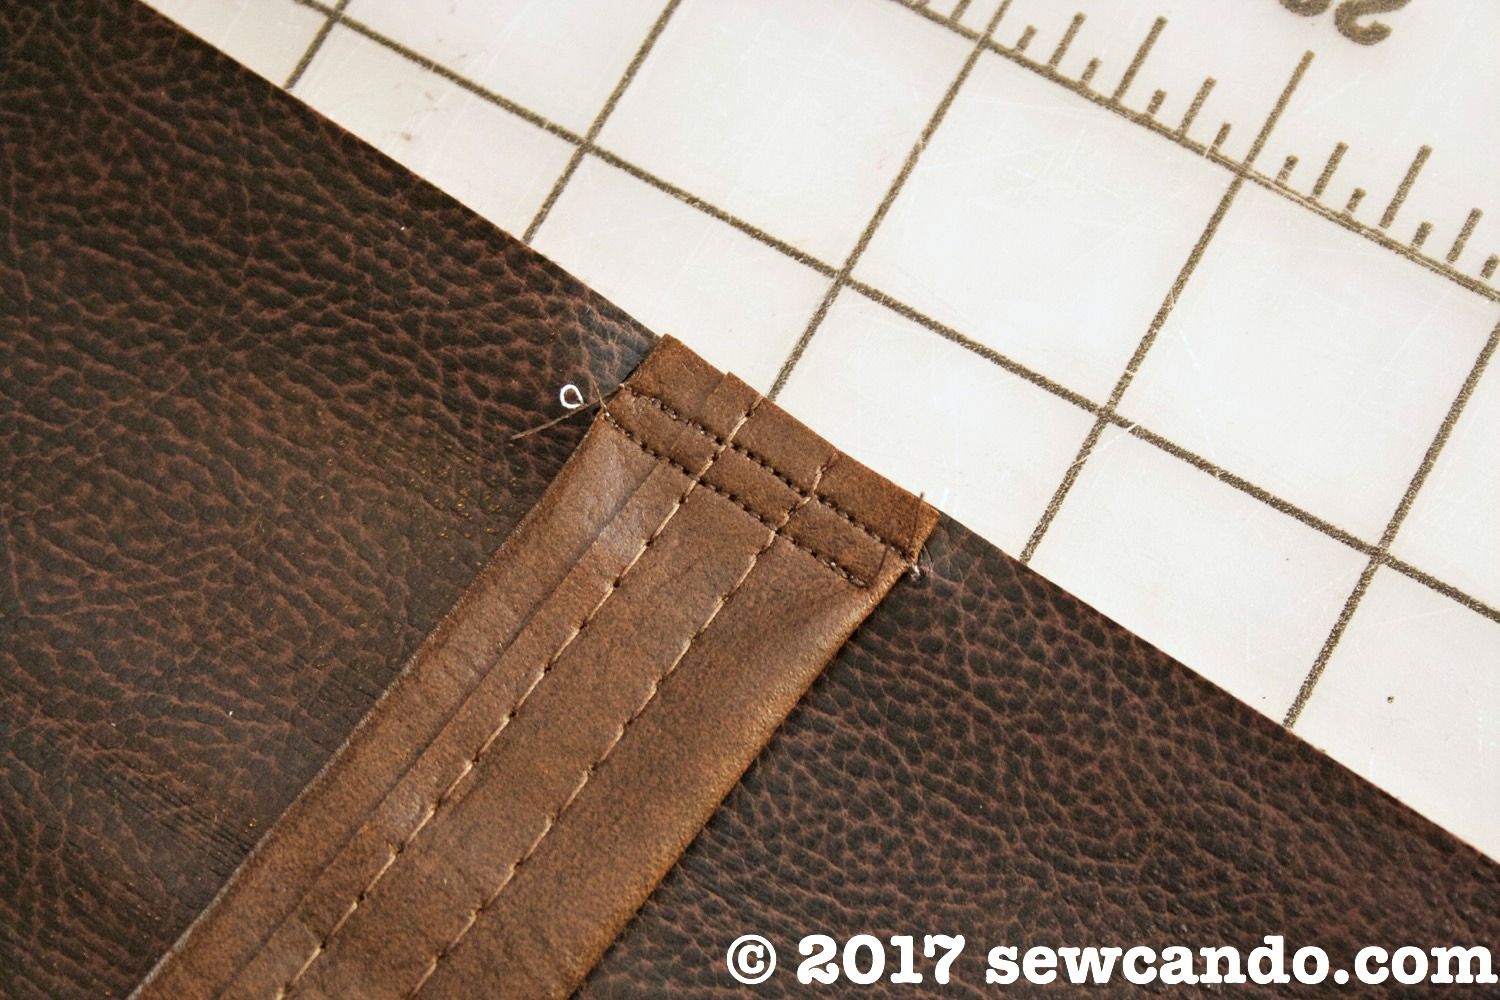
I also stitched on the edges of each strap, 4 inches inward from the sides:


I wanted the tote to be able to handle some weight, so I double stitched the straps onto the main body for extra security:


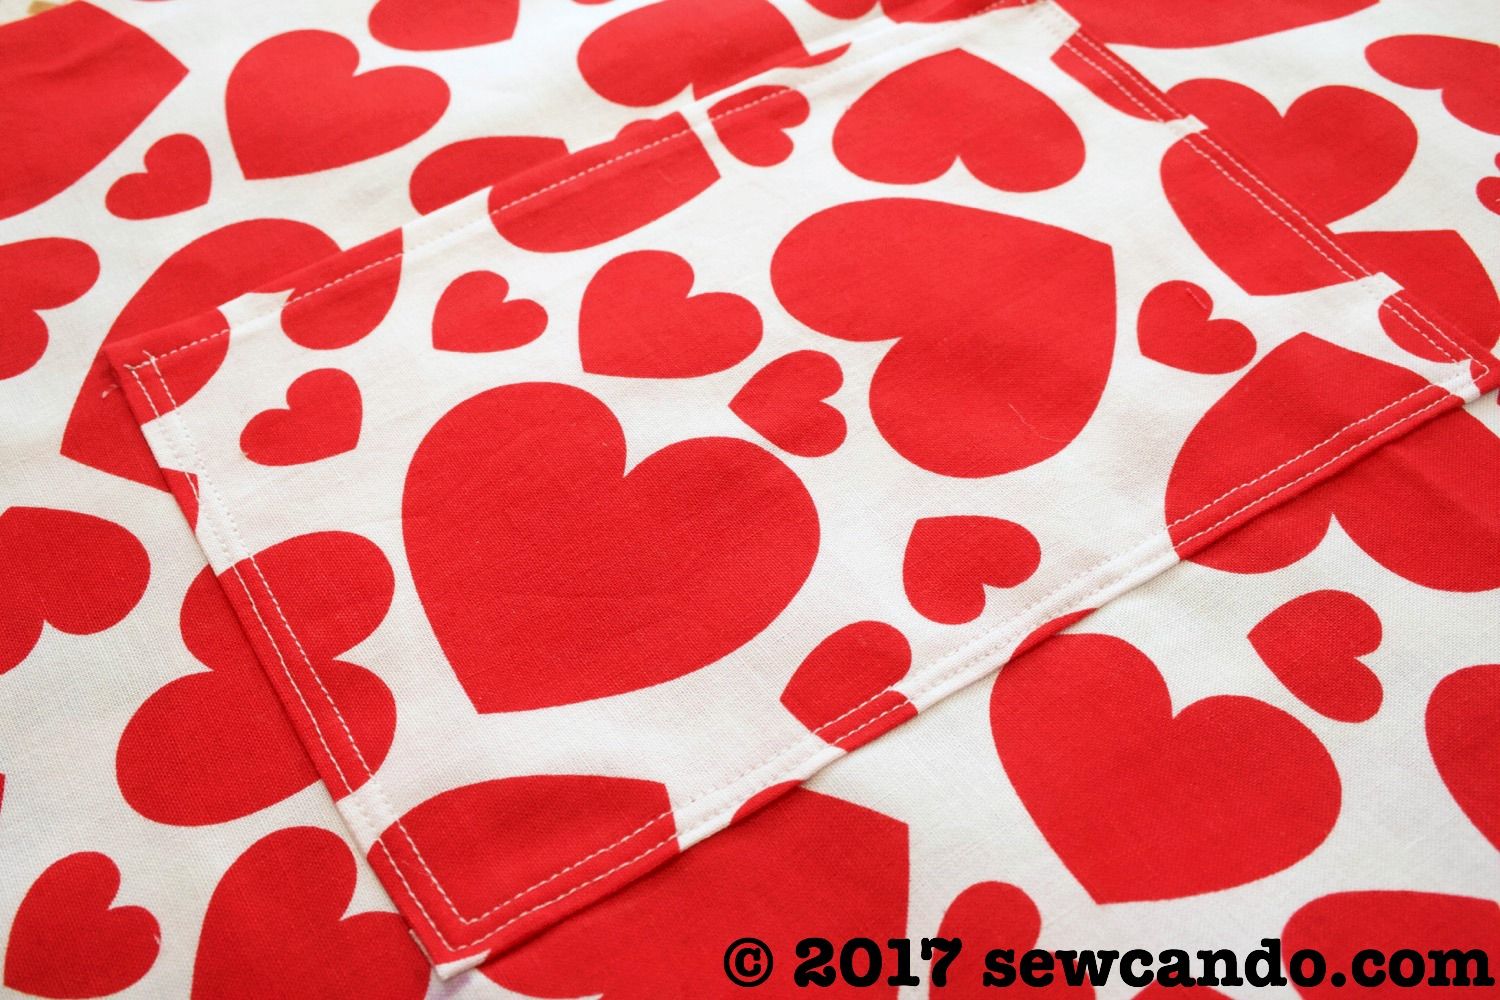
Then it was time to switch over to the lining.  I stitched up the pocket by press the top edge 1/4 in under and then folded & pressed it another 1/4in under and stitched it in place.  I pressed the other sides 1/2in under too:


I centered the pocket on my lining fabric, about 3 inches from the top edge and stitched all the sides, then another stitch down the center to split it into two pockets.


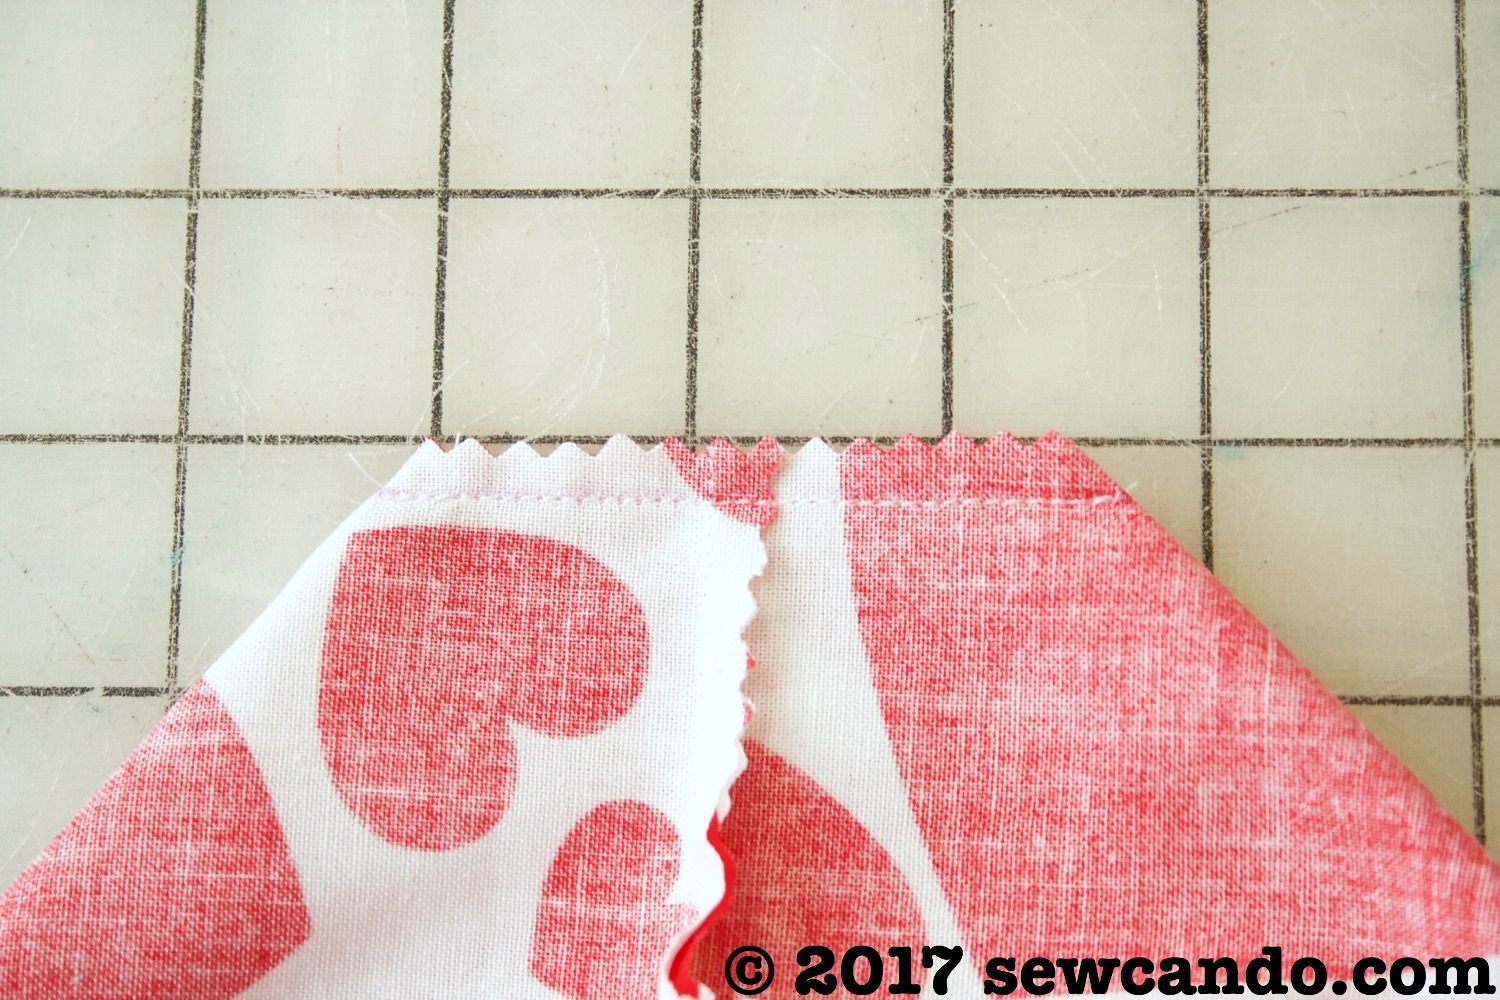
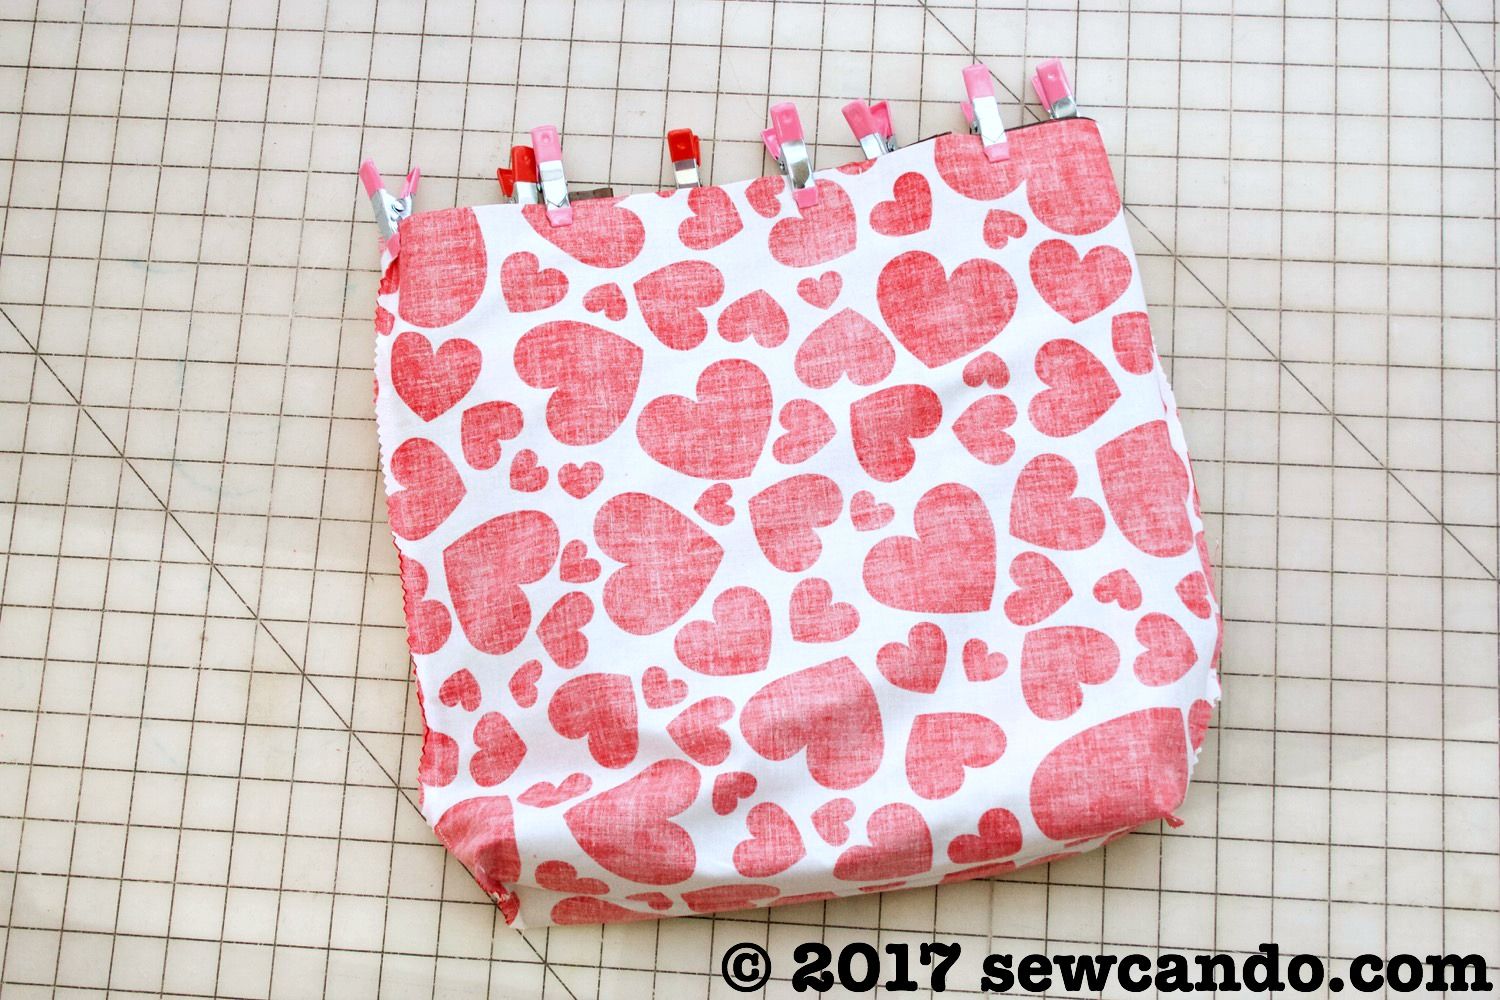
Next was stitching up the side seams, leaving a 3 inch gap on one side for turning:


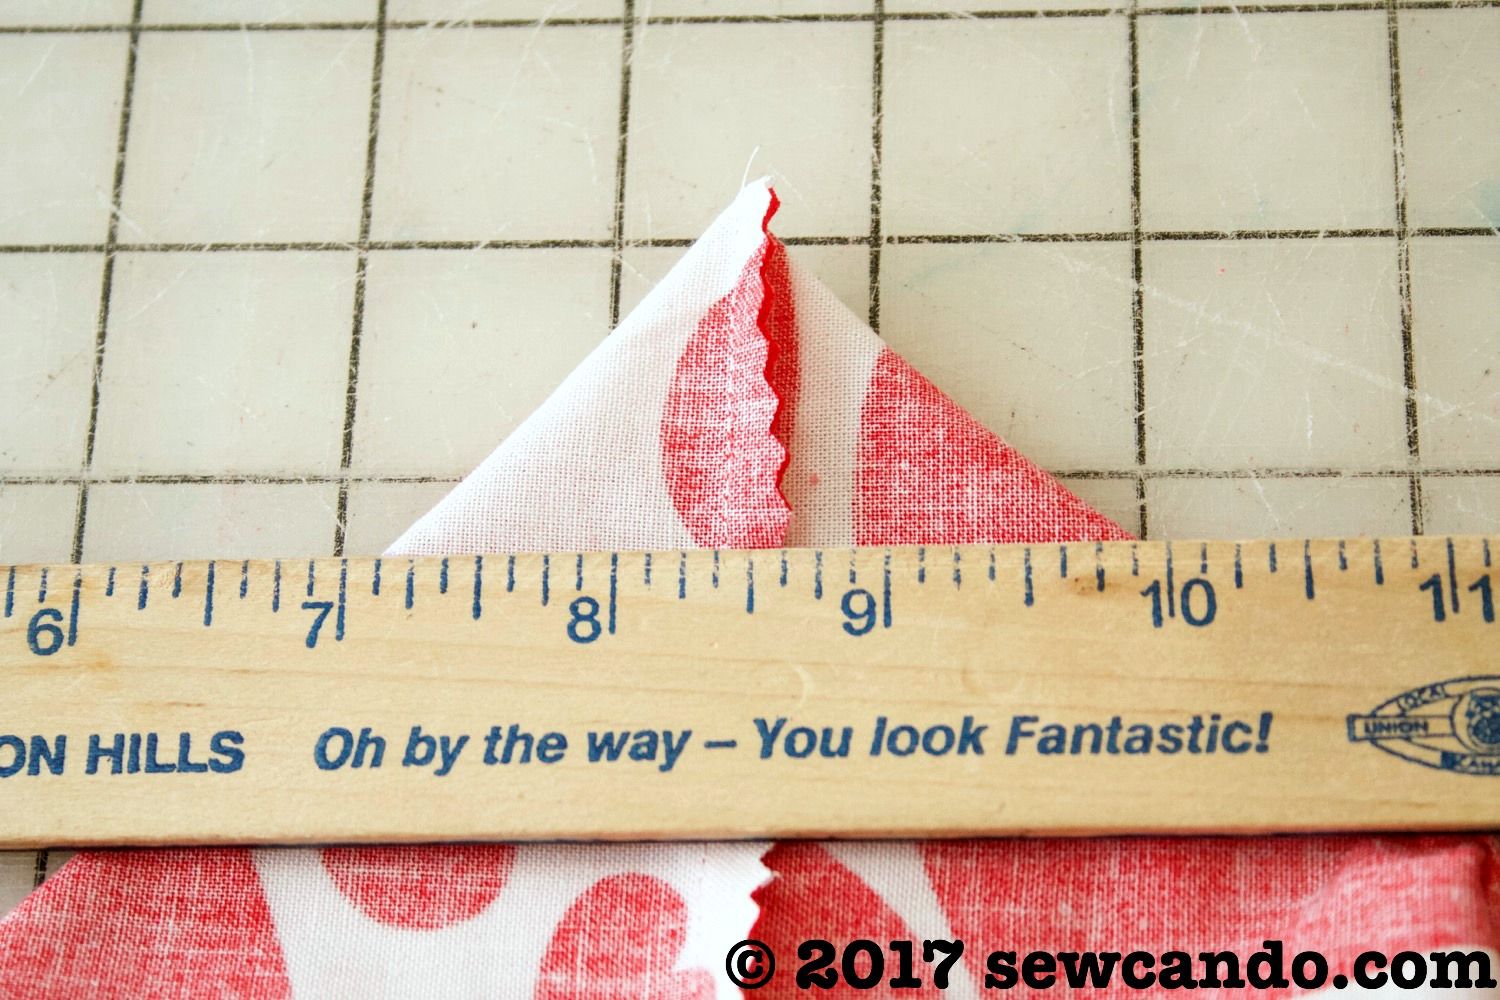
After trimming down the edges, I squared off the bottom corners by 3 inches with a ruler to give the bag depth:


After stitching I trimmed off the excess there:


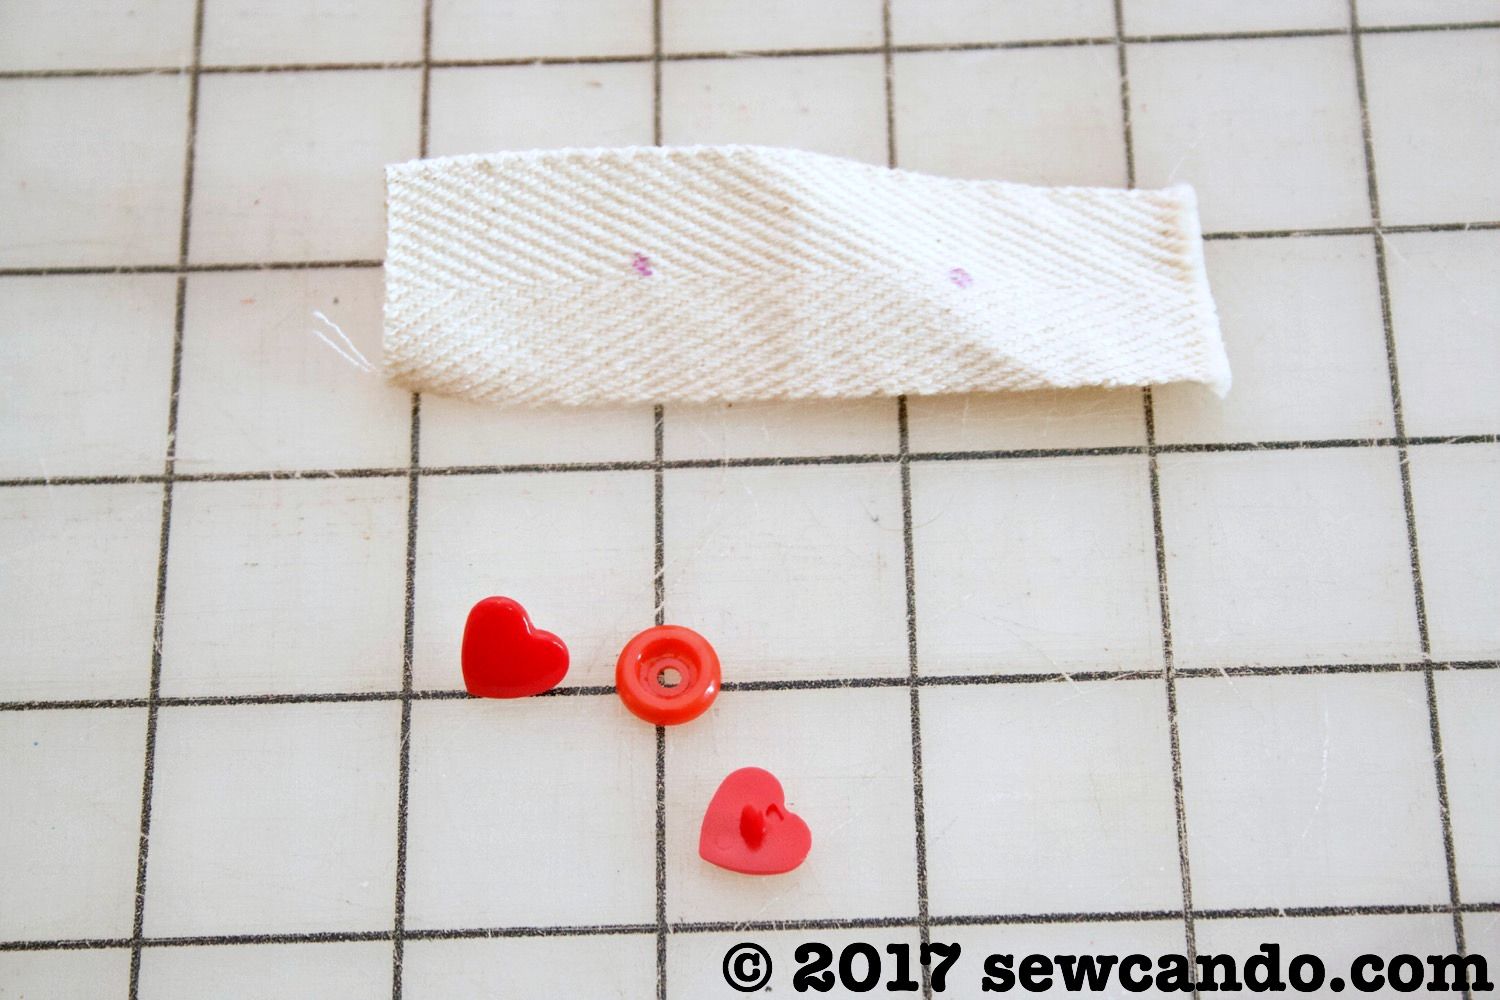
To make my decorative tag, I cut a 3 1/2in long piece of 1 inch wide twill tape and grabbed some plastic heart snaps from my stash:


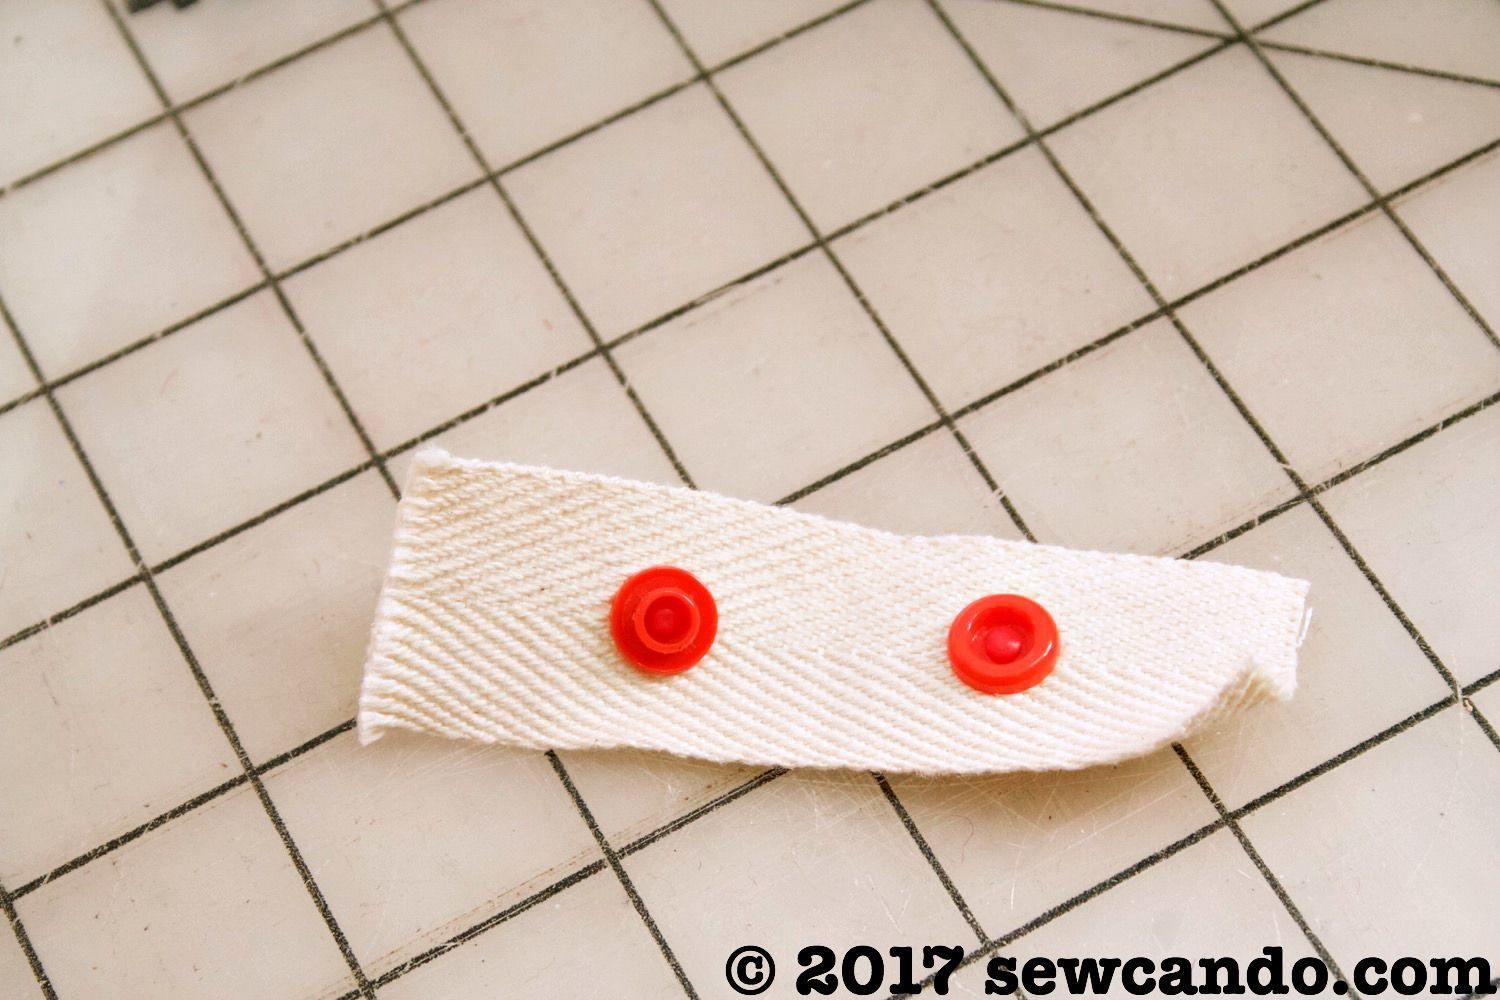
I set the snaps an inch apart with the hearts on one side so I could fold it together on the inside:


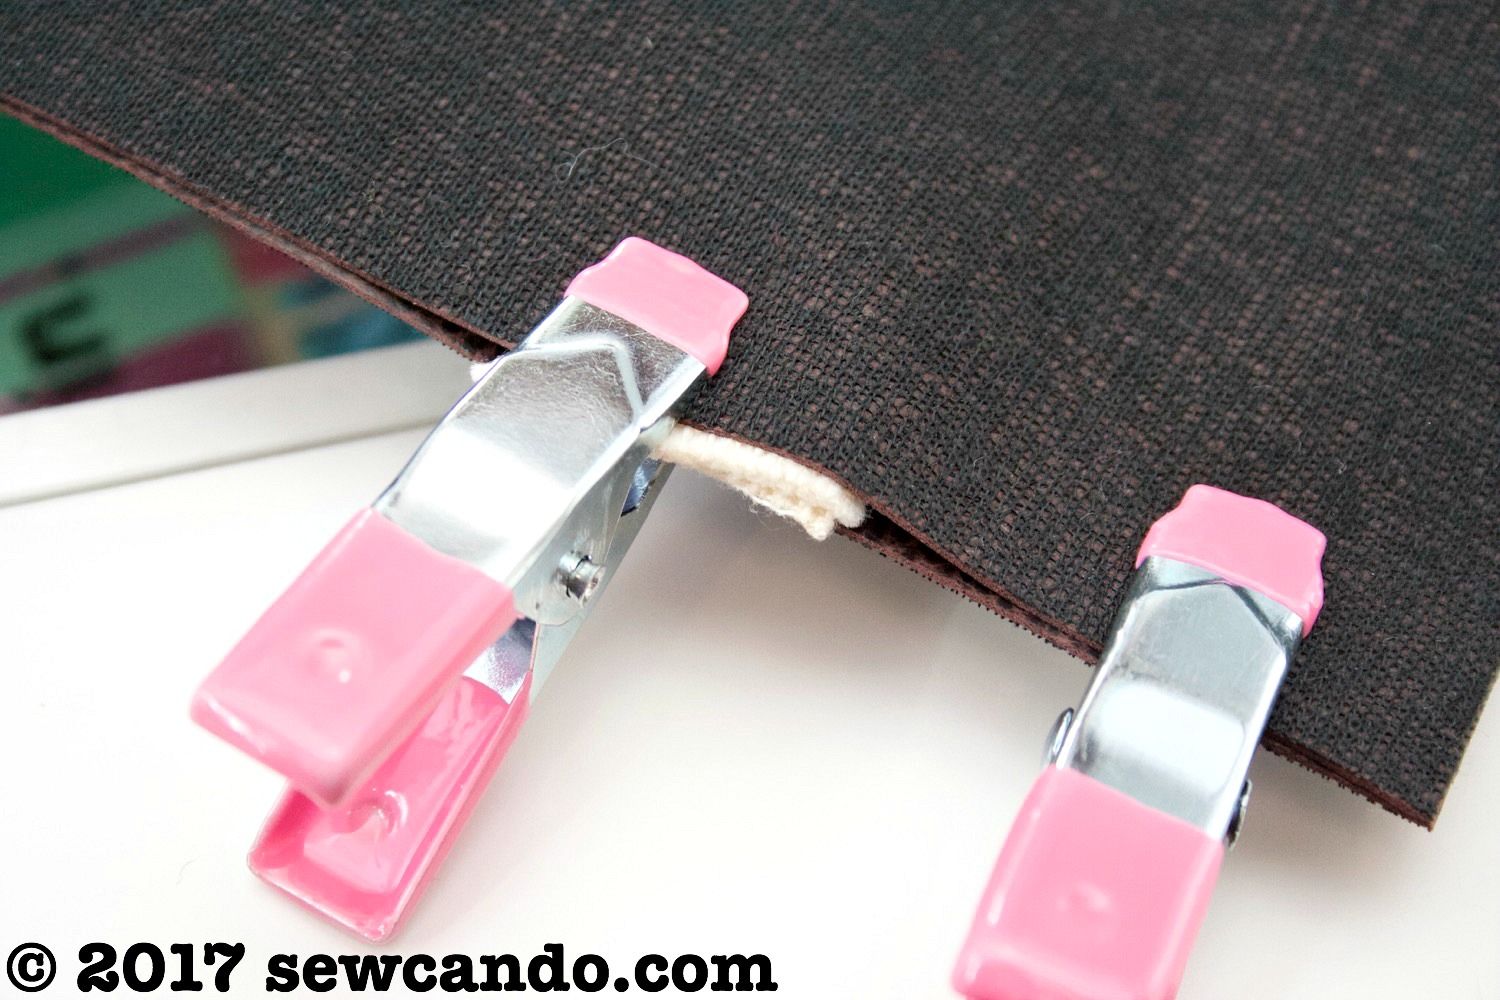
I sandwiched my tag between my pleather layers on one side about 2 inches from the top:


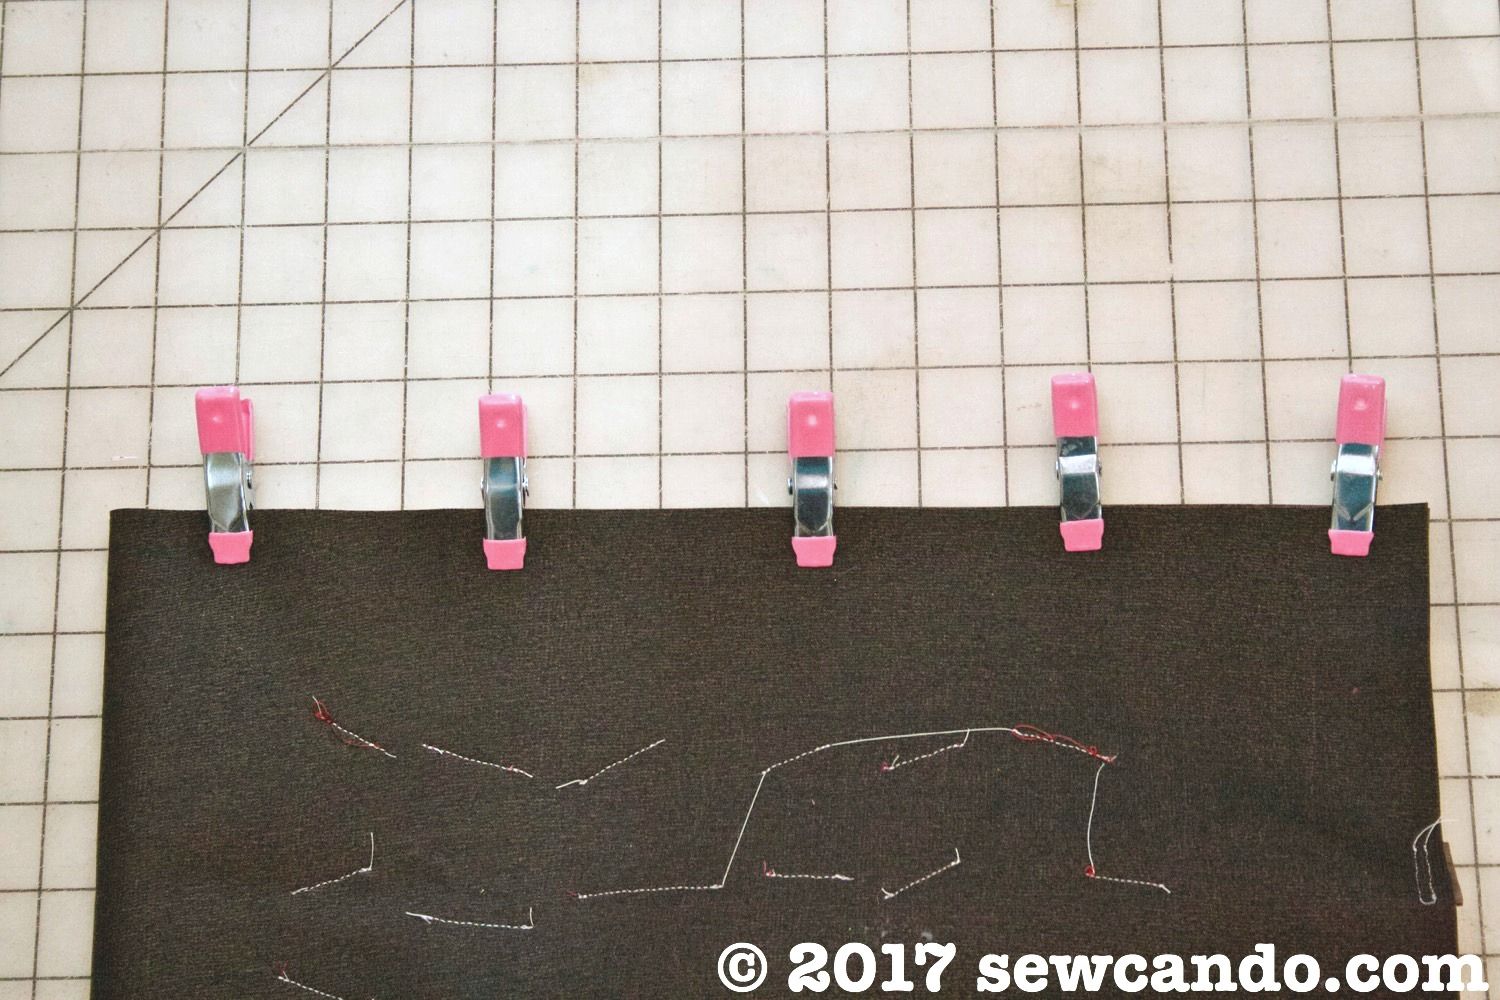
I repeated what I'd done with the lining - stitching the sides (minus a gap) and squaring off the bottom corners with my main pleather, except using small clips rather than pins:


I flipped my main tote right side out and inserted it into my lining, so their right sides were facing:


I lined up the side seams, clipped, then stitched them together all the way around:


After pulling things right side out and hand-stitching the gap closed and putting the lining into the main tote, I topstitching all the way around the upper edge:


So far I've toted this bag all over town and it's so soft & lovely.  Like a Valentine's gift for myself, but still whimsical enough to use well after the holiday.  I ðŸ’— DIY bags!


LinkWithin

Related Posts with Thumbnails