Showing posts with label thermal batting. Show all posts

Thursday, January 24, 2013

Make Your Own Snow Gear Part 2: Insulated Snow Mittens


Over the years I've gotten so tired of the flimsy knit, fleece or otherwise impractical mittens for kids.  None really keep their hands warm or dry.  We needed some really robust mittens that could take snowballs, sled rides and other snow-related activities.  Winter can be downright frigid and little hands need to stay toasty! Sooooo,  I created these babies: Insulated Snow Mittens.

Earlier this week I shared my DIY Insulated Snow Pants and these mittens use all the same materials.  This makes them waterproof on the outside, cuddly soft on the inside and with a thermal layer in between to really keep out the cold.  The trifecta of a great mitten!! Added bonus, if you make the snow pants, at least 2 pairs of mittens can be made with the scrap fabric leftover!


Note - The fabric amounts below are in case you're only making mittens.  This will make several pairs and fit approximately ages 2-8yrs.

You'll Need:
- 1/4 yd Anti-pill or Micro Fleece, which makes a cuddly, hardwearing lining.
- 1/4 yd Thermal Batting aka Insulating Lining, (traditionally used for making hot pads). It's needle pricked with silvery mylar to add the critical insulate so the warmth stays in & cold stays out.
- 1/4 yd PUL (polyurethane laminate), a laminated polyester traditional used for making cloth diapers - ideal because it's waterproof and lightweight.
- 1/2 yd One quarter inch wide elastic
- 1/2 yd FOE (fold over elastic) - Find more info on using FOE here
- Sewing Notions (matching thread, rotary cutter/shears, pins, sewing machine)
- My mitten pattern below 

Click HERE to download my mitten pattern

Start by printing pattern.  Make two copies of first page.  Cut out one as the top of mitten piece and the other with the curved section removed for the bottom (see notes on pattern). Cut thumb sections from second page.  Fold fabrics in half and cut out pattern pieces from the PUL, batting and fleece, so you will end up with a pair of each piece.

Lay batting on top of wrong side of fleece pieces.  With right sides together, sew one long thumb piece along one side of a top piece with a 1/4 inch seam allowance.  Make sure to sew the next long thumb onto the opposite side of the other top mitten (or you'll end up with 2 mittens for the same hand!). Repeat sewing step with PUL.

Next stitch small thumb piece to the curved section of the palm piece as shown below, with right sides together and mirroring for the other hand as done with the tops.  Do the same for the PUL pieces:

Trim down and cut notches into the seam allowance on the PUL pair so the curve with bend smoothly:

 This is how the pieces should look:
 With right sides facing, pin top and palm fleece pieces together
Stitch around entire mitten, except cuffs.  Trim seam allowance close to stitching:

Now take the top and palm PUL pieces and, with right sides facing, stitch down the long (non-thumb) side only and open.  With wrong side of fabric facing up, and starting 1.5 inches inward from the cuff edge, attached the quarter inch elastic with a wide zig-zag stitch, pulling elastic taut as you sew.
This will create a nice gather effect to help keep the mittens on.  Cut off remaining elastic.
Fold mitten closed with right sides facing and finish remaining edge stitching :
Turn PUL mittens right side out and insert linings into them.  Match up seams and pin together around raw edge.

Baste layers together, close to the edge.  Finish raw cuff using FOE (fold over elastic) as a binding, sewing into place with a triple zig-zag stitch close to the edge of the FOE.  Toss in dryer on high for about 10 minutes to seal the needle holes in the PUL.  Now the mittens are ready for snow!

I also made a toddler version without thumbs (just using the top pattern piece for both sides) and inserted one end of a strip of twill tape under each mitten cuffs as I stitched them on so they'd be the "on a string" variety.
I think some snow bunnies are ready for action!!

I'm also sharing this with my FAVE LINK PARTIES.
Click HERE to check them out!

Tuesday, January 22, 2013

Make Your Own Snow Gear Part 1: DIY Snow Pants


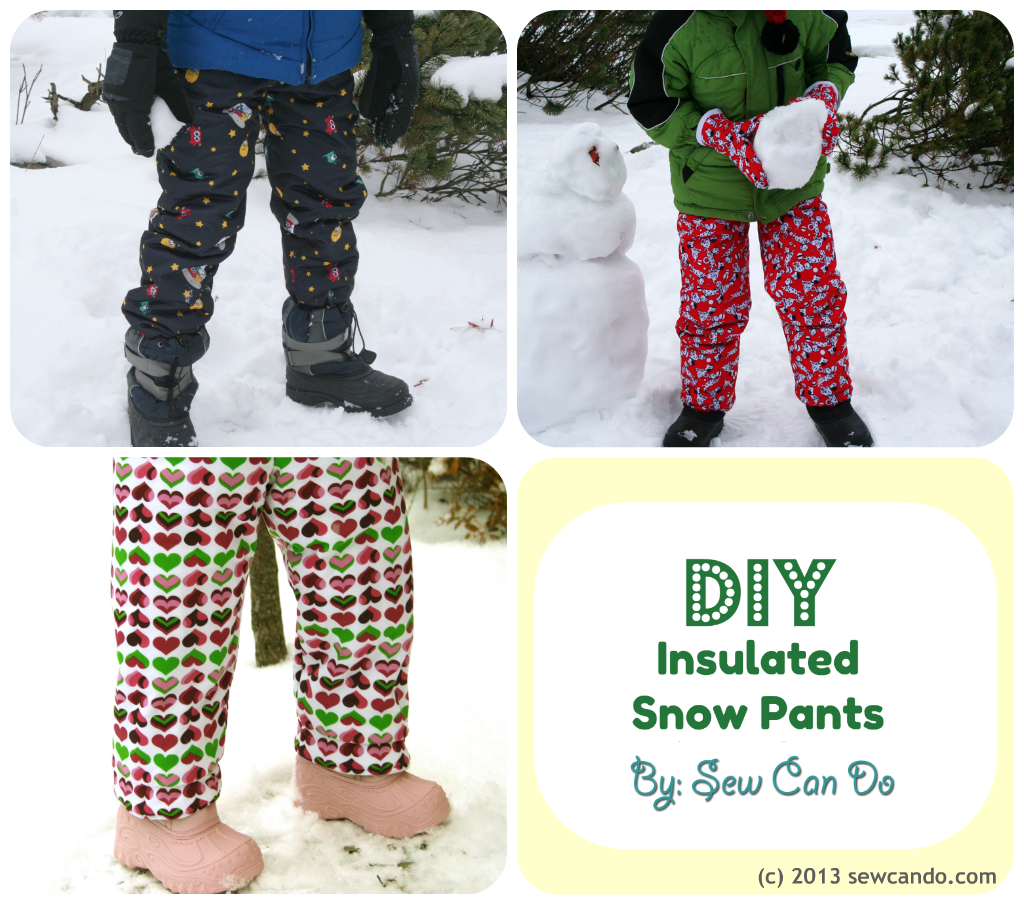
Brrr!  Winter is in full effect around here and it is COLD!  How about some tutorials to keep the kids cozy & warm and still be easy on the pocketbook?  This week I'm sharing a two-part how-to for making matching, insulted snow pants and mittens, using single yards of fabric.  And for less than $25 for an entire set:
Yes, those are 101 Dalmatians frolicking on both the snow pants & mittens!

Today's Part 1 is an updated version of my popular DIY Insulated Snow Pants. These babies are great because they are just as warm as the ultra pricey brands and you can customize your own color combos.

And did I mention they can be made in less than an hour??

You'll Need:
- 1yd Anti-pill or Micro Fleece, which makes a cuddly, hardwearing lining.
- 1 yd Thermal Batting aka Insulating Lining, (traditionally used for making hot pads). It's needle pricked with silvery mylar to add the critical insulate so the warmth stays in & cold stays out.
- 1 yd PUL (polyurethane laminate), a laminated polyester traditional used for making cloth diapers - ideal because it's waterproof and lightweight.
- 1 yd One inch wide non-roll elastic, which resists rolling & twisting to keep cuffs and waistband in place
- Pattern for pajama or loose fitting elastic waist pants*
- Sewing Notions (measuring tape, rotary cutter/shears, safety pin, pins, sewing machine)

*1 yd is enough to make up to about 10yr old sizing.  If you want to make a lot smaller or larger, follow your pattern's yardage guide & adjust accordingly.

All these materials can be found at most chain fabric stores - using coupons can make them very affordable.  Personally, I find the best selection of fleece and PUL prints & colors is online, look for diaper sewing shops to find some cute and unique designs. 

The pants pattern I used had a single piece for each leg.  If yours has 2 (a front & back), just overlap the side seams by the amount of the seam allowance to make a single leg piece - it saves time!  Since these will be going over regular clothing, choose one size up from the pant size usually worn on the sides of the pattern for the best fit (leaving waist & length the usual size).  Cut folded fabric so there are two pieces of each of the thermal batting, fleece and PUL:

Now layer a piece of thermal batting over the wrong side of the PUL:

Fold with the right sides of the PUL facing and stitch down the side.  Trim the seam allowance and repeat on other leg:

Turn one leg right side out and insert into the other leg so the crotch areas are lined up. Pin together and then stitch.  Trimming seam allowance again. 

Repeat with other leg and again using just the fleece to make lining.  I also sewed a tag onto the inner backside of the lining at this point so it's easy to know which way is back.

With right sides of outer & lining facing (and fronts and backs matching up), insert the outer pant into the lining and pin together the waists.

Stitch together with a .5 inch seam allowance, leaving a two inch gap at the back for turning.

Pull the lining out and it should look like this:

Now stuff lining into the outer pants and stitch waistbands together 1.25 inches from the top seam to form the waistband casing:

Measure the wearer's waist and ankles.  Cut elastic for waist and insert into gap and work around with a safety pin:

Sew ends of elastic together and sew gap in fabric closed.  I did this by hand with a slipstitch:

Now there are two cuff options.  One is to trim off the .5 inch seam allowance and stitch on some FOE (fold over elastic) the bottom hem with a triple zig-zag stitch.  I did this with the pants for my boys since their boots were a lot thicker and we wanted the pant cuffs to pull over them.

For a firmer, more gathered cuff, fold the raw edges of the cuffs inward .5 inches and pin:

Stitch cuffs together .25 inch from edge, leaving a 1.5 inch gap.  Repeat step for making the casing, inserting the elastic and closing the gap.
  
Pull them on and they're ready for the snow.  And they total rival the high end brands that cost $50+ in terms of warmth & keeping wetness out.

You can have them made & the kids out playing in the snow less than 60 minutes from hearing the words "Snow Day"!

Stay tuned for Part 2 of the tutorial later this week.  I'll share how to make some matching insulated mittens for keeping hands warm using the scraps leftover after making these pants. UPDATE:  Click HERE for the FREE mitten pattern & how-to.

I'm also sharing this with my FAVE LINK PARTIES.
Click HERE to check them out!

Tuesday, June 8, 2010

CraftShare: Insulating Fabric & Chic Lunch Bag Tutorial


Hey CraftSharers!  Last week we spent some time on Laminated Cotton.  Loads of uses & fun ideas  for all kinds of projects.  If you missed anything or want to refer back, just click on the CraftShare tab at the top of the blog.  I'll keep all past CraftShare posts there so it's easy to find info anytime.  This week we'll be checking out another cool fabric: Thermal Batting!


What is Thermal Batting (aka insulated lining)?  This polyester looks like batting, but is needlepricked with a metallic film to make it insulate, so just like a thermos, it helps keep the hot thing hot & the cool things cool.  There are loads of great uses for it & I can think of some great winter projects like mittens, a cozy coat, toasty snowpants & the list goes on.  However, since it's 70+ degrees and the start of summer, those aren't exactly the kinds of projects most of us want to work on right now. Soooooo,

For today's project, Chic Lunch Sac, I'm combining laminated cotton & thermal batting to make a lunchbag we can take out & about in the heat and still keep things tasting cool.  


What you'll need:
1/4 yd Laminated Cotton or PUL
1/4 yd Thermal Batting/Insulated Lining
Double fold bias tape
2 snaps (or velcro) for closure
Sewing notions (thread, rotary cutter/scissors, bobby pins) 


Super easy to make, just cut one rectangle 11"x 26" of Thermal Batting and two rectangles from the laminated cotton (I used laminated cotton for outer & PUL for the lining).


Lay the thermal batting piece on the wrong side of one of the fabric pieces.  Right sides facing, fold lengthwise.  Do the same for the lining piece.


Stitch up the sides.   Mark 2" squares out of the bottom corners of each piece:


Pull the marking lines together at the corners to square them off & then stitch down the line of each corner like this (stitch twice for reinforcement):


Trim the excess fabric triangles off:


Turn the outer bag right side out and insert the lining bag inside.  Line up the side seams using bobby pins (so you don't leave holes in your fabric):


Attach bias tape to the open edges using your bobby pins again:


Stitch on your bias tape to attach the outer & lining together:


I added two snaps for the closure.  Toss in an icepack and the goodies you want to keep cool and you're good to go!  I made mine match the Laminated Beach Bag I made earlier, so we'd keep all our on-the-go stuff clean & fresh!


What projects do you think thermal batting would be ideal for?  Have you used it yourself?  Don't be shy - share your ideas & tips in the comments and your pics in the CraftShare Flickr pool so everyone can be inspired!


Sharing this with my fave link parties too so check them out here!

LinkWithin

Related Posts with Thumbnails