With Christmas just around the corner, many crafters have special crafty gear on their wish lists. It can be tricky to know if some of the bigger items are worth splurging on, so today I'm sharing my real world experience with one of them to help make that shopping decision easier: the Cricut Easy Press.
I'm going to start off by saying, this is a totally independent review. I bought it with my own money. No kick backs, freebies or compensation from Cricut or anyone else to cloud or slant my feedback. I've seen only a few reviews like this when it comes to Cricut products, so I hope this helps others with buying decisions.
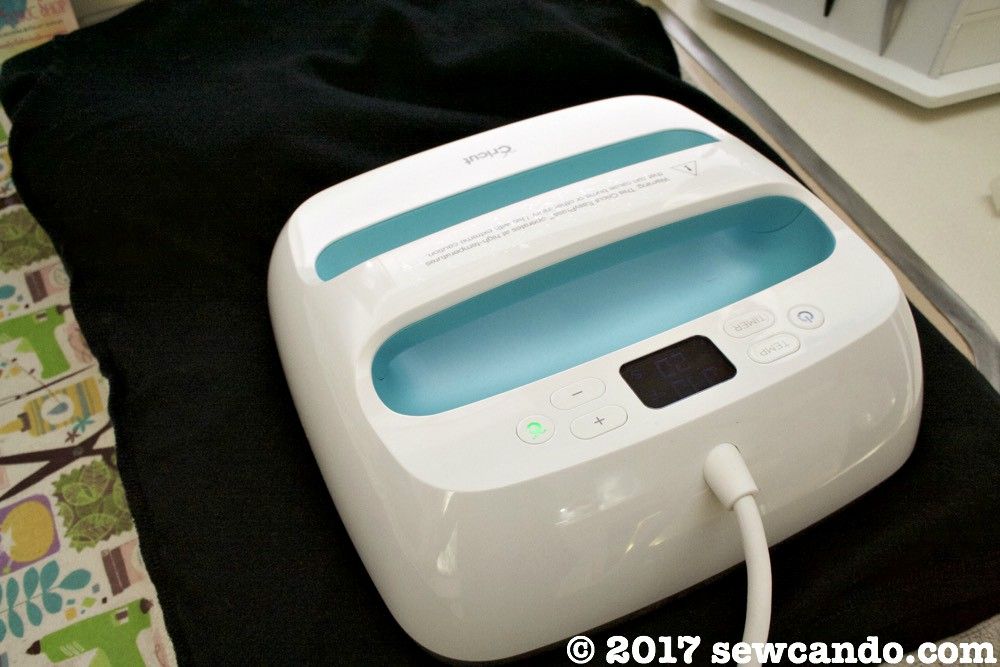
In case you aren't familiar with it, the Easy Press is a new-ish tool that came out a few months ago. It's specifically for heat pressing aka iron-on applications. Using heat transfer vinyl, you can press your own custom shirts, bags, pillows, wood and just about anything else. It's such a quick way to customize just about anything and so easy. Definitely a craft anyone can do!
Traditionally, if you wanted to use iron-on vinyl, the options have been either using a normal household iron or to buy a commercial heat press. Basic irons don't always adhere the vinyl very well - the iron it usually peels off after a number of washes. Regular heat presses can be big and bulky for home use and expensive. The Cricut Easy Press is about the same price as the lowest priced heat press machines, but has the convenience of a smaller, sleeker size.
It has easy push button settings for temperature and time.
It's also got a heat resistant safety base and automatic shut off after 10 minutes of inactivity.
Does it really work?
I'd been really curious about it when it came out, but had a hard time finding true reviews about it even a month or two later, so I took a gamble and bought one. Since then I've used it on multiple projects, used several kinds of vinyl and washed most of them multiple times. Here are the results...
The Pros:
- The size is ideal. It's big enough to do a large shirt design at 9"x9", but small enough to not take up a lot of room on the counter. It's square shape and holder base makes it easy to store too.
- It heats up pretty fast and evenly. It comes with a guide to tell you exactly how long and at what temperature to iron most types of HTV (from Cricut and other brands) on various fabrics. A project is done in just minutes, so it's ideal for limited work time.
- The button settings for temperature and timer are super simple and make sure you get an even fuse everywhere at the same time. I followed the directions for fusing on the front & inside out and the referenced HTV types adhered well every time.
Smooth/lite:
Glitter:
Foil:
- Even after a dozen washes (inside out and line drying), the designs still stayed put. No lifting or peeling like I'd had with my previous iron fused heat transfer projects. I even had this shirt that accidentally went in the dryer twice that has been washed a dozen times and still stayed as nice as day 1!
The Cons:
- The cord is weirdly positioned at the center of the top when it would make more sense to be at the bottom. Unless you have an outlet right in front of you, it means you have to maneuver it out of the way or hold the press upside down which is awkward when you're trying to press the buttons.
- They aren't always in stock. They have them advertised as in-store several chain places, but none ever seem to have any. I had to order mine online and it was out one day, available the morning I ordered and then out again a few hours later. They also randomly put it on sale for the first time about a week after I bought mine. Nothing like losing out on saving $20. Grrr.
- The instructions say for best results you need to use a heat resistant mat & refer to a Cricut heat mat that's not included with it and not even available to buy. They suggest using some stacked towels as an alternative, which I've done, but it seems stupid to promote a product they don't even sell or bother to tell you is "needed" anywhere in the product description before you buy it.
- There are some specialty HTV types, like flocked or glow in the dark, that Cricut doesn't make, so they have no guidance for temperature or time in their settings chart. The chart refers to their website for more settings, but it's the exact same limited list. Not exactly helpful. I've used settings I've found elsewhere, but I had to go back over my flocked stuff again with the press multiple times. Doing it for too long can cause it to melt or not adhere, so it's a bit trickier.
- Cricut brand HTV is crazy expensive. Even when on sale. And Cricut is almost always excluded from any coupon offers in stores so doing a few big designs can be pricey if using their brand materials. The amount on the rolls is pretty paltry and prices vary strangely too. Glitter & Foil have more inches on the roll, but cost less than the plain Smooth/Lite.
They also are frequently sold out of a lot of colors in stores & online and don't offer some that would seem commonly used like orange, light blue, pastel yellow or green. These two factors mean it's better to look for alternative brands to be cost effective with HTV projects.
Is it worth buying?
Personally, I think it's worth getting if you like to do quick projects and have a cutting machine already. I've got a Cricut Explore that's 3 yrs old and still works great so I can cut out a design in a few minutes and have it heat pressed just as fast.
I've been really short on craft time lately, but still made nearly a dozen projects so far. All have been quick and turned out well so the satisfaction level with the results has been high.
 In an upcoming post I'll share my favorite source for excellent (and inexpensive) HTV, how I make original designs the fast way and other handy tips.
 SaveSave
I had so many plans for Halloween projects this year. I was going to have lots of posts and be all festive too. Between an out-of-state craft show, kid birthdays, home renovation planning, complicated costume requests and an unexpected city-wide water issue, most of my ideas got sidelined for more pressing issues. Halloween's less than a week away and I'm scrambling just to get the costumes done. UGH.
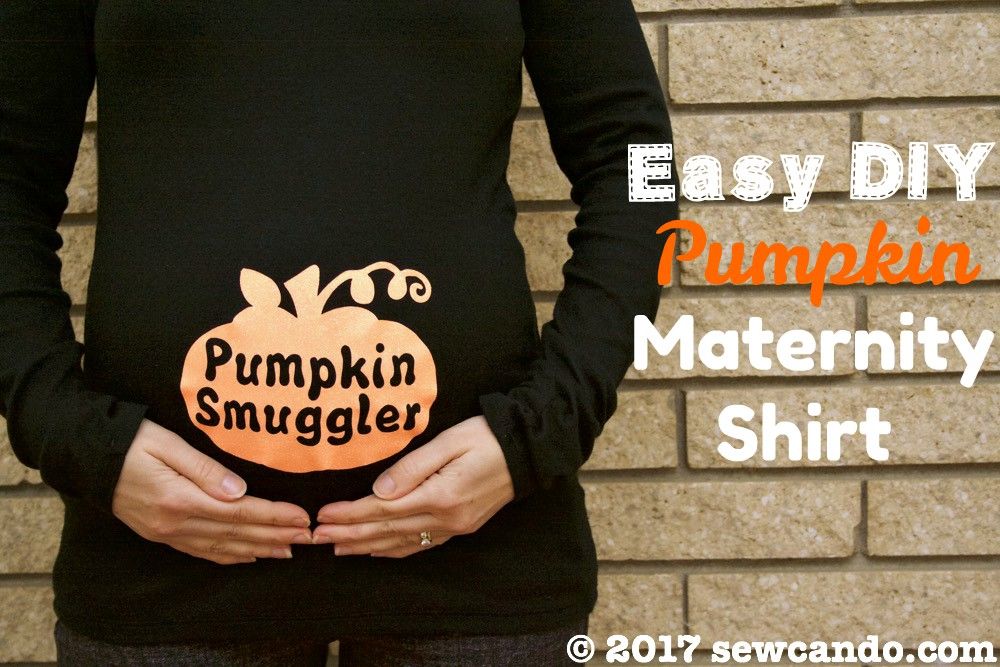
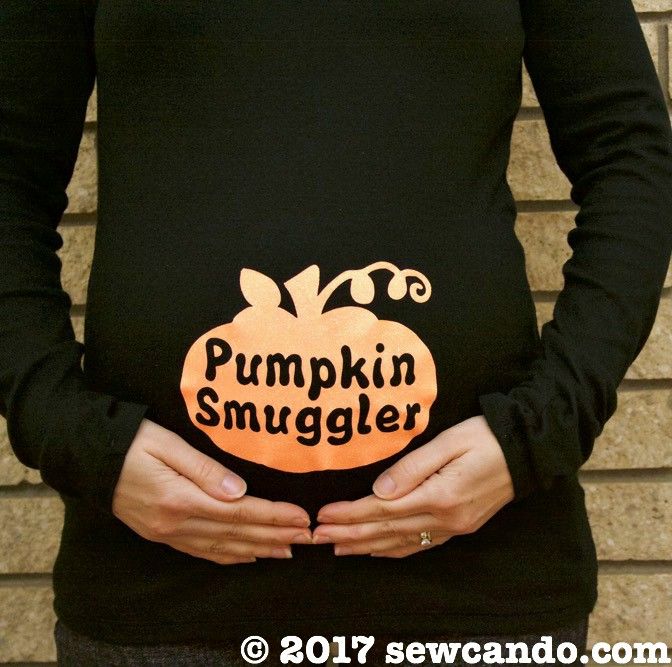
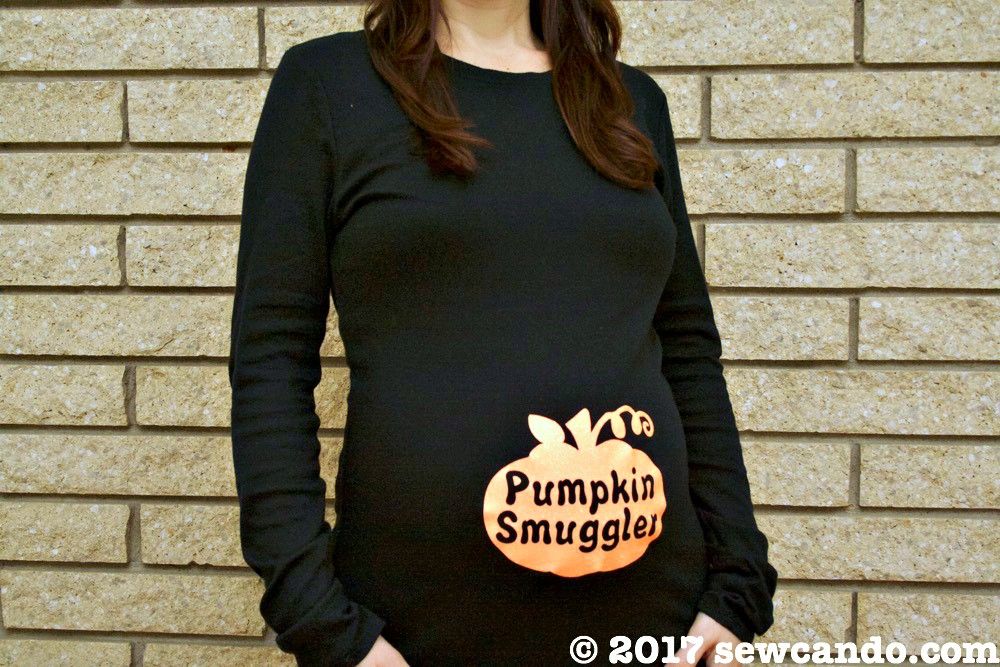
There's also another new development that's made finding craft time a little trickier and the very reason for today's DIY Cute Pumpkin Maternity Shirt tutorial:
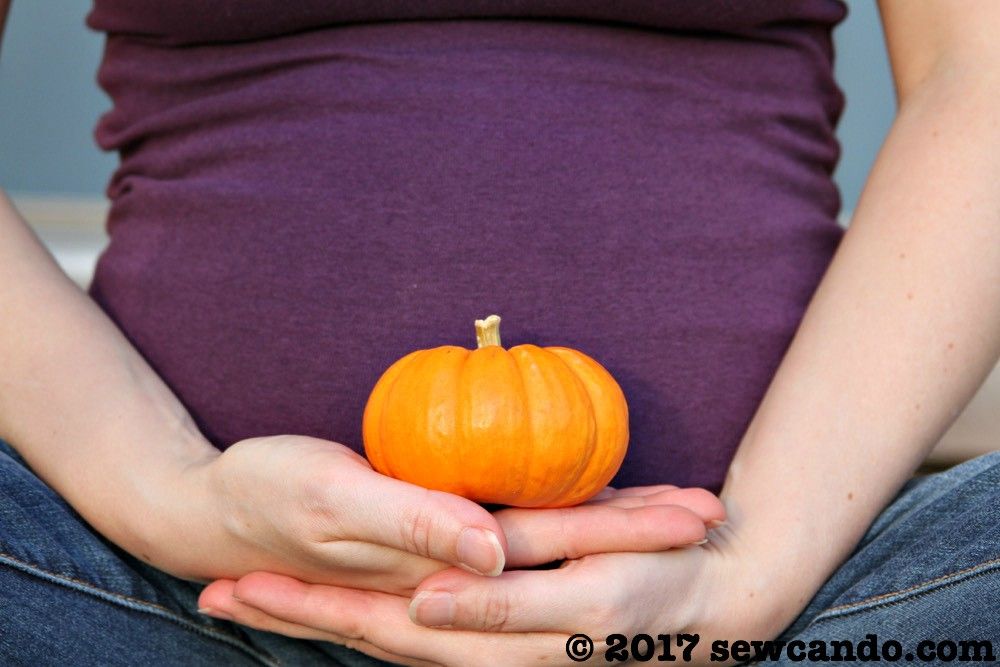
A new Sew Can Do baby is on its way:) And that means maternity & baby things are now at the top of my need-to-make list.
Maternity clothes are always a challenge for me since I'm petite and really short. I tend to start showing pretty fast & very roundly in the bump area, so I can't get by with my regular clothes for very long. This being baby #4, it's happened even sooner.
 I also hate the baggy, blobby "can't tell if I'm really overweight or pregnant" look most maternity tops create on me and the price of a cute maternity top you're only going to wear a couple of months (or even less if it's seasonal/holiday) is almost criminal and nearly impossible to find. So today I'm sharing how to make cute, bumptastic maternity tops on the cheap.
Materials:
- Stretchy solid t-shirt*
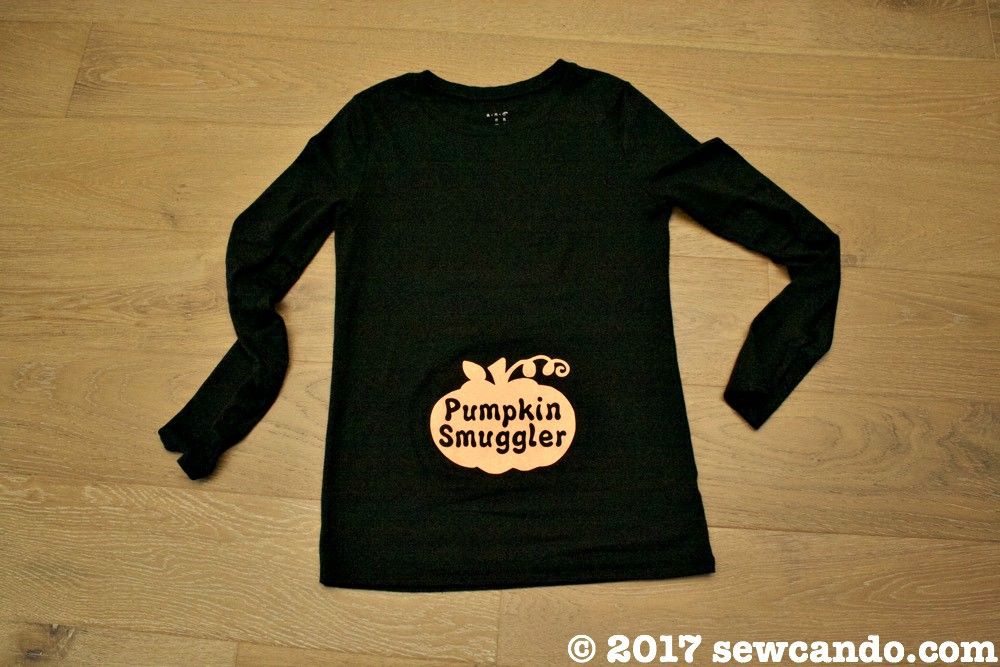
- Heat transfer material (mine is the glitter variety)
- Cutting machine or exact-o and patience.
- Iron or heat press. I used my new Cricut EasyPress.
*A basic, stretchy solid tee is the key base. There are some maternity versions that aren't too pricey, but I've found the regular size ones at Target work best and are by far the cheapest. Their old Merona brand or the new A New Day brand (which is the same thing) run about $9 for a long-sleeve, even less for short sleeve or tank style and are good quality. They are super stretchy & ultra soft. Most importantly, they are very long, which is ideal for the growing middle. I buy them in a size larger than my usual and they're perfect - there's enough give and length to go the whole 9 months.
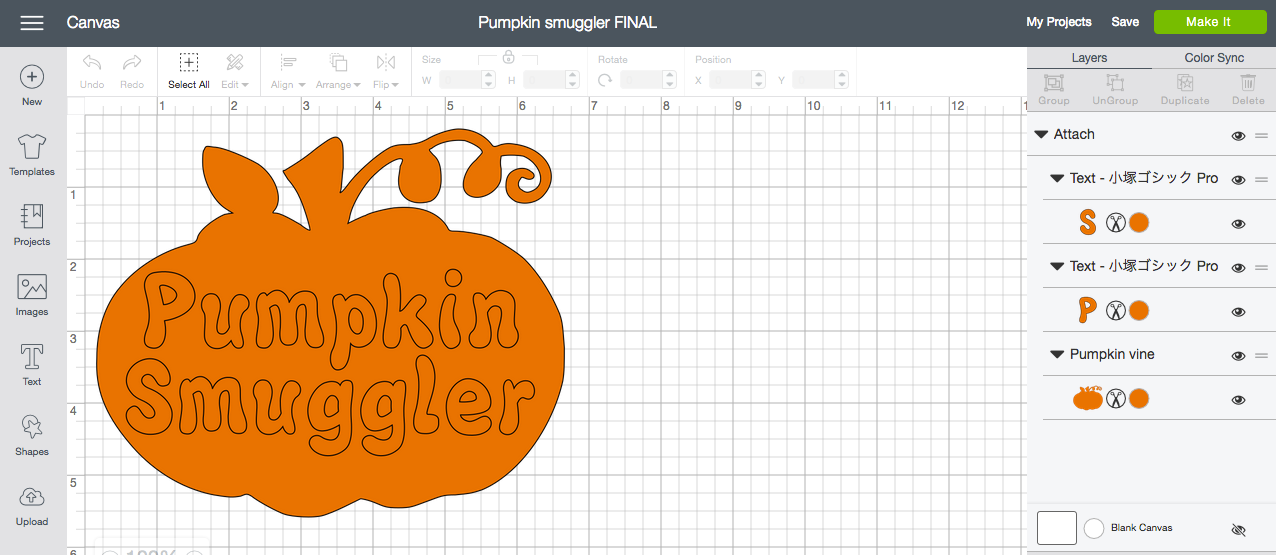
 After pre-washing my shirt I got my design together. I used a pumpkin silhouette image found online and opened it in Cricut Design Space then turned it into a cut file there.
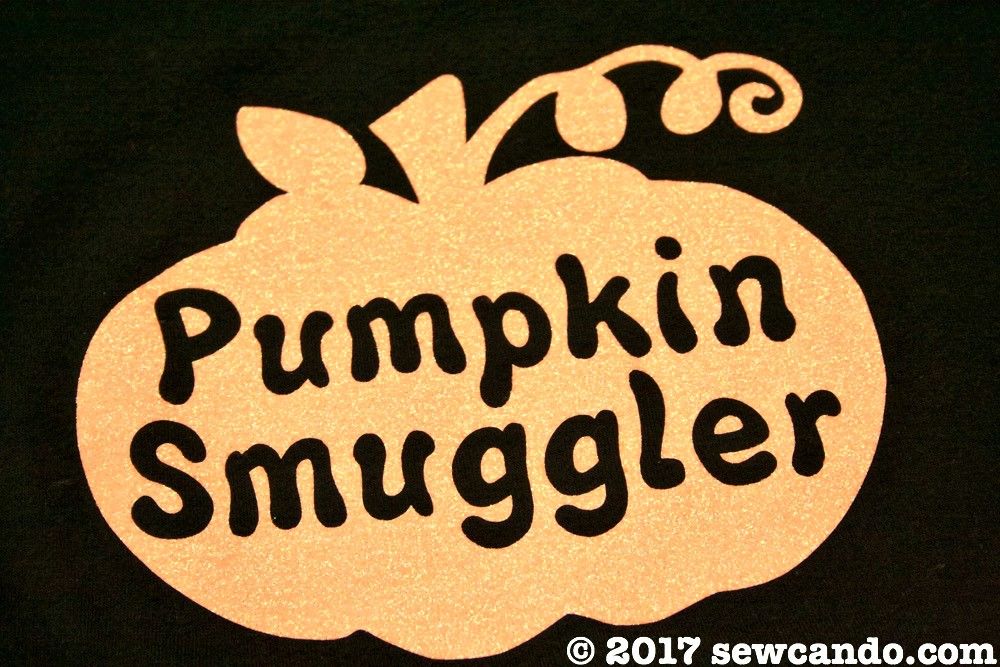
I added the Pumpkin Smuggler text in a fun font and then had the machine cut it out. Remembering to mirror it before cutting is key since the material is cut face down on the mat. If you don't have a cutting machine you could print out a paper copy to lay over the heat transfer materials and then use an exact-o to cut out the details, but a machine is way easier & faster.
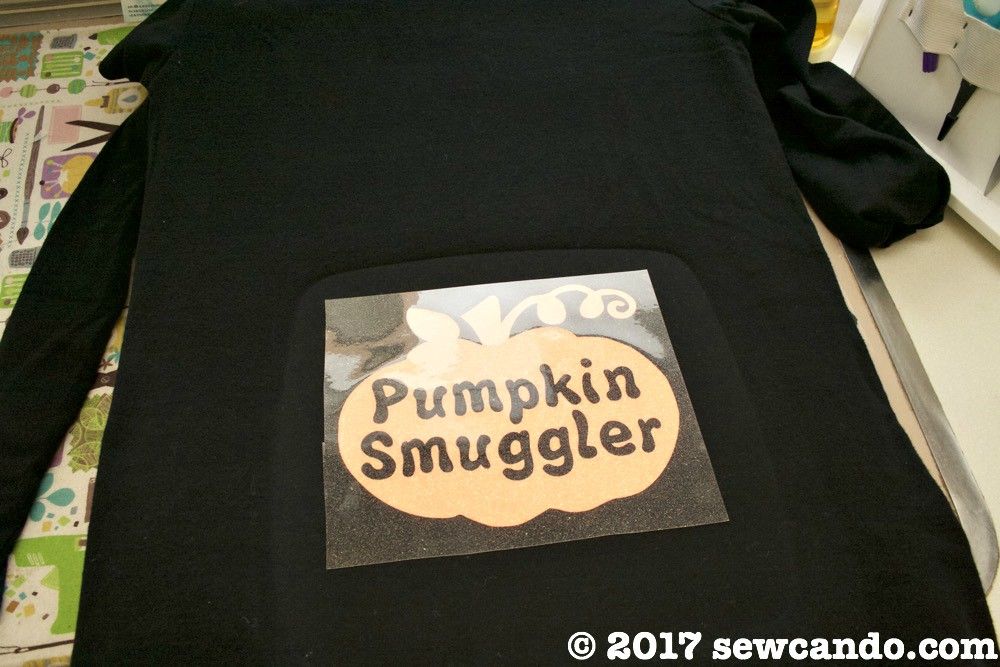
I tried my shirt on and noted the exact spot I wanted my design to be. After a quick press to warm the fabric up, I placed my heat transfer on it and pressed away according to the directions.
Once cool, I pressed it again on the wrong side with the shirt inside out and then peeled off the protective cover sheet when completely cool. I'll be sharing my unbiased, bought with my own money opinions & experiences with the new Cricut EasyPress in a coming post.
The shirt turned out exactly as I'd hoped and the size of the design means it doesn't pull or distort over my round middle which is key. The glitter finish adds a glitzy, festive feel too:
 I've already worn it 3 times and can't wait to wear it again for several upcoming Halloween activities. Not bad for a $13 top I made myself! Now I can't wait to make some fun & thrifty looks for winter, Thanksgiving & Christmas!