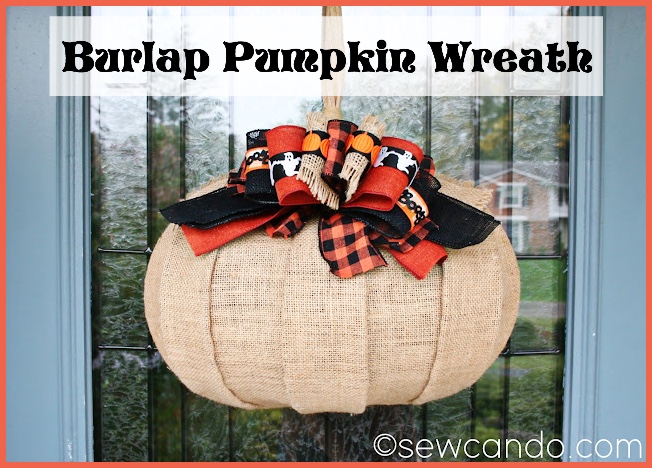
To decorate our front doors this year I made fun burlap pumpkin "wreaths" using some wire pumpkin forms.

They feature lots of festive Halloween designs and a layered ribbon design to add lots of texture and holiday colors:

I looked at a lot of tutorials and techniques done with wire pumpkin forms before I made this. I wanted the final look to be more tailored than just draping fabric over the form. I followed a lot of what this video by Crafting Cousins did, but used burlap yardage I cut myself rather than fabric + burlap ribbon, ditched the messy, fume-y E6000 glue and added my own layered ribbon technique for a unique bow accent that could also handle being outdoors.
Materials:
- 1 yd burlap (36"x40")
- 2 wire pumpkin forms
- Various 2.5" wide wired ribbons
- Various 1" wide ribbons
- Satin cut-out trims (mine are from Sugar Pink Boutique)
- Hot glue gun
I want to start out by saying not all burlap or ribbon is equal!
When I gathered the rest of my supplies I first grabbed some rolls of 5.5" wide burlap at the craft store. Big mistake! That stuff is really loose weave so you can see right through it. Unless you're scrunching it up or have something directly behind it, it's too net-like for most projects, so I needed something better.

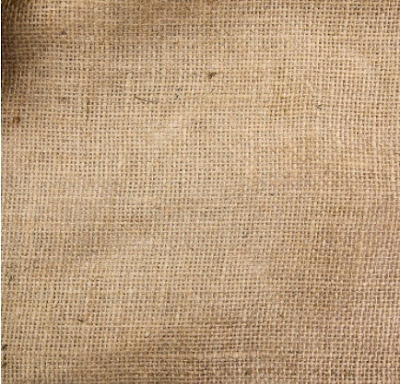
I found this fantastic burlap sold by the yard on Amazon here. It has a much tighter weave and a warmer color. Much more versatile for sure. It was really reasonably priced and even delivered on a roll so no creases!
I used some basic craft store solids for my "background" ribbons, but added these specialty satin cutout trims to add really nice detail:

I bought from Sugar Pink Boutique. They cut apart without fraying and are puffy so their dimensional element really kicks the finished look up a notch compared to regular ribbons:

I also got my buffalo check orange & black wire ribbon there. It has a soft flannel fabric feel too:

Now, let's make some pretty pumpkins!
To start I cut the following pieces for each of my wreaths:
(4) 17"h x 4.5"w burlap strips for mid-sections
(2) 12"h x 5"w for ends
(1) 17"h x 6"w for central section

I started with the center section of the wire form and dabbed some hot glue on the middle of each of the center spokes:

I placed the widest strip over it, making sure there was enough on either side to wrap it around the wires to the back:

With it affixed I worked my way to the ends, running a few inches of glue down the wire...

...pressing it down as I worked. Doing it this way on either side keeps the burlap taut to have a nice full shape. I used a silicone finger protector to smooth it, but a pencil or chopstick would work ok too.

Once I got to the ends, I clipped into the overhanging ends right where the spokes attached to the outer frame:

Then I hot glued the sides around to the back:

Folded the flaps at the top & bottom over and around to the back side and glued them.

I did the same with the spokes on either side, leaving gaps between like this:

To fill in the remaining mid-sections, I glued along the edges of the wrong sides of the burlap sections I just did, starting at the middle as before:

And placed the remaining 12"h x 5"w pieces onto them, working the same way outward, but from the backside this time:

For the outer end sections, I glued the inner sides the same way, clipped them right at the ends and then pulled the outside edge under the wire....

Then folded them over to the wrong side over the wire and glued in place. This will cover up all the wire so the burlap pumpkin is good to go.

Time to embellish!
I dabbed a bit of hot glue to the back of each of my satin cutout trims

and affixed them to some 1 inch wide grosgrain ribbon to make them really pop and add a firmer body to them:

A lot of tutorials I saw for bow-making use insane amounts of ribbon. You don't want to waste anything when you use specialty trims, so I have this layering trick for getting the most out of every inch! I cut each of these "treat" pieces to be about 9 inches:

Then a cut 24 inch long pieces of my wider, basic ribbons:

I centered the smaller strip over the longer ribbon piece and dabbed a dot of hot glue on the back ends of the short piece and stuck it to the longer one.

Then I folded each of the new multi-layered ribbon strips in half:

I stacked them in the order I liked and tied them tight around the middle:

I fanned them out and fluffed up the loops to get them how I wanted:

I tied the bows onto each wreath and added some hot glue onto the stem for extra security:

I added a loop of burlap ribbon tied in a lark's knot to hang them off my door hooks:

And then my pretty pumpkins were door-ready. I like that they add some seasonal fun, but aren't too busy or over-the-top. Just the kind of holiday I need right now!

Happy Halloween!