Wednesday, October 31, 2012

Happy Halloween - Roman Style!


I had planned to make this post a bit more detailed, but with our power going in & out + wrangling 3 kids in the midst of it all, this is more of a "brief synopsis" mode -

This year our middle guy had his heart set on being a Roman Soldier for Halloween, so the Mr. and I decided to take on the challenge and by some miracle I think we pulled it off:
We found a great tutorial for making the helmet from cardboard and a broom on Instructables.  My husband did a terrific job putting it together and made it nice & metallic with some shiny chrome Duck Tape.  It has taken some serious effort to stop our guy from just playing in it around the house before our Halloween festivities!
I made some snap-on wrist cuffs, leg armor and breastplate with silver pleather & red fleece I had leftover from some projects last year.  I used some cool silver plastic snaps I bought at KAMsnaps to make them easy to wear.  We bought a cheap men's XS red t-shirt for the tunic and used my old Red Riding Hood design (minus the hood) for a fleecy warm cape. Brown pleather strips attached to a sash made the apron bit and I hand sewed some old silver buttons to the tips of each strip.
And of course since we barely pulled it together in time, it was almost a Halloween costume disaster.  We debuted it at an outdoor event the other day and were stuck in the pouring rain for most of it.  Then halfway home the little guy got sick in the car all over the whole ensemble.  Soaked and puke covered is NOT a good look.  But having experienced enough kid-tastrophes, I always buy washable fabrics when I make their stuff, so thankfully we were able to wash everything.  Now our little soldier can march on tonight.  And get a happy sigh of relief from his slightly worn out parents.

Have a Happy (and hopefully somewhat warm & dry) Halloween Everyone!!


Tuesday, October 30, 2012

Pattern Review: Seamingly Smitten's Kate Dress

Today I've got a pattern review for a new dress design from one of my sweet sponsors, Seamingly Smitten.


I was given a copy of the Kate Dress PDF Pattern to try out.  This dress is an A-Line style that doesn't require any zippers or buttons and is for any sewing skill level.  Features like inverted pleats at the neckline and handy pockets add nice details.  


I liked how the dress design fits a wide variety of body shapes and how well it worked with prints and fabrics of all sorts - that's a must for patterns in my book.  The encouraging instructions & photos of each step made things simple too.


I did have to add some extra pleats at the sides of the neckline since I'm on the petite side, but no other alterations were required (unlike my usual experiences with the big name patterns).


In the spring/summer it works as a sheath dress on its own, but add a jacket & boots and it can work well for fall too:


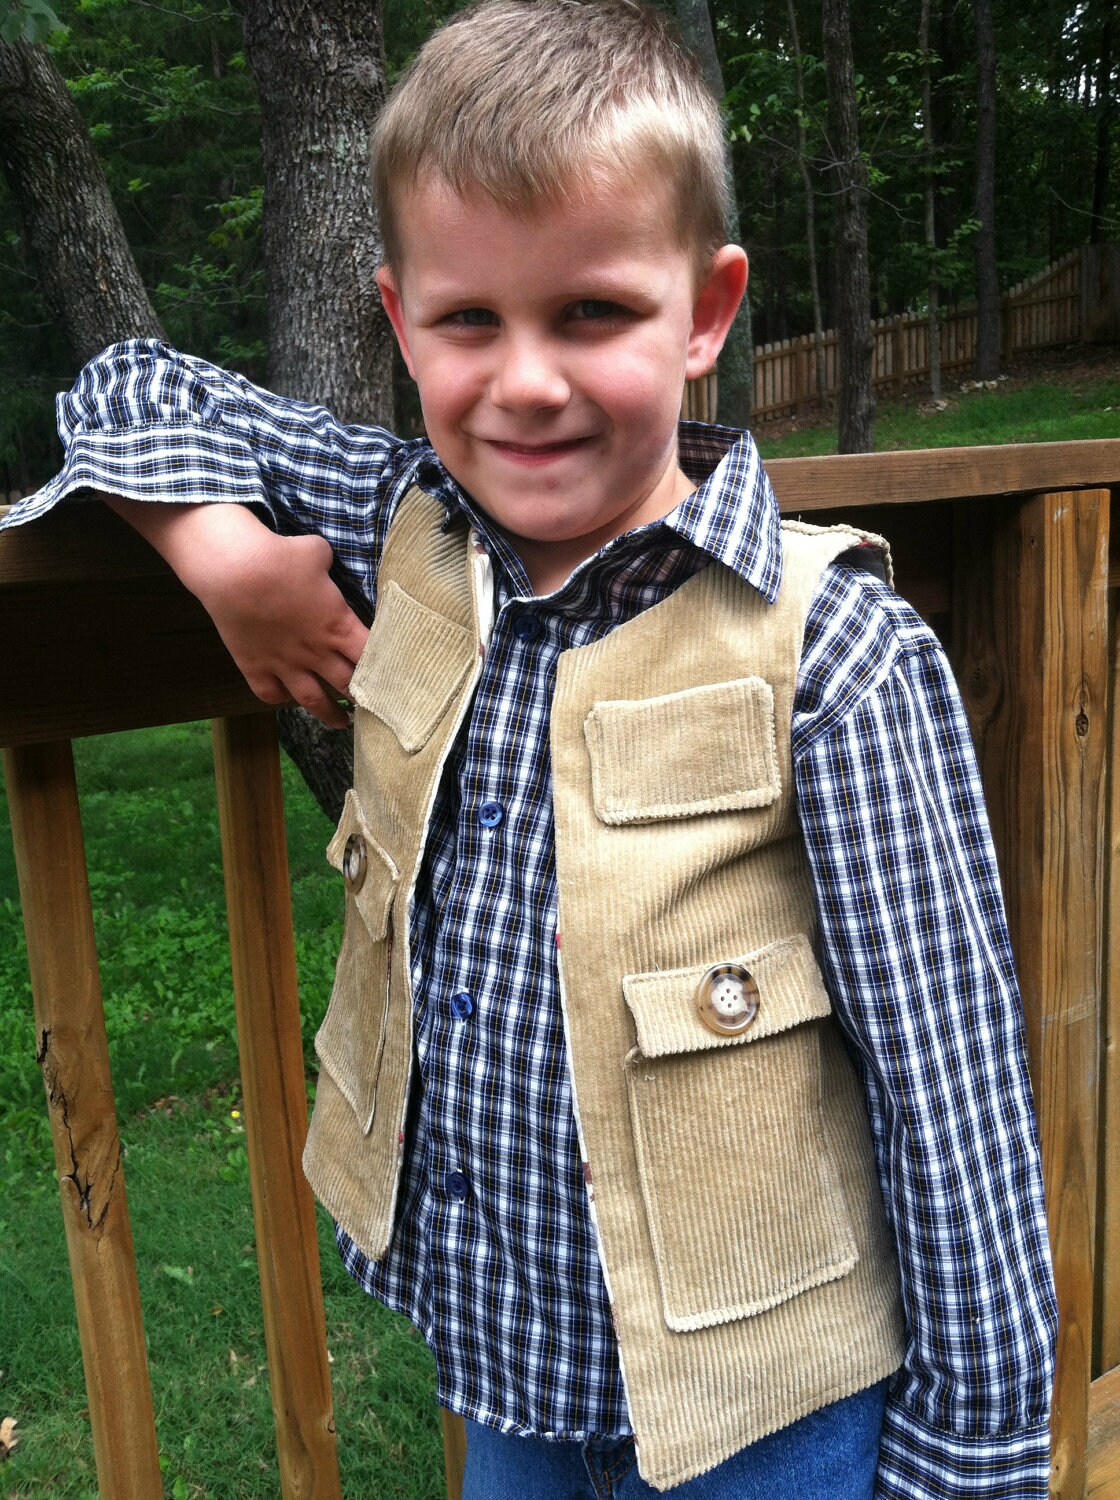
Seamingly Smitten also has some new patterns for the kids: the Boy's Cargo Pocket Vest Pattern which contains sizes from 3 months all the way to 10 years:


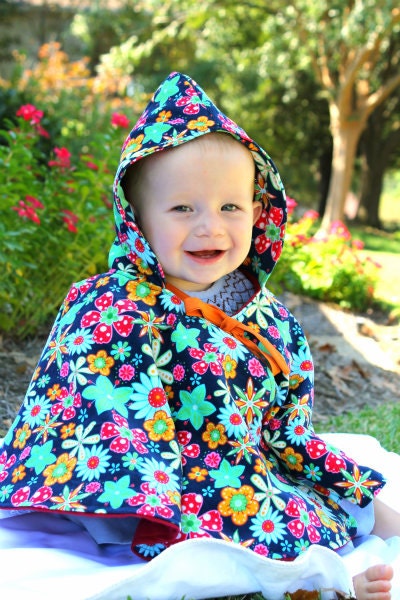
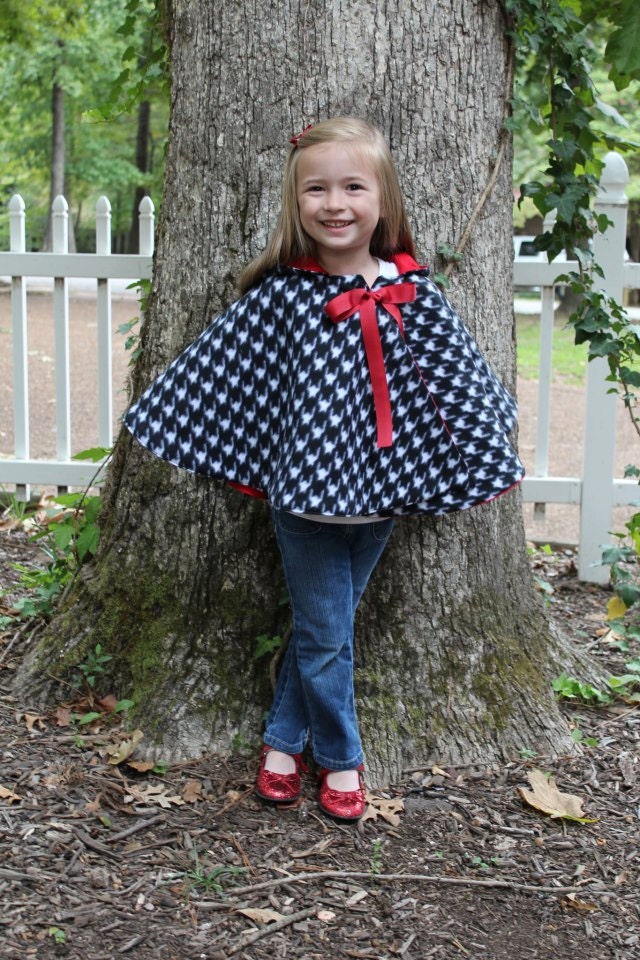
As well as this versatile Cozy Hooded Cape for the little ladies:


Brand new styles or old favorites, all Seamingly Smitten patterns have:
  • Easy-to-follow, step-by-step directions
  • Photos for each step (no more guessing what the wording actually means!)
  • Tutorial-style directions with helpful notes cheering you on
  • Sizing charts to get the right fit
  • No need for sergers, zippers or anything else - the usual "scares" of sewing.
  • PDF format - simply print, cut and sew!

Definitely the features we all need to keep sewing when life is so busy!


Sunday, October 28, 2012

It's Time For The Craftastic Monday Link Party!


Happy Halloween Week Friends!  Are you getting geared up for the big day?  I'll have a little new costume reveal on the big day, but also have a pattern review and some craft news to share this week too.

I've got to say last week's link party R-O-C-K-E-D.  There were SO many fantastic projects linked I was in crafting heaven at your creativity!  It was really hard to choose just one Craftastic Blog of the Week - there were that many talented blogs to consider.  I can't wait to see what you've got this week so don't be shy and link those great ideas up!!

Here are some goodies from last week's party:

I was bowled over by the cute & clever in this camping themed costume trio from Kitchen Fun with My Three Sons.  A kid-sized camper, campfire and marshmallow=Just AWESOME!
Repeat Crafter Me shared this whimsical monster tissue box cover.  So much cooler than a boring box (and definitely encourages the kids to reach for a tissue!)
Wesens- Art showed how to turn some leaves & a plain glass jar into a gorgeous fall candle holder:
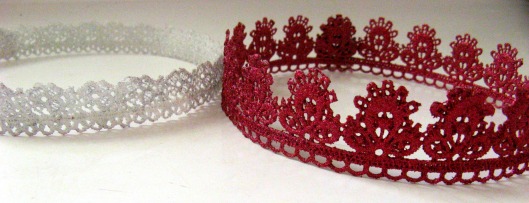
Check out this amazing idea from Somewhere In The Middle.  Some lace, a little fabric stiffener & glitter and instant awesome crowns!  I'm totally going to make some of these for my little princess & her friends!!

If you're one of this week's features, be sure to grab my Featured On button over on the sidebar to let everyone know.  I also feature these projects and more party favorites on the Sew Can Do's Craftastic Picks board on Pinterest.  Follow me there to see more great projects (and if yours is one of them)!
Follow Me on Pinterest

And the Craftastic Blog of the Week is...

CraftyStaci

Crafty Staci is a talented mom of two shares practical and fun project ideas that she's created and some she's discovered, all with a fun commentary so you feel like you've stopped by to craft with a friend.  You've got to check out her fabric inventory system (I seriously need her to come help me set one up like that).  She has There are loads of great how-tos for all skill levels like her fabric postcards, cute spring apron and tasty recipes too.   Last week she linked up a grommet handbag she made from shortening a leather coat - she's made a whole coordinated set and still has the coat to wear too!


How can YOU be Craftastic Blog of The Week,
 get a special feature here 
& one week of FREE advertising on my sidebar?  

  • Link up a new project(s)
  • Include the Craftastic Monday Party button in your post(s) or on your sidebar (a text link buried in a paragraph of parties or button on a separate party page doesn't count).  
  • Leave a comment below telling me what you linked so I can check it out
One blog that meets the criteria will be selected each week.  More details can be found HERE.

Ready to link up your crafty creations?

Party rules are simple:
  • As long as it's crafty, and made by you, it's Craftastic (no links to giveaways, shops, link parties or other people's work).  Add the link to your specific post (not the main page of your blog).
  • Grab my party button & put it on your post or blog somewhere.  The code's on the sidebar -> 
  • Check out some of the other fabulous links and share some crafty comment love.  We all love getting comments!!


Friday, October 26, 2012

Halloween Flashback: Jelly Pop Pumpkins!


Today's tutorial is a little flashback from last year that is fun & easy to make: Jelly Pop Pumpkins.  It's a homemade version of the fun shaped jellies on stick the stores sell, except these will be much fresher and tastier than the stuff that's probably been sitting on a shelf for months (or possibly last Halloween).  


The recipe is the DIY Gum Drops I shared during CraftShare a while back.  The silicone pumpkin mold is from Wilton & pretty cheap at most stores - especially now that Halloween items are already marked down significantly.


Ingredients
1 cup Sugar
1 cup Corn Syrup
3/4 cup Water
1 Box Powdered Fruit Pectin (find it in the baking/canning section)
1/2tsp. Baking Soda
A few drops of Flavor Oil (Lor-Ann makes loads of flavors)
A few drops of Food Coloring

Gear:
Vegetable Oil
Silicone Mold
2 small saucepans
Heat resistant spoons (wooden or silicone are best)
Waxed Paper
Extra sugar for rolling (about 1 cup)
Lollipop Sticks (find in candy-making aisle of most craft stores)

As mentioned before the key to success with jelled candies like these is oiling up the mold like crazy.  You want them to come out nice & easy, so a silicone mold+a good slathering of vegetable oil are critical:

Mix the sugar & corn syrup in one saucepan and the baking soda, water & pectin in the other over medium heat for about 5-10 minutes (when the baking soda stops foaming):


Then pour the baking soda mixture into the sugar syrup and stir for one minute.  Then add a few drops of flavor oil & coloring and pour into the molds.  I used orange coloring and marshmallow flavoring:


Let the candy sit for 24 hrs  - it needs to firm up into shape.  After 24 hrs, flip molds and gently push the jellies out onto waxed paper and let them fully set for another 24 hrs.


Now comes the fun part, roll each pumpkin in sugar on all sides.


I did some with black sugar for a spookier look.  I used pre-colored sugar, but you can make your own with a drop or two of coloring gel and plain white sugar (you'll want to do that in advance so the sugar is dry before using).


Then carefully insert the lollipop sticks about 2/3 into the candy.  I recommend doing this right before displaying them standing up or leaving them on their sides until serving so gravity doesn't cause things to slid down. Or just skip the sticks entirely and arrange on a plate.


My pumpkins are about 2"x2" so they're a bit on the heavy side, but tasty items like these don't stick around long in my house, since everyone wants to eat them right away.  This recipe makes about 1.25lbs of jellies, so it makes plenty for taking to parties, sharing with friends or as a festive treat for the kids.


Fun to make and fun to eat - what could be better?


Sharing this with my FAVE LINK PARTIES too-
Click HERE to check them out!

Tuesday, October 23, 2012

Sew Easy: Halloween Treat Bags In Under 20 Minutes!


There are about a million Halloween tutorials out there at the moment and while I've seen loads of ideas I love, free time to make them has not been on my side:(  I'm sure I'm not the only one, so today I'm sharing how to make some quick and festive Halloween bags - in under 20 minutes. How's that for a do-able craft?

Make 'Em Fast Halloween Bags!  Fully lined for reversibility and with a hidden layer of batting inside.  These bags are soft yet very durable.  Ideal for a carrying a big load of candy!

Here's How:
I used some spooky & sweet Halloween-themed fabrics (all by Timeless Treasures) to get a super holiday look with minimal effort (including some very cool glow-in-the-dark prints).  

You'll Need:
- 1/2 yd Candy Corn Gail-c8943-black
- 1/4 yd Tossed Jack O'Lanterns Gail-c8942-black
- 1/4 yd Soho Solid Orange Soho-orange
- 1/2 yd Glow-In-The-Dark Spider Web Gail-CG1537-Black
- 1/4 yd Glow-In-The-Dark Skeletons FUN-CG9810-Black
- 1/2 yd Cotton or Cotton Blend Batting
- Sewing Notions - shears/rotary cutter, iron & ironing board, safety pins, thread, hand sewing needle). 
- Optional: embroidery floss + embroidery needle/machine embroidery/applique

Note - Finished bag size is 9 inches wide by 12 inches high.  There's enough fabric to make 4 bags in total, but the cuts below are to make one of each bag style shown.

Cut the following pieces:
Candy Corn - (2) 10 inch wide by 13 inch high, (2) 10 inch wide by 4 inches high
Soho Orange -  (2) 10 inch wide by 5 inch high, (2) 13 inch wide by 3 inch high
Jack O'Lanterns - (2) 10 inch wide by 6 inch high
Spider Web - (2) 10 inch wide by 13 inch high, (2) 10 inch wide by 5.5 inch high, 2) 13 inch wide by 3 inch high
Skeletons - (2) 10 inch wide by 8.5 inch high
Cotton Batting - (4) 10 inch wide by 13 inch high

With right sides facing, stitch together the width sides of strips of fabric in the desired print order for the outer of the bag.  Press seams open.  If personalizing, applique or embroidery is desired for extra decoration, do so at this point.
Baste cotton batting to wrong sides of outer pieces, 1/4 inch from raw edges and set aside. Now take both strap pieces, fold lengthwise, and stitch 1/8 inch from raw edge along that side.  Turn right side out, press and then top stitch all the way around.  
Turn straps in a "U" shape and place center of a strap 3 inches inward along the top side on each of the outer bag pieces and baste into place:
With right sides facing, stitch along the length sides of the outer and lining bags and trim excess from raw edges:
Turn the lining right side out and insert into the outer bag, lining up the side seams and pin along the top raw edges.  Stitch together with a 1/2 inch seam allowance:
Pull lining out so that both bag halves have the wrong sides facing out (this will look like a big tube).Now stitch bottom ends of both halves closed, leaving a 2 inch gap in the lining bottom for turning.
Turn right side out and slipstitch opening in lining closed by hand.  Insert lining into outer bag and press gently with iron to smooth out.  Now these treat bags are ready for action.  Perfect for trick or treating, decorating or giving as gifts!


Sharing this with my FAVE LINK PARTIES too-
Click HERE to check them out!

LinkWithin

Related Posts with Thumbnails