Showing posts with label Eco-friendly. Show all posts

Wednesday, December 4, 2013

Reusable Holiday Fabric Gift Box Tutorial


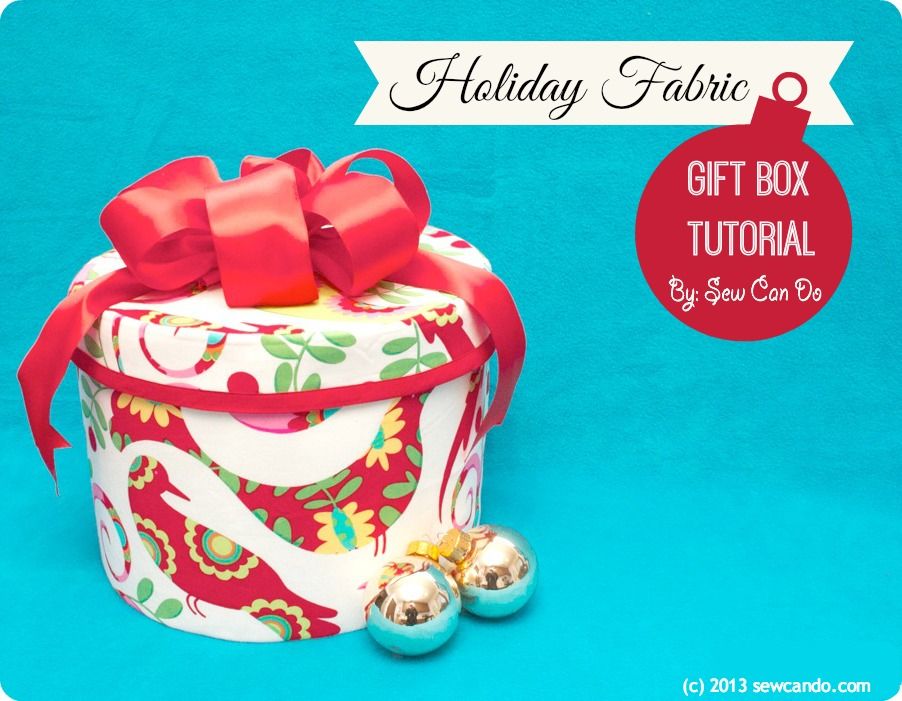
Gift shopping & wrapping for the holidays getting challenging?  Want some packaging that will wow and also won't get tossed in the trash in a hot second?  Make my Holiday Fabric Gift Box! Today's tutorial shows how to use gorgeous holiday fabrics to make your gifts look amazing and keep wrapping easy.  Added bonus, they can be used year after year, so one box will last a long time!

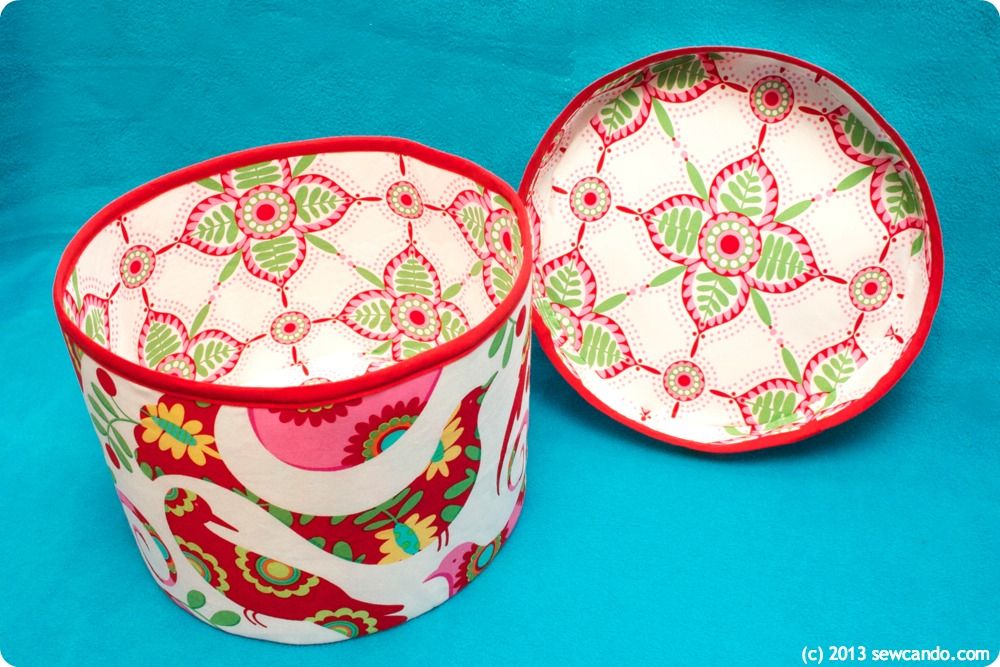
It's also a much nicer presentation than a boring paper box or bag - the inside is just as pretty as the outside:

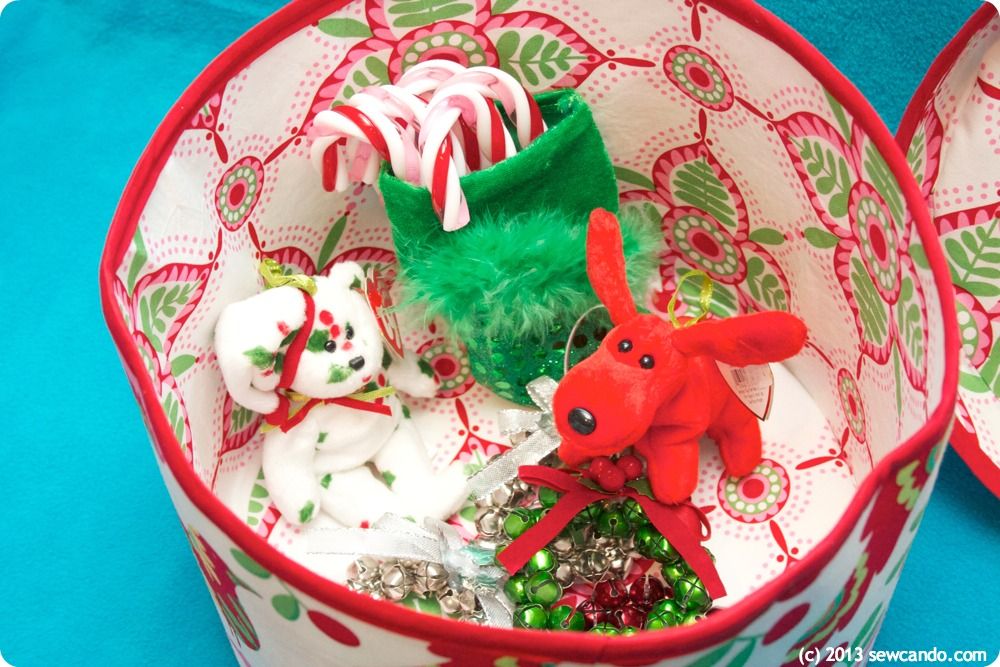
And my how-to makes a generous sized box.  No teeny-weeny, holds-next-to-nothing containers here!  This one's approximately 8 inches high by 10 inches around.  It's perfect for packaging clothing, toys, hard to wrap shapes or using for storing holiday items like ornaments or decorations:

I was lucky enough to get my hands on some lovely holiday fabric from modeS4u, a great Kawaii-themed online shop that specializes in beyond cute fabric, stationary & accessories. 


They have some seriously adorable items & ship worldwide, so I was thrilled when they asked me to pick out some Christmas fabrics to try out and design a project around them.  


And check out how cutely it came packaged - a present for me to make a present tutorial for you!!


Now, let's get to how to make your own fabric gift box:

Materials:
- 5/8yd each holiday quilting cotton for outer & lining mine can be found here & here
- 1 yd Extra Firm Sew-In Stabilizer
- 1 yd Medium Weight Fusible stabilizer 
- Spray Adhesive
- 1 package double fold bias tape
- Notions (iron, pinking shears, rotary cutter/shears, pins, heavy duty sewing needle)

Cut the following pieces:

- 8 inch high by 33 inch wide rectangle from outer + lining + fusible stabilizer
- 2 inch high by 33 inch wide strip from outer + lining + fusible stabilizer
- 10 1/2 inch diameter circle from outer + lining + fusible stabilizer


Also cut a 7 1/4 high by 32 inch wide rectangle and a 10 inch diameter circle from the Extra Firm sew-in stabilizer:


Start by fusing the medium-weight stabilizer to the wrong side of the lining pieces (base, side, lid top, lid edge strip).  Fold the side pieces of the outer fabric width-wise, with right sides facing, and stitch along the short side with a 1/2 inch seam allowance and repeat with lining piece.  Do the same with the lid strips, but use a 3/8 inch seam allowance (this will make the lid fit better later).


With right sides facing, pin the circular bottom to the box side piece and stitch together. 


Repeat this with the lid outer and lining pieces, again using a 3/8 inch seam allowance.  Trip all raw edges with pinking shears or clip around curves.


Now the lining half of the box & lid is set:


Personally, I hate trying to sew Extra Firm/Ultra Firm stabilizer into place on a curved item. It's hard to get on the machine, adds a lot of thickness to seams and tends to shift around when sewing.  Even a careful job, with an expert hand, can end up looking wobbly and lead to some profanity, mutterings about throwing the project out the window, etc.  So here's what I do to save my sanity on projects like this:  grab a can of spray adhesive and lightly coat the stabilizer (tip: do it outside or on scrap paper so you don't get sticky spray on everything around it).  This is where it's important to have cut the stabilizer smaller than the fabric pieces, as mentioned earlier, so it will fit together like a glove when the seam allowances are gone.


Smooth the circular pieces into place on the wrong sides of the box bottom and lid top.  If there are wrinkles or it's not centered, just peel it up and move.  That's what you can't do when sewing & it slides around (unless you want to unpick all the stitching and start over, which I rarely want to do).


Repeat with the side piece on the outer fabric.  It takes a little time, but I feel like it's much better than wrestling with it on the machine.  It helps to start pressing it on it's side and then sit the box up and smooth like this:  


No need to add it to the lid's edge, so one less thing to spray!  Once everything looks good, insert the lining into the outer box, smooth together, and pin along raw edge at the top. Repeat with the lid.


Encase the edge in the bias tape and stitch along the tape edge, using a heavy duty needle. Repeat with the lid.


Now the box is ready to fill with all sorts of holiday goodies:


I love how both fabrics are bold and mid-sized designs, but they totally compliment one another.  Add a bow on top and be ready to wow this season!


I'm also sharing this project with my FAVE LINK PARTIES.
Click HERE to check them out!

I was not financially compensated for this post.  I received fabric from modeS4u, to review & use as I desired.  The opinions are completely my own based on my experience.   For my complete disclosure policy, click here. 

Friday, May 10, 2013

Artterro Eco Art Kit Giveaway & Review


Today I've got a special treat - a new crafty giveaway and review to go with it.  This way you can see how fun this prize truly is!  It's all thanks to the lovely people at Artterro:

Artterro photo ArtterroLogoSmall_zps00ee16ed.jpg

Arttero makes fun & eco-friendly arts and craft kits of all sorts.  Bookmaking, dolls, jewelry, garden art, these are just some of the kits that they offer.  Artterro is all about creativity.  

Each kit is carefully curated to offer a delightful art experience for practically any age and skill level, and they include an ideas sheet full of inspiration to get you started. Their materials include many handmade, recycled and US-made components, and their packaging is minimal, recycled and reusable. With Artterro, kids and adults can truly unplug and enjoy art.   

So how are the kits to use?  

We got a chance to try out the Wool Felt Bug kit:


The package was small, but there was a surprising amount of supplies when we separated them out.  We could have made more than half a dozen buggies with all this:


Since my youngest was under the recommended age, but still wanted to participate, we used some craft glue of our own for some of the fabrication, but the boys got to do a bit of hand sewing on theirs with the needles & embroidery floss from the kit.  


I liked that because a lot of glue-only crafts tend to fall apart when the kids start playing with them, but ours haven't.  Check out the bugs my little bugs made:


I wasn't sure if the kids would really stick with making their bugs - they have a tendency to get frustrated when crafts are too free form (unlike their mother), but the inspiration guide that was included gave them some good starting points and then they really took off on their own.  


My oldest even decided to make layers of scales with sequins on his bug's tummy:


Overall I thought this was a fun, solid kit.  It was nice that there was enough of everything for all 3 of them and we still have enough supplies for each of them to make another bug.  A great gift idea to get the kids crafts too, so I'll be keeping these in mind next time we get a birthday invite.

I also like the variety of crafts they offer and that they aren't gender specific.  Or limited to just being for kids - I kind of want to do this Garden Art Kit all by myself:


Want to try them out too?  


Artterro is giving away a Wool Felt Bug Kit to one lucky 
Sew Can Do reader:


And Artterro has a special discount for Sew Can Do readers:
  Through May 21,
 enjoy 20% off at their online store
 with code: SEW20.

Thanks to Artterro there are lots of great ways to get some new crafting going and save at the same time!  

a Rafflecopter giveaway

I was not financially compensated for this post. I received free products to review & giveaway. The opinions are completely my own, based on my experience.

Tuesday, September 25, 2012

Who's Got Ants In Their Pants? A Lined Pants Tutorial


I can honestly say my kids have ants in their pants and it's not even an exaggeration anymore.  And these ants are the cute kind, (if you can consider ants cute that is).  I saw this tiny ant print fabric and a voice in my head cried out "Ants In My Pants! You NEED to make that a reality!!!"  So I did: 
Would you believe I had a HUGE ant phobia back in high school and now I'm raving about using ant print fabric?  Yeah, I know I'm a weirdo.  In my defense the phobia was more due to a carpenter ant infestation in a kitchen one summer, so the teeny weeny ants weren't really part of the phobia.  And all 3 of my kids love bugs - even my 3yr old daughter.  She couldn't wait to see these pants.  Maybe we're a total family of weirdos...but c'mon isn't this little guy more sweet than scary?
To make my Ants In My Pants I recycled an old pair of men's jeans and used a basic one-piece pants pattern for the design.  The fancy (p)ants fabric is the Itsy Bitsy Ants print from Timeless Treasures. The pockets are also lined and the fold over design makes a few little ants peek out over the tops:
The cuffs fold up so some teeny ants peek out there too:
For the outer fabric I started with an old pair of men's jeans of my husband's that had shrunk a bit and cut the legs open along the inside leg seam.
I folded the cut lining leg piece in half and place the fold along the remaining outside leg seam of the jeans and then opened that piece up to cut the outer pant legs.  This made sure those already-in-place side seam would be nice and straight when finished.
I cut out 2 pockets & matching linings with a tall, angled top.  Then I sewed them right sides together and left a small gap to turn them right side out.  A quick press to flatten, then folded the top portions outward and stitched them down.  Then I placed them on the back portions of the jeans and sewed them into place:
I sewed up the inner leg seams and crotch seams for the lining and outer pants so I had to separate pairs of pants.  Next I followed the same steps I used for making my insulated snow pants a while back.  All the details for sewing the layers together, turning and forming the waistband can be found HERE.  For the bottom cuffs I just folded the raw edges inward, pinned together and topstitched near the edge.  
Then we turn the cuffs up and are ready for getting a little antsy.  For daring days we can wear 'em full ants side out.  I like to think we're doing our part for the environment by recycling some old clothing and showing a little bug love at the same time:
And of course once I got going I had to make a matching ant applique shirt with some fabric scraps (a little tutorial on this is coming up next):
Now the next time my kiddos act crazy in public I can just point to the pants and say that's the reason.  Problem solved!  

Sharing this with my FAVE LINK PARTIES too-
Click HERE to check them out!

Wednesday, June 8, 2011

Perfect Picnic Placemats


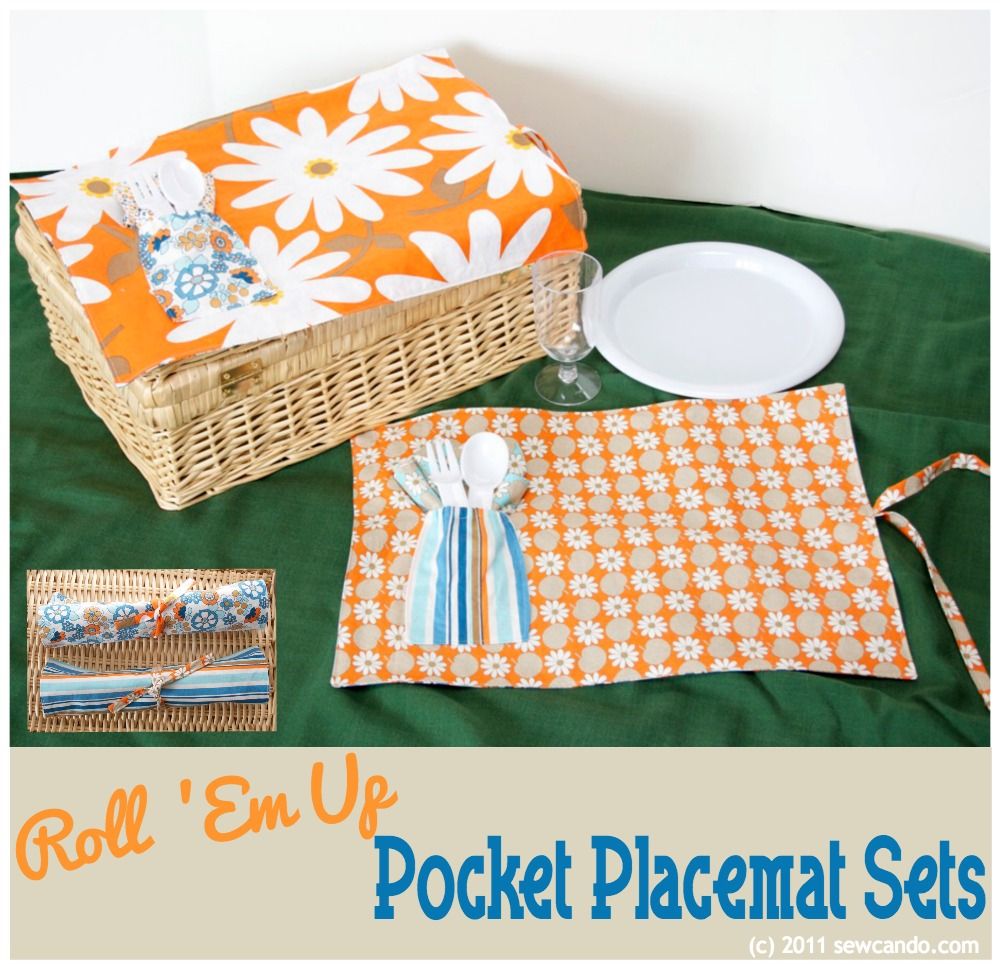
Now that the weather has finally perked up, it's time to break out the picnic basket and start eating outdoors.  This is a major deal for me since my kids seem to love to feed the floor half their meals.  I'm sure most of the time it's accidental, but the floor is never that hungry and I'm the one who has to it clean up.  Eating outside is very attractive to this mom.  So instead of buying a bunch of throw-away stuff, how about some reusable gear?  Much more eco-friendly and much more stylish.


These placemats are reversible and have an elasticized pocket so you can tuck in utensils & a napkin and roll them up so everything stays put when you're on the go.  Then just toss them and the napkin in the wash and all set for the next al fresco experience.


Here's how to get your own stylin' set going:

Step 1: Using 1/2yd cuts of various fabrics, cut 2 rectangular pieces for each placemat (you can decide how big you want them to be - mine were approx. 14"h x 20w")


Step 2: Then cut a rectangle for the pocket (mine was 7"h x 5"w).  Fold over the top to make a 1/4"hem and then fold over again another 3/4" to make a casing and stitch it into place.  Cut a strip of 1/4" wide elastic that is 2 inches smaller than the width (in this case 3") and feed it through the casing:


Step 3: Now turn under the remaining 3 sides and pin the pocket in place on the side of a placemat piece and stitch the sides & bottom:


Step 4: With right sides facing, place the other placemat piece on top and stitch together all the way around, but leave an opening several inches wide in the middle of one side for turning (and for adding the tie). Turn right side out.

Step 5: To make the tie, cut a strip 2"w x 14" l.  Fold the long sides to meet in the center:


Fold again and then stitch along the edge.  Fold over the short ends and refold again to hide the raw edges & stitch in place.


Step 6:  Fold the tie in half and place the folded end into the opening of the placemat and top stitch all the way around:


To make a coordinating napkin, cut two 11"x11" squares of fabric and repeat Step 4, then turn right side out and top stitch the perimeter. 


I used the really cute Organic Suzy Q fabric collection by Timeless Treasures to make mine.  I loved how the colorful prints look together & have a retro feel.  


Now if the picnic basket would just pack itself, we'll be all set for fabulous outdoor eating!  

Sharing this creation with my FAVE LINK PARTIES too so click HERE to check them out!

LinkWithin

Related Posts with Thumbnails