Showing posts with label Ottobre Design. Show all posts

Thursday, October 27, 2022

DIY Little Shepherd and Sheep Costumes


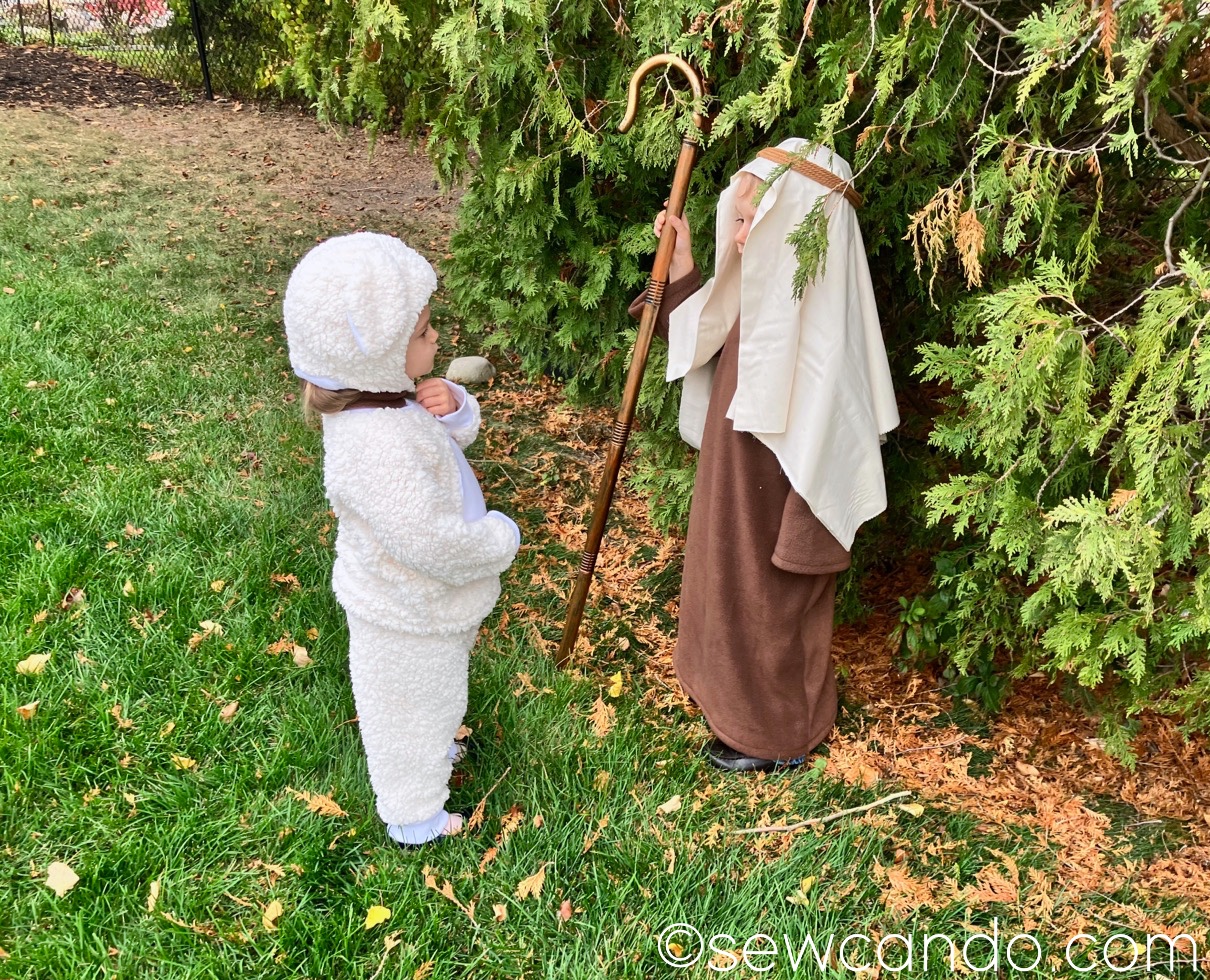
I thought a coordinated costume effort would be really cute for my 2 & 4yr old for Halloween this year.  Living in the midwest it also meant they had to be both warm and easy to layer more clothing under.  And, most importantly, they be comfortable/willing to wear.  My solution was a sweet Little Shepherd & Sheep costume pair.  Just look at that sheep frolic!


My mini shepherd has a long fleece robe to keep him covered, a traditional headdress and of course the necessary shepherd's crook:


My little lamb has a fuzzy soft sherpa body, cuddle ears and a sweet sounding bell collar:


This photo cracks me up because it looks like they're having a a serious conversation.  What a shepherd and sheep talk about,  I don't even know.

I used 1 1/2yds of sherpa fleece fabric for my 2T sized daughter.  I also got a 1/2yd of white fleece for the tummy and hat and 1/4yd of ribbed knit for the neckband and cuffs of the top and pants.  For the main costume I used some of my favorite patterns for toddlers, the raglan top and jogger pant from the book Kwik Sew's Sewing for Toddlers by Kerstin Martensson.


I cut an oval from the fleece to applique onto the shirt front before I assembled it, but otherwise followed the patterns exactly.  The fit is roomy enough to add clothing underneath for a chilly Halloween night.


For the hat, I used the same Turtle Dove cap pattern from the Winter 2009 issue of Ottobre Design that I used a few years back to make the head part of this DIY chicken costume.  I modified it to extend & overlap under the chin with a snap closure.
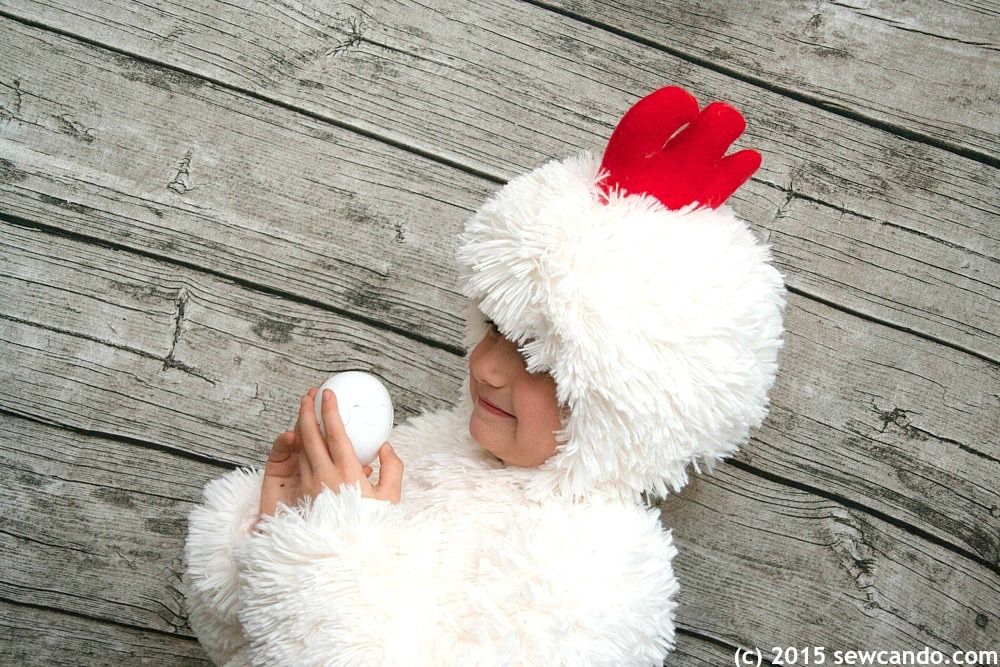

It's ideal for making hats like this that have ears since it has three main pieces so adding them is easy.


I hand drafted some ear pieces and cut a piece for each component from the sherpa and the white fleece for the outer & lining sides.  I sewed the ears together first and then basted them where I wanted them on the hat before I assembled it.


It turned out exactly as I'd pictured in my mind right off the bat, which was so nice.


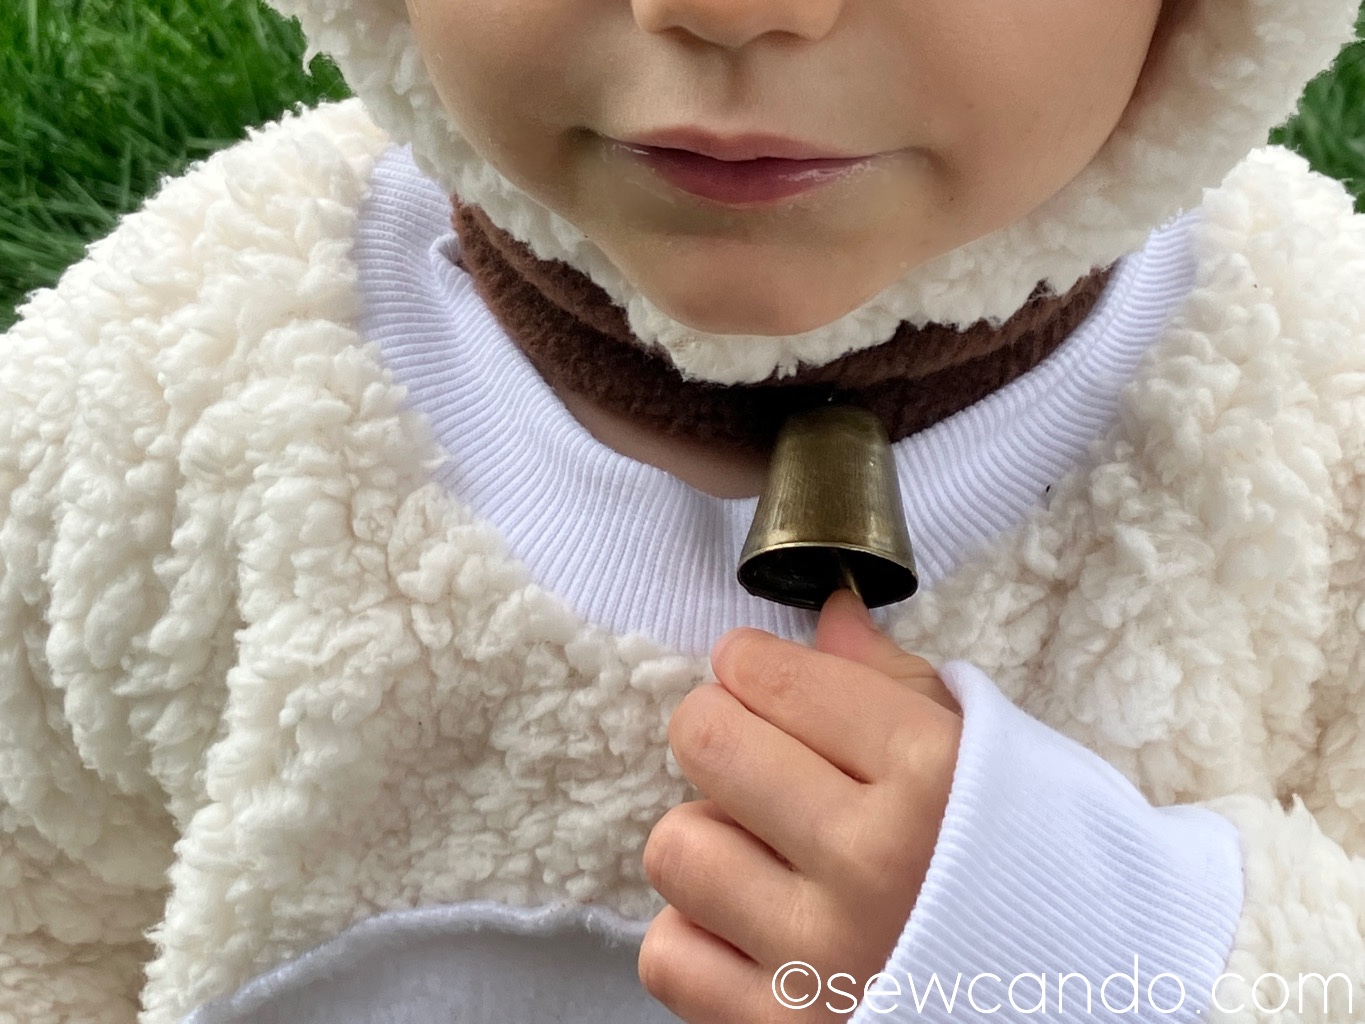
I also made a little collar from a long scrap of brown fleece, with a snap closure and hand-sewed a bell on it.  My daughter finds it fascinating so she just won't leave it alone (which is why it's hard to see in most of my photos).  I feel like the bell collar was key for distinguishing this as a sheep/lamb costume since many people can do a quick glance at a fluffy costume and think it's just about any animal.  

For my little shepherd I totally winged it.  Which was somewhat miraculous because I literally threw it together from nothing 48hrs before a trunk or treat event at our church.  They were a big hit since they "teamed with the theme" of the location;)  


I started by using one of my 4yr old's fluffy sweatshirts as my base for shape & size.  I folded it in half and measured his height from shoulder to ankle to start an extended pattern that would become a robe.


I then used a yard stick to extend it out in an A shape from the underarm for the proper robe shape and then traced the sleeves and belled them out the same way.


Once I had my pieces I cut them all out from my 1/5yds of brown fleece and also made 3 inch wide neckline facing pieces by tracing the neckline of my front & back and sewed everything together.


For the headdress I look a yard of muslin found on clearance and folded it in half.  To anchor it I got some soft cotton craft cord and wrapped it around his head a few times and held it together with little clamps to remove it intact.  Then I hand sewed it in 4 spots to make it stay in place.


Placing it over the muslin gave a real shepherd look that was easy too:


And to round out the look I got this lightweight kid-sized plastic shepherd's crook off Amazon:


I'm so happy about how these turned out, especially since I barely had time to throw them together.  I do like to make the costumes, whenever I can, when my kids are little.  It makes it more memorable and I know my time for getting to pick them myself or getting them to be willing to coordinate is short so I need to use it.  My 2 yr old actually squealed with delight when she saw it and insisted on trying the hat on, so gotta make the most of this stage for Halloween costume fun!


Have a Happy Halloween!!


Thursday, February 17, 2022

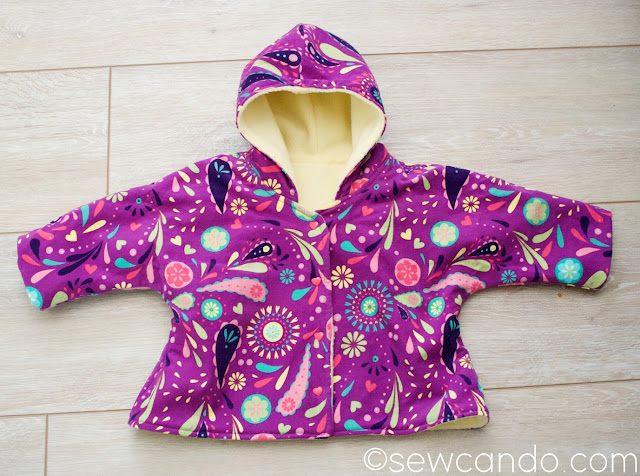
Ottobre Design Pattern Hack: Easy Toddler Coat


My now 2yr old needed a versatile little jacket that could stretch from fall to spring.  Something that would keep the chill out in the milder weather, but could also comfortably fit with bulky winter sweaters and fleeces worn underneath this time of year.  So I did what us sewing moms do - I hacked a pattern to make one on the cheap!


I sifted through my pattern & fabric stash so I didn't have to buy anything new.  


For my base design I borrowed from a pattern I've used several times before, Ottobre Design's Funny Dots Coverall.  The last time I made it I used minky lining with an interlock knit outer.  I originally made it for my now almost 4yr old and he & my little lady each wore it for an entire season and it still looks almost new:


For this jacket version I used anti-pill fleece for the lining with a fun print corduroy for the outer fabric.  The fun colors mean it works for fall, winter and spring seasons:


Since my daughter was almost 2 when I made this, I used the largest size (74cm) and added an extra 1/2inch or so to size it up a bit.  The European shape always gives extra growth room too, which is a big plus when sewing for smalls.  

I turned the original "snowsuit" style into a simple jacket by cutting the pattern pieces just below the waist area and skipping the placket front of the coverall - instead just extending the length of the front pieces to match the back.  Then I cut those and the hood pieces out from both fabrics.  Since I didn't have to worry about direction for either one, I was able to easily cut everything from a single yard of fabric for each layer.


Assembly was pretty fast since you just need to stitch the front halves to the back from shoulder to sleeve cuff along the top and from lower sleeve cuff to hem at the sides.  No sleeves to set in!


The trick to easily bringing the lining & outer jackets together is to baste the hood (with both fabrics already stitch together at the front) onto the outer:


And then, with right sides facing, stitch together the outer and the lining all the way around, leaving a gap at the bottom for turning. 


To attach the sleeves, I use this technique of folding over the lining like this and inserting it into the corresponding sleeve opening of the outer fabric and stitching the right sides together.


It looks crazy, but when you turn it right side out from the gap in the bottom, it puts everything perfectly together.


I used plastic snaps to finish the front.  I had some cute heart shaped ones in my stash, which echoed the small hearts in the fabric print and in the perfect matching color too.  These durable snaps make it really easy to get a restless toddler in and out of it.


This little coat has been nice and roomy.  We turned up the cuffs at the beginning of the fall season, but I'm confident it'll comfortable fit her into the beginning of next fall by turning them down.  Not bad for a thrifty stash-bust!


Wednesday, March 31, 2021

My DIY'd Little Lamb Easter Baby Dress Set & Teether


What could be sweeter for Easter for a baby girl than a little lamb outfit?  I thought it would be an ideal change from the usual bunnies & flowers and better suited to the meaning of the holiday.
 
I couldn't find a pattern that had all the features I wanted: puff sleeves, full skirt, pullover neckband, so I drafted up my own. 
 
 
Since the weather here usually is chilly at Easter, I also made a coordinating pair of leggings with the Ottobre Design Lola pants pattern:


I used that pant pattern it just a month ago with this outfit:
 
 
The fabric I used this time was a soft rib knit velour, that is cuddly, but light in weight:

 
I also used it for the neckband on the dress and the color was a perfect match:

 
I also found some decorative lace elastic in my stash so I added that as an extra detail on the sleeves:
 

I even made a matching silicone teether toy (and one to send as a gift for my baby nephew too):


I'll be honest though, I didn't think this new Easter outfit would be done in time.  I literally just finished it and it was 50/50 until the last stitch that I was going to have to scrap the dress and scramble to do something else.  The fabric was super cute, and I'd bought it months ago eagerly waiting to use it for Easter, but it just didn't seem to want to cooperate.  Literally everything seemed to go wrong. 
 
 
There were several times when the thread randomly bunched up during basic stitching.  Total bird nests.  The fabric curled quite a bit when cut and shifted around a lot when sewing too, even when well pinned and using a walking foot.  Even with fresh bobbin, re-threading & fresh needle it was fiddly, which was odd since euro knits usually sew like a dream.  My seam ripper got a work out!
 
My gathering technique with cord for the skirt portion normally works well too - where you baste a wide zig-zag around some thin cord to easily pull the ends & gather.  This time the cord kept jumping as I stitched so it threaded through the cord in a number of spots.  That meant I couldn't pull it without snipping those stitches.  It should look like this, captured between them:

 
And I'm not going to totally blame the fabric, because I may have made the sleeves a little tight with the elastic as well. 


When I first stretched the elastic to gather the sleeves it didn't seem to cinch up enough and looked too loose despite it being several inches shorter than the sleeve width.  I tried steaming it to shrink up a little, but it did nothing.  So I unpicked an entire sleeve and stretched the elastic a bit more as I sewed, which looks better, but may now be a bit too snug on her chubby arms.  
 
I'm going to try it on her today & if it is I may do a chop shop on the sleeves to remove that section and re-hem them (thank God I made them a little longer than I usually do so there's a little extra length there!).  I also ran out of my favorite fusible tape, which makes hemming on knits that curl MUCH easier, so there was more messing around to finish that too.

 
I was really pleased with how quick the teether toys came together though.  I'd bought the beads from different places, but I feel like they paired together really well:

 
I'd originally planned to make them circular but didn't like how they looked as I threaded them, so I did clip versions instead and these cute angel wing heart teethers I had in my bead stash were perfect for the tail ends:

 
When all is said & done, the outfit did turn out as I'd imagined despite the hurdles.  I'm going to try my pattern on another fabric and if it works out there, I'll make it into a free PDF & tutorial.


Happy Easter!


LinkWithin

Related Posts with Thumbnails