Showing posts with label Garden. Show all posts

Wednesday, July 29, 2020

Landscaping & Gardening for the Non-Gardener


I'll confess, I'm a wannabe gardener.  Unfortunately, even when time and resources are a plenty, I've just never had the knack.  I really admire all the people who can DIY beautiful yards, but I'm not one of them.  I've tried various bed types, yard locations, plants & gardening gear and each year it's been lackluster results.  I'm always battling extreme weather, insects, critters, ridiculously uncooperative clay soil, but every spring a little part of me wistfully wants a lovely garden to gaze at.   

With my crafts & creative projects shoved to one side for most of the season because life has been far from normal, I was a bit skeptical a little raised bed kit and some quick shopped flowers would actually work out.  This year, despite massive challenges, I think I may have finally gotten my wish:


And it took just 3 days to actually do.  No backbreaking work and was set up in under an hour.  The most time spent was just getting the soil to fill it.  Not bad, huh?

Originally this part of my backyard was a small herb & vegetable garden.  This photo from a decade ago showed how it looked at its best when I first set it up.


Over the past several years it became super straggly.  I wish I'd thought to take a photo before I tore it out to show just how bad it had become.  I'd tidy it every few weeks, but it still looked a mess.  It would overgrow on one side and get overrun with weeds on the other.  The back section just refused to grow anything I planted despite soil changes, rest periods, etc.  That decorative fence didn't hold up either.  I had to change to one that was wood with wire to keep the wildlife from eating the few things that did grow, but that was constantly fading from the sun and getting broken pickets from the lawn mower bumping it.  I'm sure the retired neighbors behind me hated the dumpster fire view from their immaculate patio and stunningly landscaped koi pond.  So when I saw this Versailles Sunburst raised bed on a gardening supply website I was like "YES!  A makeover is the answer and it looks like even I can't screw this up!" 

This kit is made up of curved composite boards with hinged brackets that you can configure in the different shapes and stack.  The maker is Frame-It-All and, just to clarify, this is not a sponsored review, so I'm being totally candid about this item with no strings attached (which is pretty rare on blogs these days).  By layering them and locking them together with stakes, you can get a three-tiered raised bed that has 9 separate sections and makes this pretty shape:  


It does remind me of the actual ornamental gardens at the real Versailles, with all the symmetry and interlocking shapes, but a much smaller scale and without requiring a royal budget or a famous landscape architect.  A couple of hundred bucks rather than millions was enough cost for me.

 
Setting it up was surprisingly easy - my husband & oldest son got it all together in about half an hour (I was busy wrestling with a baby & toddler a few feet away).  I paid a little more to get the 2 inch wide boards so it would be really sturdy.  The biggest challenge was in getting the kit itself.  It's only sold online and most places had ridiculously long ship times.  When I finally found one that shipped immediately (which was actually drop ship from the maker), I was sent the wrong set.  After contacting them, then the right one arrived, but missing 2 of the key stakes needed to finish it.  The supply place I bought through (Gardener's Edge) gave awful service and but Frame-It-All was prompt in trying to sort things out, so if I ordered again, I'd buy direct for them.   

Since I didn't actually get all the parts until late June, and plant availability was limited (even more than usual thanks to the pandemic), I mainly went with perennials that are a zone hardier.  That way they should handle our abrasive MI winter better since they'll be above ground where the temperatures get colder.  I got some pretty Floribunda roses for my lowest tier that flower all summer and don't require pruning:


 A mix of black-eyed susans and marigolds for the skinny second tiers and lavender & rosemary for the largest top tier:


I impulse bought a pair of hollyhocks to go in the center, but the gorgeous flowers didn't last long, so I'm hoping they will repeat bloom like they're supposed to - for now they just look like weird stalks.  I repurposed my faux stone brick edging to make a border to keep the grass from encroaching and not have to worry about the mower destroying it like I did with the fence.


 It did take A LOT more than the 19 cubic feet of soil recommended - more like double, which mean several extra trips to the store.  It also did not come with instructions on set-up, just how to attach the brackets to the planks.  Thankfully I'd already been to the manufacturer's website, where there's a handy video to show how to easily put it all together and layer it.  

We'll see how well it holds up through the seasons, but so far I'm really happy with it.  It looks so nice (my neighbors even complimented it!) and with watering being my only maintenance for the rest of the summer, it's a speed I can totally handle.  
Finally, a little garden success!!  


Wednesday, July 5, 2017

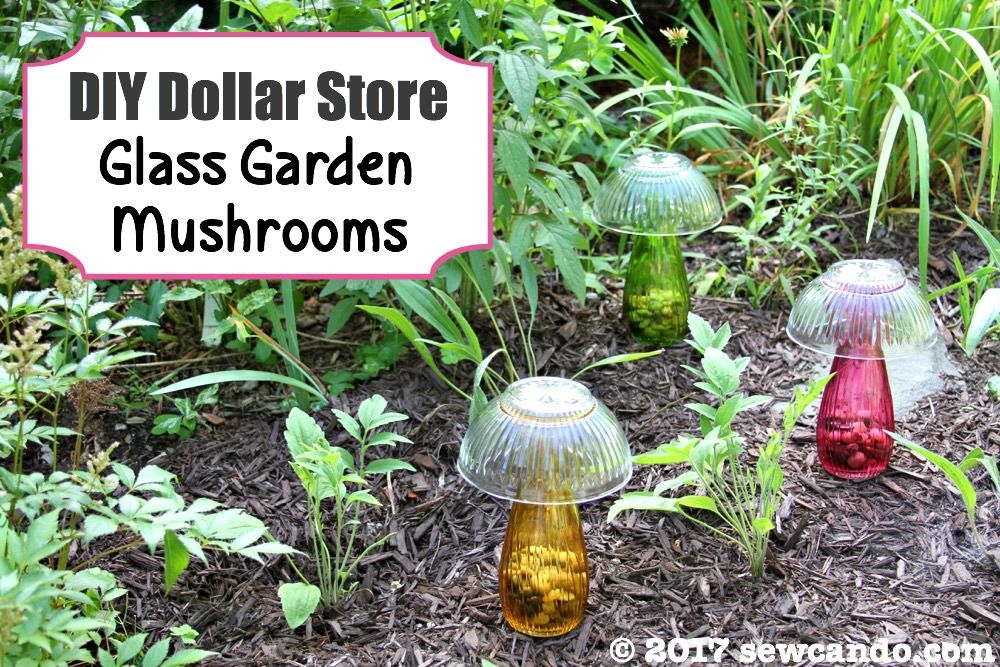
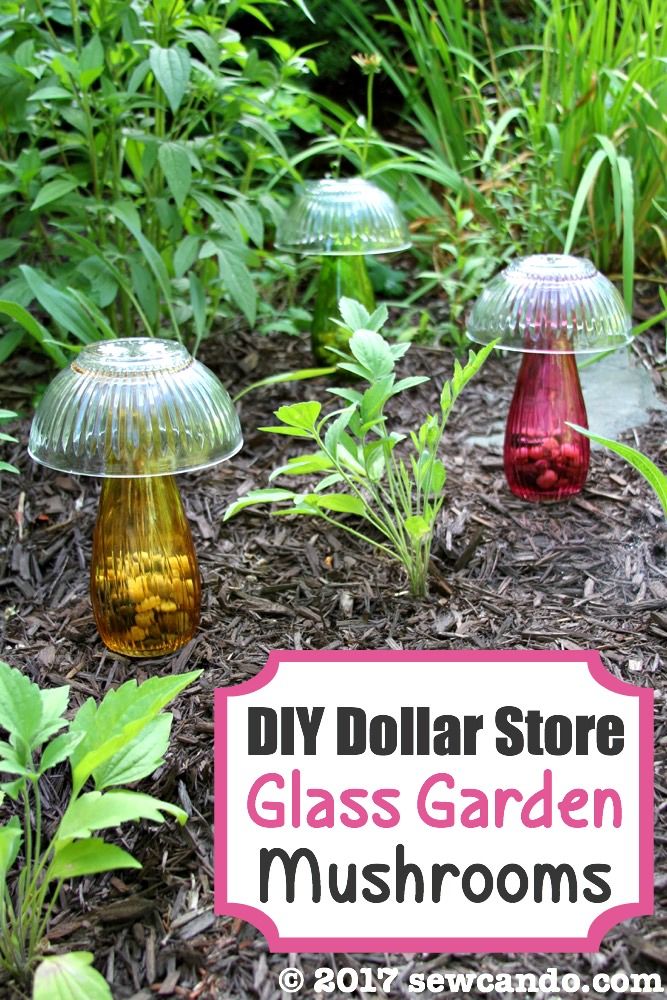
DIY Dollar Store Glass Garden Mushrooms


Today I'm taking a little departure from my summer Sewing with Knits series to delve into an easy outdoor craft project: DIY Dollar Store Glass Garden Mushrooms.


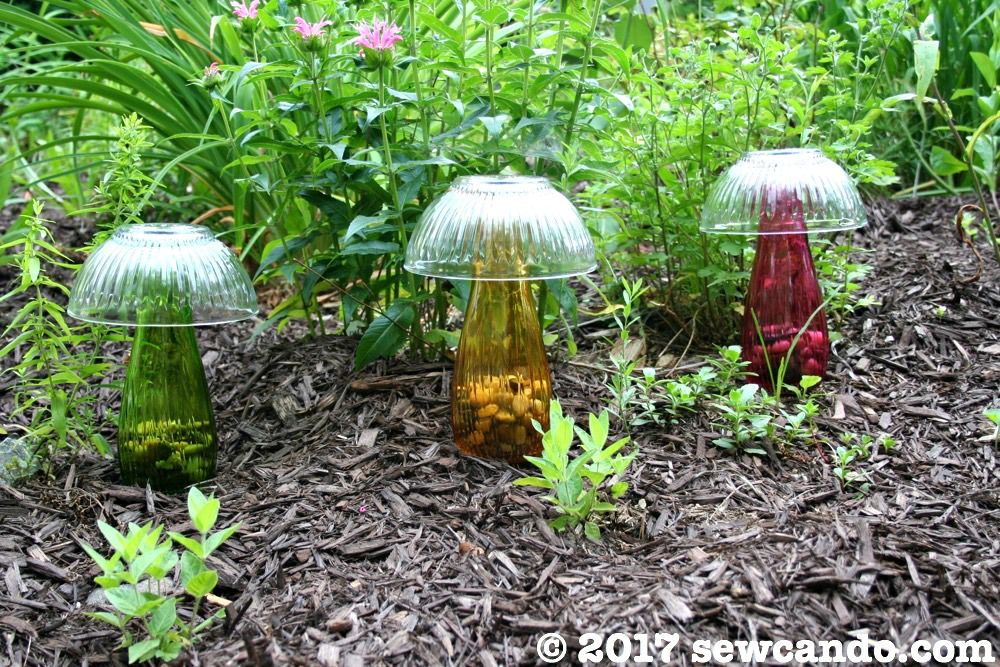
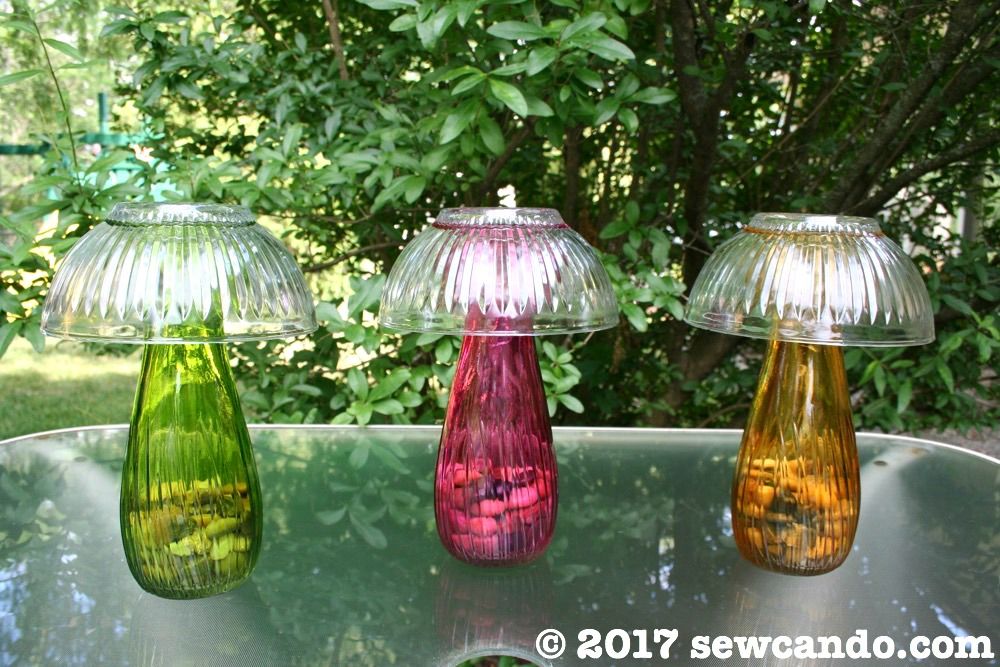
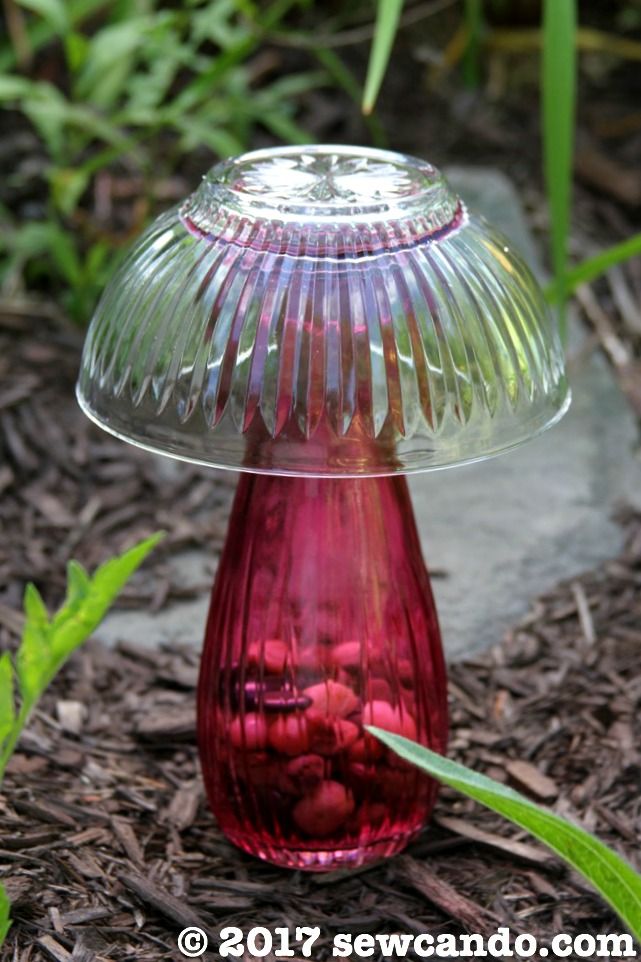
Super quick to make and easy on any budget.  It's a great way to add a little decoration and color to the garden:


I saw a similar idea in a photo (with no way to track down the original source), but it used cheap styrene plastic bowls and vases.  The concept was cute, but it totally looked like what they were - thin plastic bowls with a fake flower carving designs stuck on cheap plastic bud vases.  Not the most stylin' garden decor.  

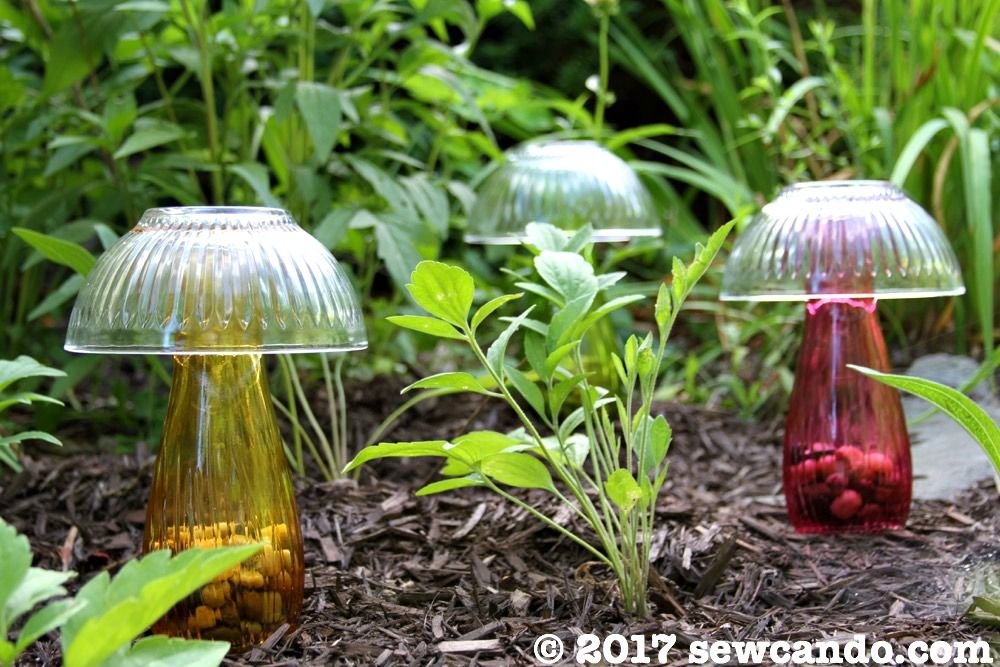
Flimsy clear plastic couldn't withstand the sun, wind or rain longterm either.  One good gust of wind and they'd be airborne!  I figured glass would be a much better option for durability and appearance, as well as river rocks inside for extra base weight and aesthetic detailing. Using colored glass also makes them pop against the plants and mulch: 


I got my supplies from the dollar store.  They literally cost me $2.25 apiece.  A much better price than most garden decorations I've seen for sale!

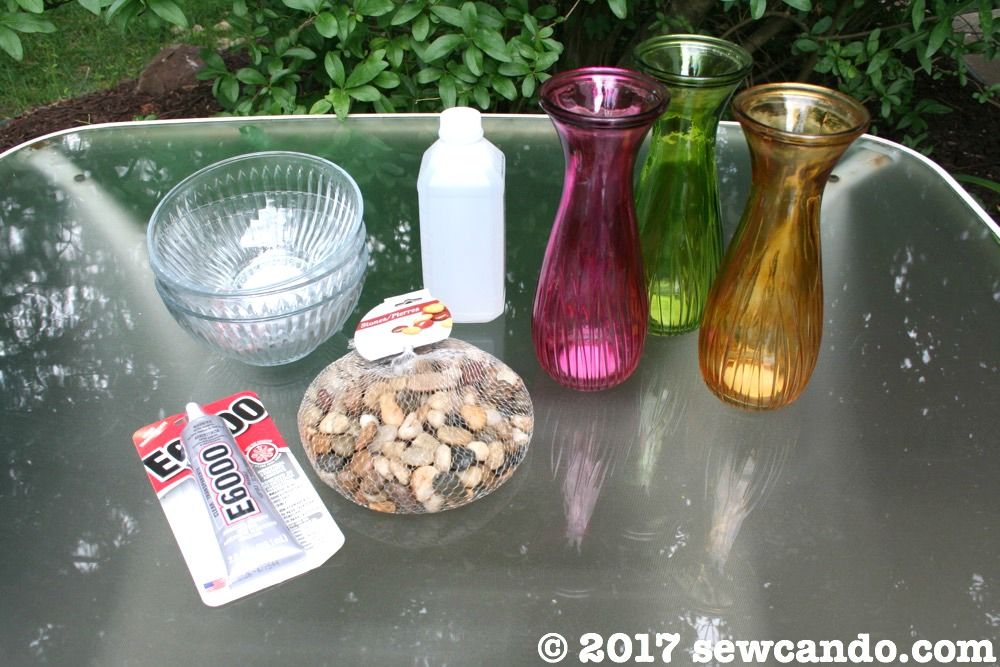
Materials:
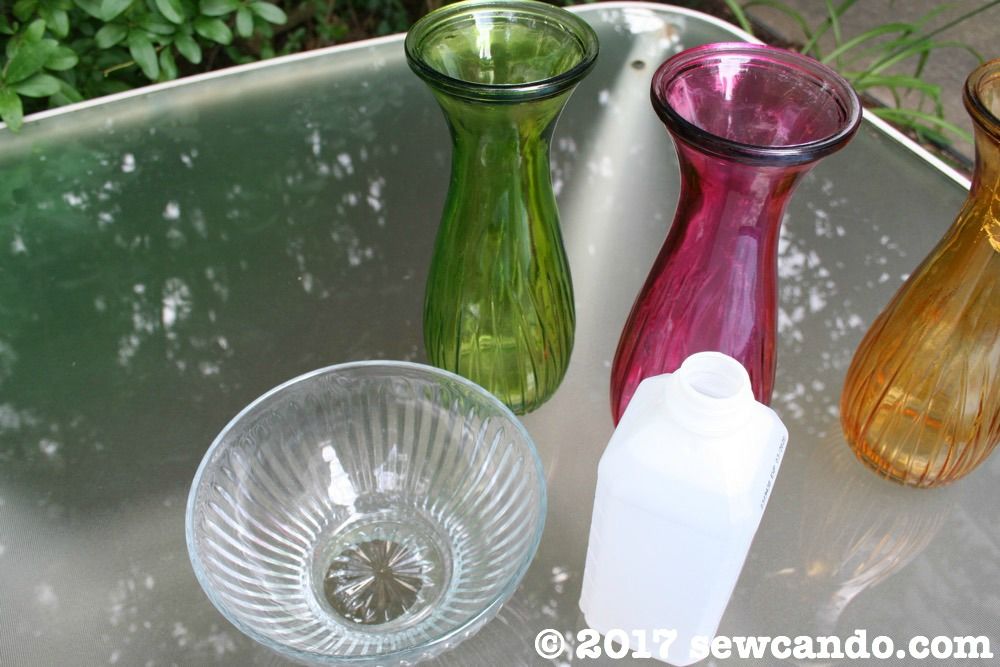
- Colored glass vases
- 5 inch glass bowls
- Bag of river rocks
- E6000 glue
- Rubbing alcohol 


Start by using rubbing alcohol and a paper towel to clean the top edges of the vases and insides of the bowls.  This makes things sparkling clean & residue free and insures the glue will hold well.


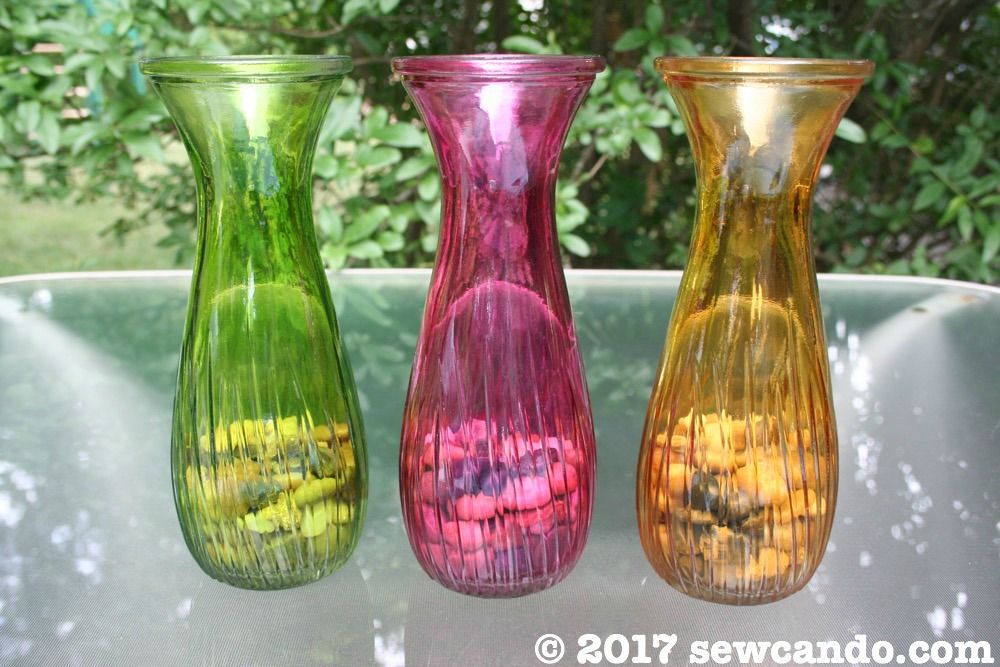
Add river rocks to each vase until one third full:


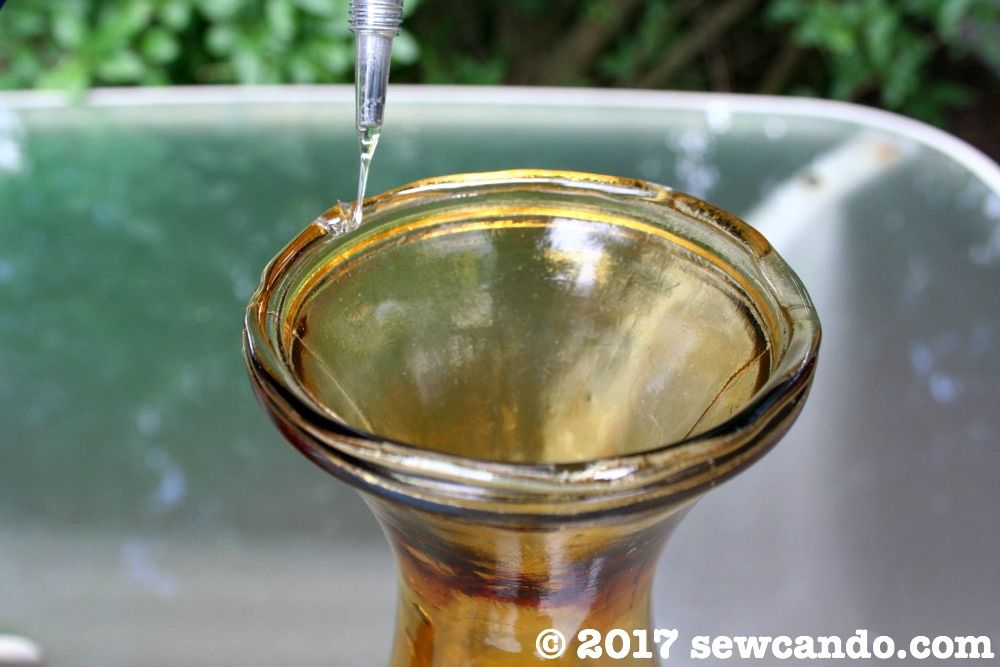
Run a line of the glue over the top edge of each vase:


Set an inverted bowl on top of each vase, being careful that it is straight and wait for the glue to dry and cure.


Place them out in the garden and enjoy the added whimsy.


Their durability means they can be hosed off and no garden critters can easily tip them over.  My garden & my wallet are both happy!


Wednesday, May 25, 2016

Easy Gardening: A Native Plants Fairy Garden


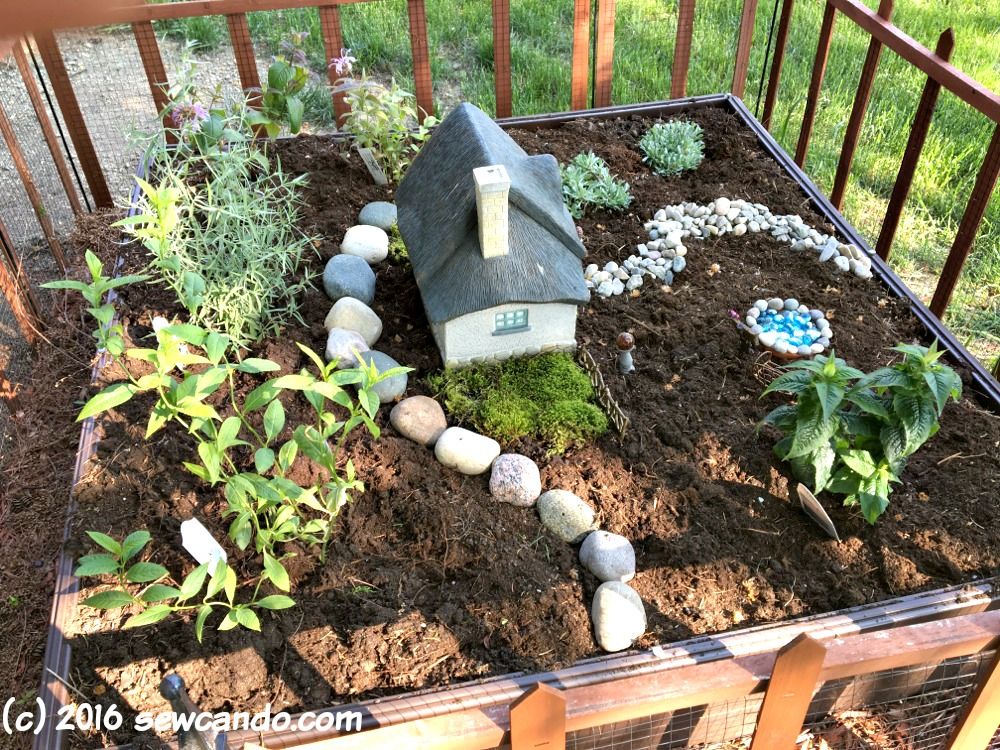
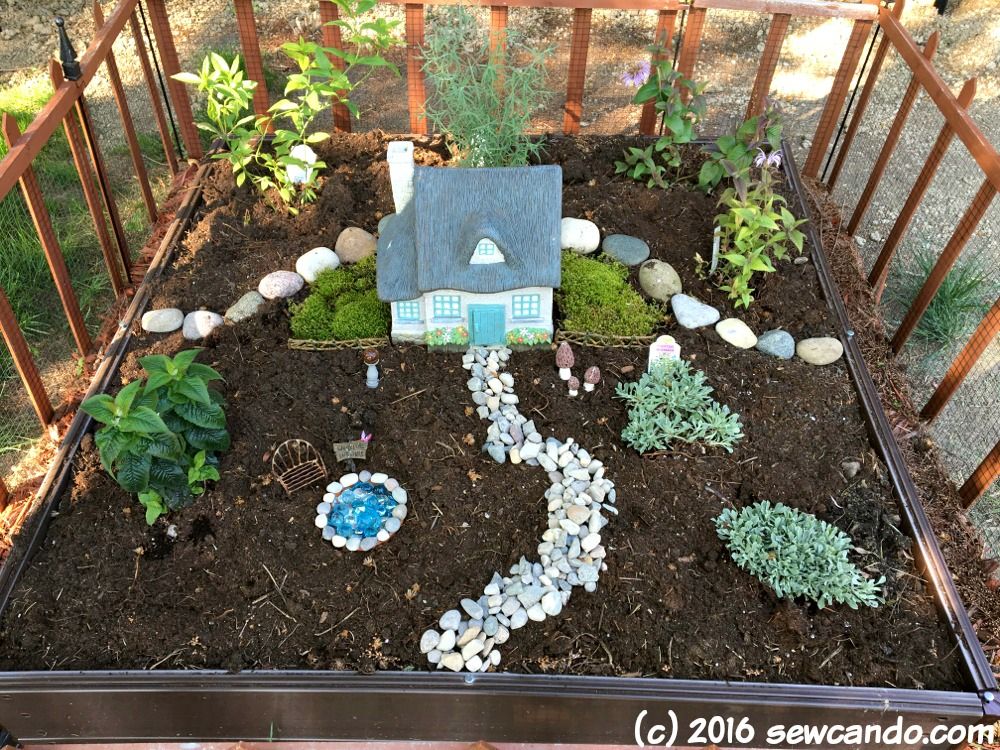
My craft room has been a bit underused recently.  Instead of sewing and indoor things, I've been focused on sorting out my yard.  Most of it is boring & laborious, but I wanted to share the recent part that was a total pleasure: my Native Plants Fairy Garden!  There is something about fairy gardens that is so relaxing and enchanting.  I've been wanting one for a long time and it was surprisingly easy AND will attract fairy friends like butterflies, bees and hummingbirds!


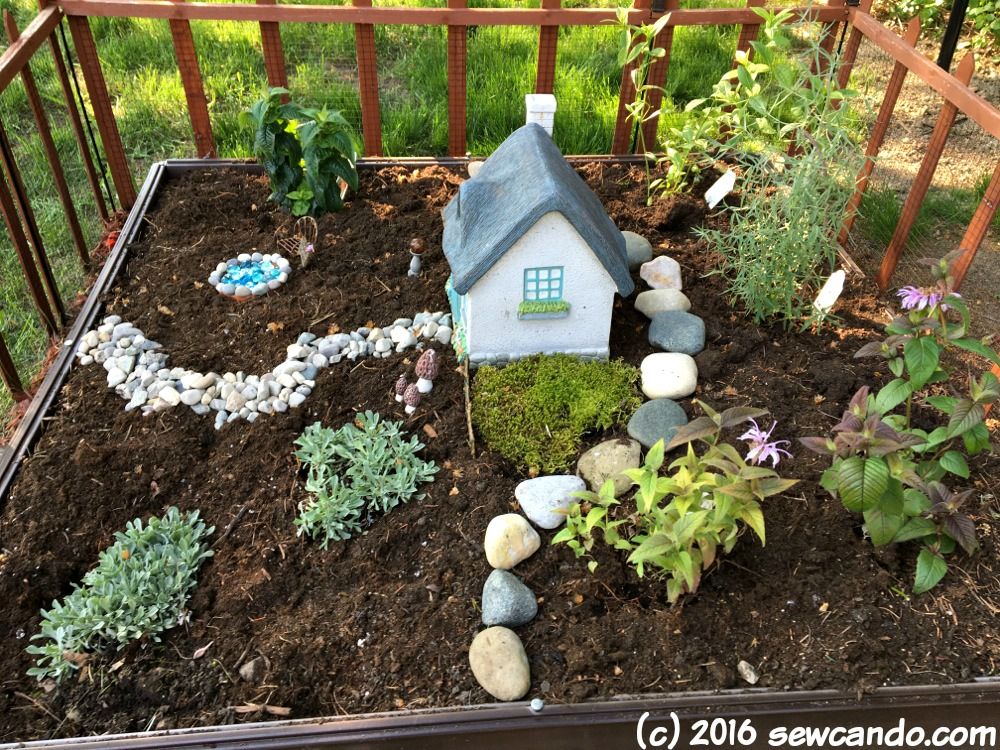
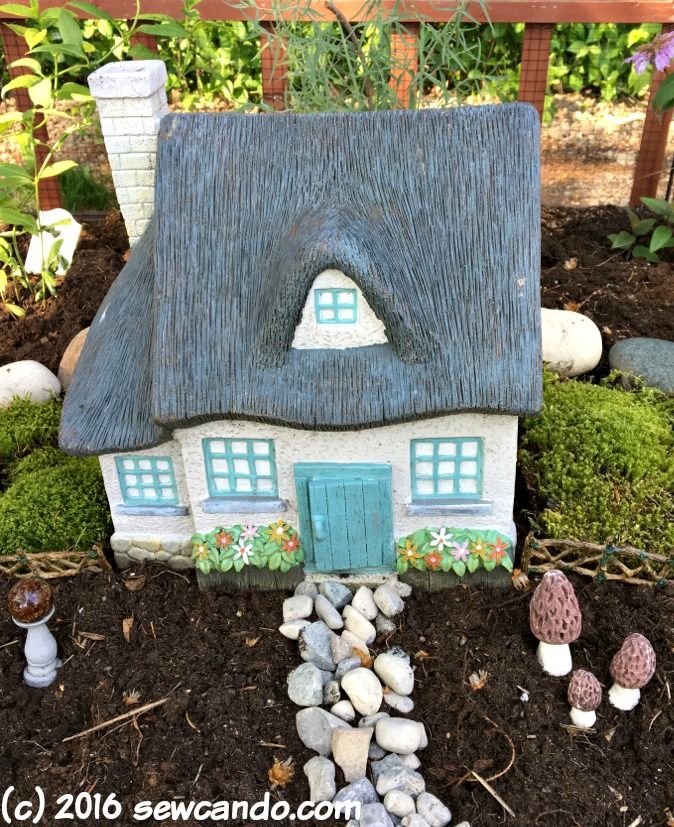
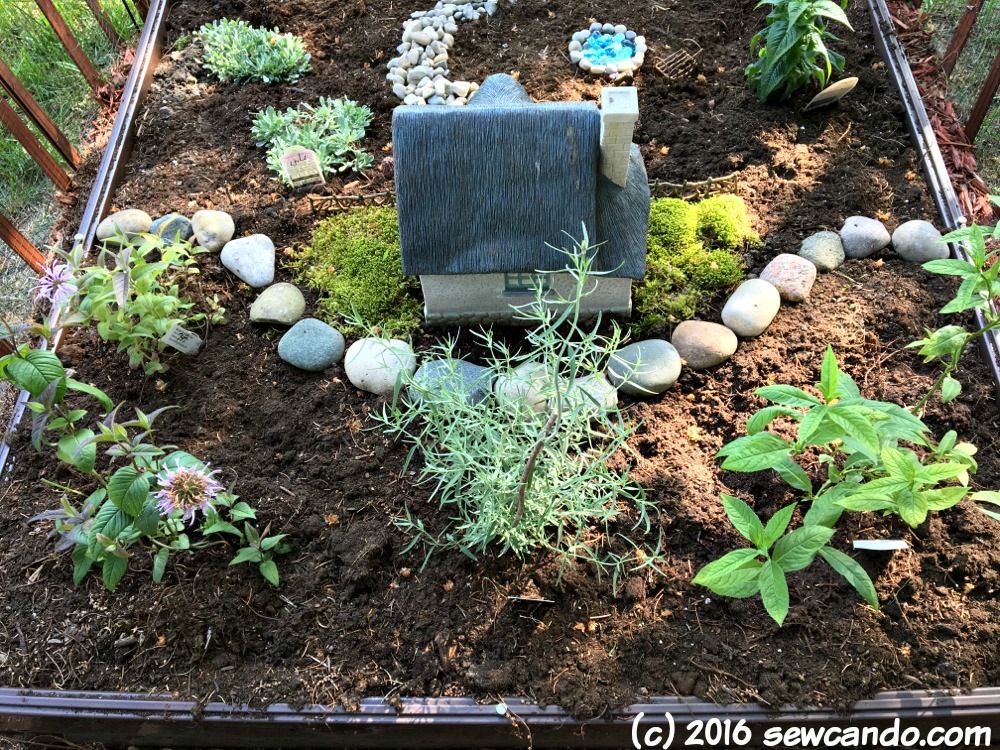
A few years back my husband had bought me this large resin fairy house.  I'd had it in a shady corner surrounded by some meager hostas.  No one ever goes over there and I tended to forget about it.  Now my little house is center stage!


Our yard gets A LOT of sun and has tons of clay soil.  I have a 4 foot square raised bed that has mocked my prior attempts to grow vegetables.  The results have always been pitiful no matter what I've done.  This year I wanted to take a breather from urban farming, but was trying to figure out how to pretty up the space.  Now it's home to native plants and hopefully a few fairies;) 


FYI - If you want to attract the pollinators (aka butterflies, bees & hummingbirds), and have minimal maintenance in your yard, go native.  These are plants that originate in your region. No special soil amending, fertilizing or gardening magic is needed for them to thrive.  If you're like me and despite lots of effort you struggle to get things to grow, this is an ideal way to add beauty and help wildlife at the same time.    

From Top Left Clockwise: Pussytoes, Monarda didyma, Turtlehead, Orange Hyssop Agastache, Bradbury's Monarda.

Since I'm in Michigan I used White Turtlehead (Chelone glabra), Pussytoes (Antennaria parvifolia), Monarda didyma and Bradbury's Monarda (Monarda bradburiana).  Not a lot of nurseries carry native plants, so it takes a bit of searching to find them, but they're worth it.  They'll fill out well, flower throughout the summer and add pretty colors to an otherwise blah spot.  I did also add one non-native plant, Orange Hyssop Agastache, because it also attracts the butterflies and birds.   Fairies like to feed those lovely creatures you know! 

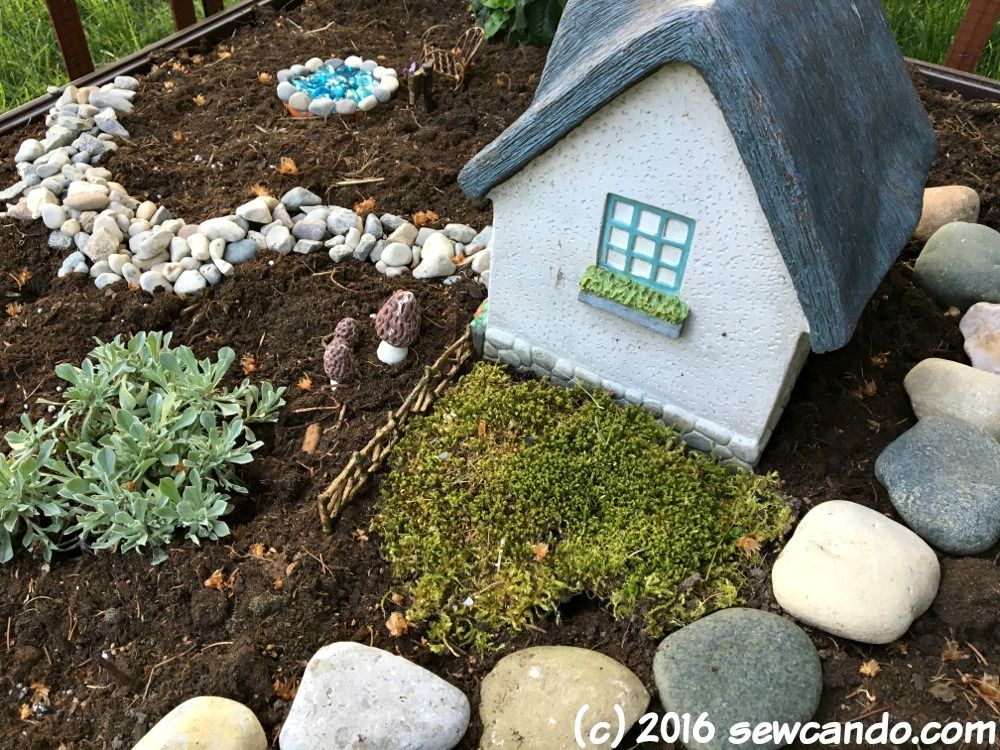
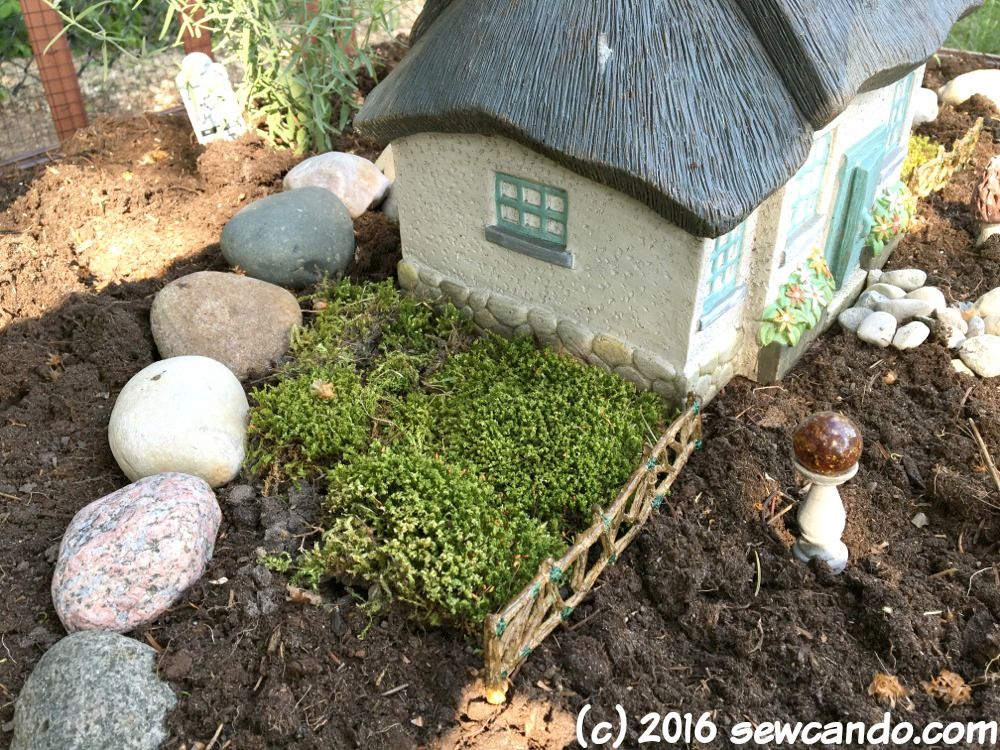
I actually had a good portion of the other supplies already.  I moved my little house and added a few accessories like a little fence, stone mushrooms and a mini gazing ball.


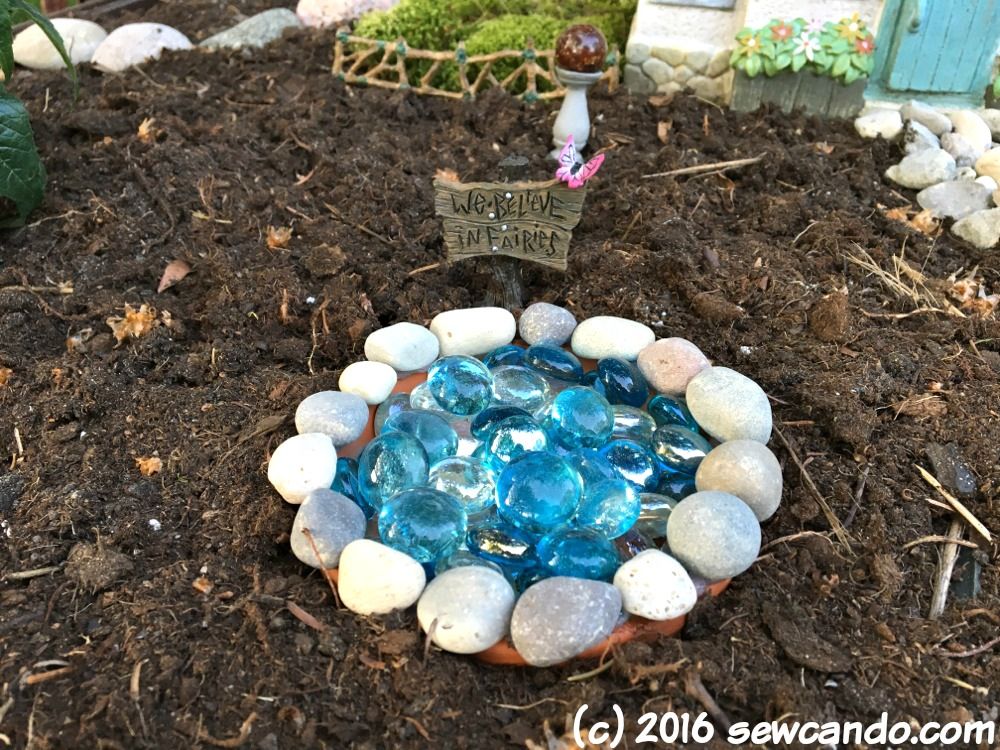
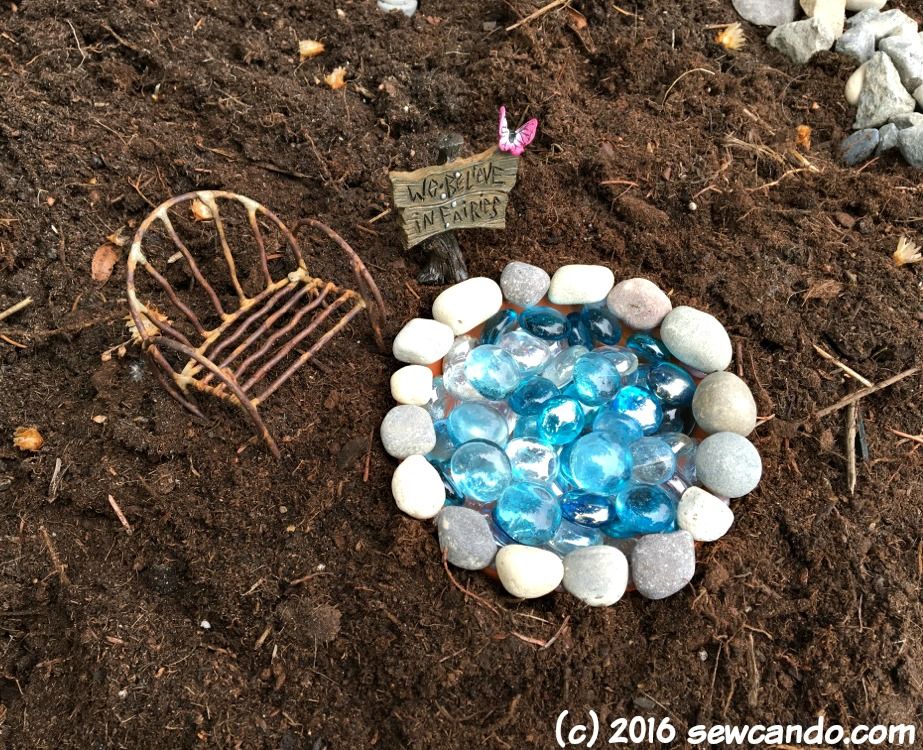
I wanted to add a little pond, so I used a terra cotta dish and glued small stones along its edge with some weatherproof silicone.  


I filled it with some clear and blue glass stones I had in my stash and set it into the soil.  Instant permanent sparkling pond!


More small pebbles made a meandering path and larger egg rocks from my front yard made a nice border behind the house.


I also found some moss growing elsewhere in the yard and transplanted it for an added fairy-esque feature.


I'm seriously in love with how my little garden looks and can't wait to see it in full bloom and filled in as things grow.  I also feel confident it will be able to handle the sun & weather.  I've seen a lot of lovely fairy gardens with delicate plants and pretty, yet fragile furnishings, but most of those just won't stand up to the outdoor elements around here.  


On the plus side, I found a few dish garden containers in my basement this week, so I'm eager to do a few smaller fairy gardens with the kids using them.  We can keep those in our enclosed back porch, which means we can craft up some decorations from scratch or use some of the more fragile props and plants I keep seeing.  Inside or not, the more fairies around here, the better!  


Wednesday, June 24, 2015

Simple & Stylish DIY Garden Markers (On The Cheap).


For me, summer usually means more crafting out of necessity than just what I feel like making.  Today's project is the perfect example of this kind of thing:  Simple & Stylish DIY Garden Markers. 


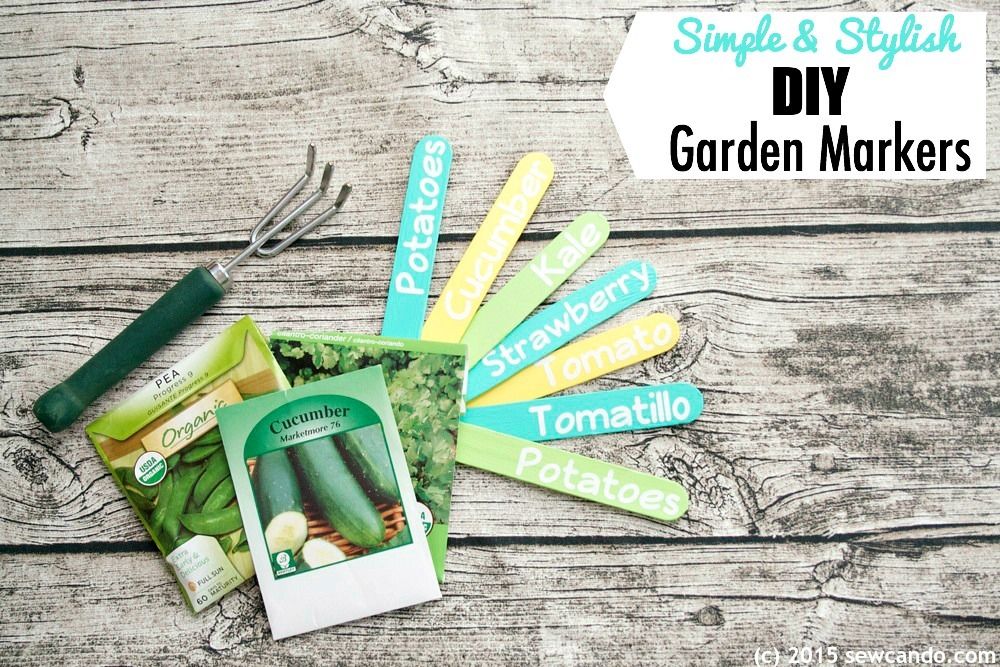
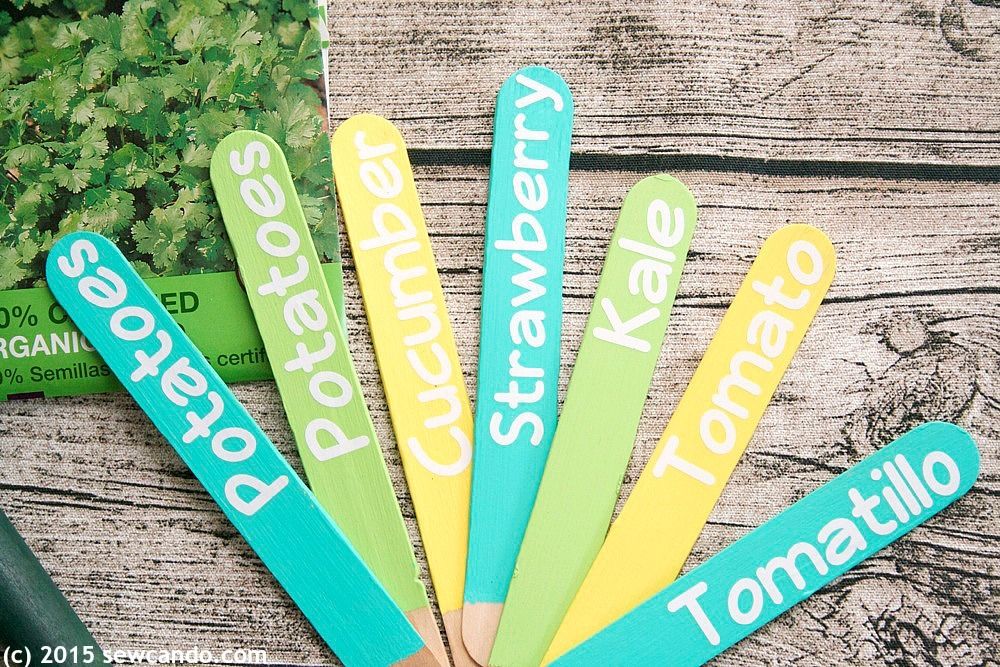
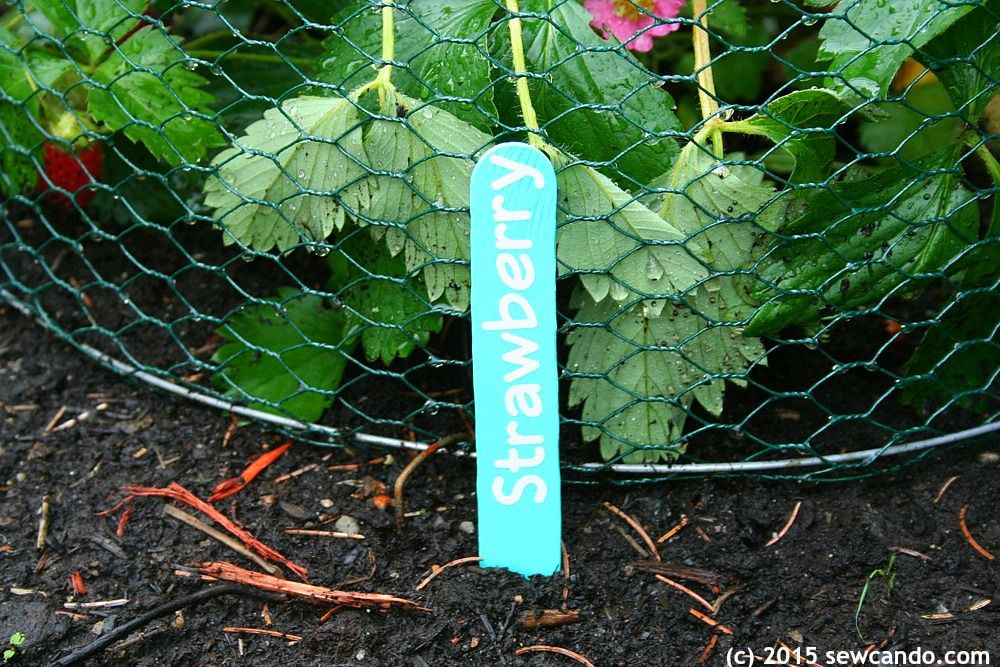
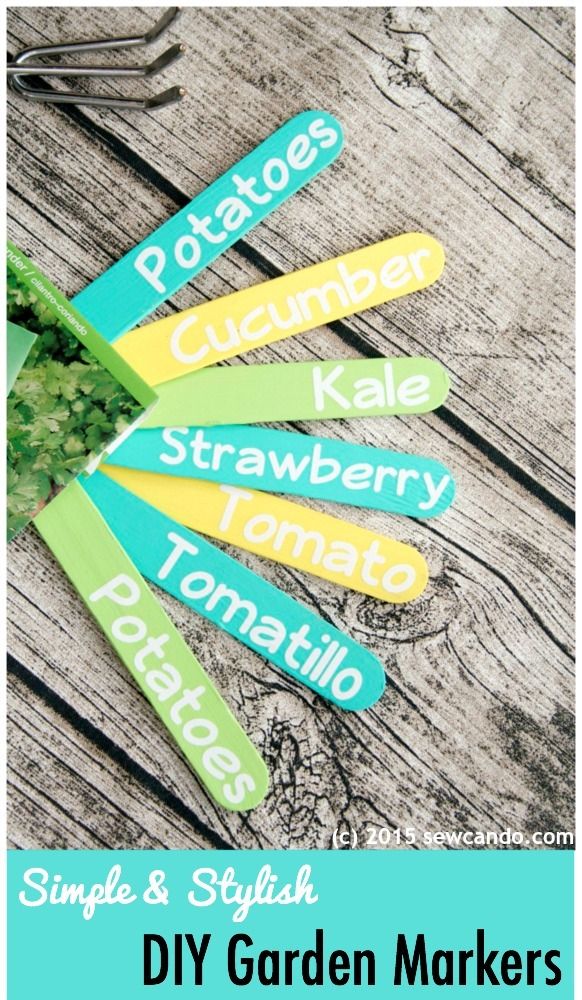
Using just what I had on hand, and a little patience, I made these simple sticks that add a splash of color & organization to my garden beds:


I've been putting in extra effort in my garden this year.  The past few years results have been pretty underwhelming, so this time around I've been pulling out all the stops: using grow lights on my seedlings, lasagna-style layering the garden beds, making tripod trellises, etc. Heck, I even ordered a giant bag of worm poo as the ideal soil enrichment.  I'm in it to win it this year.  We will grow decent vegetables this summer! 


That being said, labeling my miscellaneous herbs & veggies was stumping me.  Cute garden markers can get pricey when you need a lot of them like I did.  I needed something like 25 markers.  Even the Pinterest-perfect DIY's out there involve procuring lots of materials if you're planning to make more than a handful.  I need them to be able to take the obscene amount of rain & wind too.  I saw lots of chalkboard versions, which just seemed...odd.  Are these people growing plants without water then?!?  Running outside and re-writing them once a week?  That's not gonna work for me.


My atrocious handwriting wouldn't help either.  A rummage through my craft drawers gave me this idea.  Inexpensive, fairly simple and easy to do in big quantities:


Here's how to make 'em.
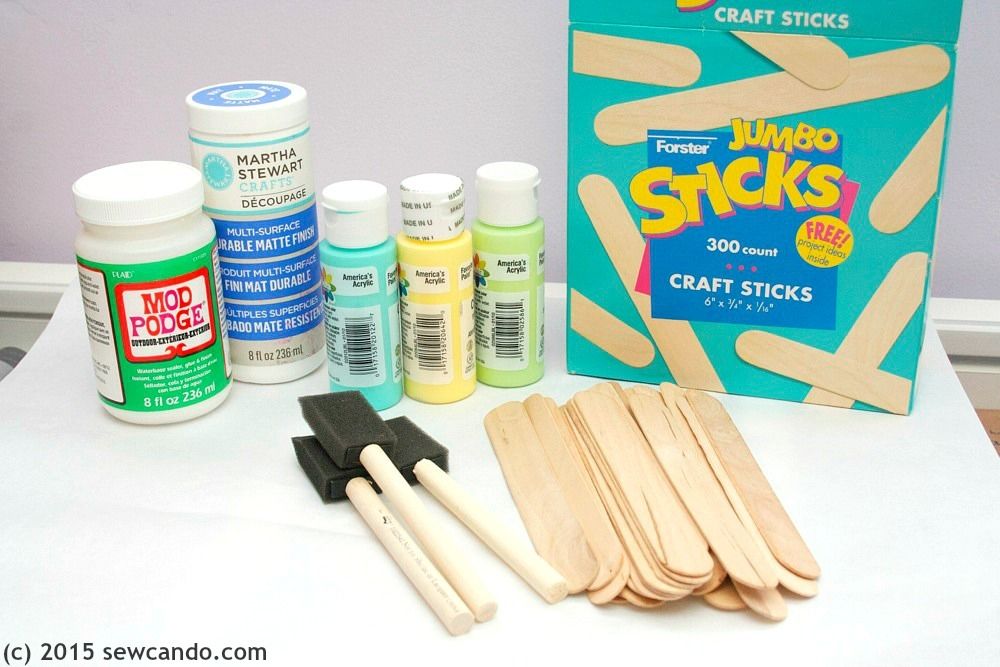
Materials:
- Jumbo craft sticks (aka tongue depressors)
- Acrylic craft paint & brushes
- Decoupage sealer (make sure it's rated for outdoor use)
- Optional: Vinyl, Transfer Tape & Cutting machine

FYI- I'm not pimping any particular brands or getting paid to rave about any specific supplies.  This is what I happened to have in my stash & just decided to use:


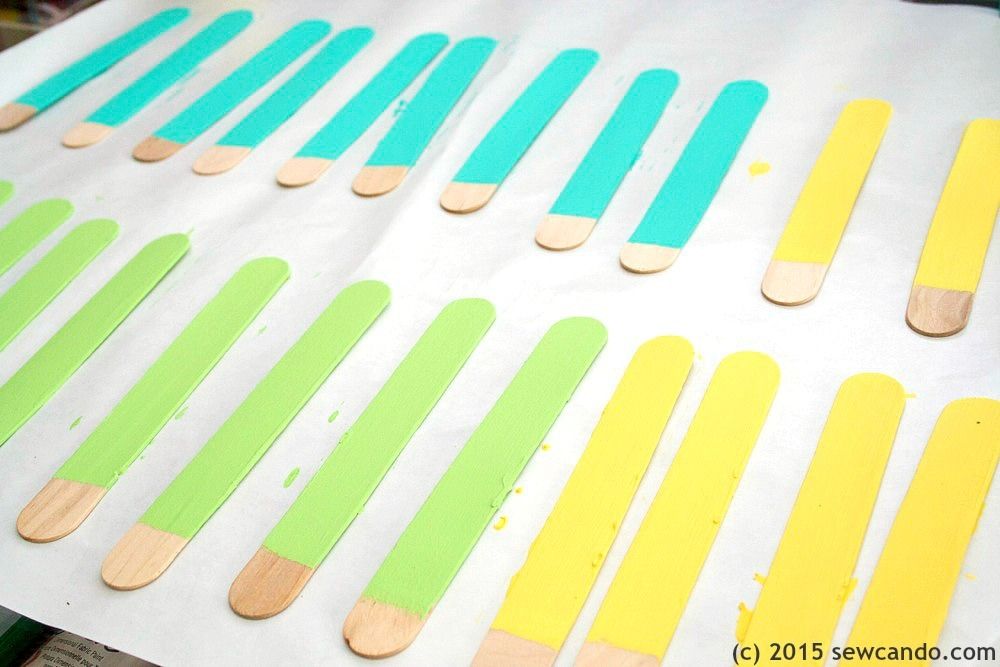
I started by painting my craft sticks.  I did 3 coats on each side, waiting the required time between coats.  I used a piece of freezer paper, shiny side up, underneath.  That worked great to keep things clean and the paint not sticking.  I left the bit at one end unpainted so it would be easy to hold while painting (it's the bit going in the ground so no one will see it anyway).


Side note: The next cutting machine & vinyl bit is optional if you have beautiful handwriting. I do not.  I wasn't about to do a nice paint job and then ruin it by writing my chicken scratch on it.

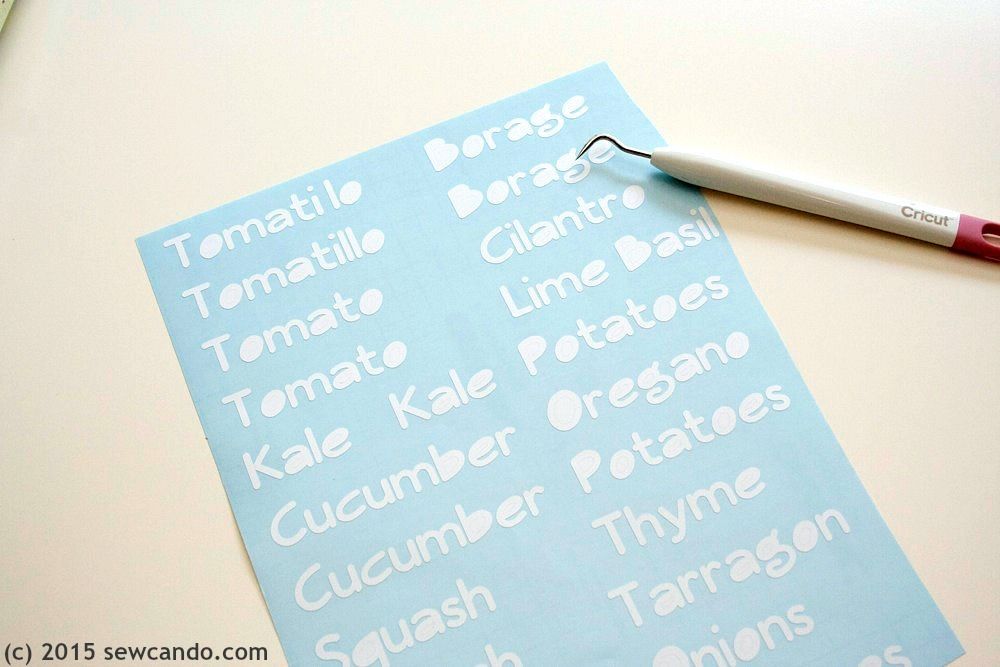
I used my Cricut Explore to do the vinyl cutting.  I choose a font I already had (Veggieburger), made it bold, and typed up all the herbs & vegetables and sized them to fit my craft sticks.  Then I cut them out from white vinyl remnants from a previous project (perfect example of when hoarding scraps can be useful!).  I weeded out the excess bits.


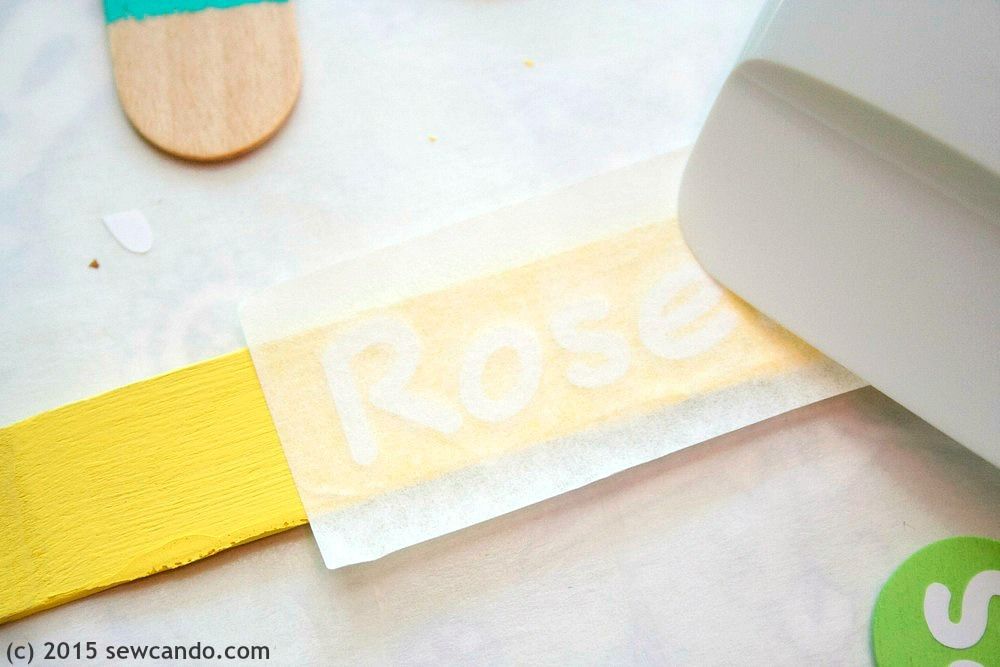
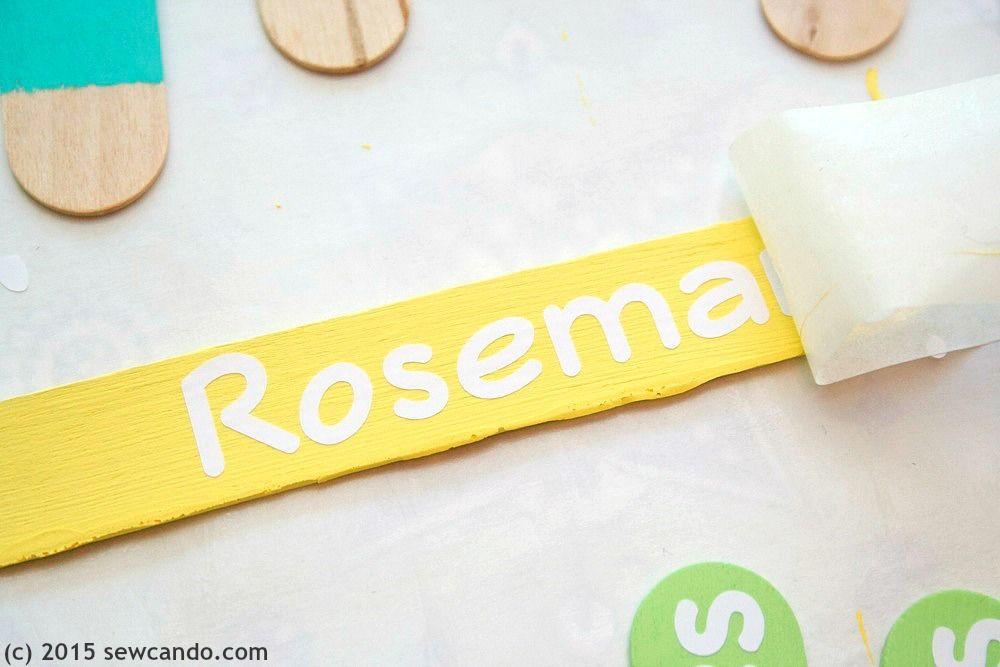
Next I cut a bit of transfer tape and used it to pull up a single word, then pressed it onto the upper end of a stick.  I rubbed it on with a scraper tool.


I peeled back the tape and repeated it all again with the next plant name and stick.  I was able to use each piece of transfer tape about 3 to 4 times, until it wasn't sticky enough to pull the vinyl off the backing, so it didn't take much tape to do them all.


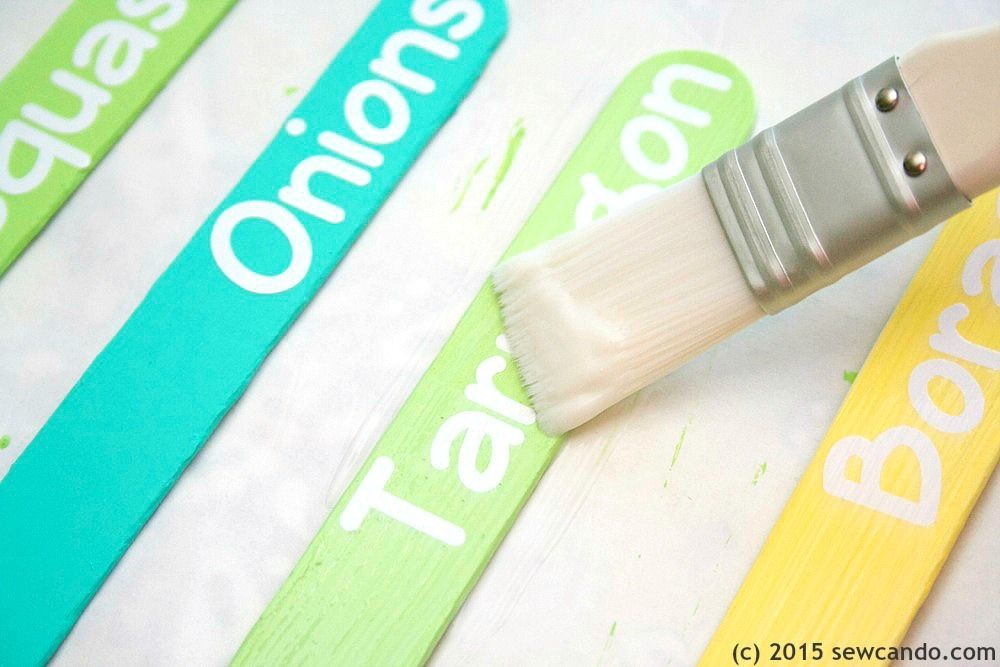
We've been getting A LOT of rain around here and I didn't want these to get yucked up right away - or for the vinyl to peel - hence the sealer.  I did 3 coats on each side with that.  I ended up only using the Martha Stewart decoupage sealer.  I'd used the Outdoor Mod Podge before, but it always felt tacky to the touch when dry, so I skipped it this time.


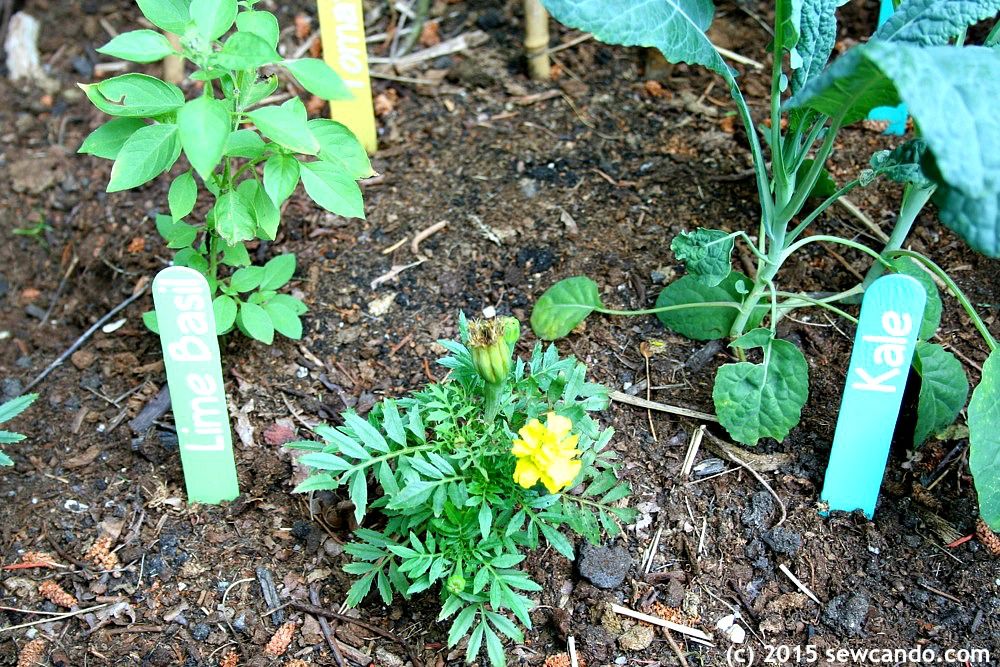
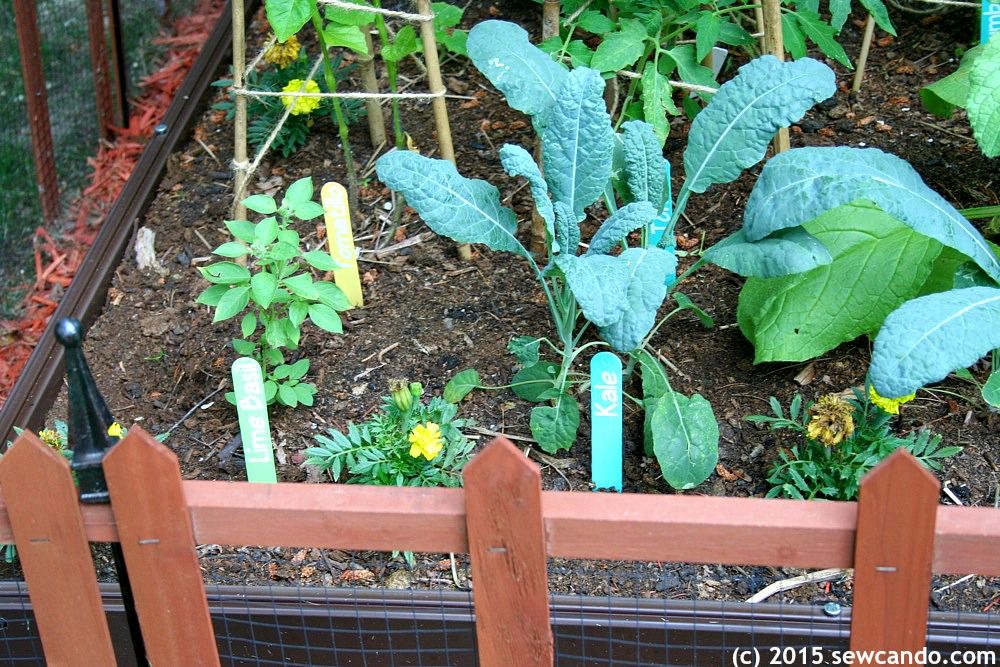
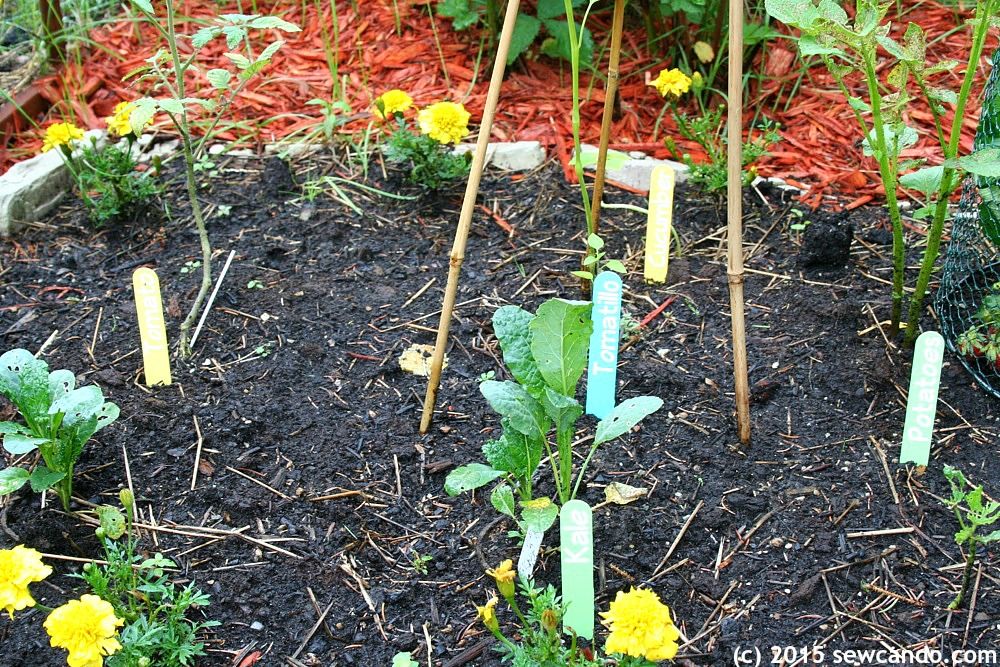
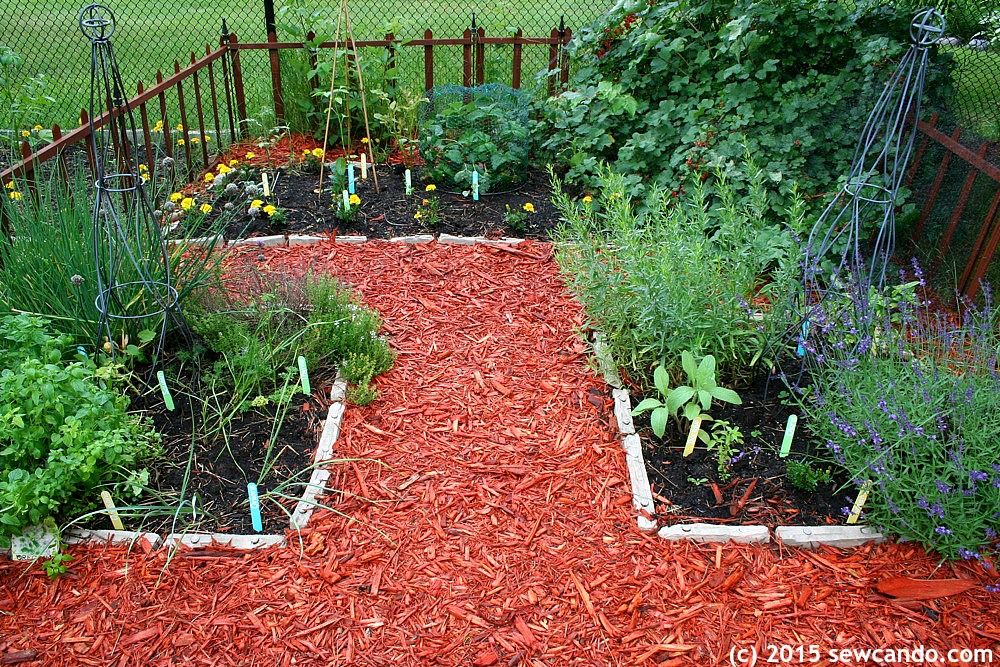
The only tough part was waiting a few days for everything to cure before setting them out in the gardens.  This is my herbs, berries & extra plants garden:


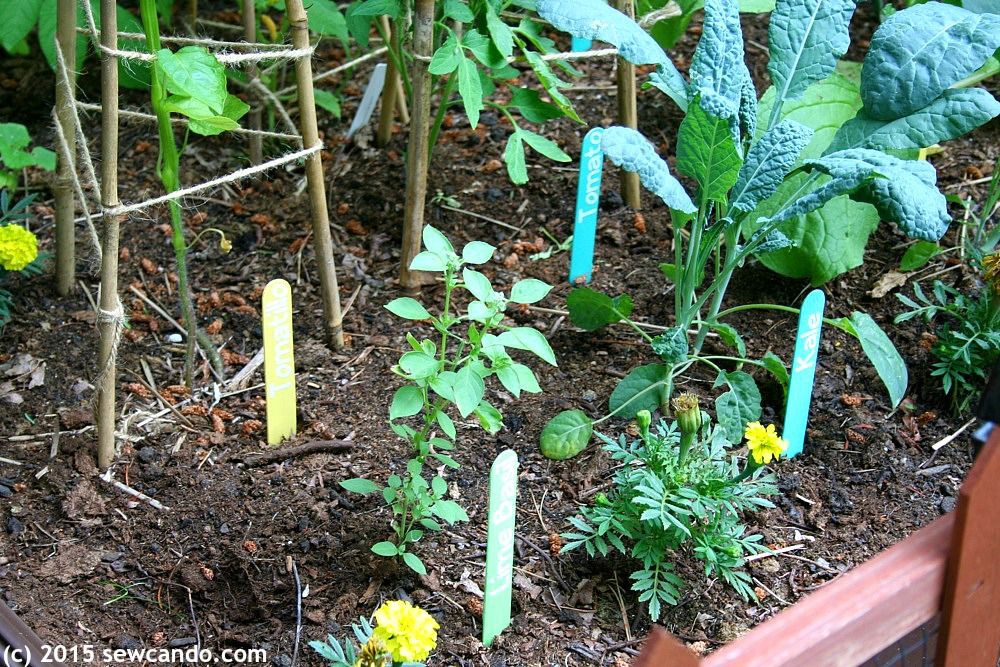
Now it's easy to find what's growing at a glance there & in my raised bed:


I'm hoping they'll hold up all season.  We'll see.  If they don't at least the price was right - $0!


LinkWithin

Related Posts with Thumbnails