

Now that
it's getting sunny & warm and green things are growing, it's time
to get back into the garden. And what better way to get motivated
than with a fun little Gardener's Apron to wear!
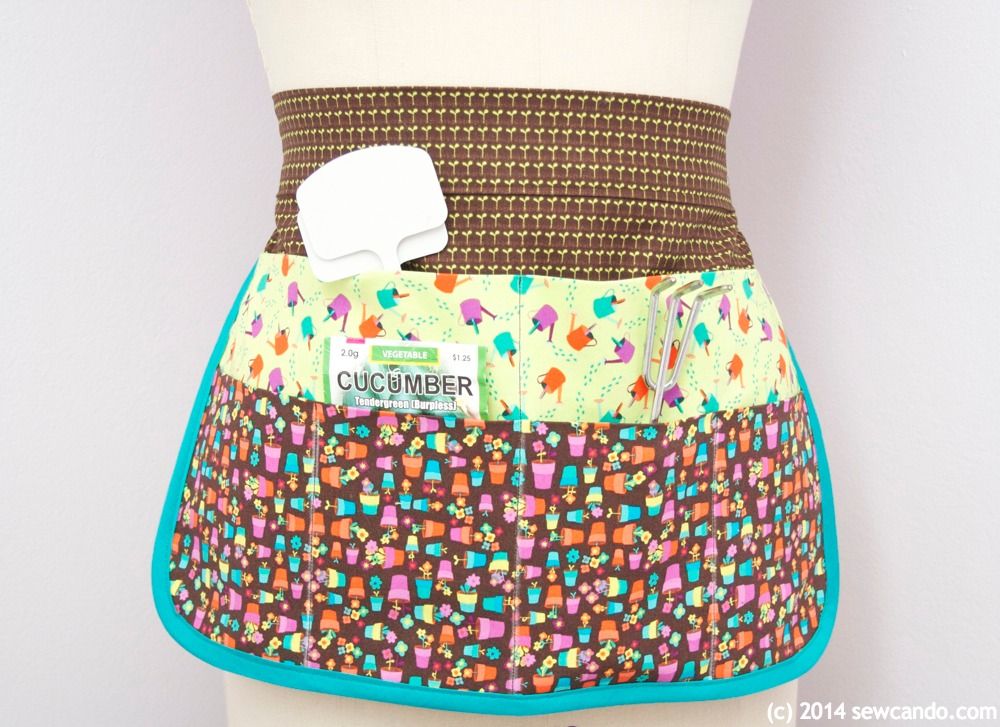
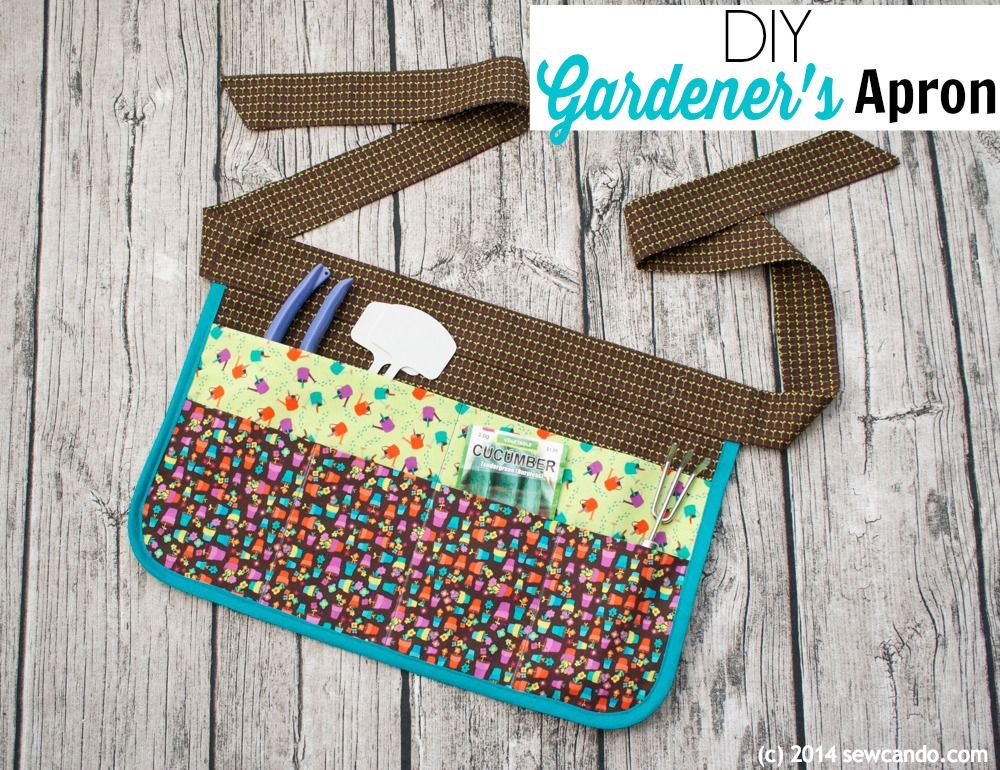
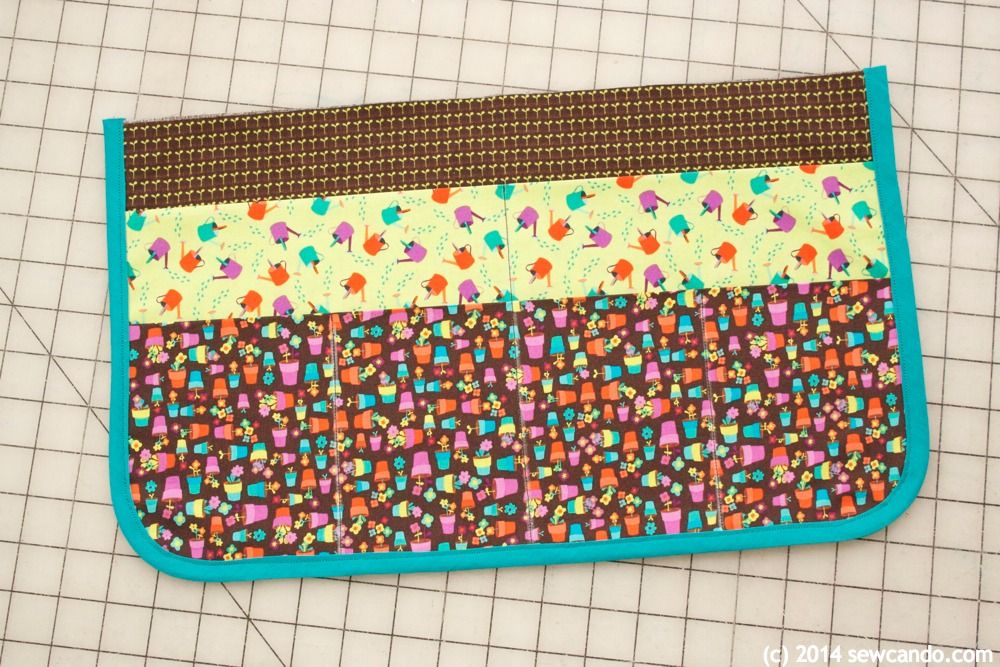
This
gardening apron has two rows of multi-sized pockets, so you can
easily tote items of all sizes like hand tools, stakes and seed
packets. A simple sash tie means it's nice and adjustable too. It
also works great as an apron for crafting & baking and can be
flipped to the flat, reverse side as well. Lots of options for
whatever you're working on.

Make it
in about an hour to wear out in garden the very same day!
Materials:
- Cotton
fabric (1/2yd for body & sash, 1/2yd or FQ for each of the pocket
layers)
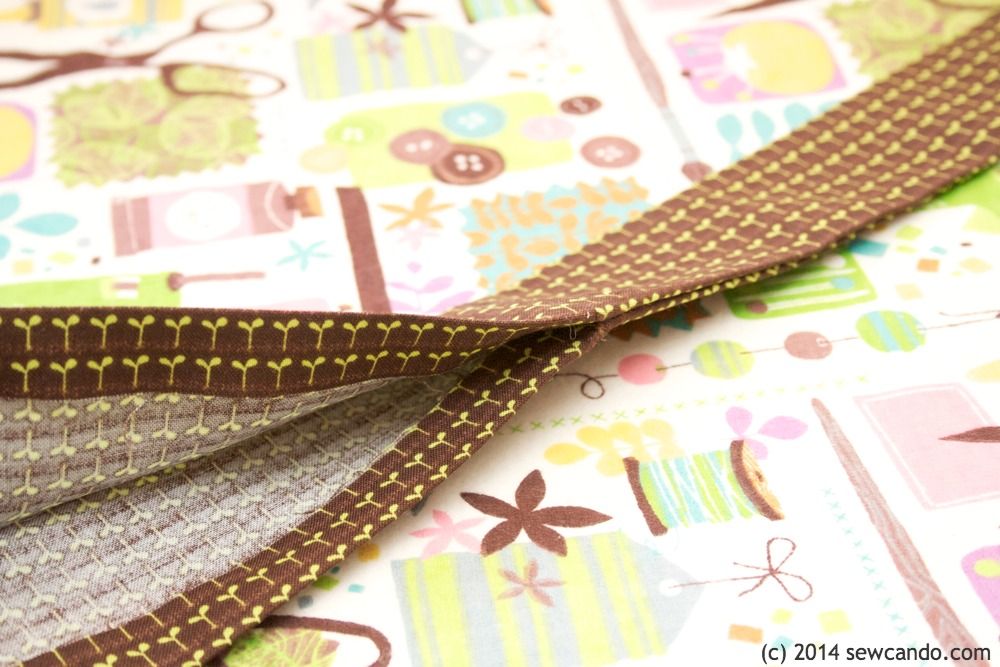
- Double
fold bias tape
- Sewing
Notions (shears/rotary cutter, pins, marking pen/chalk, iron)
The cute
prints I used are from the new How Does Your Garden Grow? collection
by Timeless Treasures. I'm seriously in love with this collection's
bright colors and fun mini prints. Perfect for a gardening themed
project!
Assembly
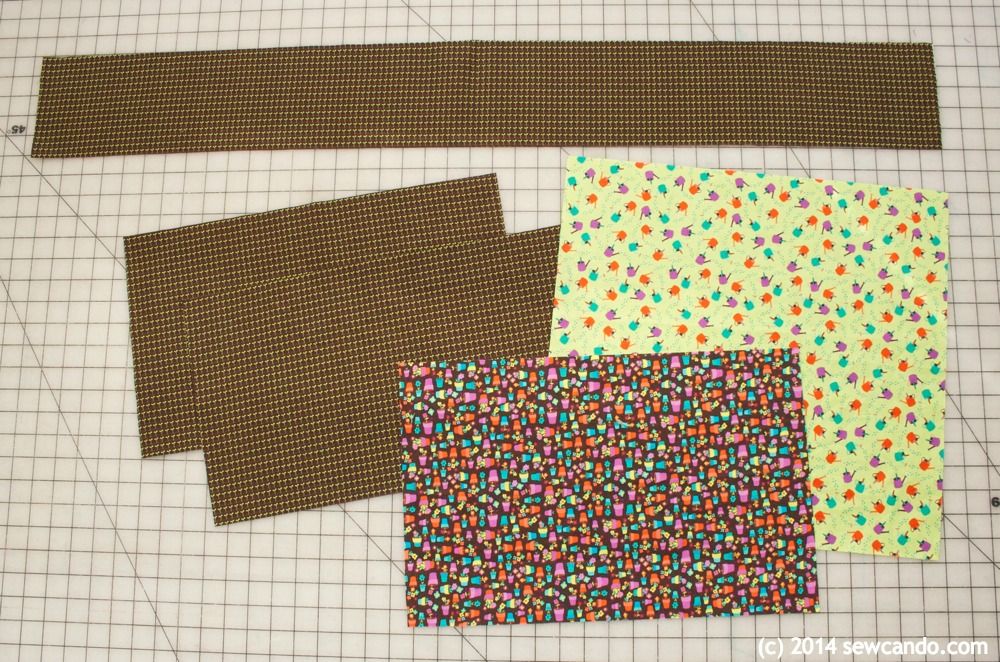
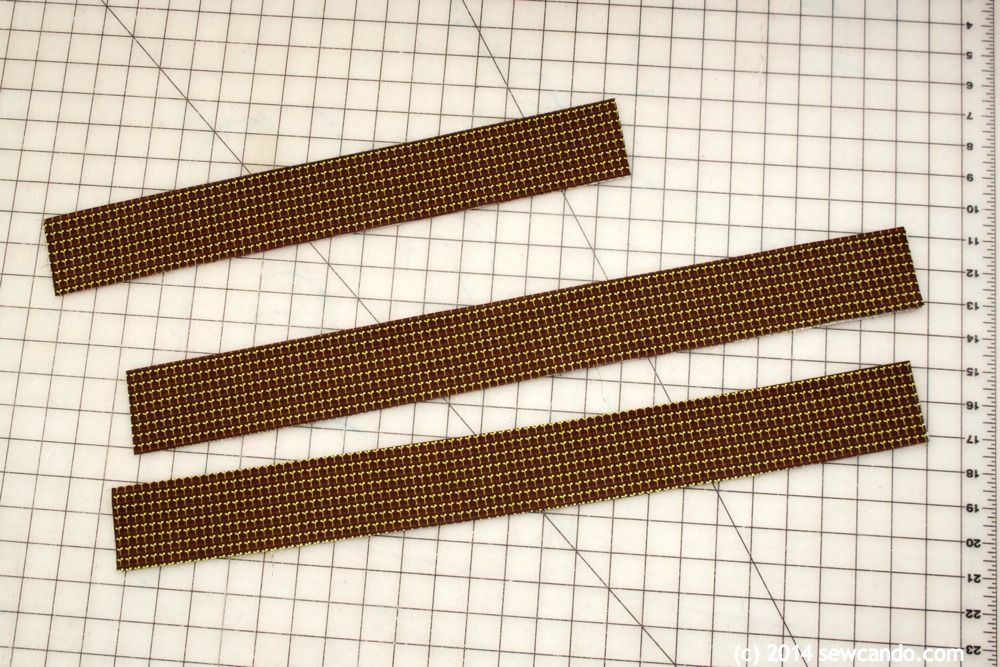
Start by
cutting the following pieces:
Apron
body - two rectangles 17 inches wide by 10 inches high
Tall
pocket - one rectangle 17 inches wide by 16 inches high
Front
pocket - one rectangle 17 inches wide by 11 inches high
Sash -
one strip 17 inches wide by 5 inches high and two strips 22 inches wide by 5 inches high
Fold
both pocket pieces in half, height-wise (wrong sides facing) and
press.

Stack
layers so apron body pieces are on the bottom (wrong sides facing
inward), tall pocket in middle and then shorter pocket on top, with
bottom corners all lined up. Use a bowl or small plate to trace &
round off corners.

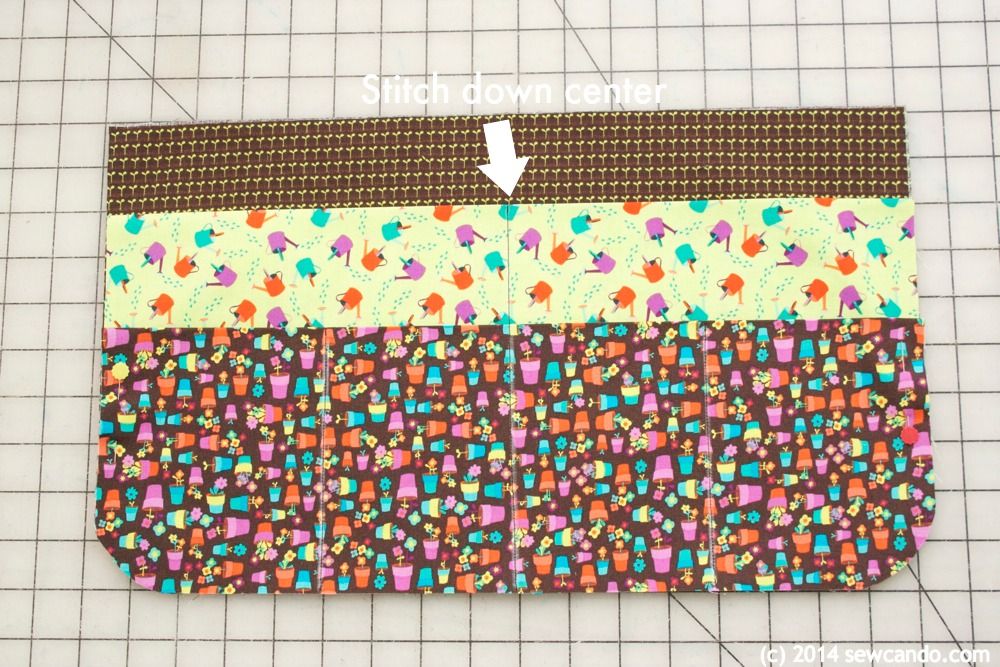
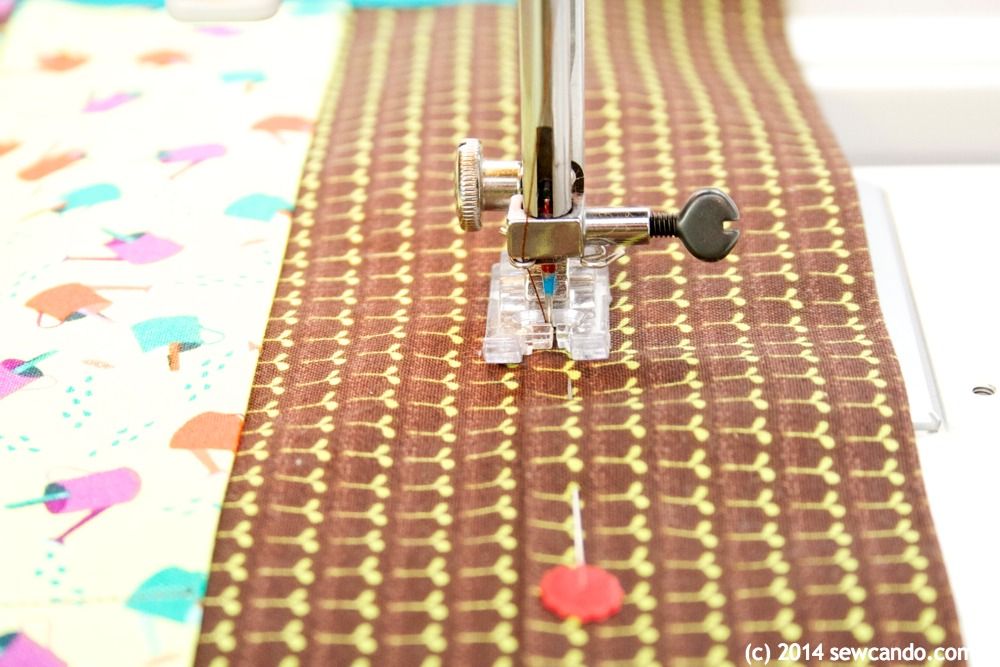
Keeping
pocket pieces together, mark lines along the front with disappearing
marker or tailor's chalk as shown and stitch down the two outer lines
along the shorter pocket.

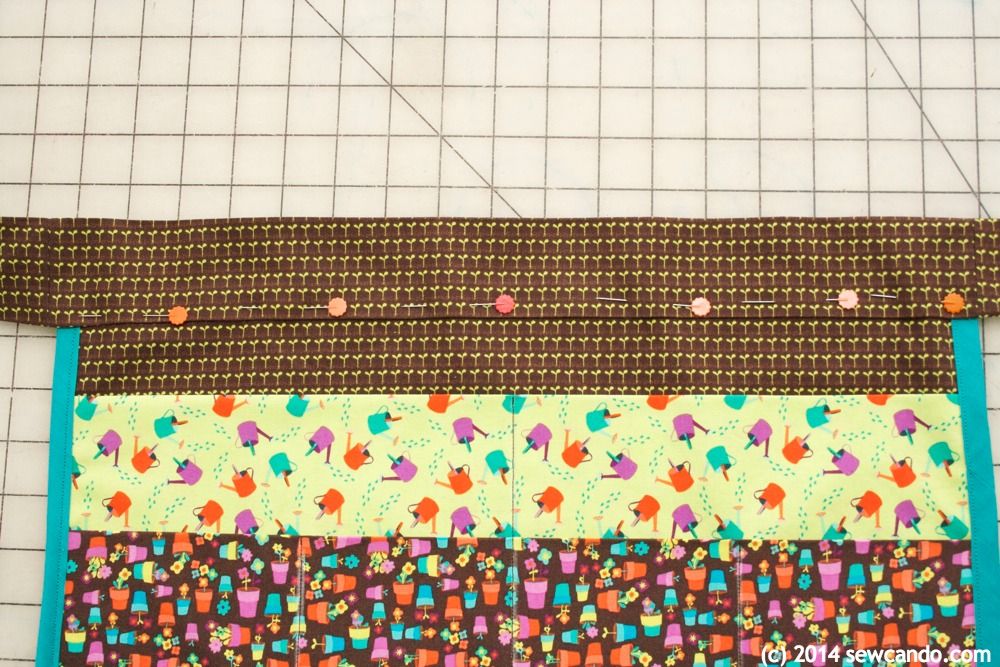
Lay
pocket pieces on top of body pieces, pin together and stitch along
middle line from top of tall pocket to bottom. Now there are two
rows of pockets with different sizes.
Baste
along sides and bottom to keep the layers even and then encased in
bias tape and stitch tape into place.
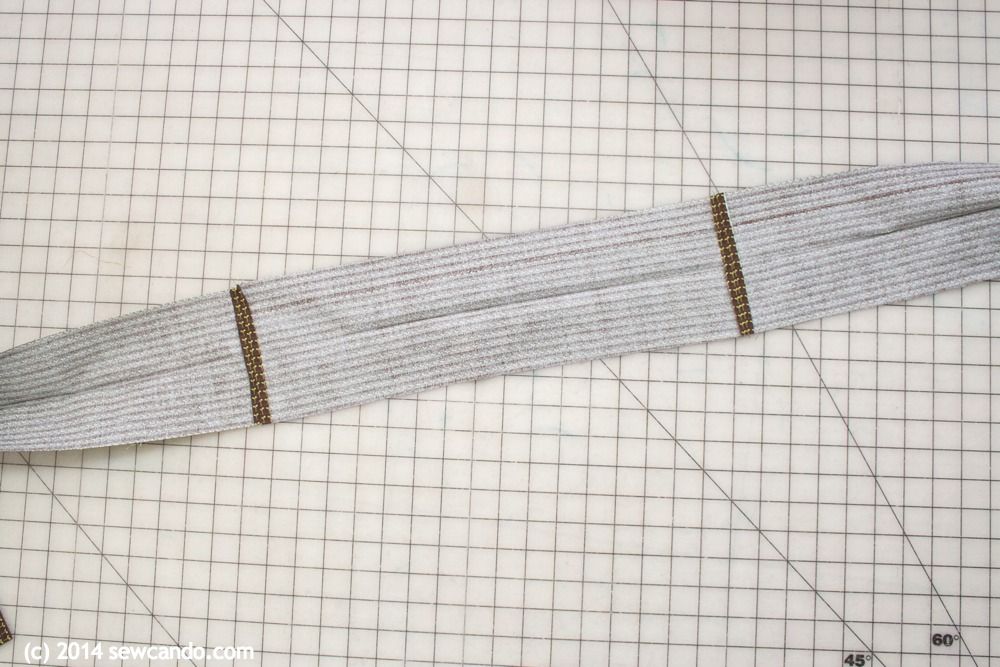
Take
sash pieces and fold in half height-wise and press along fold to make a nice top crease.
Open and
stitch each short end of the middle piece to a short end of the
longer pieces.
Fold in
half, right sides facing, and stitch edges together for the just
longer pieces. Stitch the short sides on the diagonal with a ½ inch
seam allowance.

Leave
the middle portion of the sash open. Trim raw edges.
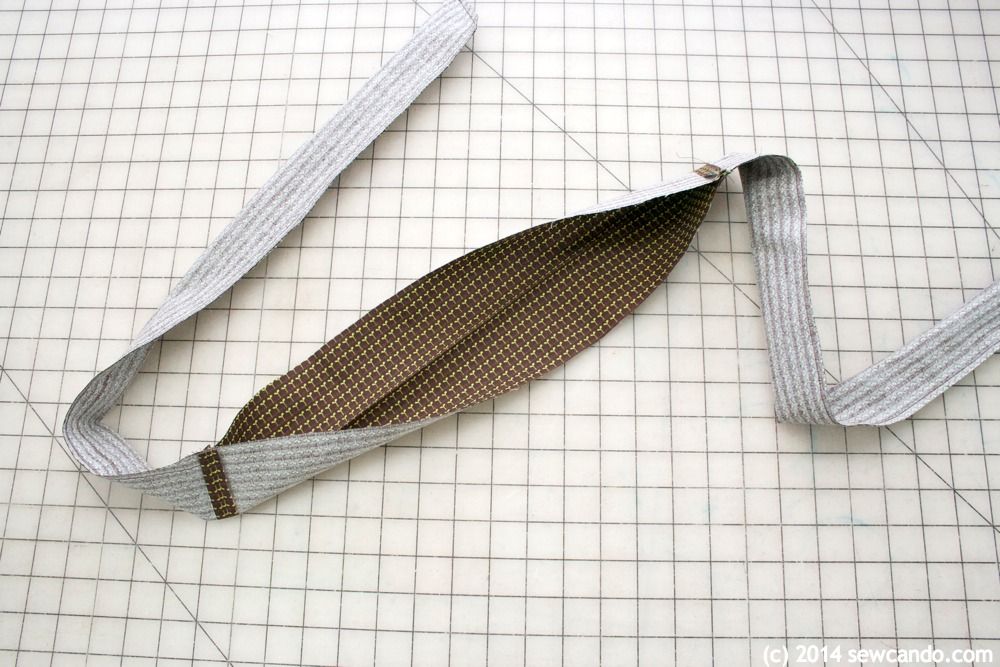
Turn
right side out and press all around, pressing raw edges inward on the
middle portion.
Insert
apron body into opening of sash. Using a directional print like this
sprout one makes it very easy to line this up evenly. Pin into
place.
Carefully
top stitch 1/8 inch away from the opening, removing pins and sewing
slowly so the body stays in place and doesn't shift.
Now the
apron is ready to wear and fill with gardening goodies.


I received the fabrics pictured from Timeless Treasures to use as I desired, with no financial compensation. The opinions are completely my own based on my experiences.
That's a great little apron for gardening!! I've got a Craft Gossip post scheduled for later this morning that links to your tutorial:
ReplyDeletehttp://sewing.craftgossip.com/tutorial-gardeners-apron-with-lots-of-pockets/2014/04/16/
--Anne
I love this! You are very talented. Thanks for sharing with us at Wake Up Wednesday Linky Party.
ReplyDeleteAngel
I love this apron---pretty and perfect for gardening all at the same time! Thanks for a great idea.
ReplyDeleteCheryl - this is so cute. I definitely need to make one of these. I was doing some gardening last weekend and was thinking I needed a little apron to hold my seed packets, etc. It was so windy and I didn't have any pockets in my workout clothes I was wearing to garden in - this will be very useful - pinning.
ReplyDeleteNo only is the pattern adorable, you have fantastic fabrics!! Love it. Pinned!!
ReplyDeleteVery cute! I love it
ReplyDeleteLovely apron! Pinned this :)
ReplyDeleteThanks for sharing! It gives me a great idea for how to start a tool belt. :)
ReplyDeleteThat's what's great about this project Kelley - it's super versatile. Hope you make one!
DeletePretty apron, could use some thing like this on the allotment.
ReplyDeletePopping over from Creative Monday blog hop.
now that I sew, I' ve desided to make my self the aprons for my flower shop. so that's perfect. once again thank you very much. pinned
ReplyDeleteThat's fantastic. Will love to see it when you do!
DeleteThanks for sharing this project, I will definitely be making this for a gardening friend.
ReplyDeleteI hope you do - please sent a pic when you do:)
DeleteHi Cheryl, I 💖 this pattern, could you please tell me the length of the waist band strips. Thanks Jackie
ReplyDeleteMeasurements have been updated above.
DeleteHi Cheryl, Love this pattern! Thank you so much.
ReplyDeleteHearing that always makes my day!
Deleteperfect. I love this. I kind of adjusted mine, but it works beautifully. I made it for our garage sale next month.
ReplyDeleteFantastic Bobbi! Would love to see it:)
DeleteThank you! I'm making 4 of these for my Girl Scouts to wear while they work cookie booth. This way we won't have a cash box that can get stolen. I just took out a couple seams and made it only have 4 big pockets.
ReplyDeleteThat's a great alternative use Trish!
DeleteThanks for this tutorial! I made it for my mother for Mother's Day. I am worried however that the sash is not long enough!
ReplyDeleteWhat a nice gift Rachel & I'm so thrilled you used my tutorial. The sash can just be tied in a basic knot - they're meant to be shorter than traditional aprons so they don't dangle into the dirt. If they still seem too short, you can always at velcro or snaps as an alternative to tying. I hope your mom enjoys it!
DeleteI love the apron! So cute! I do inventory jobs, and always need my (Menards or Lowes) apron for the pencils,cards, etc. Been trying to figure out how to make it prettier! I like the simple idea and will do that and will get a lot of compliments for sure. I like the one gal using it for garage sale. Another around the house with notepad in it and pockets for misc I find. I also appreciate the well done instructions. Very clear. There are so many uses for this. Thanks for sharing!
ReplyDeleteThanks Caroline. This style is so versatile and by picking fun fabrics it makes it personal to your own style. It's still one of my very favorite projects:)
DeleteYour garden apron is so adorable. Great tutorial. Stop by my Thursday Favorite Things party since you are being featured.
ReplyDeleteHugs,
Bev
I have made four of these for christmas presents, thank you so much! A very satisfying project and easy enough to hand sew. My advice would be not to use slippy fabrics like corduroy as it was a nightmare to keep all of the layers correctly lined up. They look fab and are sturdy though so still happy with the results.
ReplyDeleteThat is wonderful to hear! I'm honored you made so many with my tutorial. I'd love to see them if you want to send a photo. Merry Christmas!!
DeleteThanks for the tutorial. I made one and I think it turned out ok considering it’s only the second thing I’ve made. 🧵 Wish I could post a picture
ReplyDeleteThat's great to hear! I'd love if you could send it to my email cheryl@sewcando.com. Then I can feature it at the Craftastic Monday Link Party so everyone can see it:)
DeleteThanks for the tutorial. I made one and I think it turned out ok considering it’s only the second thing I’ve made. 🧵 Wish I could post a picture
ReplyDeleteI just made this and love it. My massage therapist sister needed one when she works on her private clients. I extended it from 17in to 21in. I also would probably add 6-12in next time on the sash/ties. Cheryl, do you have an Instagram? I’d love to tag you in my post. Thanks!
ReplyDelete