


Last week I shared how to make a fabric gift box, but today I've got an easy "make in about 30 minutes" reusable option for you: A Chalkboard Gift Sack.
Reusing gift bags is smart, but that usually means searching for extra gift tags to use with them or, if they're themed bags, having to store them in the basement for a year until the holiday/occasion rolls around again. How about wowing someone with a bag they can easily reuse - just wipe and write a new recipient. Or use them to store and organize by just writing the contents on the outside. It's ideal for kid's stuff.

Just think of the grateful parents who can just carry the toys home in a storage bag instead of giant plastic packaging & boxes and the time saved cleaning up yards of wrapping paper!
You can change the dimensions to make a smaller or larger bag to fit a particular gift, but the dimensions here will produce a good medium-sized bag (14in wide by 16in high) that works for a wide variety of items.
- 1/2 yd Red fleece
- 16 in by 5 in piece of Chalkboard fabric (I get mine from Laminates)*
- 1 yd silver cording
- Double fold bias tape
- Sewing Notions: shears/rotary cutter, pinking shears, disappearing marker/tailor's chalk, safety pin/bodkin, heavy duty needle, thread)
Optional: Walking foot
* I highly recommend this particular chalkboard fabric because it's nice & smooth (some types are a bit grainy in texture) and, most importantly, it's BPA & phthalate free.
Cut two rectangles from the fleece that are 16 inches wide by 18 inches high.

Cut a strip from the chalkboard fabric that is 16 inches wide by 5 inches high. It doesn't matter which direction you cut, since there's no grain or stretch. This type of material is sort of like a flexible plastic with a bit of a threaded backing. If there are any creases or folds to remove, use this tip that Deb from Laminates shared with me: iron on the wrong side on the cotton setting.

Condition the chalkboard fabric by rubbing all over with the side of a piece of chalk and then wipe clean and then repeat.

Encase the long sides of the chalkboard fabric in bias tape and stitch into place close to the edge.

Mark the placement of the chalkboard panel on the right side of one of the fleece pieces. I made mine 5 inches up from the bottom. And pinned the panel over them (careful to only pin on the bias tape so no holes will show).

Then stitch into place. While it isn't necessary, I used my walking foot to sew this and it really helped to keep things from shifting as I stitched.


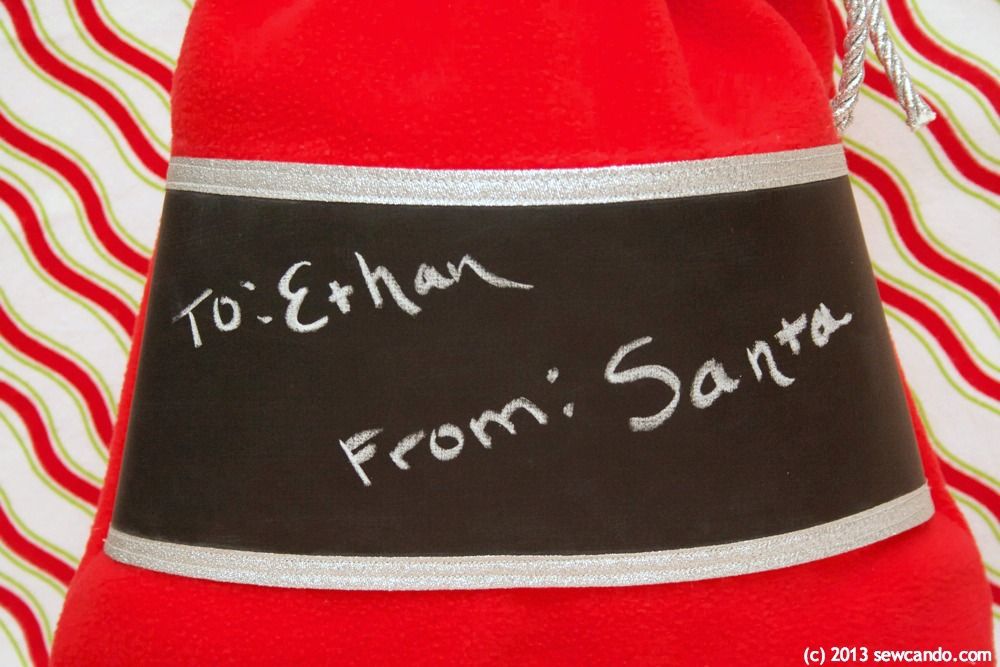
Write your To & From and the bag's good to go. My sons are getting some Lego & building sets for Christmas and with these bags we'll be able to keep them nice & tidy and easily know where they are too.

I'm also sharing this project with my FAVE LINK PARTIES.
Click HERE to check them out!
Cute idea. I have a bit of chalkboard fabric and wondered what I was going to use it for. This is a great idea!
ReplyDeleteI love this! What an awesome idea! :) I didn't even know there was such a thing as chalkboard fabric!
ReplyDeleteReally cute and personal gift bag. Nice idea, Cheryl.
ReplyDeleteadorable :)
ReplyDelete