Showing posts with label Organizing. Show all posts

Wednesday, January 13, 2021

What's Coming to Sew Can Do in 2021


Well, it's a new year and I'm ready for new things, how about you?  Besides the pervasive insanity we all experienced in 2020, there were a lot of other things that kept me from crafting & blogging most of the year: a new baby with some health issues (thankfully much better now), 4 other kids stuck in the house 24/7 and my shop cranking up to a whole new level of business as demand for fabric & inspirational items skyrocketed.  It all left precious little free time to create or to even daydream about being creative.  After an entire year of that, I really, really missed the pleasure making things brings. 
 
With this year still being so uncertain, the need to find things that are uplifting and relaxing is high.  I doubt I'm alone in feeling this way, so I've got some plans to foster those positives on Sew Can Do:
 
Trying new-to-me crafts & craft products

There are a number of interesting items out there I've been wanting to try and 2021 is going to be the time for it.  
 
- More Fabrics -
- Crafts & Techniques -
- Supplies & Notions -
- New Gear -
- Organizing Stuff -
 
I'm on the lookout for different things to mess around with - now with a sidekick, my 11 yr old daughter, to really give things a good going over and make it more fun to do as a team.  Time saver ideas and old school techniques that are helpful for sewing & crafting too.  I have a few products I've discovered that I'm currently giving a go and will continue to look for more.  
 
Each is something I purchased for myself and have no agenda or monetary incentive to talk about.  I've really missed reading candid, honest crafter blog posts about trying stuff.  Showing the good, bad & ugly of products and on their own dime has gotten rarer.  So I'm going to do just that.  No sponsored shills or affiliates for products or brands here, just a crafty lady, trying stuff and sharing thoughts about it.  Previous posts like that have the highest views, which tells me they're helpful & needed.


Small Business Support & Tips
 
It's not easy to have a small business these days.  Even before the Covid crazy it was challenging.  Having an online fabric & craft supply shop takes up a lot of time and has been a constant learning curve for me over the past few years.  Prior to that I spent several year running my own handmade shop on Etsy and was a partner in a brick & mortar retail store.  I thought I might start sharing some things I've learned that might help others with a business.  Time savers, mistakes to avoid, things to try/think about.   And, from time to time, highlight some awesome small crafty businesses I buy from to help give them some shout outs too.  
 
Free Patterns & More Patterns
 
I saw a huge surge of interest in my free patterns last year -  especially the apparel ones.  With people spending more time at home & trying to save money, I get it.  So I'm aiming to create more of those & share 'em.     
 
Craft Rooms + Fabric/Craft Supply Hoarding
 
I realize it's been ages since I addressed Fabric (and Craft Supply) Hoarding.  It's a constant up & down issue for many of us and I want to share what I've been doing and not doing since this last post.  Hopefully it'll light a fire under my backside to better balance the volume of stuff, how frequently it gets used and what's worth buying & tossing out. 


Reality Based Craft Community Vibe
 
Over a decade ago, when I first started Sew Can Do, social media was in its infancy, so blogs were mainly found while searching for particular things, features or word of mouth.  Communication was literally just comments & emails.  You subscribed to get posts by email or added them to readers to stay updated.  And there was no ranking by another entity under their arbitrary or changeable whims.  No jockeying for search placement, SEO tags, messing with hashtags, or algorithms that decided if you were worthy of being seen or hidden.  It felt so much more connected and personal rather than slick, corporate & controlled.  Over a year ago I walked away from social media and I talked about why here:


With even more negative things coming from social media since then, it's just reaffirmed to me how good it is to make your own community with individual connections, directly on blogs, through comments, email, etc.  Personal blogs acting like real people run them and doing it for fun, rather than trying to be an influencer, internet famous or monetize anything and everything.  That's why I've loved hosting my Craftastic Monday Link Party and plan to keep that going.  Link parties are a great way to promote your blog and discover others without all the strings of social media or getting a few paragraphs in to discover it's really more of an ad rather than a tutorial.


I'd love to hear what you'd like to see here this year and what your crafty plans for 2021 are.  Sew Can Do has taken a lot of work & time over the years, but the joy it brings to make and share my projects & see others enjoy them too makes it worth it:)


Wednesday, October 3, 2018

My Small Space Dream Craft Room Tour 2018!


I don't know how time has gone by so fast, but it's been 4 years since my last craft room tour!  That last one has been one of my most popular posts, so it seemed high time to open the door to my little slice of crafting heaven again and let my crafty online friends in for a new visit.  Come on in!


A little historical background on my space: the room is a former laundry room/galley kitchenette that's about 8ft x 11ft plus a 4ft x 4ft alcove. When we moved in, the alcove was a louver doored closet (sized for holding a washer & dryer) on one side and along the other wall there were a bunch of basic cabinets and a small counter with sink and a stove.  Since we have a normal kitchen and our washer & dryer are in the basement, this room was sort of a question mark as far as usefulness.  Check out these old photos from before this was a craft space and you'll see just how lackluster it was:


I think this is much better, don't you?


This catch-all, wasted former closet got cleared out:  


I migrated my plastic bins full of fabric & sewing gear out of the basement and eventually bought myself an EZ View desk from The Original Scrapbox and a padded swivel chair from Ikea to create a sewing nook.  


There's a second taller desk along the same wall for more crafting space and storage.  I saved up for a while to splurge on both desks and they were totally worth it. 


The see through tops make all the small supplies normally hidden in bins & drawers easy to spot and add some crafty beauty.  The key to keeping things organized in my limited space has definitely been my desks. They're designed to have loads of places to store craft and sewing supplies.  With 4 years of constant use, I can definitely say they were money well spent.  I haven't outgrown them and they've held up to everything I've thrown at them. Literally.   A sewing machine fell on one from a high shelf a few months ago and not a scratch!  


To keep cleaning up minimal, I make sure to always put things away in the same place. With 4 kids and a husband that all leave stuff everywhere (and almost never put things in the same place twice), I need as much help as I can get.  It saves me loads of time since I don't have to dig around looking for things or struggle to remember where something is if I haven't used it in a while.  This is especially true for things like patterns & manuals:  


The Original Scrapbox recently came out with sturdier plexiglass tote bins for the desk shelves to replace the thinner fabric totes my desks came with way back when.  New desk versions all come with these clear totes now.  They were kind enough to upgrade my previously purchased desks to those and I recut card stock fronts to decorate & camouflage the contents.  I also made some vinyl cut labels to stick on them for easy at-a-glance sorting.  Things look more up to date and stay well contained:


I still do all my oven baking with the stove in the room and half the cupboards house various cooking and baking items I don't have room to store in my kitchen. 


I made a less-than-useful sink into a built-in ironing surface by removing the faucet and cutting a piece of MDF to fit the sink lip. I upholstering it with Insul-Bright™ and a layer of cute canvas fabric on top. Since it rests in the lip all the way around the sink it's perfectly lined up with the counter for extra workspace. This little DIY has worked great over the years, is the perfect spot to use my Cricut Easy Press for heat transfer projects and has saved me a bundle by not needing to get a new counter (not to mention no longer needing to drag an ironing board in & out of this tiny space). 


To maximize the remaining space (aka the one wall left), I added white bead board shelves for storing & displaying my smaller supplies like ribbon & beads:


I still have spool racks mounted to the wall next to my sewing desk:


and a big revolving thread rack to store all my other threads neatly next to my Brother PE-770 embroidery machine. Not only do they add some color & a bit of themed decor, but they make it easy to find exactly what I need for a project instead of digging through bins like I used to.  With baby #4 having joined us this year, saving time and keeping things as neat as I can is a must!


Another new thing is that I now share the space with my 9 yr old daughter these days - she's taken over the cabinet under the sink area to keep her own scraps, mini dress form and sewing machine in so she can "work" with me when I'm sewing.  We're still trying to organize her things a bit better, so details on that to come, but the new sewing machine she got for her recent birthday will fit right in decor wise:


We did a sewing themed birthday party for her this year, so many of the props I made have found a home in my craft space, like the DIY giant thread spool storage canister on this shelf.  It's also where I keep fabric and craft books in my sewing nook:


Another improvement to my space has been this little guy, a ScrapMaBox shelf that The Original Scrapbox gave me to try out:


Before I got this organizer, I kept small notions in a drawer of my sewing desk.  Over time the drawer got fuller & fuller and I was constantly sifting through stuff to find things.  If I kept them in containers it looked neater, but meant I had to dig through those instead just the drawer.  Now that I've got this helper, all my little things like pins, needles, marking pens and seam ripper have their own mini shelves and I can see and grab them in an instant.  It's sized so that I can also fit it inside one of the main shelves of my desk if I want, but I like having it right on top, easy to spot.  


It's given me more storage room in my drawer now & doesn't look like a mess anymore:


It's also given me the perfect place to display my whimsical pincushions:


The shelf above my sewing desk is one I'd repurposed from a guest bathroom ages ago. It's still great for my sewing-themed knick knacks like a vintage Strawberry Shortcake figurine sewing, some My Little Pony sewing character figurines, my sewing machine USB drive: 


I'm trying to figure out a few ways to squeeze even more into my space now that I've got a junior crafter eager to join me, but overall I'm pleased that the set-up I've been using has worked so well for so long.  As much as I'd love a giant room for all my crafting endeavors, this cozy space is still a dream for me:)


I was not financially compensated for this post.  I received a ScrapMaBox & totes from The Original Scrapbox to customize as I desired and review.  All other items referenced were purchased by me.  The opinions are completely my own, based on my honest experiences.  

Wednesday, September 19, 2018

DIY Giant Thread Spool Canister: The Perfect Craft Room Decor!


Looking for a cute accent for your craft space?  Extra storage that is fun & functional? Make a handy Giant Thread Spool Storage Canister!  

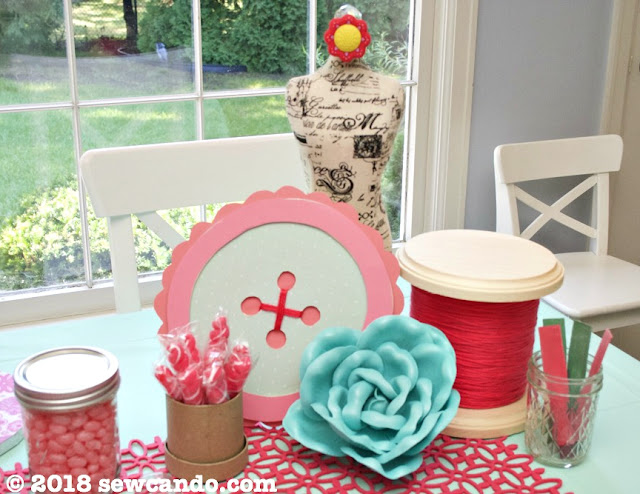
I came up with this project as a party decoration for the Sewing Themed Birthday Party I put together for my daughter:


A giant faux spool of thread (aka cotton reel for my UK friends) was a super cute table accent: 


Not only was it the perfect table decoration, but it's become totally practical after the party, thanks to its great hidden storage for small notions and accessories:


Now let's make one the easy way!


Materials:
- Yarn
- 2 wood circles (beveled edge is ideal)
- Cardboard canisters - mine were nesting
- Tacky glue, hot glue

I got all my supplies at the local big box craft store, so easy to find.  I gathered my yarn, wood circles and cardboard can to get started:


I totally lucked out and found a skein of yarn in the exact shade of pink that matched our other party decorations (and my craft room for its later residence) in the clearance bin:


For the canister I used the largest of the nesting 3 container set, but the lid from the middle size so the top edge of my finished container would fit into it to stay on.  If you don't have a smaller top to use, you could probably roll a strip of cardboard into a circle slightly smaller than the base or use a lid from something else.  


I started by giving the entire canister a good coat of tacky glue using a foam brush.


I put a dab of hot glue at the edge to tack down the start of my yarn and then began winding it around the canister in a single row, fairly close together:


It was ok there were some small gaps in this layer since another layer was going over it.


I wound a second later back down, keeping it pretty taut so it would stay even:


I put another dab of hot glue to attach the tail end to the bottom edge.  Hot glue works ideally because you don't have to wait for it to set:


Then it was time to attach it to the base.  A round squiggle of hot glue on the top of one wood circle was all that was needed and then stuck the canister on it:


To do the top I did another round squiggle of glue on the other wood circle, but this time it was on the underside and put the smaller canister lid on it.  


Boom - All done and ready to fill with all those crafty supplies!


Wednesday, May 11, 2016

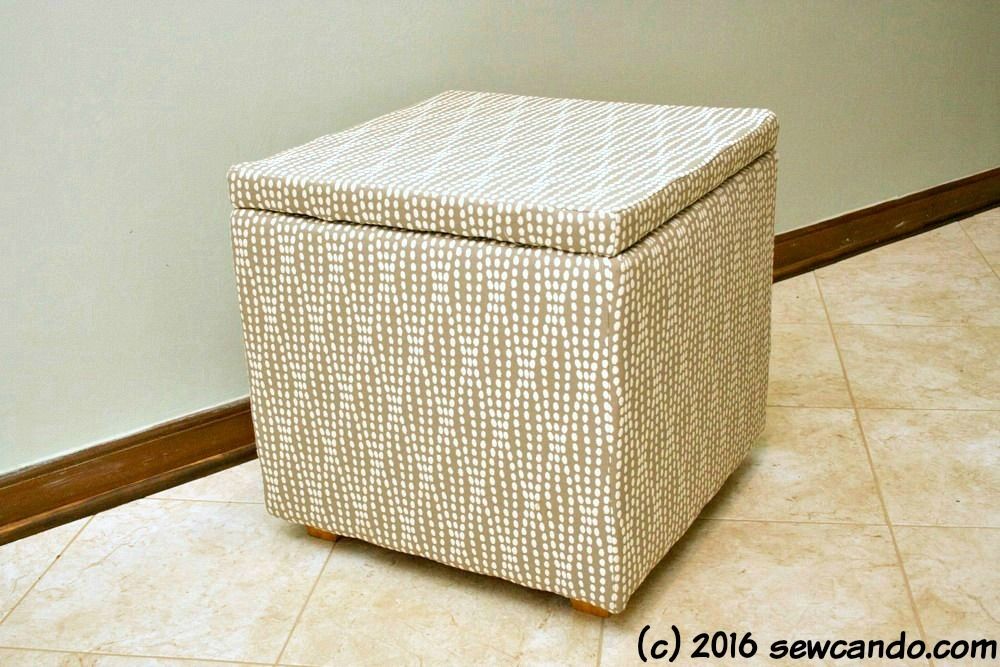
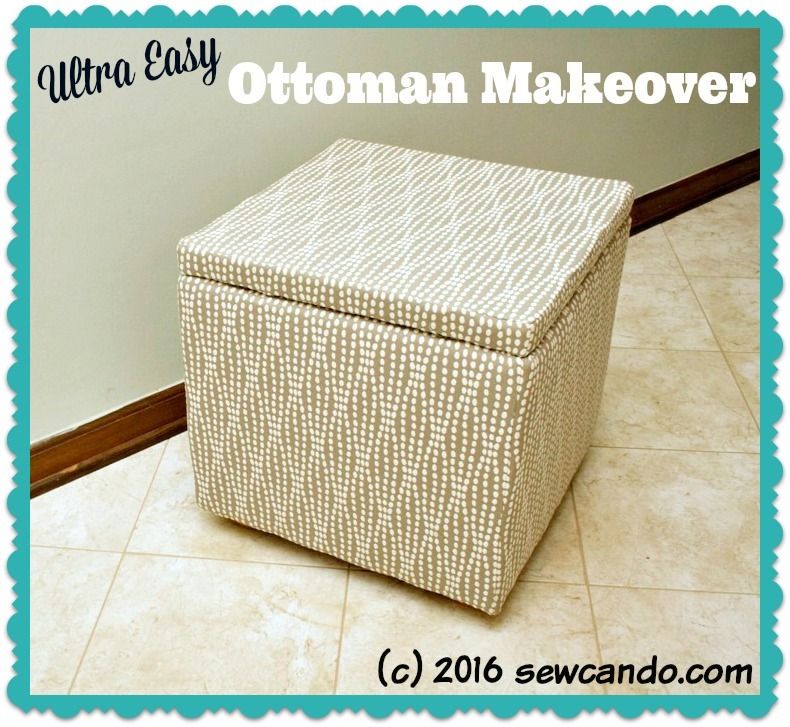
The Reupholstered Storage Cube ANYONE Can Do


Do you love DIY'd home decor?  Doing makeovers on stuff in the house?  I love the idea of revamping things to pretty up my house, but execution-wise, I always feel like I'm flailing around.  Stuff ends up looking like I cobbled it together myself.  Blindfolded.   Is that better than just buying something new?  Not really.  Except with today's project.  Which tells me if I can make it look good anyone can.


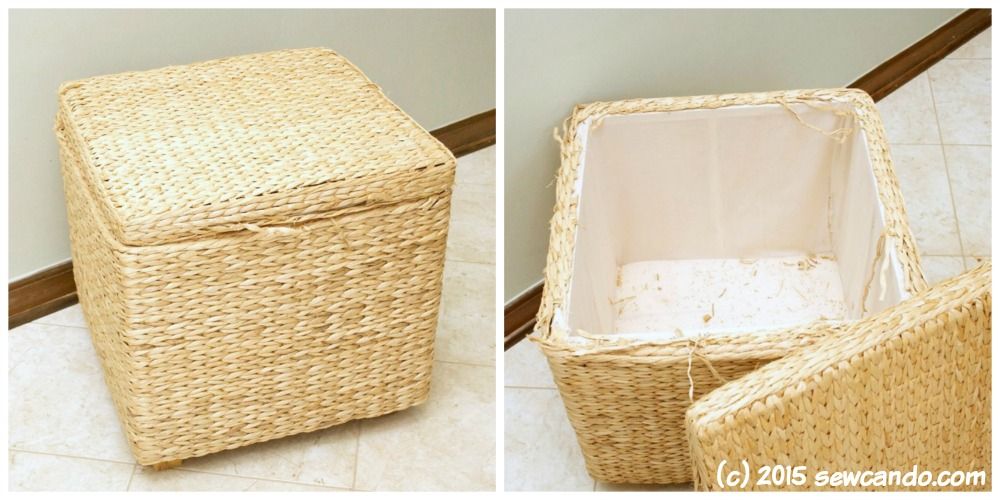
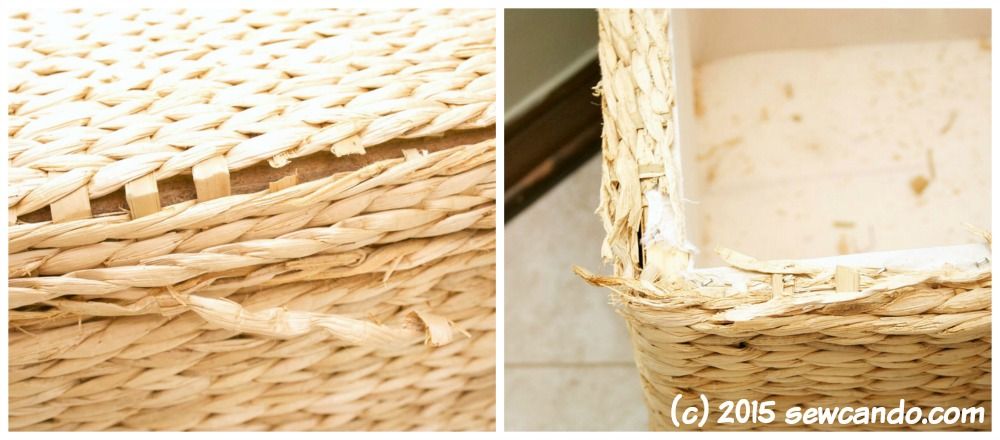
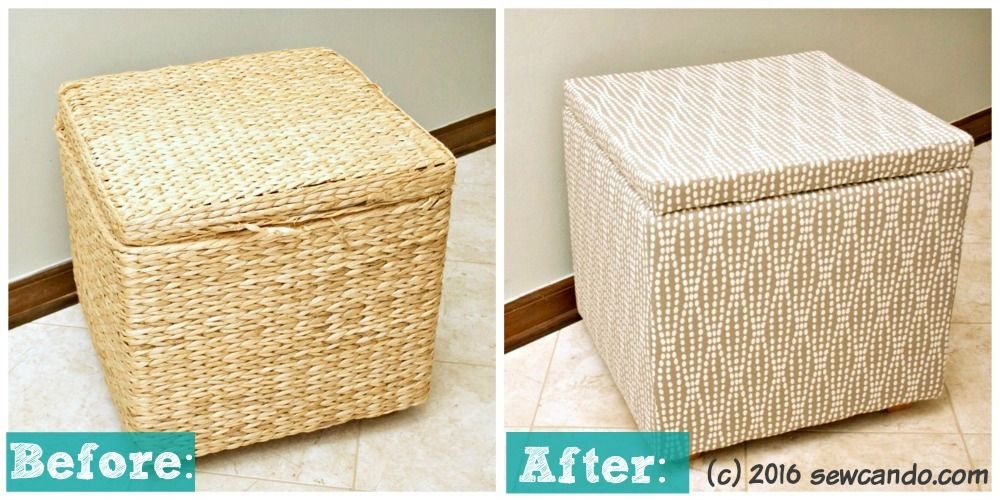
We had this rattan cube for years.  The kids stored their dress-up clothes in it and helped keep our family room from totally being taken over by kid stuff.  I'd loved it, but it started to show its age and look worn out:


We found a bigger basket hamper to replace it, but I still couldn't bear to throw this guy away.  His bones were still good, just looking superficially rough.  There was no way I could repair his woven exterior, but I could give him a total body lift!     


Added bonus: it cost me $0.  That's right: FREE.  I had some old batting and this really nice Waverly Home Decor fabric in my stash crying out to be used:


I'd won the fabric as a prize in a design competition a few years back - when I'd created this fabric clock project:  


Knowing I wasn't out any money really helped.  If things turned disastrous, it wouldn't be a loss, right?  I tend to get paralyzed with indecision when tackling a new home project, because I'm afraid I'm going to mess up and waste valuable materials.  Great mentality for a crafter, right?  Ha.

Materials:
- Ratty storage cube
- Home decor fabric ( I used about 1 1/2yds)
- Poly batting 
- Staple gun
- Sewing machine
- Notions: Yard stick/ruler, rotary cutter

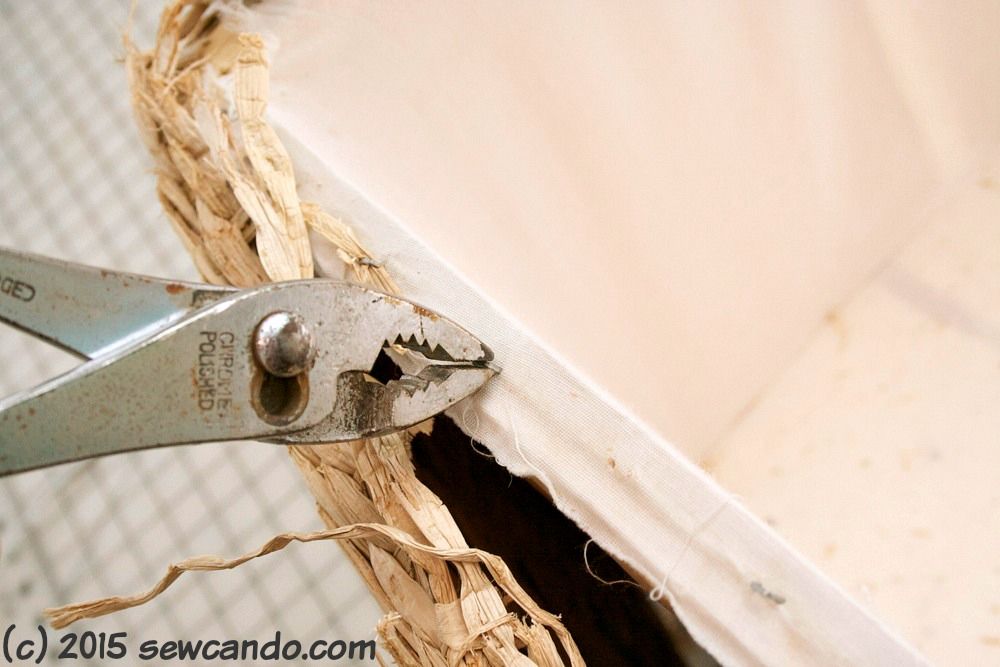
First I used pliers to pull out the staples that held the rattan on:


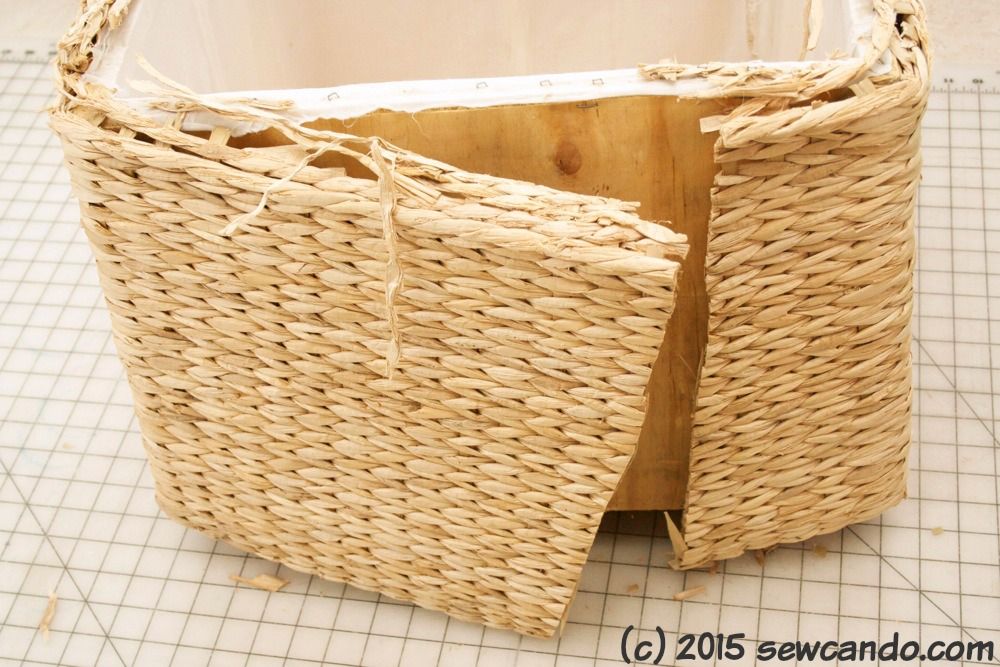
Then, I carefully cut through one side to easily take it off in one piece:  


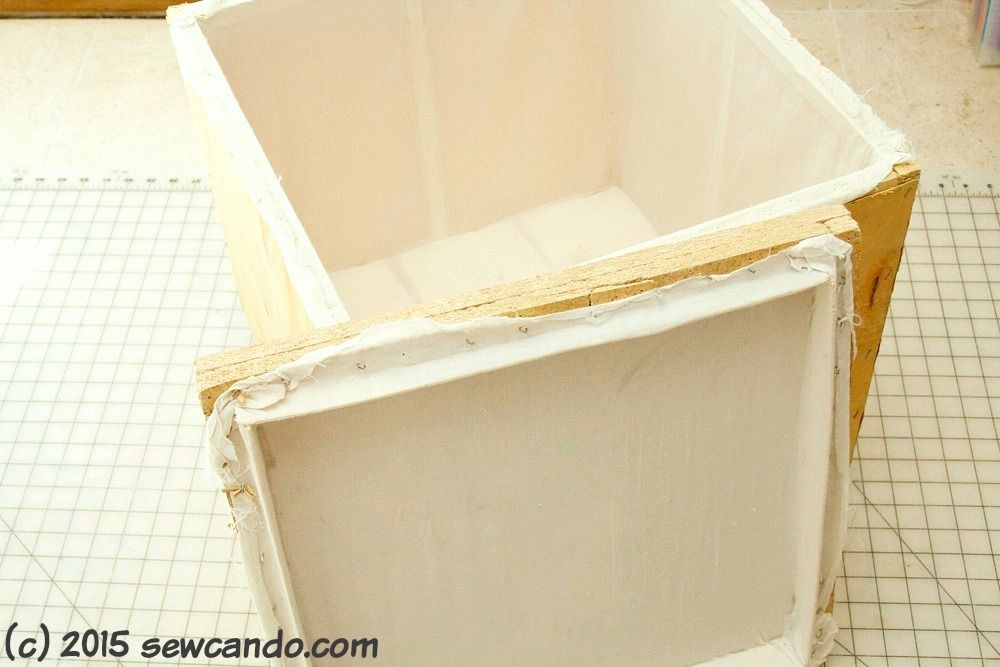
The base unit was MDF & thin wood veneer.  Not nice on it's own, but perfect for upholstering with a little padding & fabric:


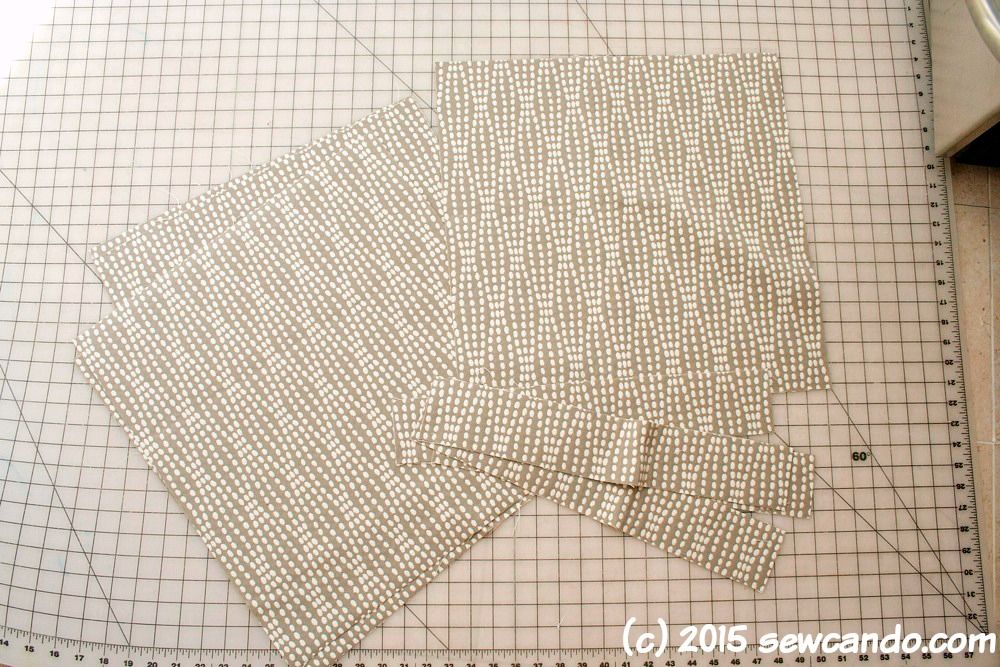
I measured the sides and decided to cut four pieces that were 1/2 inch wider on either side (for the seam allowance) and 2 inch higher on top & bottom for folding in.  For the lid I added an extra 1/4 inch on all sides of the top piece and for the lid side strips, I added 1/4 inch to the short sides and 2 1/4 inches to the height.  I also cut the same pieces from my batting.


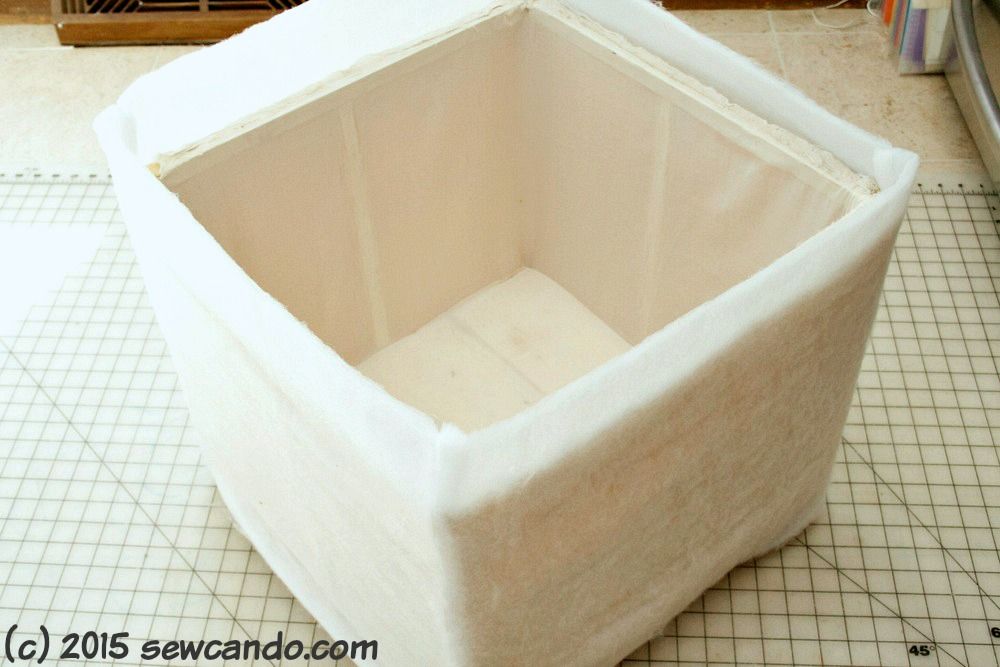
I stitched the four sides together to make the main shell and did the same with the corresponding batting.  


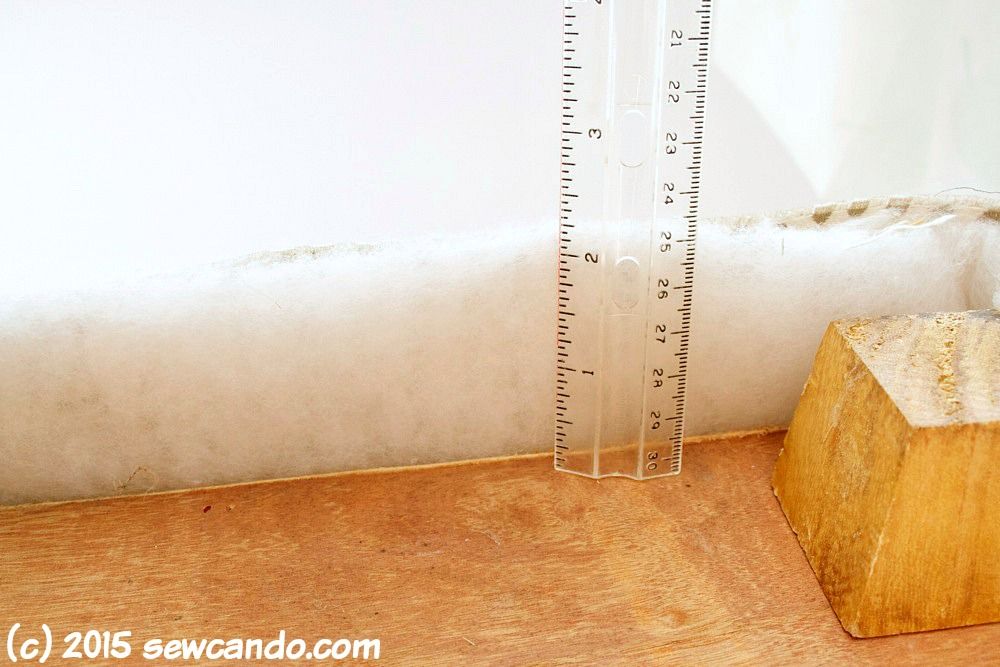
I slide the batting into place and then carefully pull the fabric "sleeve" over it.  It was a snug fit, so I went slowly to keep the batting from shifting.


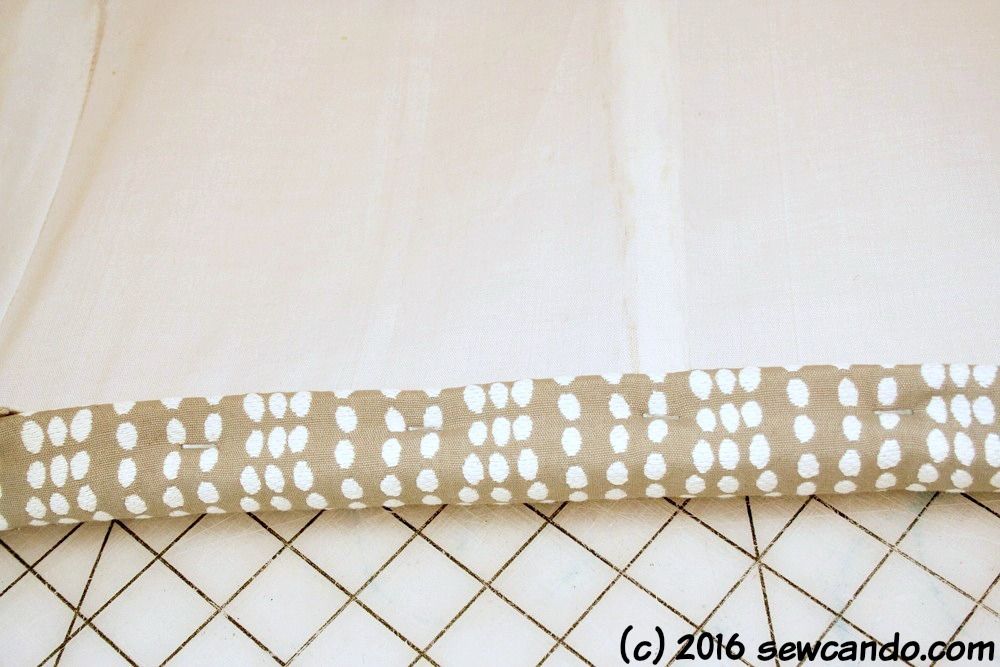
I measured my fabric sleeve all the way around and shifted as needed to make sure there was 2 inches on all sides:


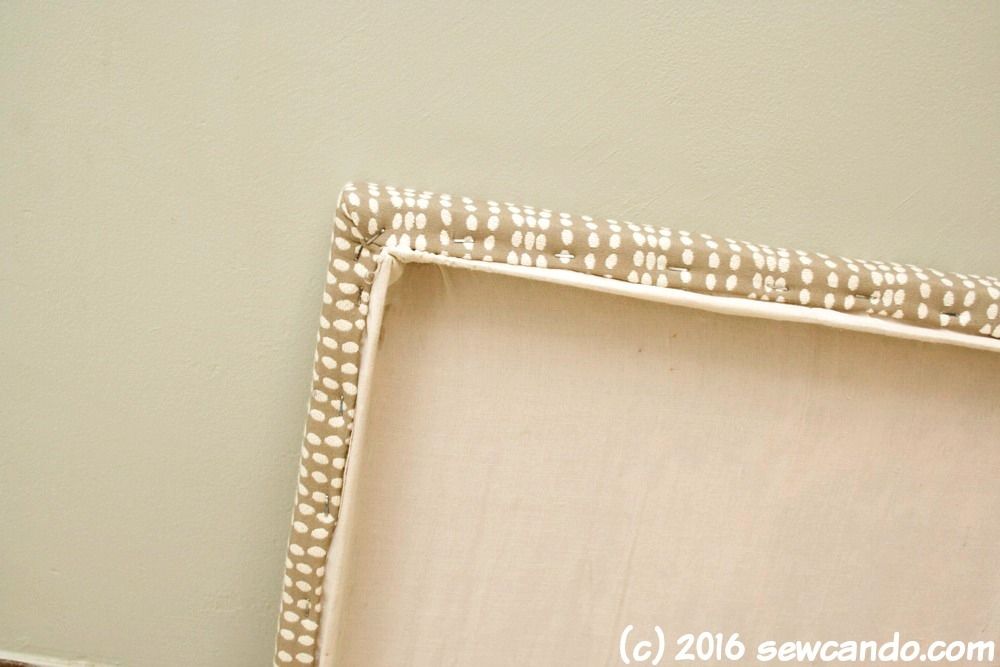
Once everything was even, I set to double folded the raw edge under and then stapling it down underneath and on the inside.  Holding it taught is key.


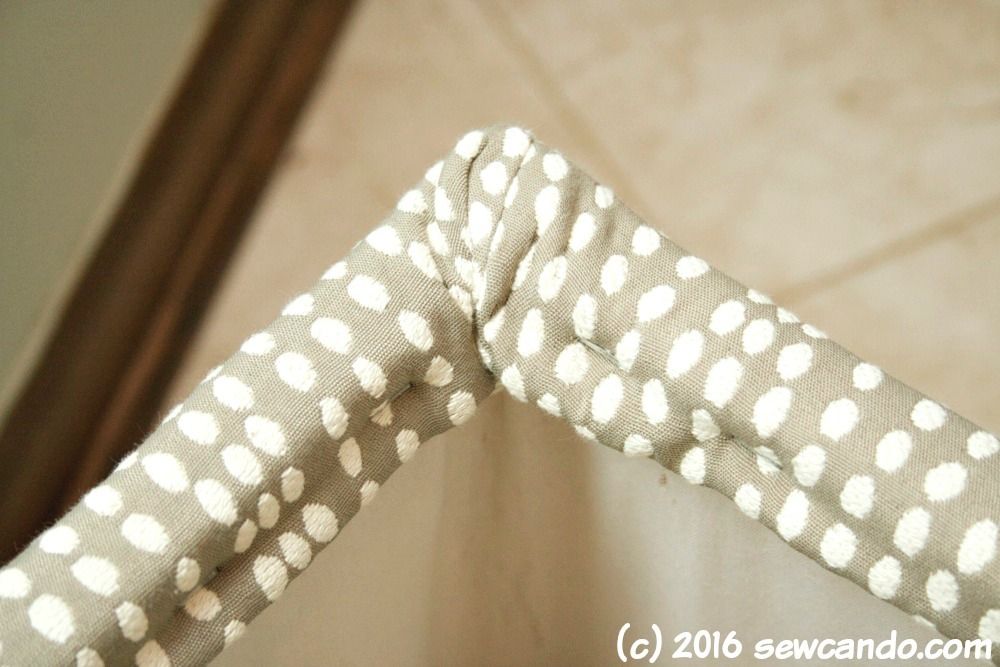
I started in the middle to anchor things and then folded the corners in, flattening them down and then stapling down the sides over them:


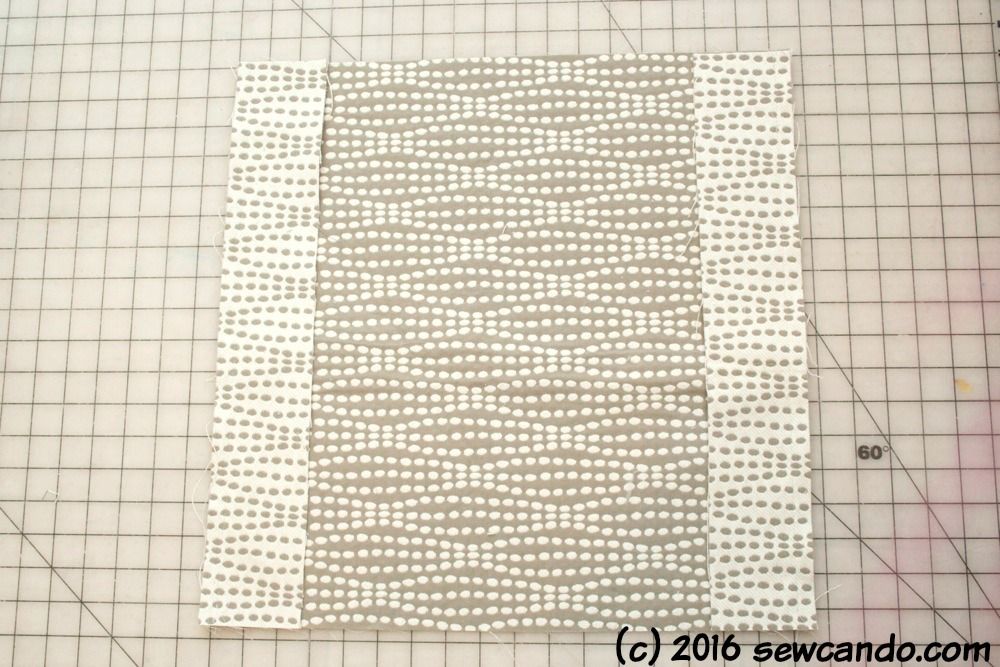
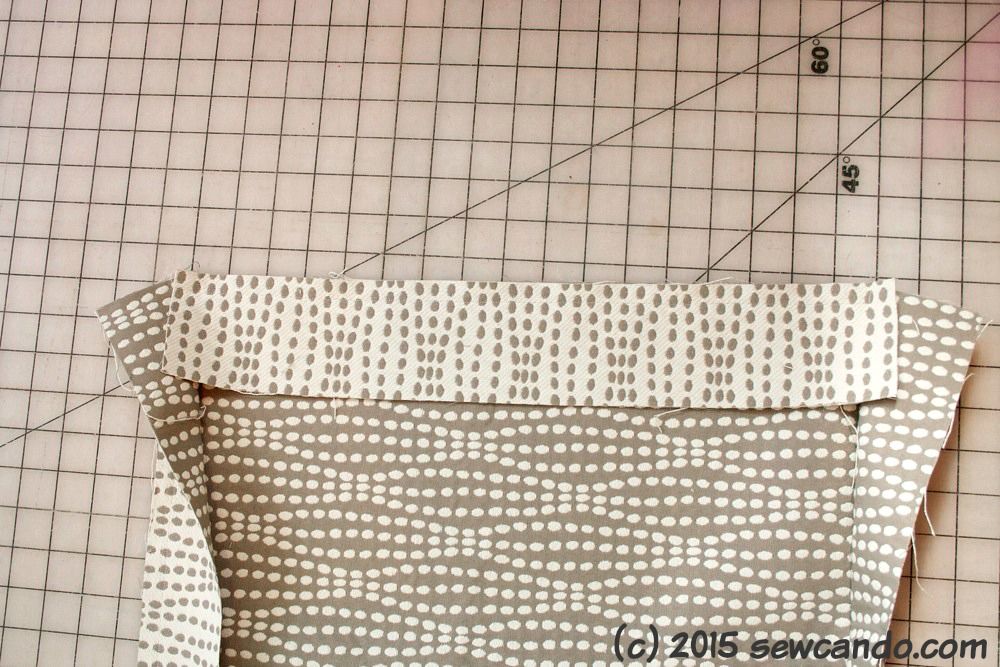
For the lid I stitched the thin side pieces to each of the lid top sides with a 1/4 inch seam allowance:


I made sure to stop stitching a little bit before the ends, so it would be easier to do the short sides:


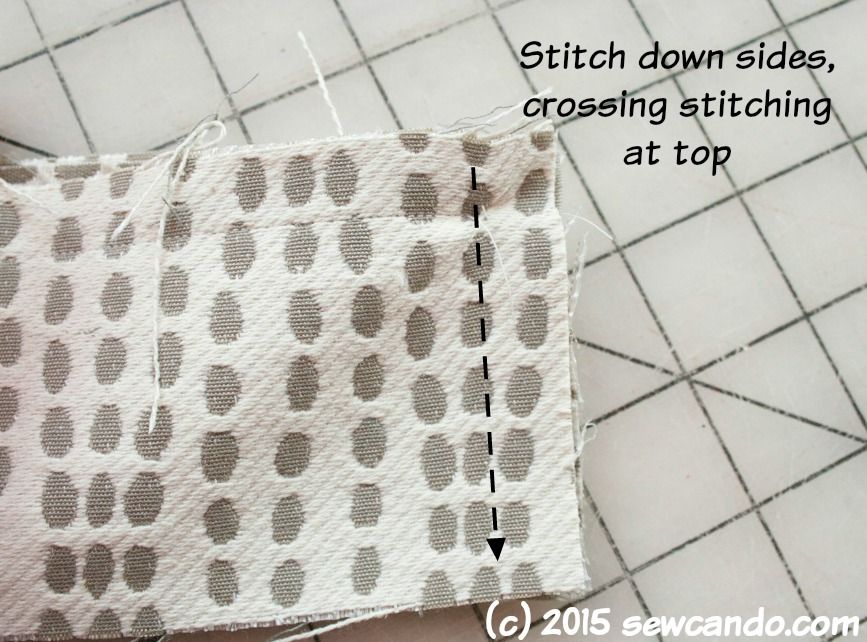
For the sides, I pulled them together and stitched down, crossing over the stitching at the top to get the corners nice & crisp.  


I did the samewith the batting version and then the folding + stapling to secure them to the lid.


The nicest part is every time I look at it I'm pleased and like how it turned out.  This is the total opposite of most of my DIY home projects (where I notice my goofs more than anything).It looks like it came from a store - even up close - which is my "decor success" test.  


So often DIY projects look great in those far away beauty shots online, but get next to them in real life and the homemade-y quality jumps out.  Maybe I'm too much of a perfectionist, but when I'm asked "Oh, did you make that?" that always translates to "Cause it looks like it!" in my mind.  I guess this is a reminder to keep on trying, because sometimes it'll end up a winner!


LinkWithin

Related Posts with Thumbnails