Today I've got a new downloadable pattern that's handy & stylish for the little one: My 3-in1 Infinity Bib!
For such small people, babies sure need a lot of stuff! Our diaper bag weighs a ton right now. Streamlining is hard though. My little guy is a drooly one. He's also still in the occasional spit-up phase, so good bib & burp cloth need to go everywhere with us. As does a lovey blanket, which is vital to him going to sleep. How about being able to bring one thing that acts as all 3? Enter my new pattern.
Use it folded lengthwise as a bib to keep drool from soaking those cute outfits:
Fold it in half sideways for lightweight, yet absorbent burp cloth:
Leave it open for a baby-sized blankie to cuddle:
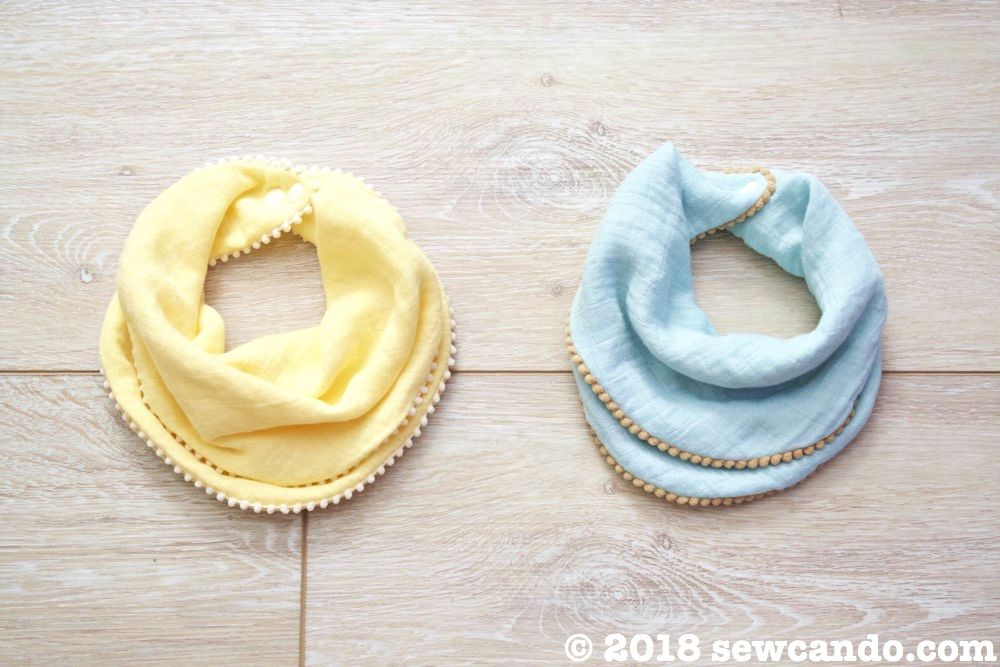
It's been a crazy hot summer, so something light & breezy is key. I've made mine out of bamboo cotton swaddle muslin which is perfect. It allows for airflow and is super soft. It also looks stylish thanks to some pom pom trim.
I'd seen a similar bib design for sale online for the hefty price of $18 each. Yikes. With how many bibs my 4 month old can go through in a day, I'd need a small loan to afford more than a day's worth. Mine cost about $3.50 each to make & are a quick sew. My son's favorite swaddle blankets are a swanky brand made from bamboo muslin, so being able to make these from that same lovely fabric for a fraction of the price is ideal. Serious savings!
Now let's make one!
Materials:
- My FREE Infinity Bib Pattern HERE
- 1/2 yd bamboo organic cotton blend swaddle muslin fabric (I bought mine from Simplififabric)
- 1 1/2 yds baby pom pom trim (I bought mine from Sugar Pink Boutique)
- 2 plastic snap sets
- Ball point needle
Download the pattern and print at 100% scale. Measure the printout against the 1 inch sets box to confirm sizing is correct. Cut out all 4 pieces and tape together at sides as indicated.
The swaddle muslin I bought gets softer in every wash. Being a bamboo/organic cotton blend, it's the cuddliest muslin I've found too. The baby pom pom trim is nice & plush and adds just the right amount of detail.
Start with folded fabric and, using the pattern piece, cut out the bib front & back:
On the right side of one piece, pin the trim 1/4 inch from the raw edge:
Stitch the trim in place, using a ball point needle.
Sew the trim all the way around, curving around the pointed ends, and overlapping the raw edges.
Place this piece over the other piece, right sides together and pin.
On the side with the trim attached, stitch the bib front & back together, using the trim stitching as a guide to stitch over:
Leave a 1 1/2 inch gap for turning, then slipstitch closed by hand.
Set the plastic snaps along the markings, having the male snaps face up on one end and the female snaps face down on the other.
When the ends are snapped together, this will give the slight twist needed for the layered infinity look.
Or just leave it open for a quick cuddle. Whatever baby needs in the moment!

It's been a while, but I'm thrilled to have a new easy tutorial and FREE downloadable pattern to share today!! A quick & simple to make Bandana Bib:)
My little guy has reached the phase where he is super drooly most of the time. Poor guy. Bibs are a necessary accessory to keep him from sporting a constant wet ring on his neck and clothes. All my kids were like that as babies and most bibs didn't do the job because they soaked through right away. Finding bibs that aren't hot and plastic-y, but still keep the moisture out is tough though.
I decided to make some that are comfy, have a bit of style to go with outfits AND most importantly, keep baby dry.
By using PUL fabric as the back side, it keeps the dribble from getting to the clothes or skin underneath, but it's not hot or stiff like the usual vinyl manufactured bibs have.
Woven cotton or knit would also work well for the front, but I decided to use some scrap gauze leftover from making some baby pants. It's breezy & soft for summer, but also soaks up moisture well and gets softer the more you wash it.
Making this bib is fast & easy too, which is key for us moms with babies!
 Materials:
- FQ or (10in high x 14in wide piece) of Gauze, Cotton or Knit
- FQ or (10in high x 14in wide piece piece) PUL fabric
- Download my FREE Bandana Bib pattern HERE
- 2 sets of plastic snaps & setting tool
- Marking pen, lip balm, clips (or bobby pins)
Optional: walking foot
Materials:
- FQ or (10in high x 14in wide piece) of Gauze, Cotton or Knit
- FQ or (10in high x 14in wide piece piece) PUL fabric
- Download my FREE Bandana Bib pattern HERE
- 2 sets of plastic snaps & setting tool
- Marking pen, lip balm, clips (or bobby pins)
Optional: walking foot
Print the pattern at 100% scale (use the inch gauge box to confirm the print size is correct)
Fold both fabrics with selvage ends together and cut out a bib from each on the fold.
Mark placement for snaps on right sides of fabrics.
With wrong sides facing, place clips around bib edges (using pins makes holes in the PUL and we don't want that!).
Run a bit of lip balm along the shiny PUL side to keep it from sticking to the presser foot when sewing - it's ok, the lubricant is good for the machine and easy to wipe off the fabric.
Stitch together with a 1/4 inch seam allowance, leaving a 2 inch gap on one side. Using a walking foot is ideal since it keeps the fabrics from slipping or catching on the feed dogs. I use one for all my PUL projects.
Clip around curves. To save time and avoid the chance for clipping into my stitching, I use pinking shears.
Turn right side out. Pressing PUL to get the edges flat could melt it, so press them down with my hands and clip them, then topstitch all the way around.
Set snaps using a snap press or pliers. I highly recommend using plastic snaps since they'll hold up great to constant tugging and washing.
Put the stylin' bib on the bub and admire how cute and fashionable baby is. Now we've got a cute coordinated outfit and we're keeping it dry:)