

This little project is one I've been waiting to do all year:
Faux Gingerbread Men Ornaments!

It's a simple DIY, but so much fun and they look super cute on the Christmas tree. This year being so challenging, I needed a rewarding holiday craft and this was definitely it. And as delicious as these "cookies" look, there are no calories;)

Materials:
- Cork tiles (1/4 inch is ideal)
- Gingerbread man cookie cutter or template
- Spackle w/pastry bag+tips or Whipple Creme
- Decorative faux candies, small beads or polymer canes
- 1/8 inch wide satin ribbon
I started with cutting my cork tiles. I wanted the finer type of cork so it would look more like an actual cookie. I already had a nice big gingerbread man cookie cutter to use as my template.

I'd planned to trace and cut them with an x-acto knife, one at a time, but my lovely husband made things much easier by cutting them in stacks on his band saw. I had a dozen identical "cookies" in 5 minutes.

I've used spackle for faux frosting, with great results on my glitter houses, in the past:

But with two under 3yrs milling about my house this Christmas (making my living room a labyrinth of gates around the tree, fireplace, etc.), I wanted to make sure everything on was non-toxic, just in case a grabby little hand got hold of one. So I found this fun kid-safe stuff called Whipple Creme. It's actually a toy line of fake desserts for older kids to decorate - it comes in a pastry bag, with a star tip, and works just like the real thing. I bought mine on eBay to get the best price (where 2 were the same price as just 1 on Amazon).

You just knead it a bit before opening and it's good to go and hardens as it dries just like royal icing. The only downside was no straight tip and I needed to be able to do more than just big star shapes, so I double bagged it with one of my own pastry tips over the opening to do the squiggles on the arms and legs. My decorating skills are pretty minimal, but I like to think that them all being a little less than perfect just makes them seem more real.

For the eyes I used a product called Beads in A Bottle by Tulip that I had left from a bunch of other projects (see those here). It's a kind of puff paint, but stays nice & rounded (and happened to be in my stash), so it was the best option to do licorice style eyes and mouth.

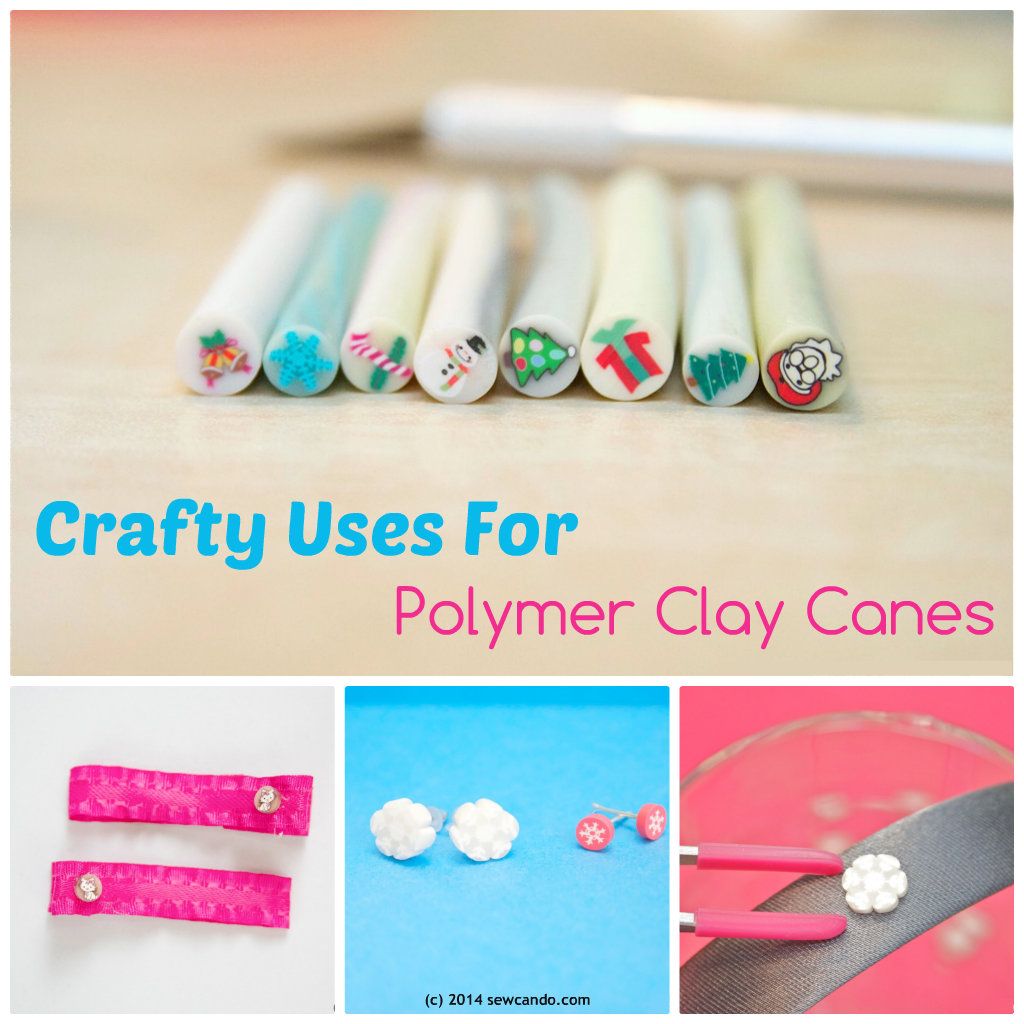
I also had some of these mini polymer clay canes for my "candy" embellishments.

You just cut them with a razor blade to the desired thickness and glue them on.


They're meant for manicure nail art, but I've used them for lots of other projects over the years (see them HERE).
The decorating was just like you would do with real cookies - on a cookie sheet covered with parchment paper. I also got the husband to drill holes in the tops to make them easy to hang.

I used tweezers to nestle some of the clay pieces into the faux frosting.

The only downside was the Whipple directions oddly didn't say how long it took to dry, so I guessed and gave them 24hrs before I added some 1/8 inch ribbon loops to hang them.
I'm pretty happy with how they turned out and feel like it would be fun to make more of these with my bigger kids. After all, there iss still time before Christmas and I've got an unused bag of Whipple Creme left...I'm also feeling a strong desire to make some actual cookies, since I'm highly suggestible when it comes to treats;)

These are just too cute, Cheryl! I just wonder how long it may have taken to cut those one at a time had your other half not come to your rescue. ;-)
ReplyDeleteHave a Merry Christmas!
I could still be cutting if I'd had to do them by hand. lol. Was so grateful to have his help!
Delete