

Sometimes you need an easy win craft project. I just haven't had loads of time to make many intricate or frivolous things this summer, so most of my projects have the "need to do" kind. My Easy DIY Fabric Panel Wall Art is one of them.
A year ago we completely renovated our downstairs bathroom. An over the toilet cabinet was removed so we ended up with a big blank wall space on one wall. I just couldn't find the right thing to put there to "finish" the room. I didn't want a bunch of stuff on shelves that would get dusty or potentially fall in the toilet. I'd deliberately chosen neutral grey, white and cream shades for my teens who primarily use this bathroom. But when it was done I felt like it was too stark.

Then I had the idea to turn a fabric panel into the perfect decorative solution. It's a small change, but it's had a big impact:

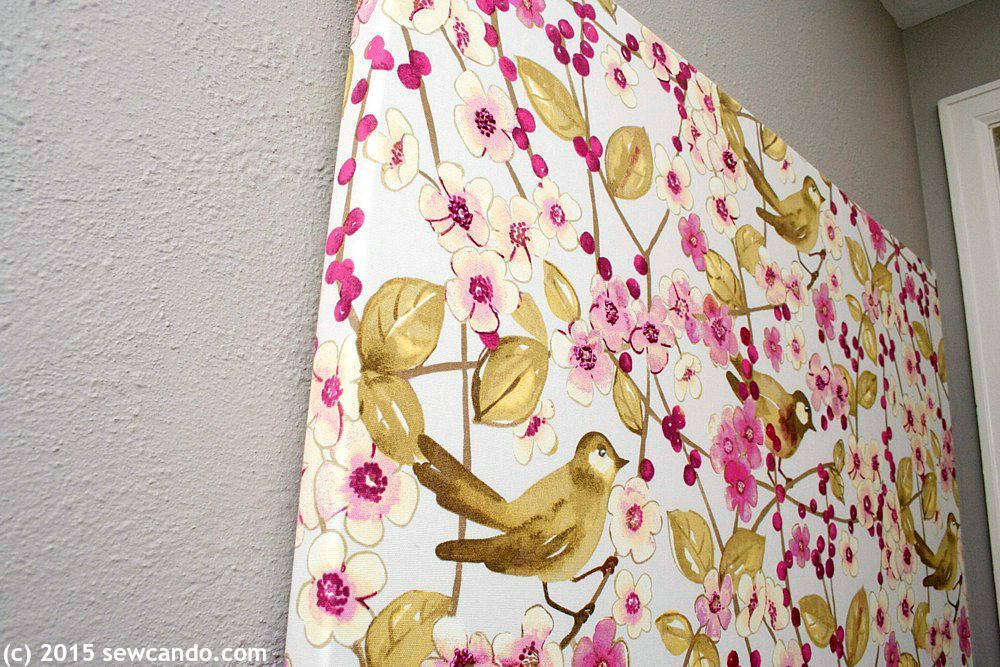
I fell in love with this Grateful Cotton Blossom fabric panel. I'd ordered it to carry in my shop and had impatiently waited many months for the bolt to come in. Even though I'm not usually an "on-trend" design kind of girl, the pretty cotton blossoms, weathered shiplap background and combination of colors all appealed to me. I knew I had to make something with it.

I also loved the photo-realistic burlap bow on the wreath. Since this is hanging in a bathroom it's ideal- there's the look of a real bow, but won't get damp or dusty!

It seemed the perfect way to add a splash of color and home-y-ness to our previously too boring bathroom.

I'd done a similar faux painting fabric wall art project a few years back for our foyer, except that used home decor fabric and had some additional dimensional paint detailing. This one was even quicker to do.
- Fabric panel (mine is available here)
- Blank canvas (mine was 22"x28")*
- Iron
- Staple gun
- Picture hanging materials
* Make sure the fabric panel will wrap around to the back of the canvas - having at least 2 inches of play from the canvas dimensions is ideal.
Start with a fabric panel and blank canvas. Iron the panel smooth to get it as wrinkle-free and flat as possible. No need to prewash.

Wrap the panel over the canvas until you get the spacing you like and it's nice & straight. I had the wreath to make it easy to center mine:

To keep things from shifting out of place while stapling, or when flipping the canvas over, use small clips on the sides and remove as you go. This is key when you have horizontal stripes like this:

Flip the canvas over onto a solid flat surface. The floor is ideal to get right up over it for good leverage with the staple gun. Pull the fabric taut against the canvas frame and, if possible, fold the raw edges under (but as it's the back that no one will see, it's not necessary). Working from the center out towards the corners, begin stapling every few inches.

Once you've reached the corners fold the excess fabric on an pulled one side down and then fold over the other and staple on an angle:

I didn't want to faff about with trimming off my longer top & bottom edges so I just folded them under and stapled them in place.

We nailed a sawtooth picture hanger on the back and hung it up. I added a matching woven basket and trash can to tie things together. Now it feels more finished. . .

And I've found a great way to enjoy my new favorite fabric panel every day:)


Very clever idea for making wall art. Looks great in the bathroom. The colors a perfect blend.
ReplyDeleteHave a great week,
Kippi
Thanks Kippi. I really love it too.
DeleteHi Cheryl! I absolutely love your art! I am so happy to be featuring you this week at the TFT party. Thanks so much for sharing with us. Have a wonderful weekend. Congrats!
ReplyDeleteTheresa
Thanks so much Theresa!! What a great surprise:)
DeleteWhat a beautiful bit of art. Such a lovely way to use a gorgeous fabric panel.
ReplyDeleteI don't like too much decor in a bathroom that can get dusty or grimy either.
I'm glad I'm not the only one. I love seeing pretty knick knacks, but it's just not realistic - this way I've got the look, but none of the dusting!
Delete