

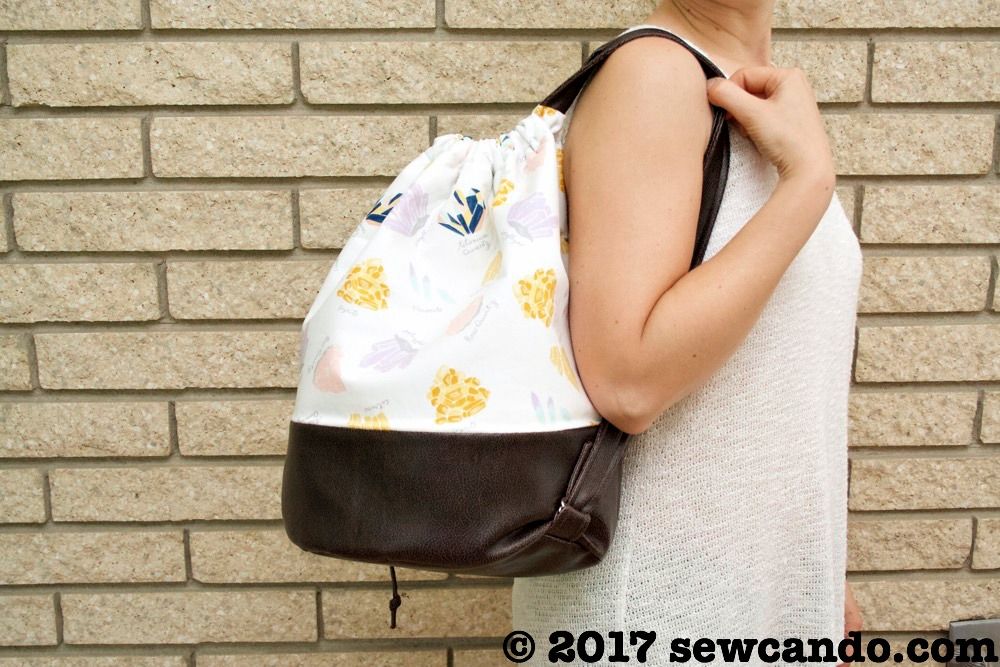
It's TWO-fer time! A fun tutorial AND a fabric giveaway to go with it! I've got a new bag how-to that's all about versatility to start things off: my Supernova Pleather Drawstring Duffel Backpack.
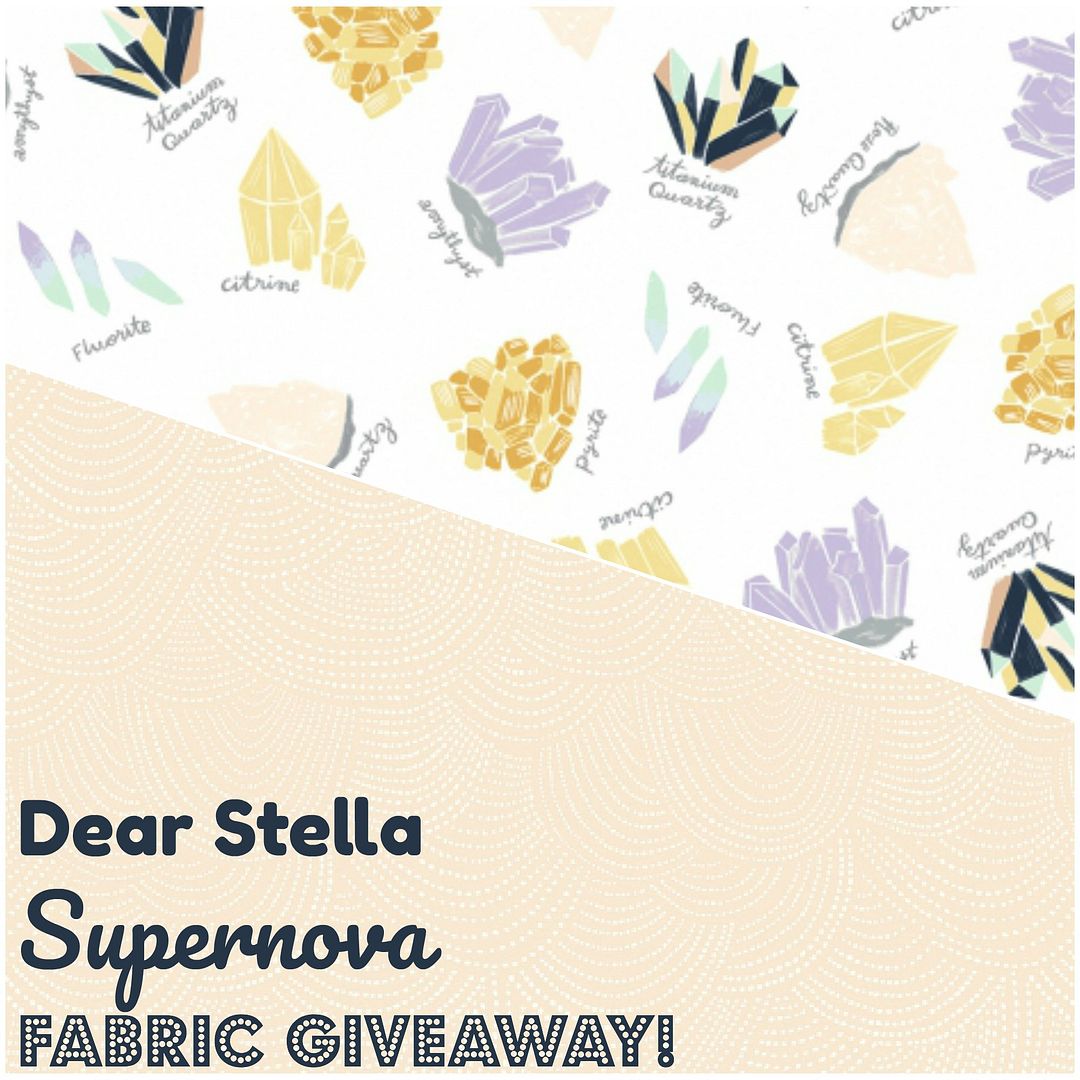
I was inspired to make it by this awesome gemstone print fabric. It's from the new Supernova collection by Dear Stella. I love the geometric mineral design. So science chic! And there's a chance for you to win some for yourself below;)
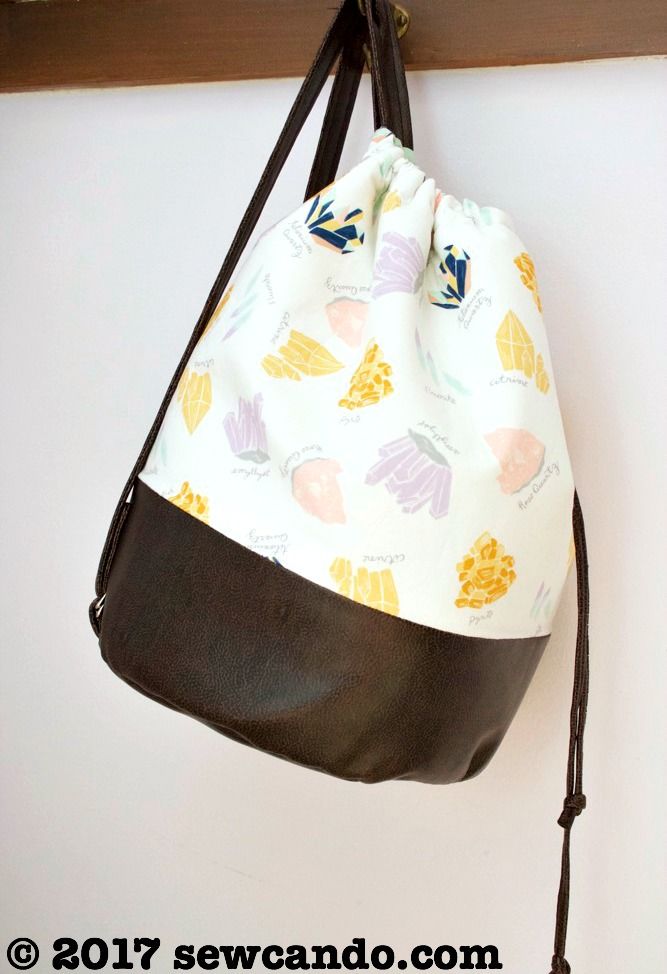
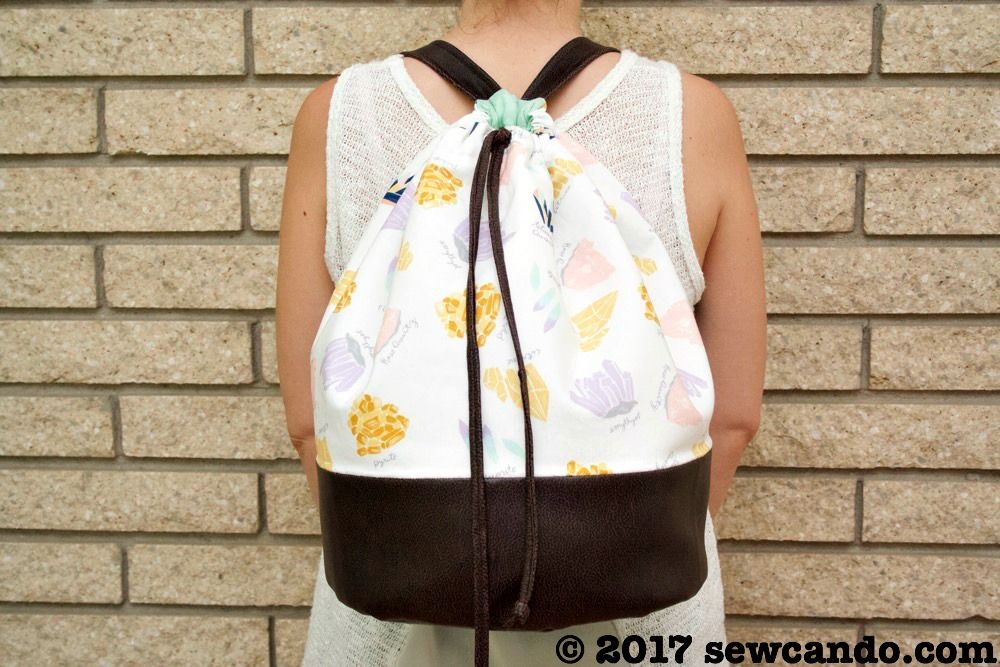
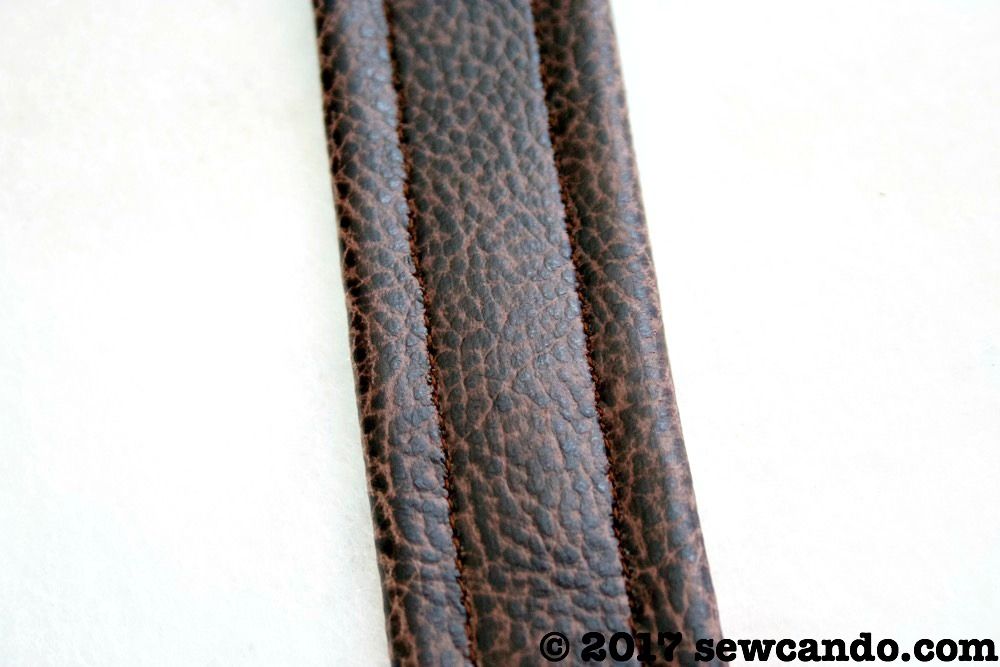
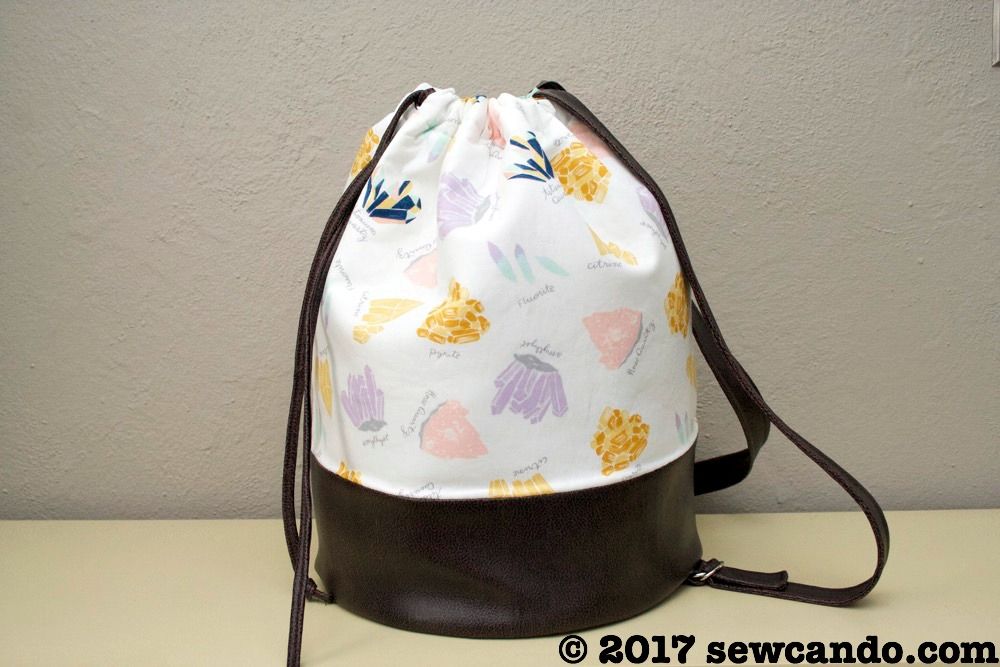
Using pleather for the lower portion, bottom and straps, gives the backpack extra durability:
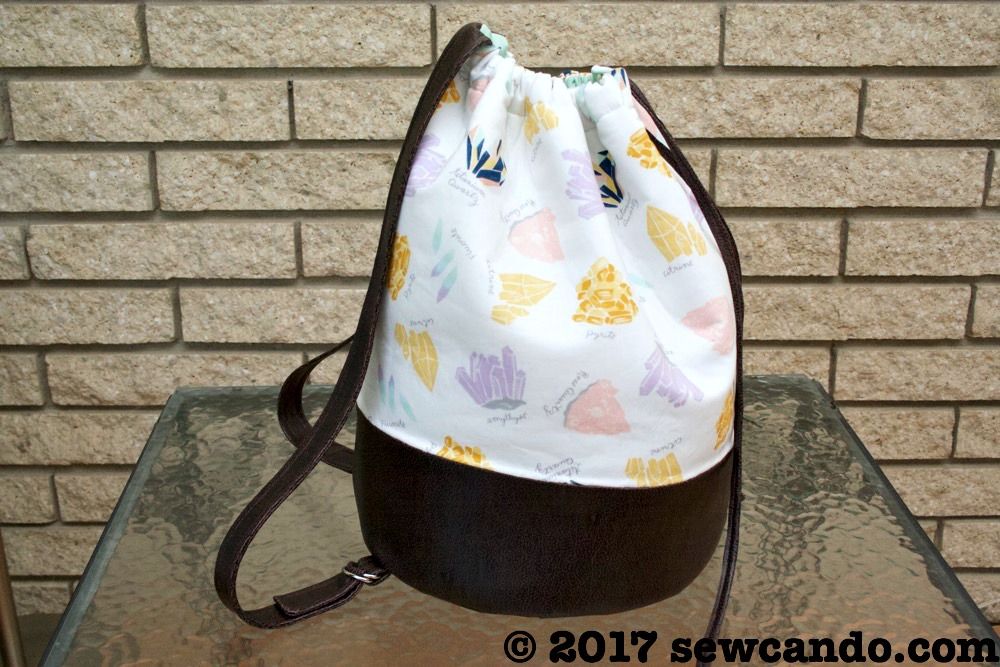
And a pretty color and texture contrast:
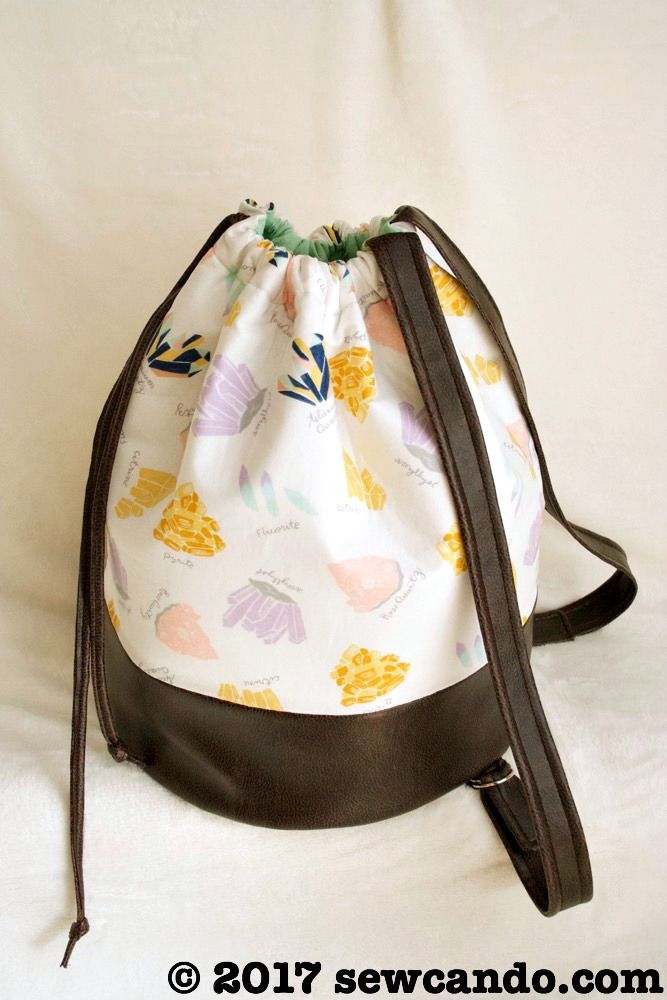
The generous size makes it work well as a backpack, large purse or even a chic diaper bag alternative:
- 1 yard outer cotton fabric (I used Dear Stella Supernova Gemstones)
- 1 yard lining cotton fabric (I used Dear Stella Triangle Dot in Midori)
- 1/2 yard pleather fabric
- 1 yard fusible fleece
- 2 pairs 1/4 inch wide D rings
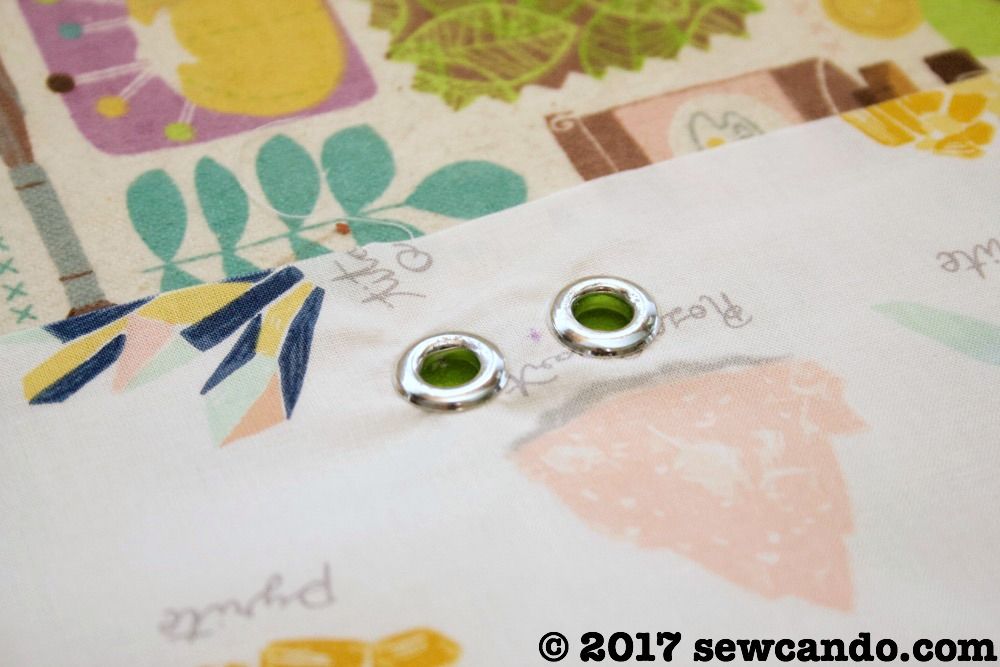
- 2 3/4inch wide grommets
- Notions: heavy duty needle, hand sewing needle, iron, basting spray/spray adhesive, marking pen, clips, pins, chopstick, matching thread. Optional: walking foot.
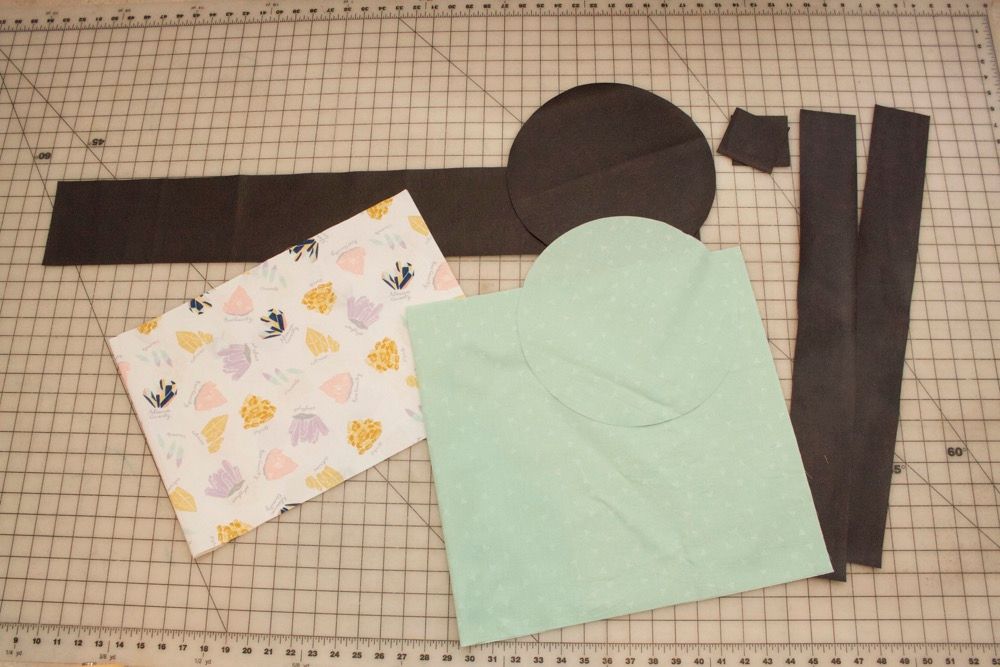
Start by cutting the following pieces:
Outer fabric
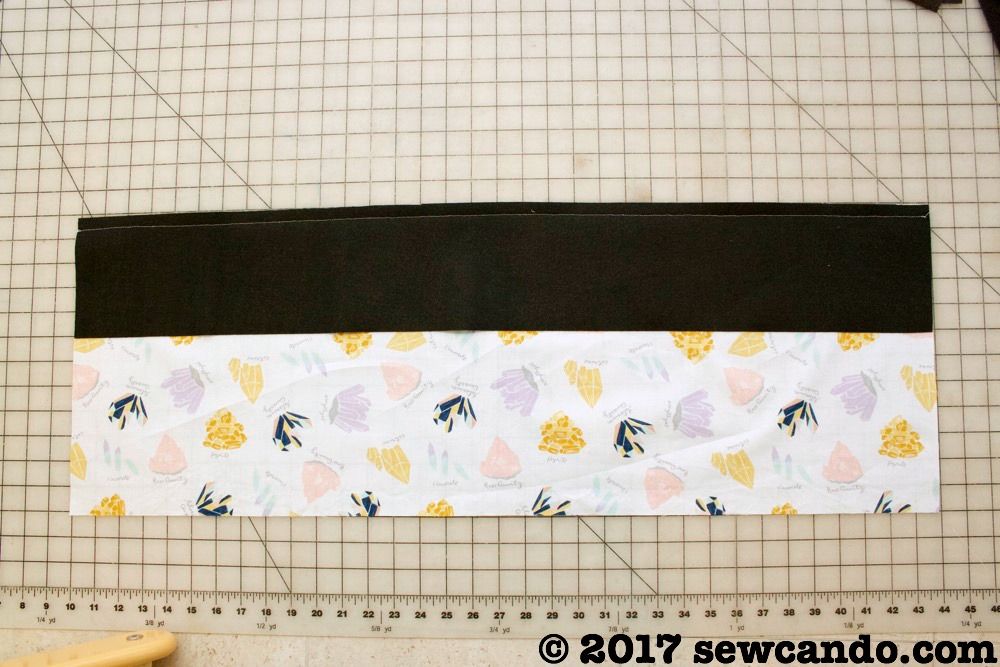
(1) 12 inch high by 34 inch wide rectangle
(1) 10 1/2 inch diameter circle
Lining Fabric
(1) 16 inch by 34 inch wide rectangle
(1) 10 1/2 inch diameter circle
Pleather
(1) 5 inch high by 34 wide rectangle
(1) 10 1/2 inch diameter circle
(2) 18 inch by 3 inch strips
(2) 3 inch by 3 inch squares (for lower straps)
Fusible Fleece
(2) 15 1/2 inch wide by 34 inch long rectangles
(2) 10 1/2 inch diameter circles
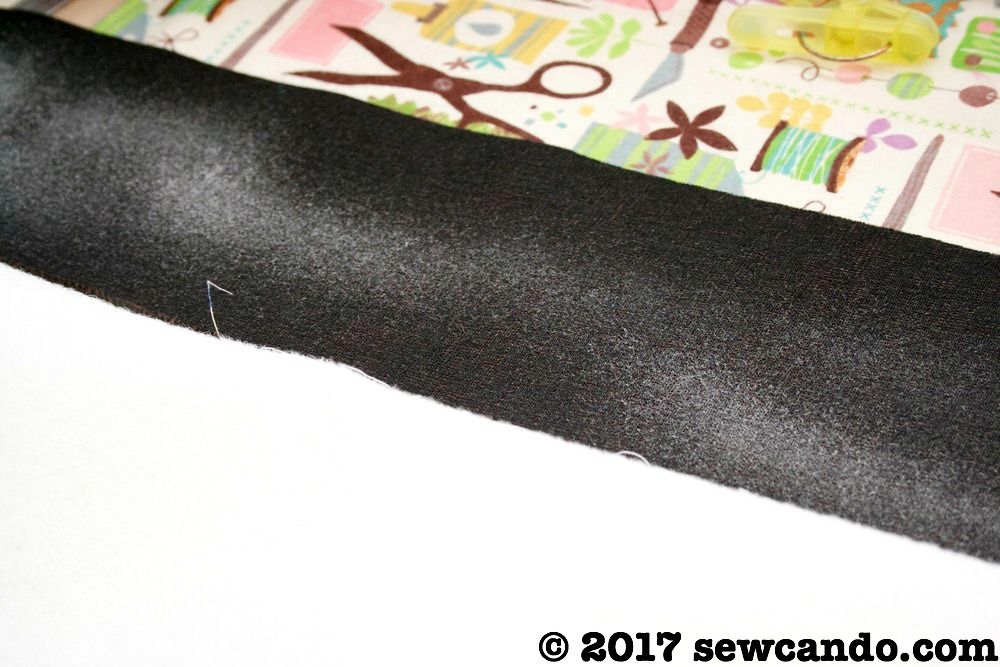
With right sides facing, stitch together the bottom edge of the outer fabric and the pleather side piece.
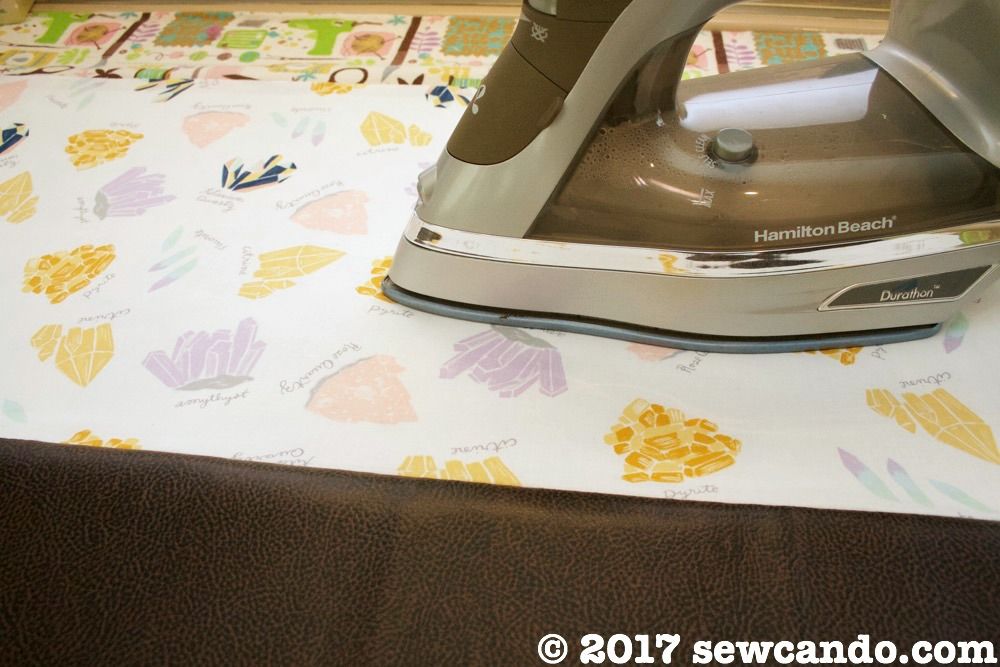
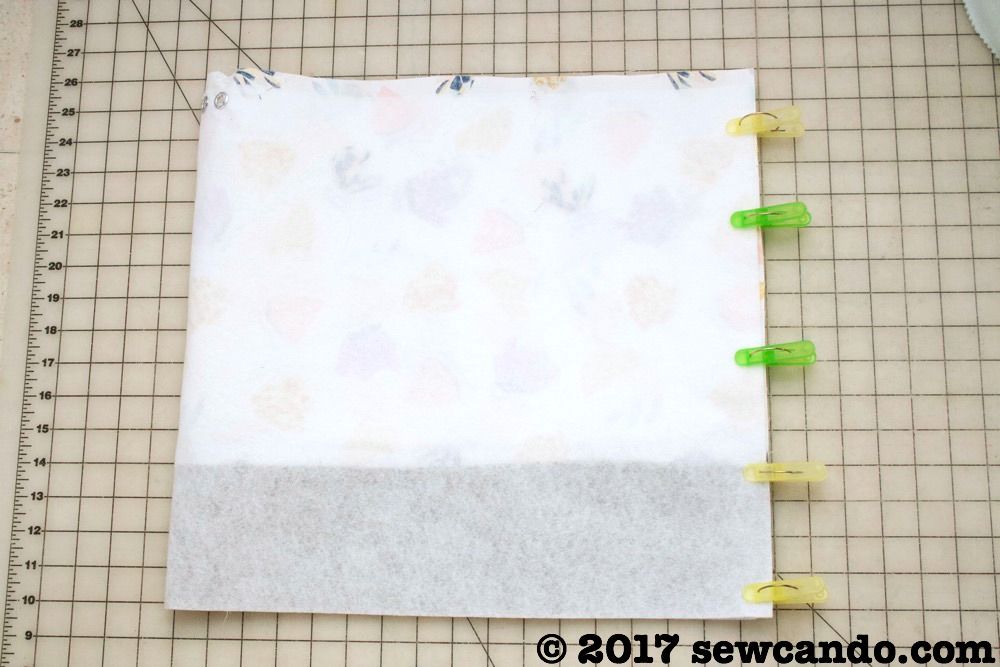
Line up a piece of the fusible, wrong sides facing, with the fabric - leaving a 1/2 inch gap at the top.

Flip and iron on the right side of the fabric to fuse, careful to keep the iron away from the pleather bottom so it doesn't melt. Fuse the fleece to the lining pieces as well.
Spray quilt basting or spray adhesive on the wrong side of the pleather so the fleece will adhere to it. Smooth the fleece onto it. Do the same with the bottom circle.
Measure to find the center of the rectangle and mark one inch down from the top edge. Affix the grommets, one half inch apart according to the package directions:
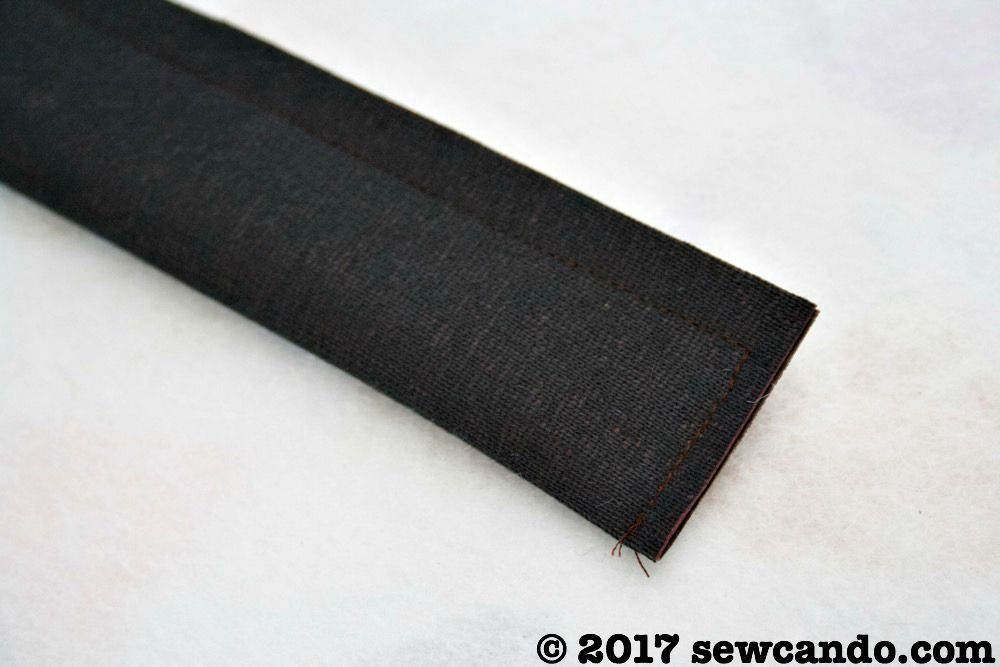
Bring short sides together using clips and stitch. Do the same with the lining, but leave a 3 inch gap in the side for turning.
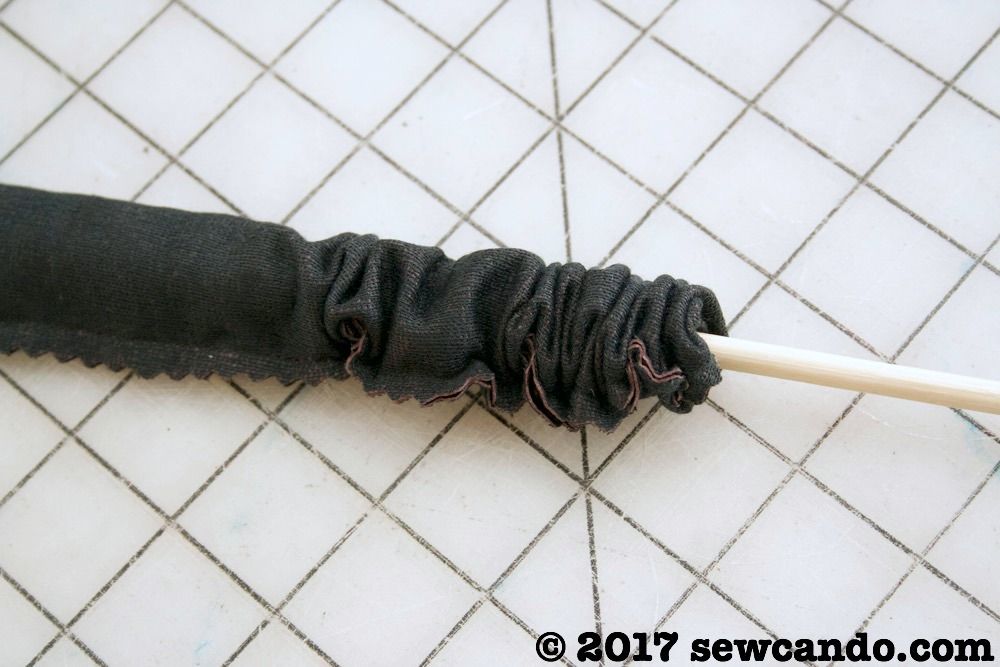
Using a chopstick or fairly blunt dowel, wiggle the short end into the strap to turn it:
Top stitch 1/8 inch from either side. A walking foot makes this a little easier, but it's not required.
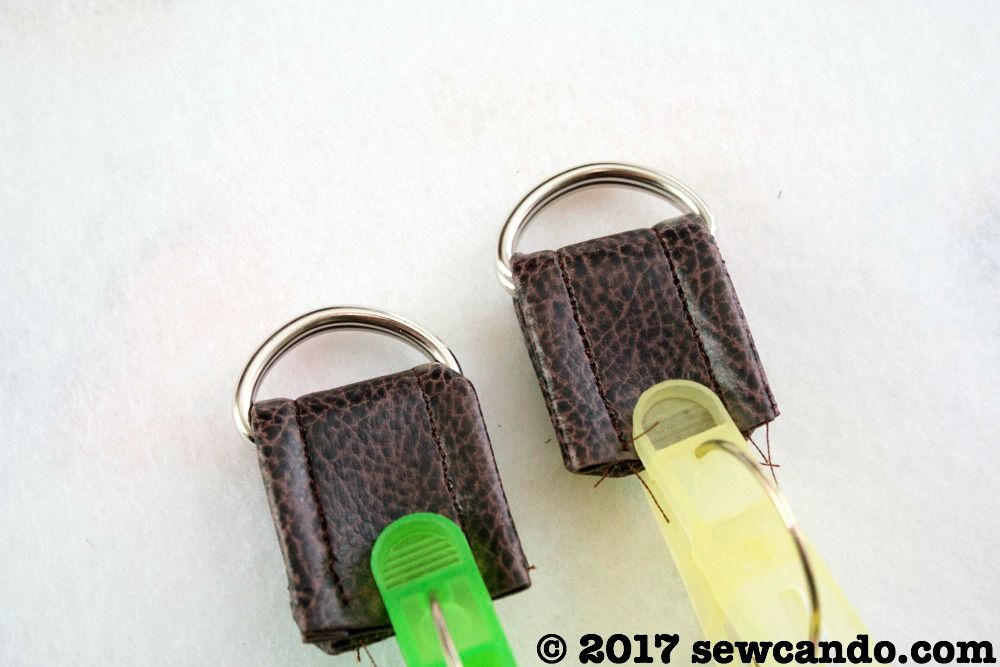
Do the same with the short straps and thread a pair of D rings through each, fold over and clip ends together:
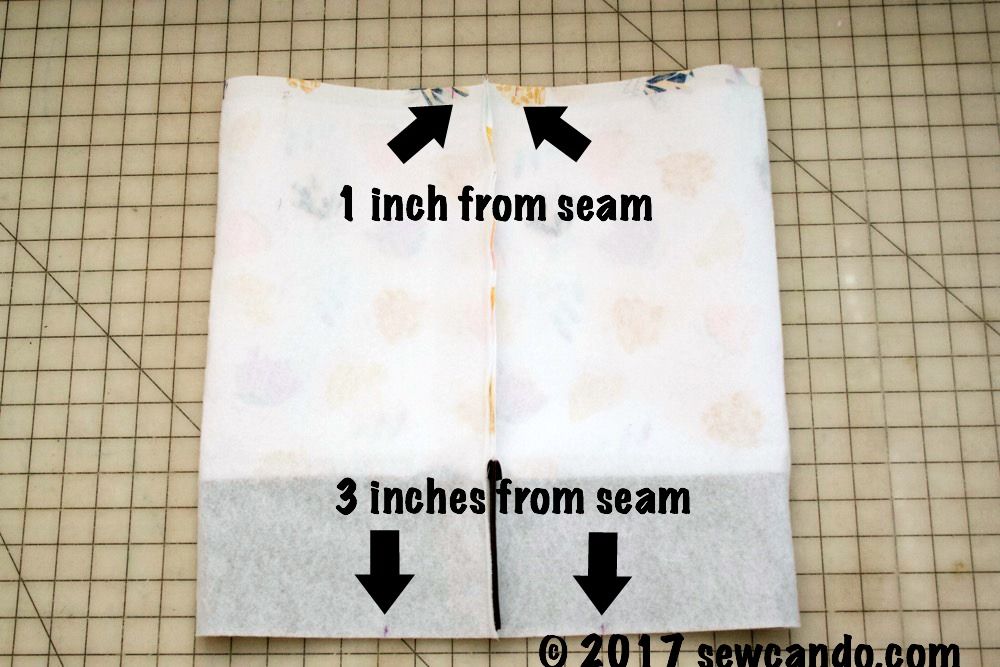
Open up outer bag with the side seam in the center. Mark along the top one inch over on either side of the seam for the top strap placement and three inches over on either side of the seam on the bottom end for the short strap placement:
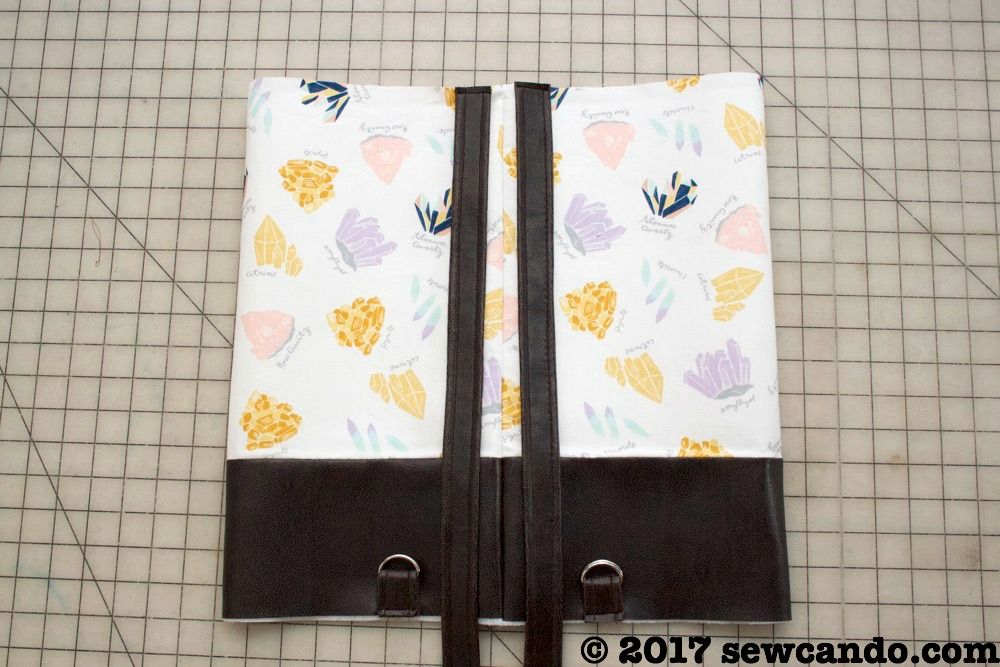
Stitch straps into place on right side of bag:
Clip the pleather circle to the pleather bottom of the cylinder and stitch together all the way around with a 3/8 inch seam allowance. Repeat with the lining (pins are ok here):

With right sides facing, insert outer bag into lining. Pinning all around the top. Stitch together with 1/2 inch seam allowance.
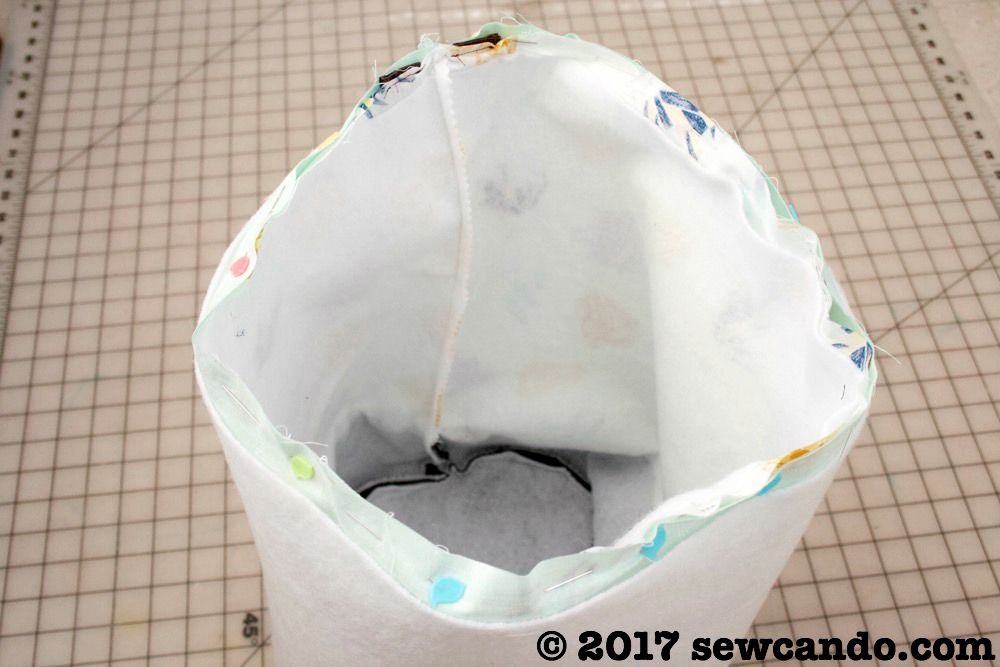
Carefully pull bags right side out through side gap in the lining. Hand stitch gap closed. Top stitch 1 1/4 inches down from top seam to create the casing for the drawstring.

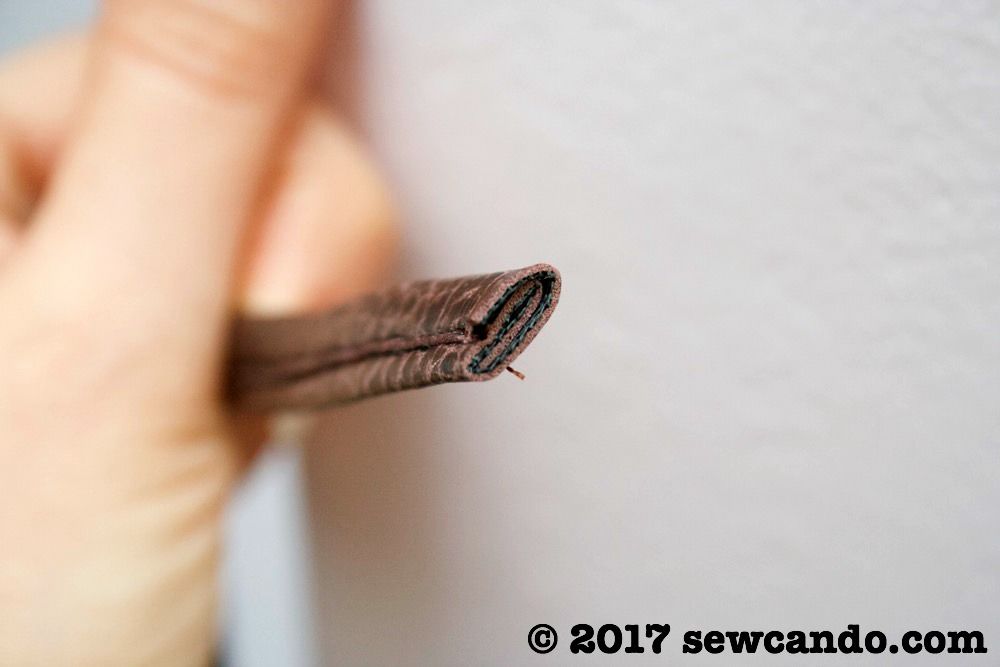
Take drawstring strip of pleather and fold over three times lengthwise. Clip in place and stitch together:

The pleather will not fray so it's ok for the raw edge to be out. Using a safety pin, snake drawstring through the casing and then knot the ends:
Pull ends to cinch closed and tie to hold in place:

Thread the straps through the D rings to the desired length and the backpack is ready to tote around!
Now how about a chance to win some of this pretty fabric to make your own??
I'm giving away a 1 1/2 yard cut of this Supernova Gemstones print and a yard of the coordinating Scallop Dot in Eggshell, courtesy of Dear Stella.

I was not financially compensated for this post. I received fabric, to use as I wished, from Dear Stella. The opinions are completely my own based on my experiences.
Great tutorial!
ReplyDeleteThis bag is so great! I'd make a set of placemats for our kitchen island. The fabric is so refreshing and perfect for my kitchen décor!
ReplyDeleteLove the tutorial I think if I won I would use the fabrics pairing it with some cork leather I have and make the backpack
ReplyDeleteThis is a beautiful print! I would love to make my girl a dress out of it-- thank you!
ReplyDeleteGreat photos on your tutorial! The fabric is fun - would make a cute kid's quilt!
ReplyDeleteAwesome bag! Great tutorial. I would make pot holders and lots of little bags. Beautiful fabrics! Have a wonderful day! angielovesgary2 atgmail dotcom
ReplyDeleteAwesome bag!! Love it!! Might make one for the Grangirlie!! Or a cooool Tote & zippy bags for inside it..for ME!!! giggle Thank you for chance to win your Give-a-way! :)
ReplyDeleteAmazing, bag, this looks so cool. Jacqui
ReplyDeletewww.mummabstylish.com
I would make some drawstring tote bags with this fabric.
ReplyDeleteI would make a bag to carry things home from supermarket or a bag like you made.
ReplyDeleteI would make a dress for my granddaughter and also a tote.
ReplyDeleteI would make project bags for my knitting group.
ReplyDeleteI would probably make myself some market bags...I am a real rock hound, so I love this!
ReplyDeleteThis print is super cute! And I love the drawstring style of backpack.
ReplyDeleteShelbee
www.shelbeeontheedge.com
I would make something bright and cheerful - something that puts a smile on my face!
ReplyDeletefrani(at)grammyshands(dot)us
this bag is adorable. thanks for the tutorial. I would make my daughter some pillows. and maybe my sister some pillows.
ReplyDeletequilting dash lady at Comcast dot net
Clear Instructions - I'd like to make the drawstring duffel bag
ReplyDeleteI would make our Granddaughter this same bag for her Freshmen year at college! She likes science things. Thanks for this great tute.
ReplyDeleteI would love to make some pillows with this fun fabric. Thank you for the great bag tutorial!
ReplyDeleteI love to make pouches and pencil cases. ☺☺
ReplyDeleteA dress for my granddaughter!! Thank you
ReplyDeleteI'd make a project bag for my crochet projects with it 💗
ReplyDeleteThis is awesome, my daughter would LOVE it.
ReplyDeleteI'd make a quilt!
ReplyDeleteWhat a lovely tutorial. I was planning to sew a back pack too. Your tutorial shall be helpful. Thank you!
ReplyDeleteI would love to make me and my granddaughter a matching tote.
ReplyDelete@tisonlyme143
I'd make some baskets and desk items. Love your bag and thank you for the tutorial! Crayolabud at aol dot com
ReplyDeleteI'd make some baskets and desk items. Love your bag and thank you for the tutorial! Crayolabud at aol dot com
ReplyDeleteI would make something for my little granddaughter - a tote or purse.
ReplyDeleteI am definitely in need of a new purse. These fabrics would be perfect!
ReplyDeleteHi, I'd like to make this Bag>so neat! Thanks for sharing!
ReplyDeletemsstitcher1214@gmail.com
Beautiful, versatile bag!!
ReplyDeleteCute!!! I'd love to sew a quilt!
ReplyDeleteI have a brand new niece and a sweet baby quilt would be perfect with this fabric
ReplyDeleteI would make pillow covers.
ReplyDeleteMy daughter loves, loves, loves collecting, identifying and polishing all types of rough gems and rocks. She would be over the moon with this fabric! So many things can be made with this beautiful print...
ReplyDeleteSuch gorgeous fabric and a cute pattern!! I'd love to make one of these. Wonder if cork would work instead of pleather??
ReplyDeleteSo pretty! I would use these for a tote bag for me to use on the commute to work!
ReplyDeleteSandy A in St. Louis
I am a scientist and I want to make a science-themed quilt. This would be a perfect addition!
ReplyDeleteI would make a dress for my daughter.
ReplyDeleteWhat a fab bag and great idea with the pleather!
ReplyDeleteI would love to make a bag like yours - thanks for this great tutorial!
ReplyDeleteI would make this bag if I won the fabric. Maybe I could squeeze out enough extra fabric to make a small cross body purse to hold my cell phone.
ReplyDeleteI would like to make a bag, too, if I would win the fabric. Your's in inspiring. Thanks for the detailed instructions.
ReplyDeleteI would love to make a couch pillow cover!
ReplyDeleteLove the bag so that's what I would sew, if I won the beautiful fabric. Great tutorial!
ReplyDeleteThis bag is so cute. I would make a copycat bag!
ReplyDeleteI would make a skirt for my daughter.
ReplyDeleteOkay this is super cute! I have never sewn with pleather and to be honest, turning those straps looks mighty scary. I can barely turn fabric tubes. Is it really doable lol?? Well obviously it is since you did it! I think I'd make the bag as well but I may go with canvas instead of the scary pleather haha!
ReplyDeleteIt's not as bad as you'd imagine. Keeping them that wide helps make turning easier - I used a knitting needle. Canvas is also a good alternative though. Either way the bag will turn out nice!
DeleteCheryl, this is so cute! Thank you for sharing. You are one of the features at the Make it Pretty Monday party at The Dedicated House. Here is the link to this week's shindig. http://www.thededicatedhouse.com/make-pretty-monday-week-226/ Have a happy week! Toodles, Kathryn @TheDedicatedHouse
ReplyDeleteLove this pattern! Could you tell me if you are using a 1/2" seam allowance?
ReplyDeleteYes, it is a 1/2 in seam allowance, unless otherwise stated.
Delete