
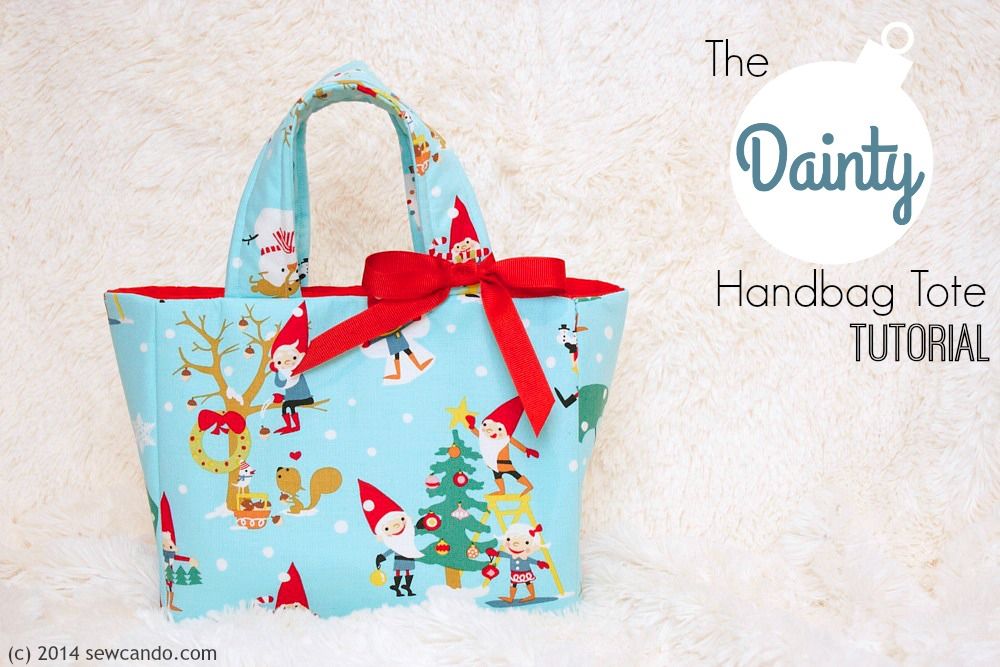

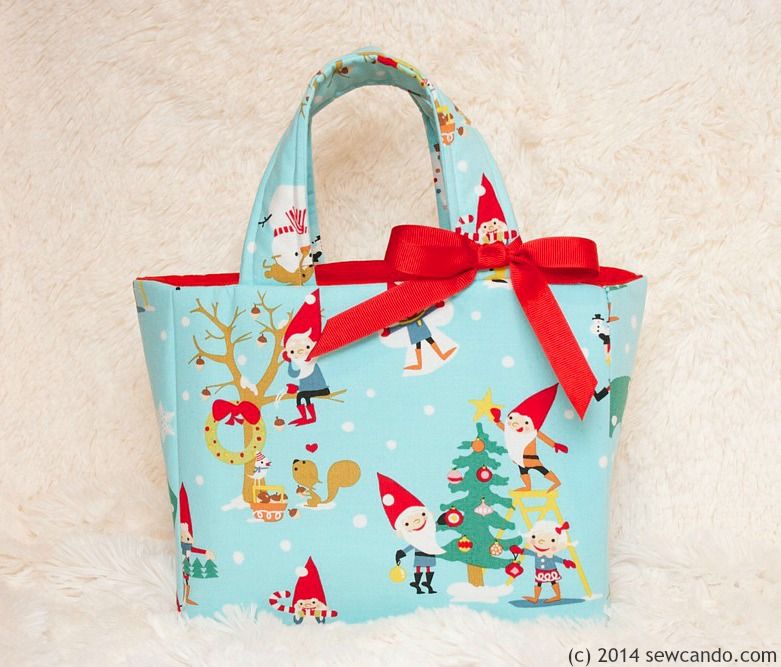
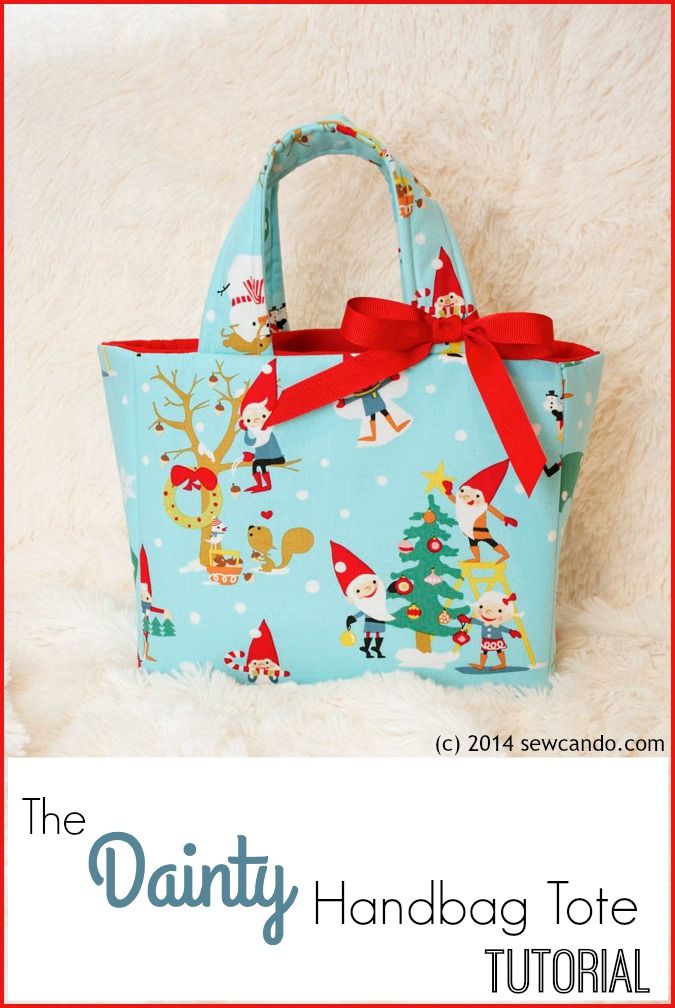
I've been in the full swing of holiday-theme sewing & crafts lately and one thing on my list was to make myself a festive little handbag. Something cute, but simple and useful. So I whipped up this Dainty Handbag Tote.
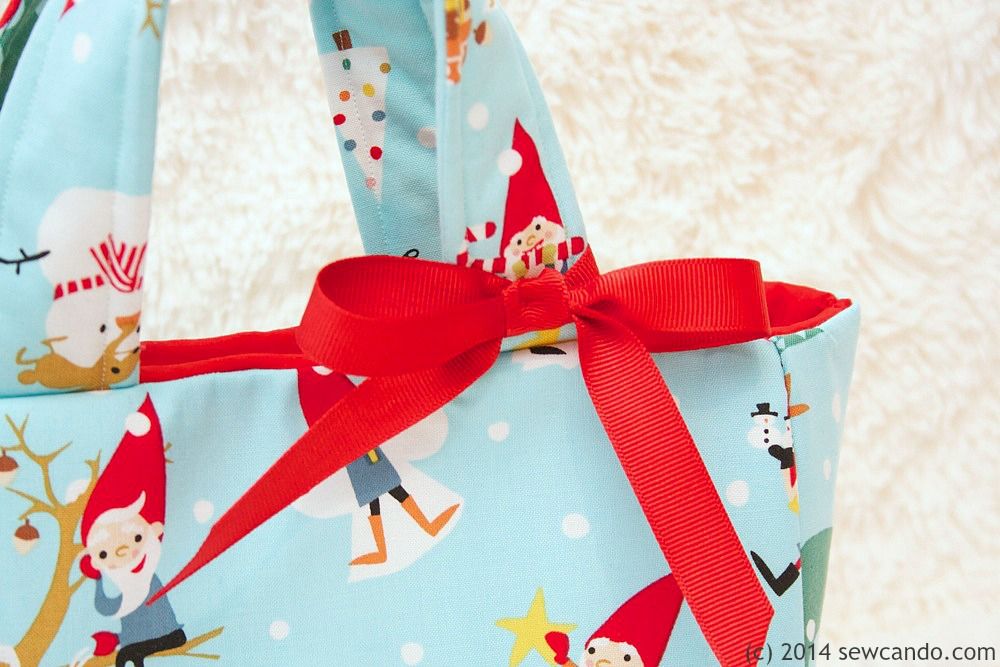
It's petite size and whimsical ribbon bow makes it quite dainty.
The bag is a basic tote shape, but has a handy partitioned side pocket and magnetic snap closure. It can hold my phone, wallet, keys and other critical purse contents just as well as my bigger bags too.

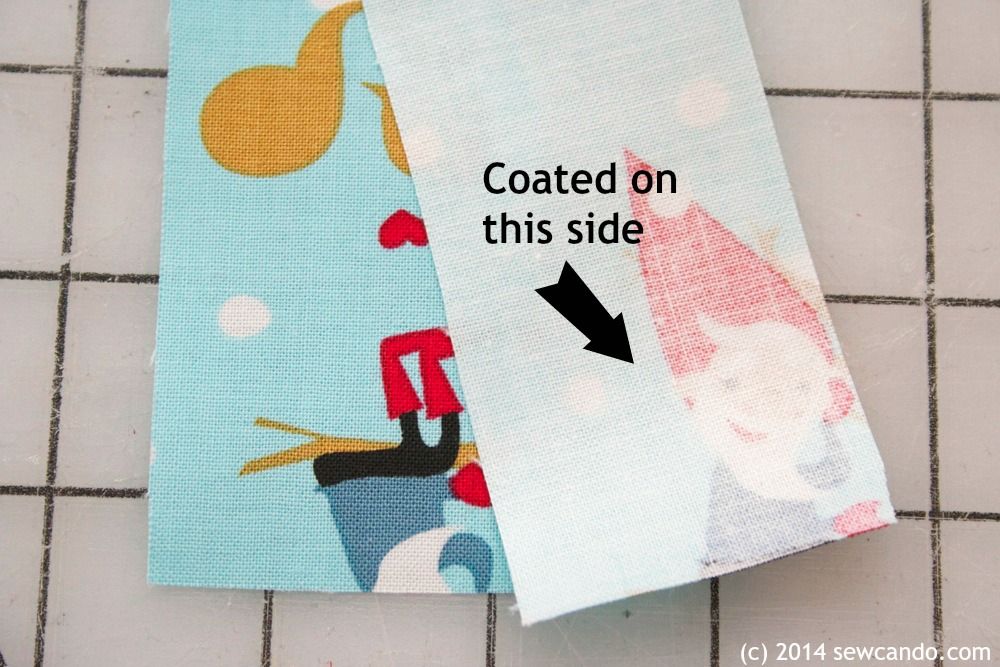
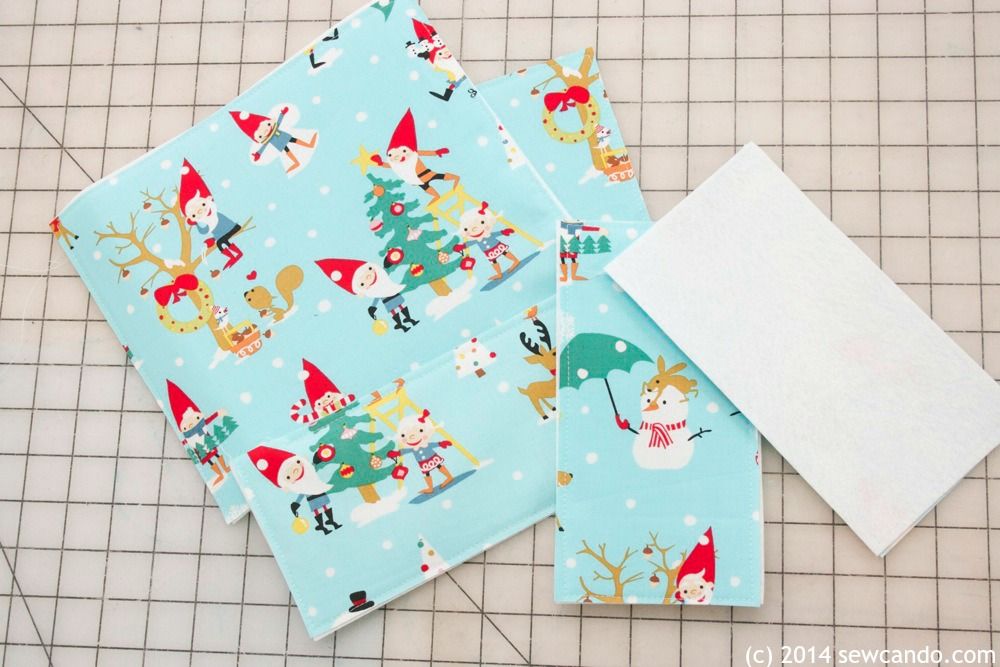
For my festive look I did a jolly red lining and the fun Gnome For The Holidays by Michael Miller for the outer fabric. I was buying some laminated cotton for another bag project at Laminates and saw this gnome print and thought it would be perfect for my seasonal purse idea, so I bought a 20in x 20in cut of it too. The best bit is while it's cotton, it's also got a PUL coating on the back side to make it water resistant - ideal for snowy days out and about:
Materials:
- 1/2yd each of outer fabric, lining
- 1/2yd each ultra firm sew-in stabilizer and fusible fleece
- Magnetic snap
- Optional - 10 inch piece of double fold bias tape
- Basic notions: rotary cutter/shears, iron, marking pen/chalk, pins, hand sewing needle
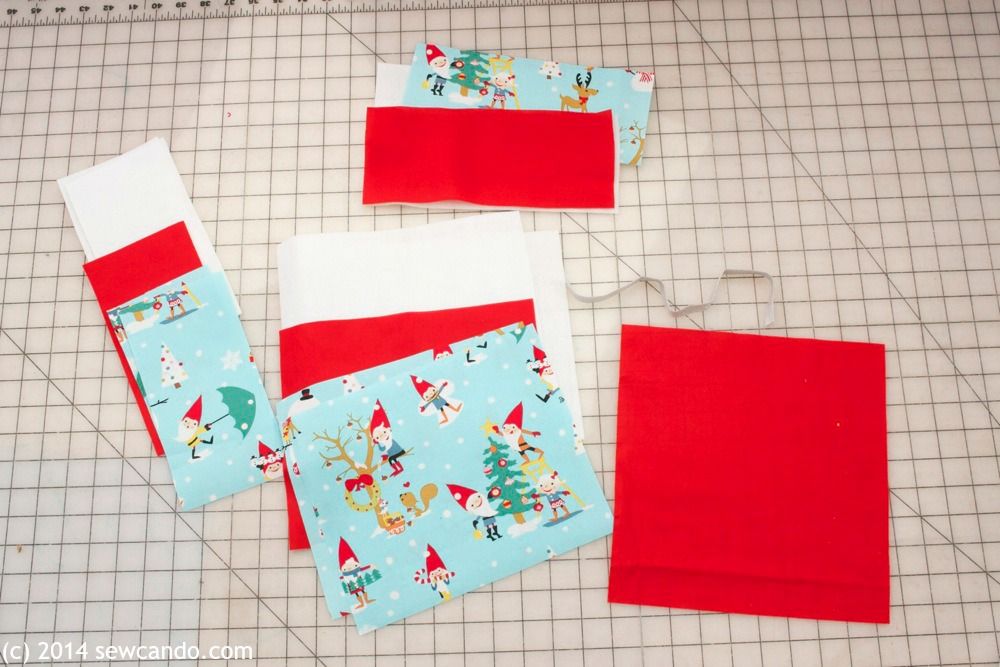
Cut the following pieces from the outer & lining fabrics, as well as fusible fleece and ultra firm sew-in stabilizer:
Bottom: 9.5 in wide by 4 high
Side: (2) 4 in wide by 8 in high
Front/Back: (2) 9.5 in wide by 8 high
For the straps cut (4) 2 1/4 in wide by 12 in high pieces from the outer fabric and (2) from fusible fleece and for the pocket a 9.5 in wide by 10 in high piece plus a 9.5 in wide by 5 in high piece of fusible fleece.
Baste the ultra firm stabilizer to the wrong size of all the outer fabric pieces and fusing the fleece to the wrong sides of the lining pieces.
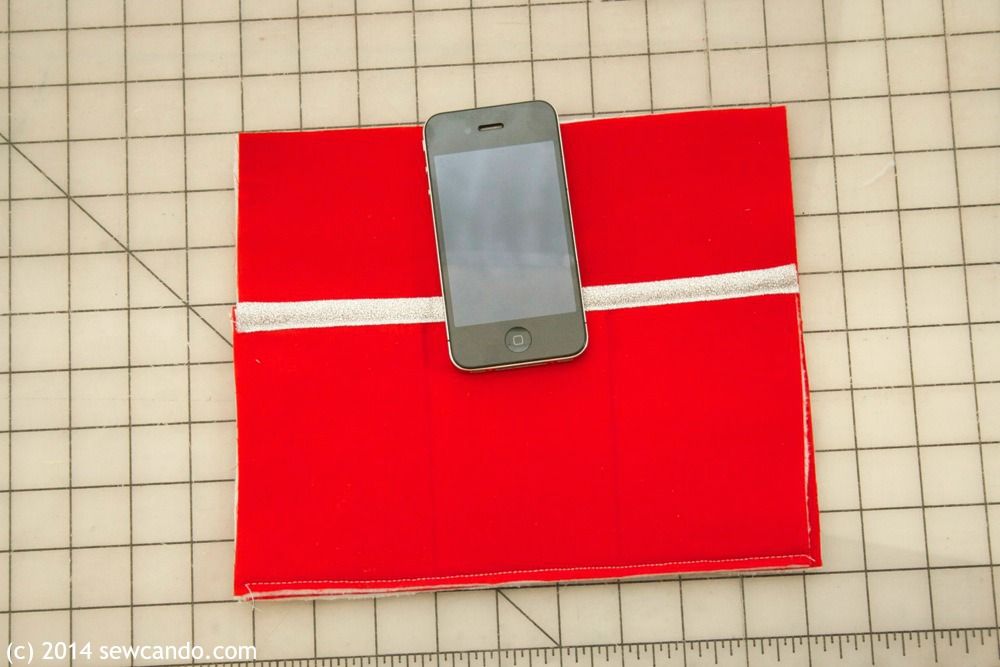
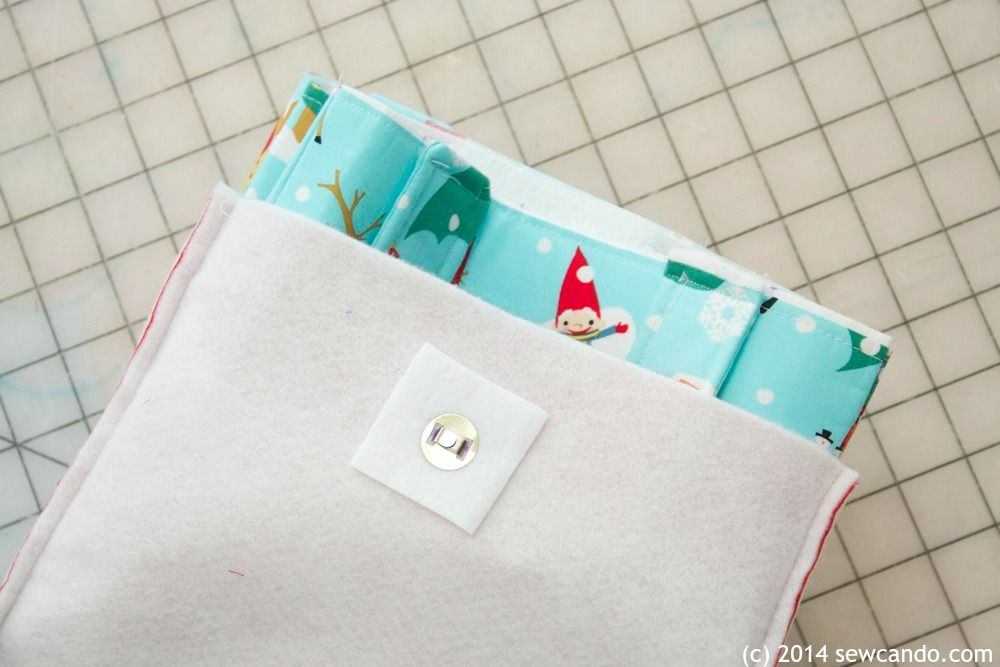
For the inner pocket, the stabilizer goes on one half of its wrong side and then the fabric is folded over. This makes the pocket lined. I added some silver bias tape along the top of the pocket, then layered the pocket over one of the lining sides. Totally optional, but it adds a nice finish.

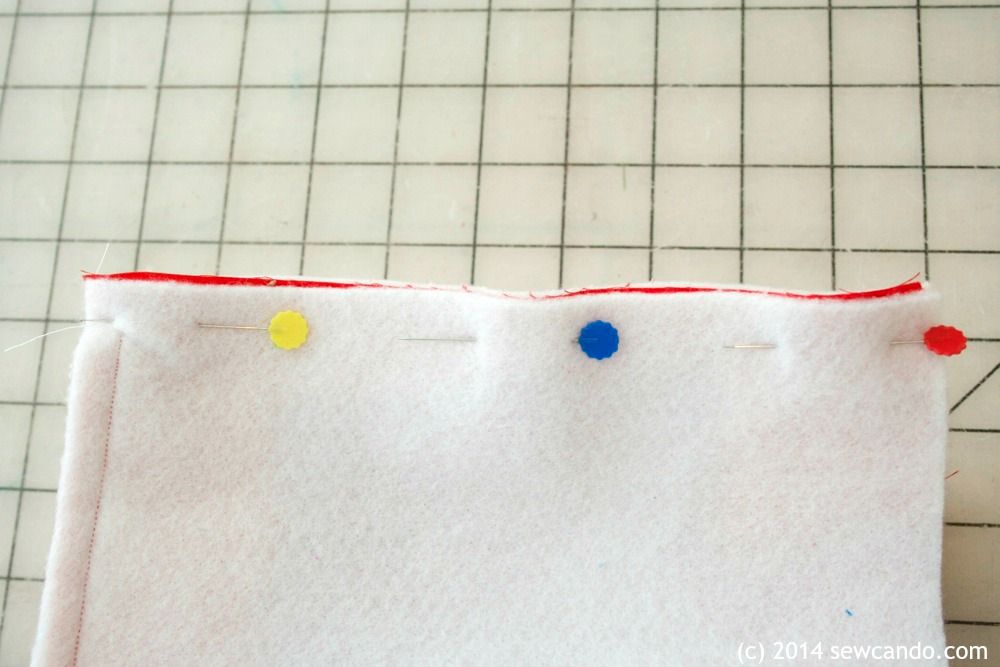
Let's start with the lining pieces. Using marker/chalk, measure out the desired pocket widths with a ruler. I made sure my center pocket was wide enough for my phone. Layer pocket over a main lining piece, pin, then stitch down the markings. Baste along the bottom edge.
Stitch together a short end of each of the side pieces to the short sides of the bottom, right sides together with a 1/4 inch seam allowance. I start and stop about 1/4 inch from the top and bottom to make it easier to do the remaining sides later.
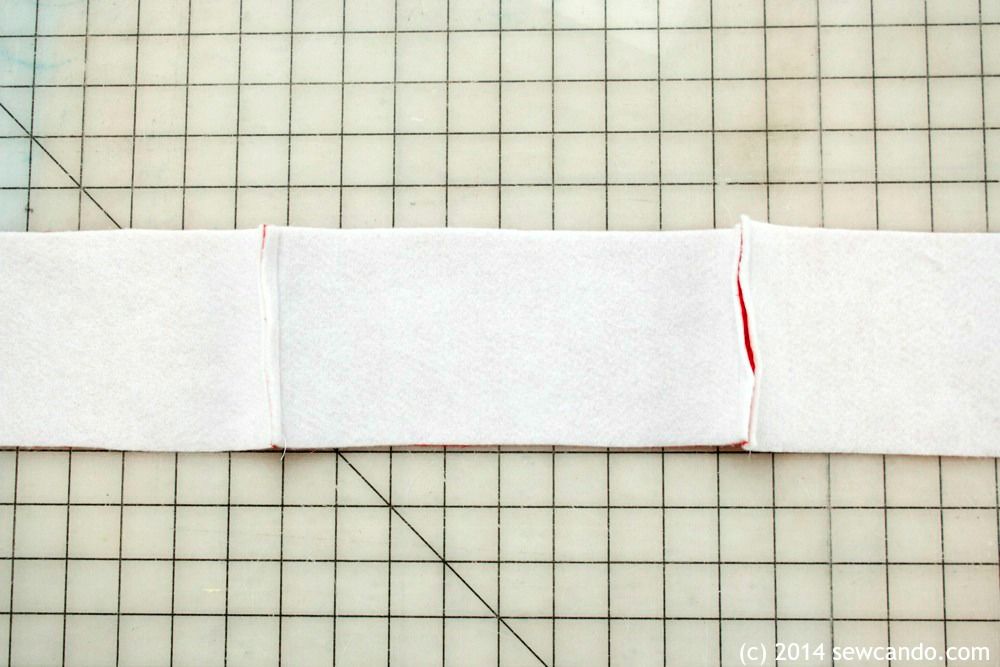
Stitch the lower side of the piece with the pocket along an open side of the bottom and repeat with the remaining sides, again starting & stopping 1/4 inch from either end. Leave a 3 inch gap for turning on that last bottom side.
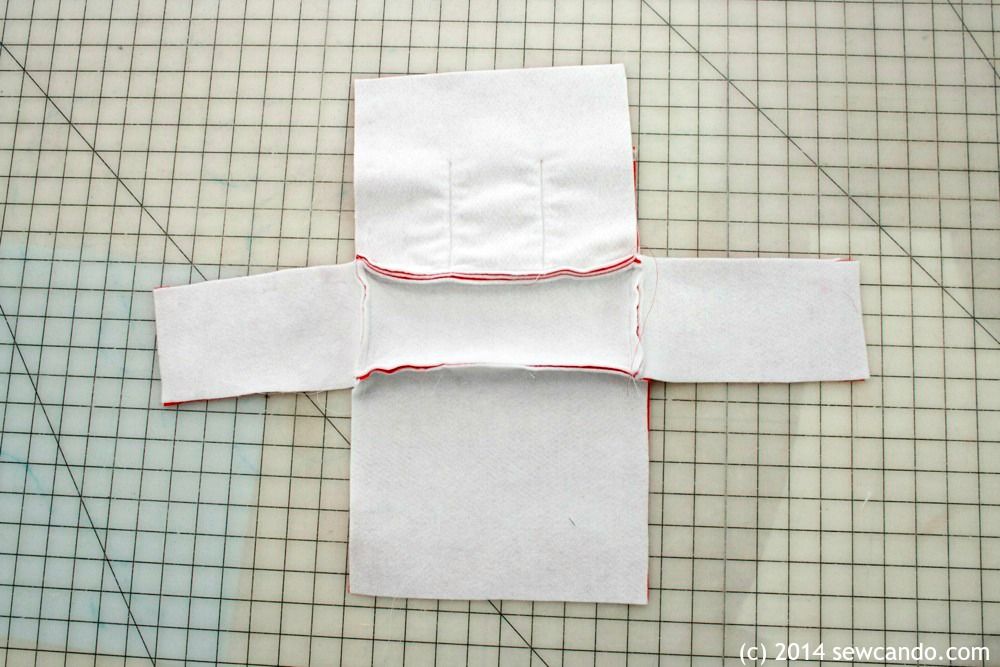
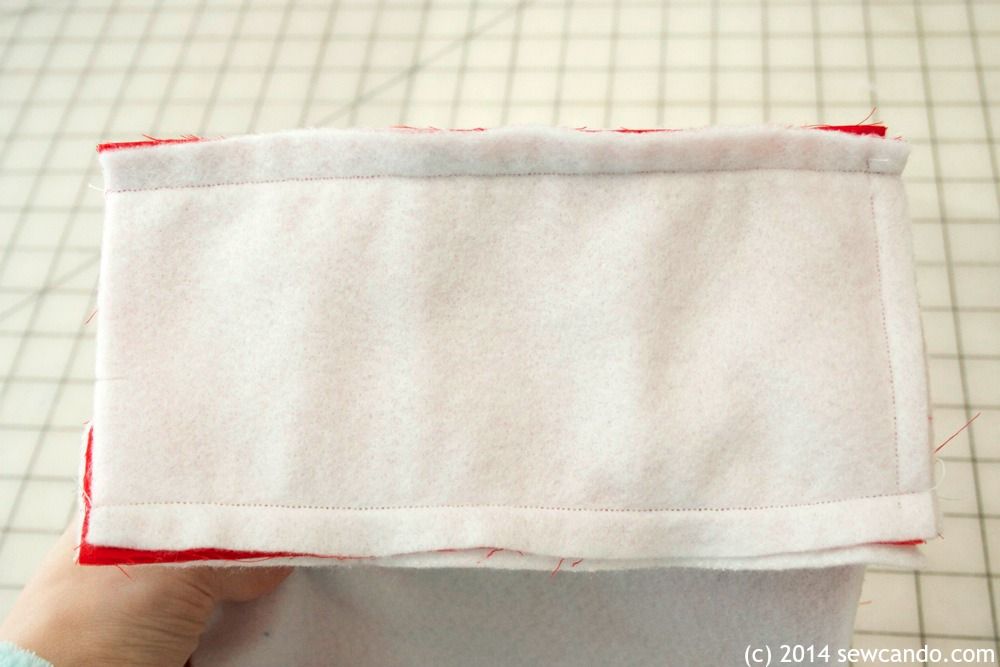
Pull together the side and main pieces, pin and then stitch together, but this time start and stop at the very ends.
Trim raw edges and corners down, close to the seams.
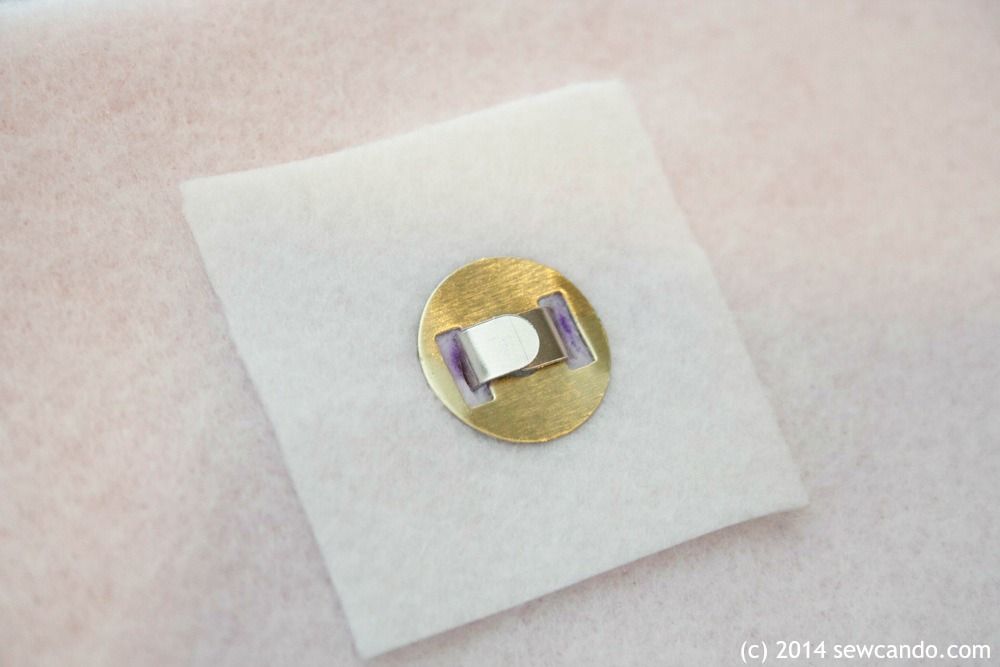
To add an inner magnetic snap, use the washer piece included with the snap to mark the prong placement on the front and back side of the bag lining. I centered them and made with a few inches below the top. Use a seam ripper or thread scissors to make small slits. Insert the snaps through the right sides and add a small piece of the ultra firm stabilizer around the back for added strength.
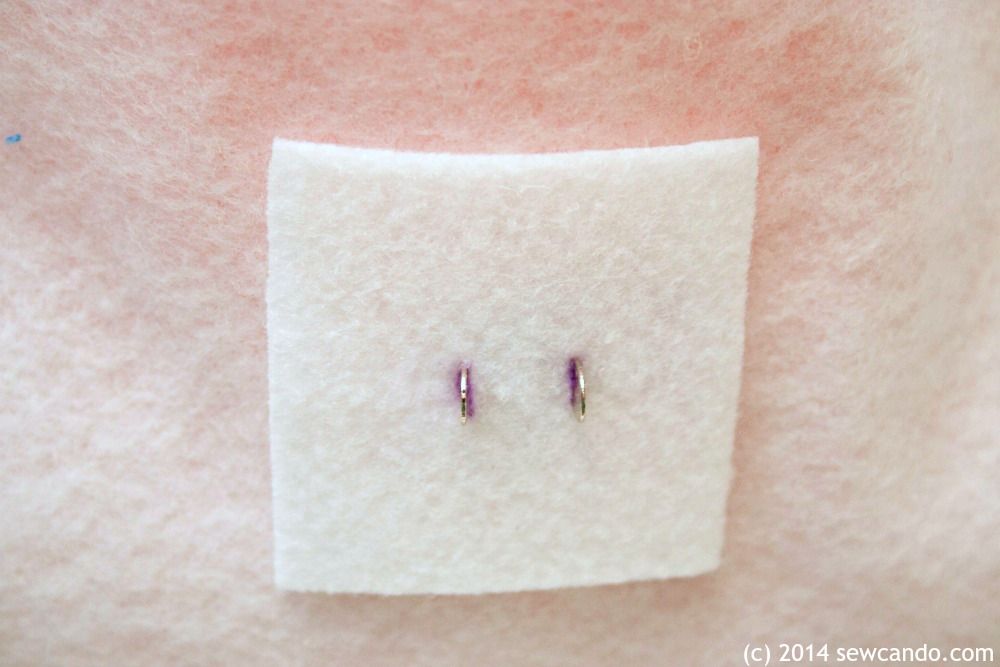
Slip on the washer and fold down the prongs.
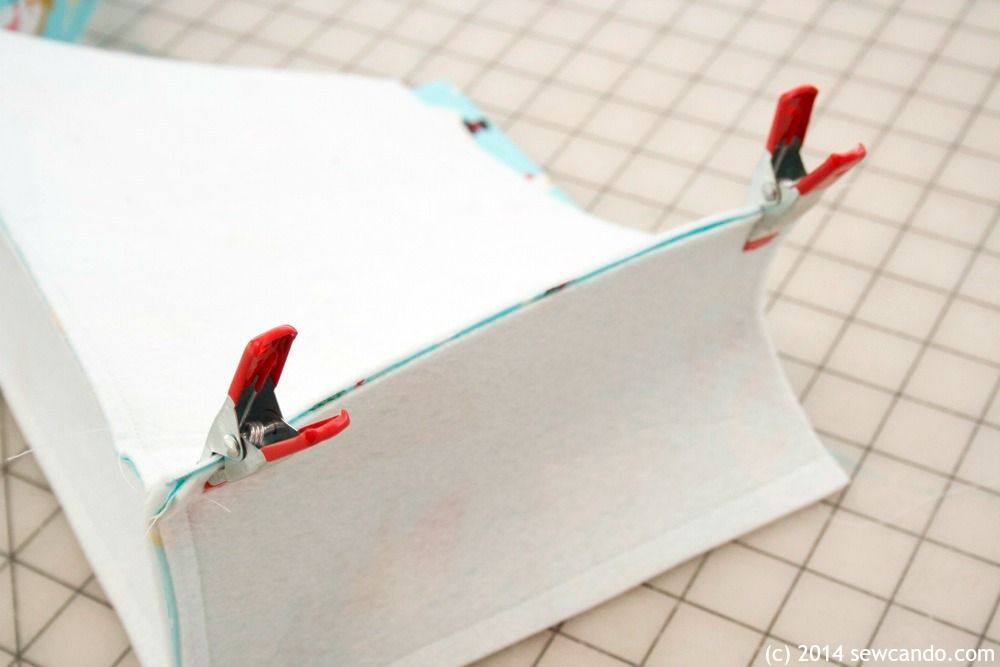
Repeat the sewing steps for the outer pieces, except don't leave a gap along the bottom edge. To avoid making loads of pin holes or shifting while sewing the stiff ultra firm stabilizer, I like to use small metal clips instead of pins. After completing all stitching, turn the outer bag right side out.
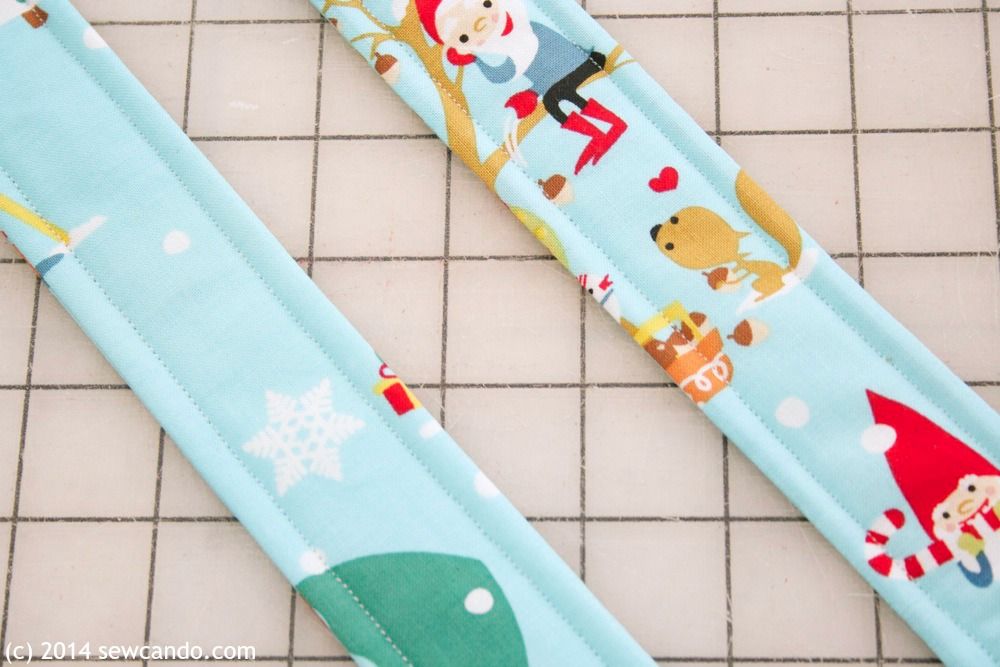
To do the handles, put right sides together and place them over a strip of the fleece. Stitch along the length on both sides and one end.

Turn right side out with the help of a knitting needle or pencil. Press gently & quickly with iron. The fleece will help keep things from getting too hot on the laminate coating. Topstitch along edges.
Place handle ends 1 1/2 inches from ends on either side and pin. Baste together.
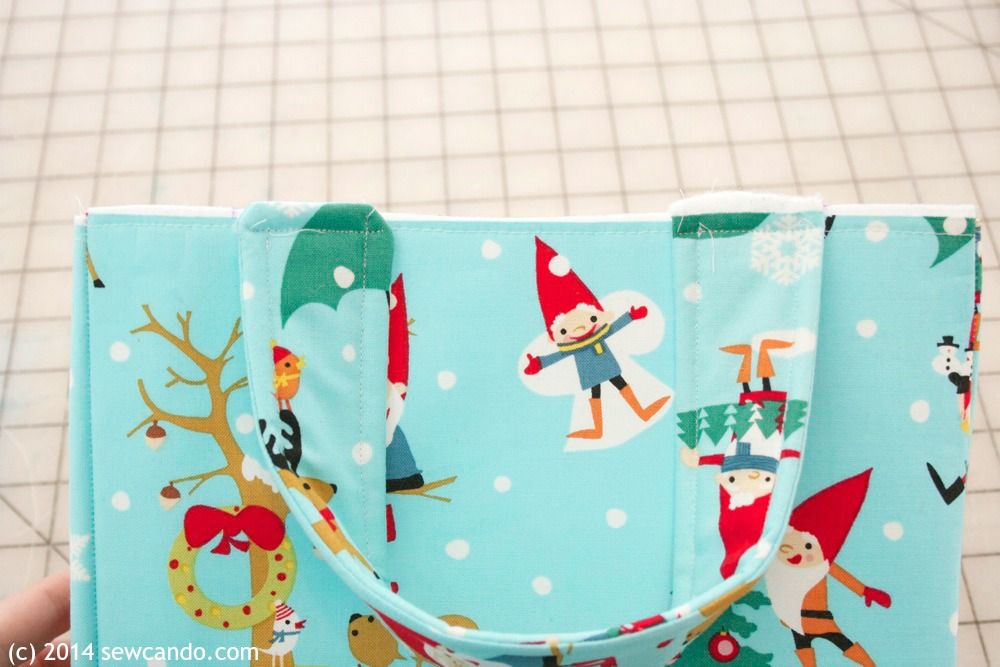
Insert outer bag into lining, right sides facing.

Tie some grosgrain ribbon in a bow on one handle and add a couple of hand stitches through the center to keep it from untying. Melt the cut edges of the ribbon with a lighter so they won't fray too.
Now this dainty bag is ready to tote around town this season:)

So cute! Nice tutorial!
ReplyDeleteI almost didn't do it, but then I thought I'm making the bag - why shouldn't everyone else get to as well:)
DeleteOh my, Cheryl!! This tote is adorable!! I LOVE that fabric too. :) Pinning and sharing!
ReplyDeleteGina
Thanks so much Gina!
DeleteI love this tote! This fabric is super-cute and perky for the holidays and I can picture a whole collection of these little bags in different colors, patterns, and prints throughout the year. Your design is stylish and practical all at the same time. Great job, Cheryl!
ReplyDeleteI used it out and about today and it worked great. I plan to make a few more in different styles & seasons to make a little handbag fashion show;)
DeleteThat is pretty cute! The fabric is adorable, but my daughters are the ones who would go absolutely crazy for it. =)
ReplyDeleteThanks Charity and I know what you mean - I can't tell if my kids like it more or I do!
Deleteso adorable!! thanks so much for sharing the free tutorial! I've pinned it and am sharing on my FB page today!
ReplyDeleteThanks so much Emily - the share is very appreciated too:)
DeleteHi Cheryl, I just discovered your blog while searching for a nice mitten pattern (going to make some for our school's giving tree). I'm sad that I hadn't found you earlier! I love everything I've read so far... Just wasted the whole morning browsing :) Definitely adding you to my reading list. Thanks for so much great content!
ReplyDeleteJane, thank you so much for the wonderful & kind words - that just makes my day to hear. I hope you enjoy checking things about and am glad to have you join me here!
DeleteI adore this. I am pinning for next year, so little time now, off to buy the fabric to add to my stash. x
ReplyDeleteAwesome to hear - Nothing like getting a jump start on the next year Louisa;)
DeleteLove this dainty handbag tote! The little pocket is so handy! Love the fabric too and appreciate your sharing the pattern and tute!
ReplyDeleteIt's pretty simple but really useful - I keep my phone in one, lip balms in another & my hand sanitizer in the third, so my bag is nice & organized now. I'd been eyeing this fabric last year so knew I had to grab some to use this year and now it's getting a daily workout.
DeleteThis is so cute - pinning for later. Love the gnomes!
ReplyDeleteThanks for the great tutorial! I made a bag for a Christmas gift using this method last night - ran into one small issue, which is that the dimensions for the pocket fabric/stabilizer aren't listed. I went with 10x10 for the fabric and 5x10 for the stabilizer, worked out well.
ReplyDeleteThanks for reminding me about that Kathleen - I've added that info. Would love to see your bag!
DeleteThanks! Can't post pics yet as it's a gift, but will link back after 12/25 :-D
DeleteI'll look forward to seeing it - Happy Holidays!
DeleteI love the tutorial except there are some things that are missing. I must have had to start over 4 times to figure it out!! Beautiful bag though.
ReplyDeleteyou know what, I am so sorry, I completely read the directions wrong!!! Not your fault!!
ReplyDelete