


Now let's see how to Deconstruct a Men's Dress Shirt into a Toddler Vest
It seems such a shame to throw away a perfectly good men's shirt just because it has a little stain or rip. Thankfully, there are tons of ways to reinvent a dress shirt - here is one just for the little man of the house. And don't they look so handsome all dressed up? Unfortunately, it's not always easy to find a vest for my toddler that's reasonably priced, so when the Mister ruined another dress shirt, a light bulb when off. Up-cycle! This tutorial isn't limited to dress shirts. You can use the same pattern for any vest you want: Cotton, Linen, Jersey, even a poly-silk Hawaiian print!
The provided pattern is a size 2T, but can be easily adjusted. Just be sure to make a test vest from muslin before you cut up that awesome dress shirt. To add length, extend the bottom edge of back and front piece 1 inch at a time. If you need even more length, add an inch to the shoulder seams. To add width, widen at the center back and front side seams 1 inch at a time. To make the vest smaller, simply reduce 1 inch at a time using the method previously mentioned.
Supplies
- Men's Dress Shirt
- Buttonhole Foot
- Pins, chalk or other marking tool, scissors, seam ripper, hand sewing needle & thread, iron
- Pattern
 |
| Click HERE for Front Pattern Piece (print in landscape format) |
 |
| Click HERE for Back Pattern Piece (print in landscape format) |
Step 1
Using a seam ripper, carefully detach collar from shirt.You will be taking out two rows of stitching.


Step 2
Before you bust out the shears, give the dress a quick press to eliminate wrinkles. Fold the dress shirt in half so that the fold is at center back. Cut out back pattern piece.
Step 3
To make the shirt front lay flat, you'll have to cut all the way up the back.. Try to position the front pattern piece so that one button will be located in the bottom third of the vest. If you can't get the buttons positioned the way you like, it's okay. You can redo the buttons later. If you have a pocket on the shirt, try to work it into the pattern. Before you cut, trace the front vest pattern on each side of the shirt so that they line up. Here's what your pieces should look like:

Step 4
Using a 1/2 inch seam allowance, sew front and back side seams right-sides together.


Step 5
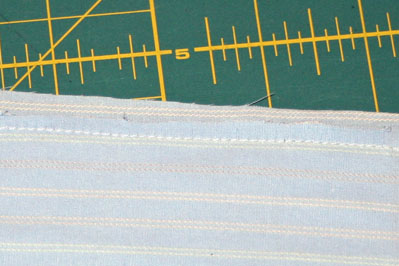
To hem the bottom of the of the vest, I like to sew a 1/2 inch basting stitch around the edge. This makes it easier and faster for me to iron because I just turn the fabric under along the basting stitch. Fold over a 1/2 of an inch and sew. Then, fold over another 1/2 inch and sew. You can go back and remove the basting stitch if you wish.

Step 6
To hem the arm holes, repeat the same method you used to hem the bottom of the vest. Except, instead of turning under 1/2 an inch, turn under 1/4 of an inch. Then, using a 1/2 seam, sew shoulder seams together. Finish the shoulder seam raw edges with a flat felt seam, just like you did on the side seams.

Step 7
Clip off the triangles located at the top and bottom of button panel. Turn under the neck line of the vest 1/4 an inch. Then turn under again 1/4 inch. You only need to do this from the buttons up 3 inches on each side. This is just to ensure that whatever the shirt collar doesn't cover will be hemmed.

Step 8
To create the buttonholes, determine where the existing buttons are located. If you were able to keep one button in the bottom third of the vest, you will need to add another buttonhole 2 inches higher. You'll also need two parallel buttons located 2 inches to the right. For a perfect fit, try fitting the vest on your child first and mark where the buttons would work best. If you have a wiggle worm, I've found bribery works. My son will do anything for a marshmallow. Also, you may have to reposition the buttons to get the vest to fit to your liking. I did, too. Use a button from the shirt with a Buttonhole Foot to make the perfect size hole. Use a seam ripper to open the buttonhole.

Step 10
Use your seam ripper to remove extra buttons from the dress shirt. Using your hand needle, sew the buttons on to correspond with the position of your buttonholes.
Step 11
To attach the collar, remove any remaining stitches so it may be opened. Find the center of the collar and match it up with the center back of your vest. Pin the collar on to the vest so that the raw edges of the vest are hidden inside the collar (about 1/4 an inch). Start in the middle and work your way down the neck line. To attach the collar, sew a narrow seam along the edge (of the collar).

Congrats! You are finished! This project could also be turned into a girl's dress by simply adding 8 to 10 inches to the middle length of the vest pattern and adding 3 or 4 more buttonhole rows. I hope you enjoyed creating this project and Happy Sewing!
Sarah's site is having a contest right now: upload a picture of an apron you've sewn - the one with the most votes will win a $50 gift certificate to use on sewing supplies!
For more details just click HERE.
Thanks for sharing today Sarah!

With so many tutorials reconstructing men's shirts, it's nice to see something new. Thanks for sharing this.
ReplyDeleteI agree Jenni! This is definitely a new take on things - I'm happy to have such a great guest sharing it!
Delete