
Today's guest is Isabel from byte-sized pieces. She's got TWO great treats for us, so twice as tasty!! Take it away Isabel:

Hey there, I'm Isabel from byte-sized pieces. My blog is mostly focused on my crafty endeavors, but I love to bake and make all kinds of sweets. Food is just a lot harder to photograph (especially since it tends to disappear quickly into hungry mouths), so often I won't even get a chance to snap a good pic before it's gone. I tried my best to capture the results this time. Today I'll show you some of my
favourite chocolate recipes, we'll make some Irish Treats and Marble Chocolates. They are both very easy and quick to make and are a great bring-along for parties. Needless to say, they're also delicious!
Both the Marble Chocolates and the Irish Treats follow the same basic idea for making chocolates. I hope they'll give you some ideas to try and experiment yourself. You can easily swap the alcohol in these with juices or flavored milk. Don't be afraid to replace ingredients you can't get or don't like with something else. Try out a few variations and see what you like best!
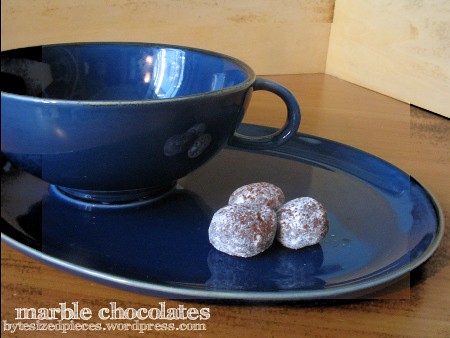
Marble Chocolates
(makes approx. 40 chocolates)
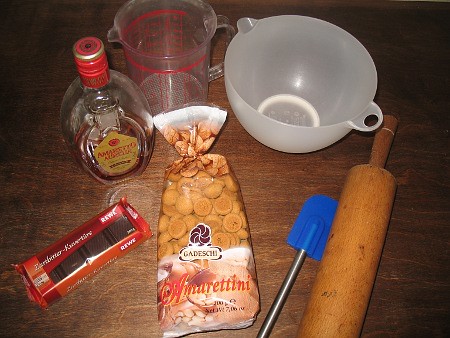
You will need:
- 150g amaretti
biscuits - 2.5 fl. oz. amaretto (almond liqueur)
- 7 oz. milk or semi-sweet chocolate
- 2 tbs. powdered sugar
- 1 tsp. dark cocoa powder
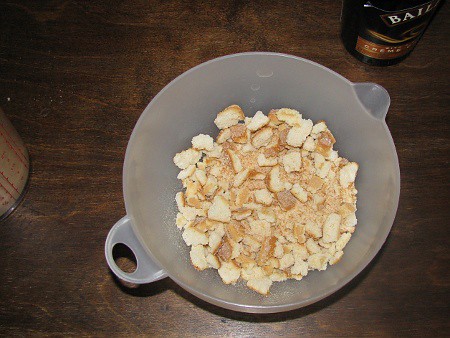
1. Crush amaretti biscuits with your rolling pin until you've got fine crumbles. You can try to do this while they're still in the packaging (be careful not to apply too much pressure, or you'll have biscuit
crumbs flying everywhere) or put the biscuits in a ziplock bag before crushing.
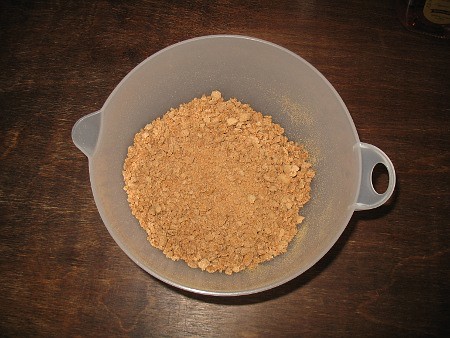
2. Mix the crushed amaretti with your amaretto, making sure to stir well so everything is wet. There should be no liquid left at the bottom of the bowl. Leave the mixture to soak for about fifteen minutes.
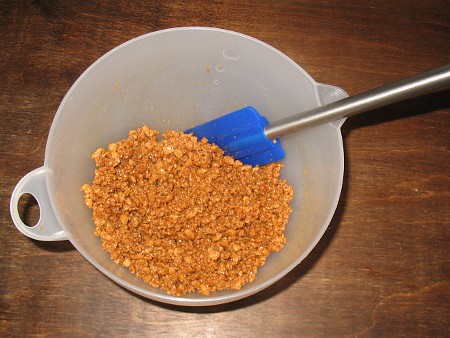
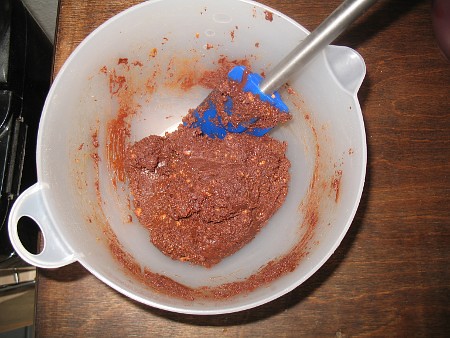
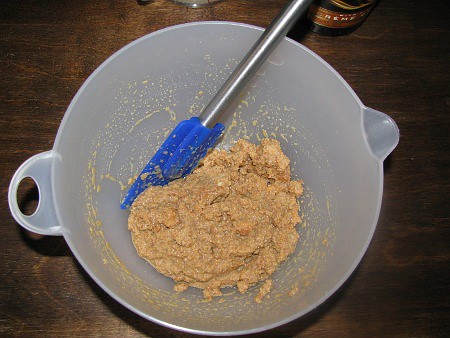
3. Meanwhile, chop the chocolate into bits and melt it. If you use the microwave, be sure to take out the bowl and stir thoroughly at least every thirty seconds. The last thing you want is burned chocolate in
your sweets. Working quickly, add the chocolate to your soaked biscuits and work everything through until it is well blended.
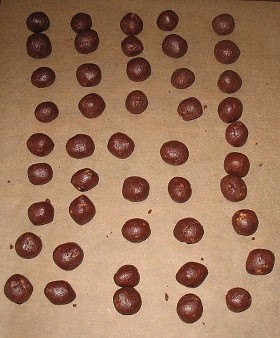
4. Use a teaspoon to scoop up a bit of "dough", roll it between your palms to form a small ball. Place it on a sheet of parchment paper. The size depends entirely on your preferences, I made mine a little
smaller than a walnut. If the dough doesn't hold it's shape, stick the whole mixture in the fridge for a couple of minutes to cool it down. Don't let it cool completely, though, or you'll have trouble forming
the chocolate. Place your marbles in the fridge until hard. (Might take thirty minutes to an hour. Go watch an episode of Buffy or do the laundry if you don't like to wait.)
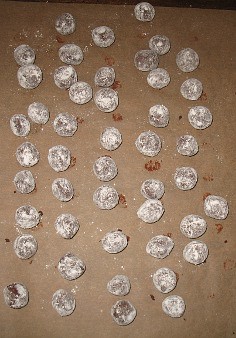
5. Get your chilled marbels out of the fridge and roll them around in the powdered sugar. I like to rub off the excess sugar, leaving them with a nice, even white coat.
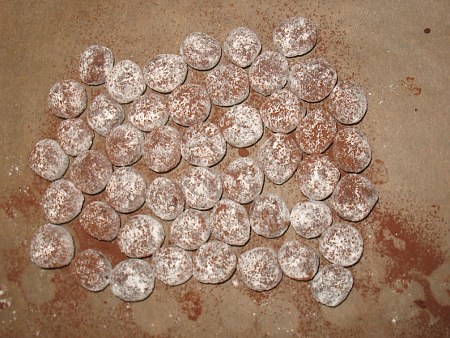
6. Finally, push the balls all together on your parchment paper and sift some dark cocoa powder over them. And you're done! Take a pretty picture, then serve immediately or store in an airtight container in the fridge for up to ten days.
That was the first recipe for chocolates. Pretty easy, huh? But there's more. Read on to find out how to make the Irish Treats.

Irish treats
(makes approx. 40 chocolates)
You will need:
- 1 pckg. lady fingers (about 100g or 12 biscuits)
- 5 fl. oz. irish cream liqueur
- 7 oz. dark chocolate
- 1/2 cup chopped walnuts
- 2 tbs. dark cocoa powder

1. Start with crushing your lady fingers into pieces. It's okay if there are a few bigger chunks left, just make sure most of them are crumbs.
2. Mix lady fingers with your irish cream liqueur. (I like the Caramel Baileys they sell here, but any similar liqueur will do.) Make sure everything is moist and no liquid is left at the bottom of your bowl.
Let sit for 15 minutes to soak.
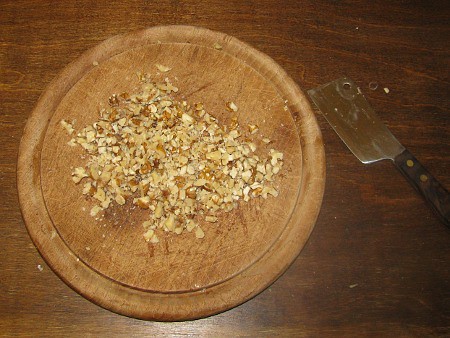
3. Chop your walnuts. The original recipe didn't even call for walnuts (I don't think they're very Irish) and I threw them in on a whim, because I had some left over. Everbody loved it! They gave the treats
the extra kick. The picture might give you an idea of how much walnuts I used.
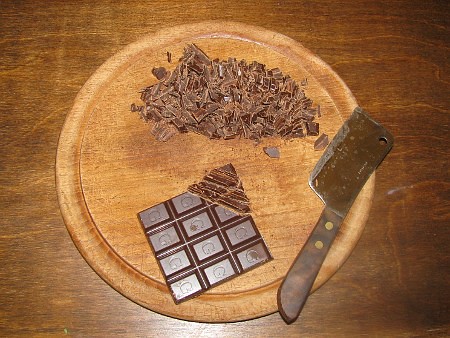
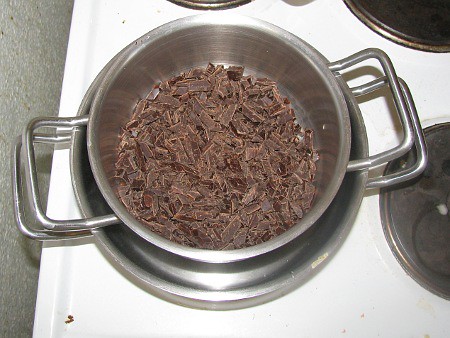
4. Chop your chocolate into pieces. I know y'all know how to chop chocolate. I just thought the picture was rather pretty. :) (And I just love showing off my little cleaver. Isn't it adorable?) Speaking
of chocolate, the quality of the chocolate will affect the taste of your treats. Always choose a chocolate you like to eat and don't always buy the cheapest brand, either. It's worth getting good chocolate to make these.
5. Melt down your chocolate. I don't own any fancy equipment and I'm not too fond of doing it in the microwave, so I simply stack two pots to melt down my chocolate. Put just enough water in the bigger pot that it reaches the bottom of the smaller one, but make sure that no water spills into the chocolate or you'll get clumps. As the water heats up the chocolate should melt down fairly quickly. You can use
the water later to cook pasta, make a cup of tea or water the flowers (after it's cooled down).
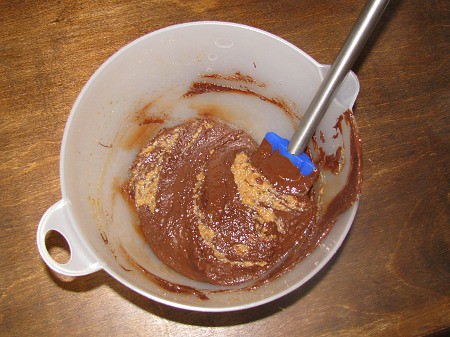
6. Mix your melted chocolate and chopped walnuts with the soaked lady fingers. Make sure everything is well blended and then pour onto a chopping board covered with parchment paper. Try to smooth it into a rectangle. I actually like to use a small baking pan covered with cling wrap. That way I'll only have to worry about smoothing down the top.
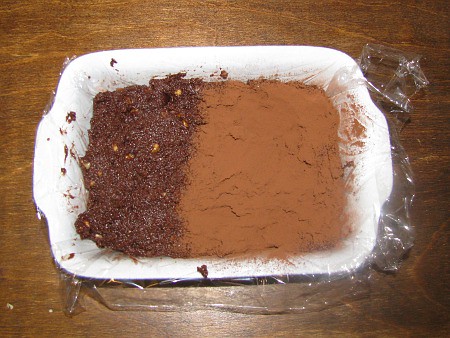
7. Once you've spread out your mixture cover it with a nice coat of sifted cocoa powder. Be generous. (On the left you can see the color of the "dough", on the right I've already sifted cocoa powder on it. Just in case you were wondering, this is an in-progress shot. It also looks a bit wonky because of the flash I had to use.) Place it in the fridge to harden for thirty minutes to an hour. (Actually, you can
leave them in there for longer. I once forgot about mine until two days later! Not that I recommend forgetting your chocolates...)
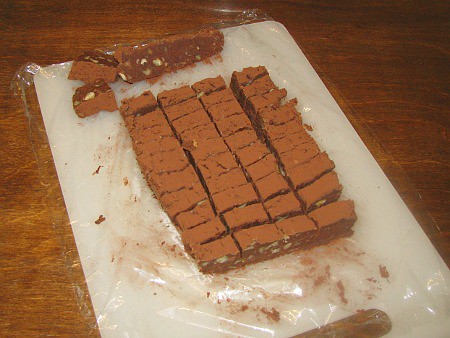
8. Take your chocolate mixture out of the fridge and place on a cutting board. I like to leave the saran warp underneath - makes for an easy cleanup. Get out a long, straight knife and cut your rectangle
into slices. Then cut across, leaving you with nice, even pieces. (Well, in theory. Mine never end up remotely even, but I totally think that adds charm!) Sift some cocoa powder in a bowl. Roll around your
treats in the bowl until covered well, tap off any extra. That's it! Serve immediately or store in an airtight container in the fridge for up to a week. I think they taste best chilled.
I hope you enjoyed making these chocolatey treats with me. Let me know if you have any questions. The things are all easily available here in Germany, but let me know if you have trouble with the ingredients or measurements. Tell me if you try one of these and thanks so much to Cheryl for letting me share these with you!
Thanks for these delicious how-to's Isabel. SO much tasty!!
Thanks for these delicious how-to's Isabel. SO much tasty!!

Wow those look great, is there anyway to omit the alcohol in the recipe and use something else?
ReplyDeleteI was just curious?
Thanks for those recipes and I can see why they do not stay around long enough to get a good pic of them!
Joyce
Yep! Isabel says "You can easily swap the alcohol in these with juices or flavored milk. Don't be afraid to replace ingredients you can't get or don't like with something else." so try whatever you like:)
ReplyDeleteThese both look wayyyyy too good!! I'm stopping over from NFF.
ReplyDeleteheather
Ooh, those marble balls look amazing. I might make those for work sometimes soon. Thanks!
ReplyDeleteThese look so utterly delicious, I wish I had all the ingredients at hand so I could make them right now!
ReplyDelete