Friday, December 14, 2018

Fluffy Yarn Reindeer Decoration Tutorial


I don't know about everyone else, but I'm definitely short on time this Christmas season. The days are counting down so fast and there's still loads to do.  This is when the Christmas crafts need to be pretty quick & easy.  Enter: The Fluffy Yarn Reindeer.


I'd seen yarn wrapped trees and a few reindeer here & there, but they all had a children's arts & crafts, rope-y look and even the slightest imperfection was really noticeable.  I wanted our reindeer to look a bit magical and what could be more fantastic than fluffy, shimmery antlers?


With his cherry red nose and snowy texture, he's an elegant Rudolph:


The best part? It's simple to make, doesn't require loads of materials and is inexpensive.  My craft win trifecta.  I didn't even have to leave the house because I had all the gear just sitting around in my craft hoard stash.  Which is good since I don't have time to run to the craft store all that often these days.


Materials:
- Papier mache reindeer (or tree/whatever shape you like)
- Skein of eyelash yarn 
- Tacky glue & hot glue
- Red shank button & satin ribbon
- Optional, but helpful, acrylic paint in the color of the yarn

The first part is optional, but key if you're a perfectionist type.  Add a bit of acrylic craft paint to the areas that are more challenging to cover.  This helps camouflage any gaps.  In this case it was the pointy ends of the antlers.  If I were doing this all over I'd probably paint the entire thing, but I was short on time so I just did a few choice spots.


I found starting at the antlers was the easiest with the yarn.  Dabbing a bit of glue along the upper area, I laid a bit of yarn over the antler tip and wound the yarn around about an inch down.  I did it a few more times to get the tip covered and then wound downward and moved to the other antler, loosely going upward and winding in more tight rows on the way back down.


Spread more of the tacky glue around the muzzle area


Then start winding from the antler area to around the mouth:


Wind around the area and then back around from the neck to the tip of the muzzle to get full coverage and then start looping it around the ears.  Dabs of hot glue here & there help keep the yarn from slipping off.


Work down the neck and then start wrapping around the center and then front to back to get the entire midsection covered well:


Then wrapping down one leg and adding a dab of hot glue at the hoof and cutting the yarn. I glued a new strand at the top of each of the remaining legs and wound down finishing them the same way.  Using a pin, I pulled loose some the the eyelash strands than got matted down with all the winding to fluff him up a bit.


For some added detailing, I ground off the shank of a cherry red button and hot glued it on for a nose.  Adding a nose was my daughter's idea and it really added the right touch.


I tied a satin ribbon bow around his neck and our fluffy fantasy reindeer was complete.


This little fella is ready to bring some wintery cheer to a special spot in our home.  Mantel, side table, table centerpiece, he can go anywhere!


Merry Christmas!


Sunday, December 9, 2018

Craftastic Monday Link Party


Hey there crafters!  Let's see all those holiday and seasonal projects, DIYs, handmade gifts and of course the yummy festive recipes!!

Last week I shared how to make a fully Decorated Pom Pom Mini Christmas Tree. Super easy for even a non-crafter to create and complete with mini glass ornaments:


We also have a winner for my giveaway for a $25 Gift Certificate to Heavenly Fabric Shop:

~~ Kayla K. ~~

~~~~~~~~
It's the biggest shopping time of the year!!  Get some FREE promotion for your blog or small business, by heading over to Facebook for the Sew Can Do Craftastic Mixer.  Support small and handmade by visiting a few new places too:
   

Share your blog or handmade/craft-related business or its Facebook page.  A new one posts every Sunday night on the Sew Can Do Facebook page at 5pm EST.
~~~~~~~~~~~~~~~~~~~
Now let's see those Craftastic Picks!

The Kittchen showed us how to make some yummy cinnamon roll pancakes:


Satsuma Designs shared this charming clothespin ballerina ornament:


Abbotts At Home created this cute red truck Christmas centerpiece:


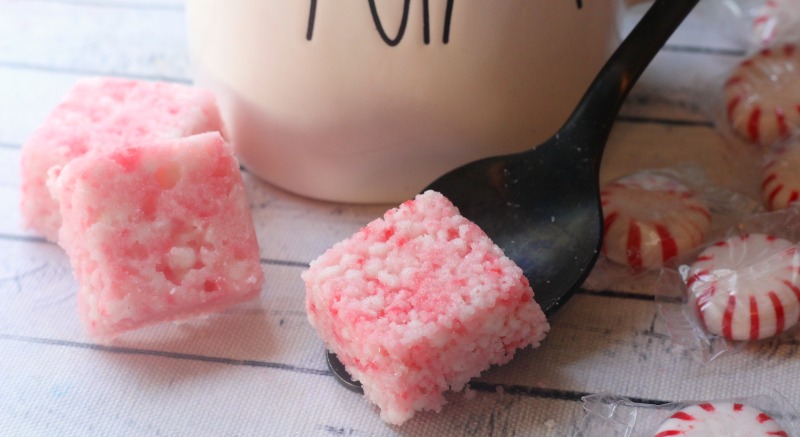
Busy Being Jennifer shared how to make these tasty peppermint sugar cubes:


Annemarie's Haakblog gave us a tutorial for making these cute crochet Christmas trees:


If you're one of this week's features, be sure to grab my Featured On button over on my Buttons Page to share the good news. 

 
Want a Chance to 
Be Featured Next Week?  

Link back to the party somewhere on your blog.
I can't feature your post if you don't share the party.  
  
I also feature these projects on Sew Can Do's Craftastic Picks Pinterest board 
AND share each of them on Twitter too for even MORE exposure for YOUR blog!

Follow me there to see more great projects (and see if yours is one of them)!   

On Twitter: 
On Pinterest: Sew Can Do

Ready to link up your crafty creations?
 
Party rules are simple: 
  • As long as it's crafty, and made by you, it's Craftastic (no links to shops, link parties or other people's work).  Add the link to your specific post. Product reviews, plagiarized or sponsored posts for random items will be immediately deleted.  
  • Grab my party button & put it on your post, party page or blog somewhere.  If you want the chance to be featured, this is key.  The button code can be found HERE.
  • Check out some of the other fabulous links and share some crafty comment love.  We all love getting comments!!


    An InLinkz Link-up
   

Wednesday, December 5, 2018

DIY Decorated Pom Pom Christmas Tree


It's the Christmas season!  Time to get festive with the DIYs.  This year I don't have tons of free time to get elaborate, but it doesn't mean we can't sneak in some handmade goodies for the holiday.  Today's project is an easy one that can be used over and over in new ways: a Decorated Pom Pom Mini Christmas Tree.


I'd seen pom pom trees before, but never any that were actually decorated, so I set out to make one that would have all the elements of a full size tree, but in miniature:


Much more fun than just the usual basic pom poms!


Materials:
- Styrofoam cone
- Green pom poms
- Low temp hot glue & glue gun
- Ball head pins
- Glass bubble ball charms
- Angel flat back/Christmas star button
- Green felt
- Mini wired tinsel

I got my foam cone & pom poms at Hobby Lobby.  Two bags of medium pom poms was just enough for a 12 inch high cone.


Making the tree is pretty simple.  Using low temp hot glue is key to keep it from melting the styrofoam base.  Add a good amount and start adding pom poms along the bottom:


For the next row, nestle the pom poms in between the previous row. They'll be nice and compact to guarantee none of the white base will show.  Repeat all the way to the top.


At the tip add 3 pom poms to finish.  I cut a circle of green felt for the bottom to fully hide the foam and glue it on.  Now the tree is ready to decorate!


You could use buttons or charms or any type, but since I wanted this tree to look like a mini version of the real thing, I used these fabulous glass bubble ball charms from my shop. They look just like real ornaments and add just enough bling. 


I did a mix of the crystal filled and the mini star filled charms.


To attach them, I used green ball headed pins.  These are perfect for making sure the charms stay in place and the green tops blend right in with the tree.  Just poke the pins into the foam.  SO easy!!


I also added an angel flat back as my tree topper:


And swirled some mini tinsel I had in my stash to give it a finishing touch.


Since the pins aren't permanent, it can be a different tree every year.  I did another religious-themed version with some delicate ribbon and these different Virgin Mary charms with Mary & Baby Jesus and a trumpeting angel button from the same set the top:


I also decorated a little bottle brush tree using my mini star filled charms by taking a few earring hooks from my jewelry making supplies to use as ornament hooks.  


The earring hooks make it easy to hang them on this style of tree and have an authentic look.  


I put a Christmas star button to the top & it was a cute addition to my mini trees:


These mini trees are great for table tops, mantles or anywhere that needs a little festive decoration.  A bit of Christmas tree fun for any size space!


Sunday, December 2, 2018

December's Here & So Is the Craftastic Monday Link Party!


Happy December crafty friends!  We're officially in Christmas countdown mode.  Advent & Hanukkah have started, so we're full on into the holiday season.  Let's see all those seasonal projects, DIYs, handmade gifts and of course the yummy festive recipes!!


Last week I shared the cozy and easy to sew Funny Dots Cuddle Suit I made for our littlest one:


And my review of the awesome Brightech LED Magnifier Lamp:


My giveaway for a $25 Gift Certificate to Heavenly Fabric Shop is ending soon too!  Lots of great Christmas crafting & gift options to be had, so check them out.  Enter HERE.


~~~~~~~~
It's the biggest shopping time of the year!!  Get some FREE promotion for your blog or small business, by heading over to Facebook for the Sew Can Do Craftastic Mixer.  Support small and handmade by visiting a few new places too:
   

Share your blog or handmade/craft-related business or its Facebook page.  A new one posts every Sunday night on the Sew Can Do Facebook page at 5pm EST.
~~~~~~~~~~~~~~~~~~~
Now let's see those Craftastic Picks!

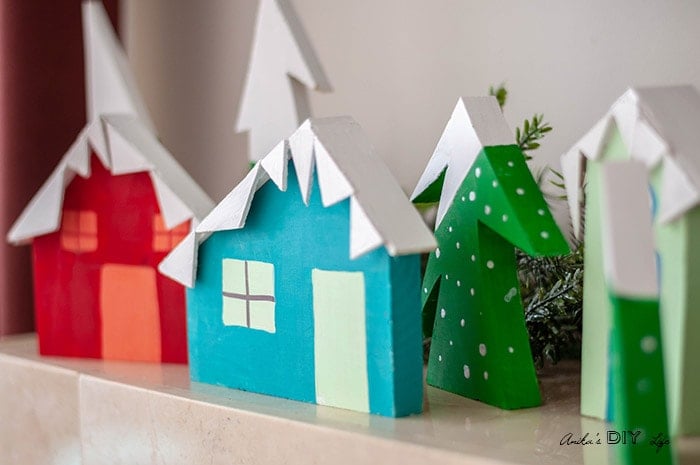
Anika's DIY Life showed us how to create a beautiful Christmas village with wood scraps.  I just LOVE this! 


Sparkle Living shared this great ornament based Christmas countdown feature.  A fun alternative to the usual Advent calendar:


The Scrap Shoppe created this free Peace on Earth cut file that can be used to make all sorts of great things, like this beautiful felt tote:


White House Crafts gave a DIY tutorial and free template for these fun pom pom reindeer ornaments:


If you're one of this week's features, be sure to grab my Featured On button over on my Buttons Page to share the good news. 

 
Want a Chance to 
Be Featured Next Week?  

Link back to the party somewhere on your blog.
I can't feature your post if you don't share the party.  
  
I also feature these projects on Sew Can Do's Craftastic Picks Pinterest board 
AND share each of them on Twitter too for even MORE exposure for YOUR blog!

Follow me there to see more great projects (and see if yours is one of them)!   

On Twitter: 
On Pinterest: Sew Can Do

Ready to link up your crafty creations?
 
Party rules are simple: 
  • As long as it's crafty, and made by you, it's Craftastic (no links to shops, link parties or other people's work).  Add the link to your specific post. Product reviews, plagiarized or sponsored posts for random items will be immediately deleted.  
  • Grab my party button & put it on your post, party page or blog somewhere.  If you want the chance to be featured, this is key.  The button code can be found HERE.
  • Check out some of the other fabulous links and share some crafty comment love.  We all love getting comments!!


    An InLinkz Link-up
   

LinkWithin

Related Posts with Thumbnails