


- Package of white chocolate wafer melts
- 1/2 cup corn syrup
- 1/2 cup cornstarch
- Flat sugar cookies
- Cookie/fondant cutters (circle, oval/egg, triangle/carrot)
- Rolling pin, butter knife, small paintbrush
- Gel food coloring
- Optional decorations: edible pearl dust, rainbow Twizzlers, pearlized gum balls
To make the easy-to-sculpt modeling chocolate (aka candy clay), melt one bag of chocolate melts in a Pyrex container in the microwave according to package instructions (usually 1 minute on half power).

It may not look like it's completely melted, but if you stir well it will get smooth. Fold in 1/2 cup of corn syrup until it starts to come together like a dough ball, then spread out about 1/2in thick on cling wrap covered cookie sheet and cover with more cling wrap.
Let it sit for at least 3 hours to set, then knead with hands until soft like play dough. Now you're ready to get decorating! Separate modeling chocolate and make the various colors with a drop or two of the coloring gel. I did some red, blue, yellow, black, lime green, tan and peach. Sprinkle some cornstarch onto a smooth work surface and roll out to start modeling.

To make Glinda's crown I used a pointy shaped cutter (a carrot) and then pressed indentations with my paintbrush handle. After layering several rows, I brushed it with pearl dust to give it some shimmer and finished it with a pearlized gum ball.


The matching wand was just white circle cut background with rolled out wand of tan and pink shimmered up to make a good witch cookie pair:

To make my Theodora & Wicked Witch, I used an egg shaped cutter for the faces:

And cut out hat shapes with my butter knife, using a toothpick to add some detail:

The Wizard & his sidekick Finley's hats were also knife cut, but with some rolled pieces added to build them up and a swish of pearl dust to accent them:

Emerald City Witch Evanora's apple was a circle I indented a bit at the top & bottom and added a little rolled stem. To get the mottled look of her magic necklace I mixed a bit of the green & black together to marble it and then cut out an oval. Pearl dust on the chain and the enchantment is complete:

My absolute favorite look was the little China Doll.


Then cutting another little white oval face and putting them together made her complete.

To make a pretty poppy flower I just cut out two circles and pinched them in the center and waved them up a bit. Rolling a few tiny black circles added the center detail and a few brush strokes of shimmer for a little magic:

And for Oz's hot air balloon, I cut up some red & yellow Twizzlers into thin strands,
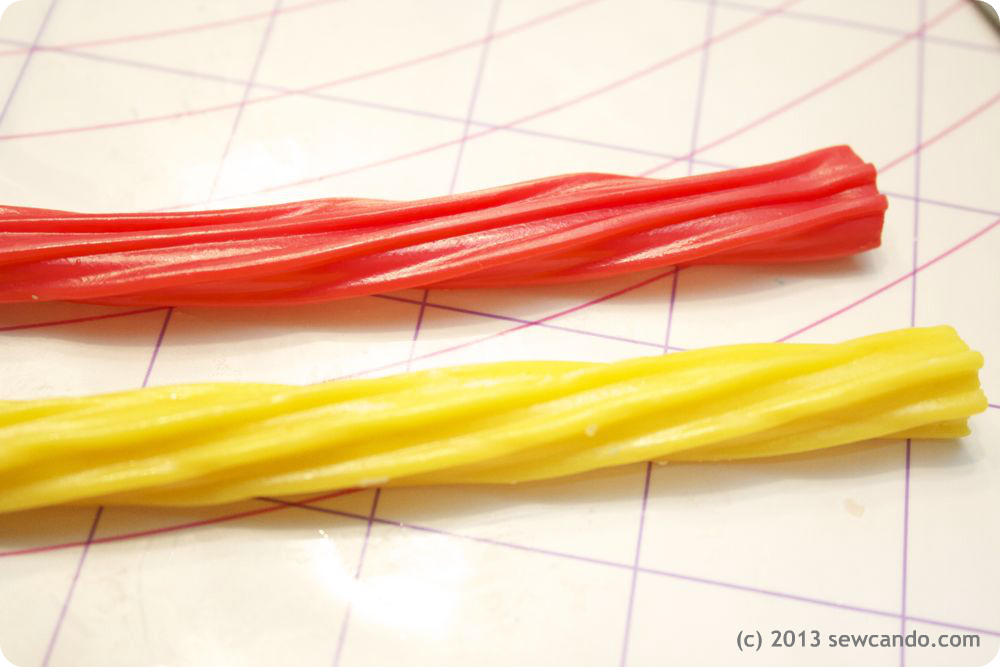
then bent those into stripes & waves and pressed them into place on the balloon:

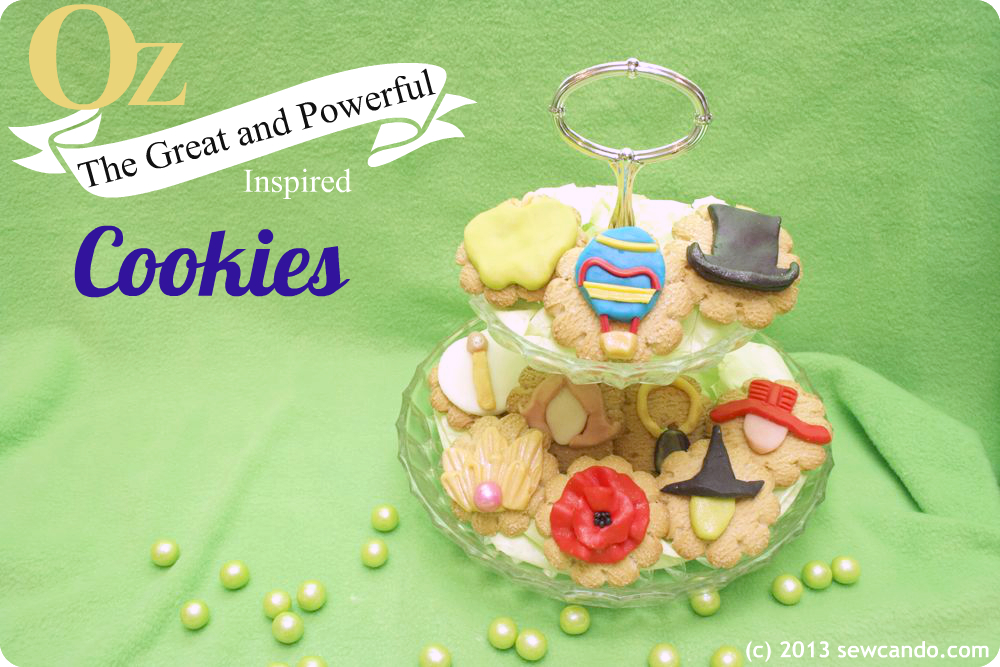
Our family really enjoyed watching this and the kids could not wait to dig into the cookie characters and take a little edible adventure into Oz. It definitely makes for a more magical snack!
Oz the Great and Powerful Blue Ray Combo Pack is out now & there's a Pinterest Sweepstakes too. Find out more on:

This is a sponsored post written for Disney and Blueprint Social, for which I received compensation. The opinions are entirely my own, based on my own experience. For my complete disclosure policy, click here.
And you can find more fun Oz-themed projects to inspire you here: