Showing posts with label Labels. Show all posts

Wednesday, February 22, 2017

Wunderlabel Review & $100 GC for Labels Giveaway!


Whether you sew for profit or for yourself, having custom labels really gives a beautiful finish to the things you make.  Today I'm showing how some sweet new labels have kicked my recent projects up a notch AND give you a chance to win $100's worth of labels for yourself!! 

Wunderlabel.com contacted me & asked if I'd like to try out some new custom labels from their shop.  I'd had custom labels made for my Etsy shop before, but never any that were for Sew Can Do, so this seemed perfect.  


Wunderlabel.com offers all sorts of label options - practically anything you can imagine for a label.  Printed and woven fabric labels in literally any size and style, custom logo labels, laundry & size labels, hang tags, stickers - even printed ribbon. All kinds of colors (& sparkly text!).  If you have a crafty business, they've got everything you need to brand your items like a pro at a reasonable price.   Plus, if you don't have or want a logo, there are cute symbols you can add to whatever text you want - including these crafty designs:


Text & Symbol Label options at Wunderlabel.com

I chose some custom woven labels in the 2 inch square size, unfolded.  I wanted something I could put on most of my sewn projects - clothing, bags, etc.  It took about 2 weeks - a lot shorter than the turnaround time I'd experienced elsewhere.  I wasn't sure how much detail they could do with my logo, especially given the tiny little holes in the yellow button of it, but they amazed me with a super clear woven image:    


They're washable and no fray.  The quality was nicer than I'd had with labels I'd bought previously too.  I've been sewing them onto lots of my projects, including my sewing machine cover:


I even added a little heat fusible on the back to iron some onto things like my dress form's apron:


Since they were large, I also folded and pressed some, envelope-style, 


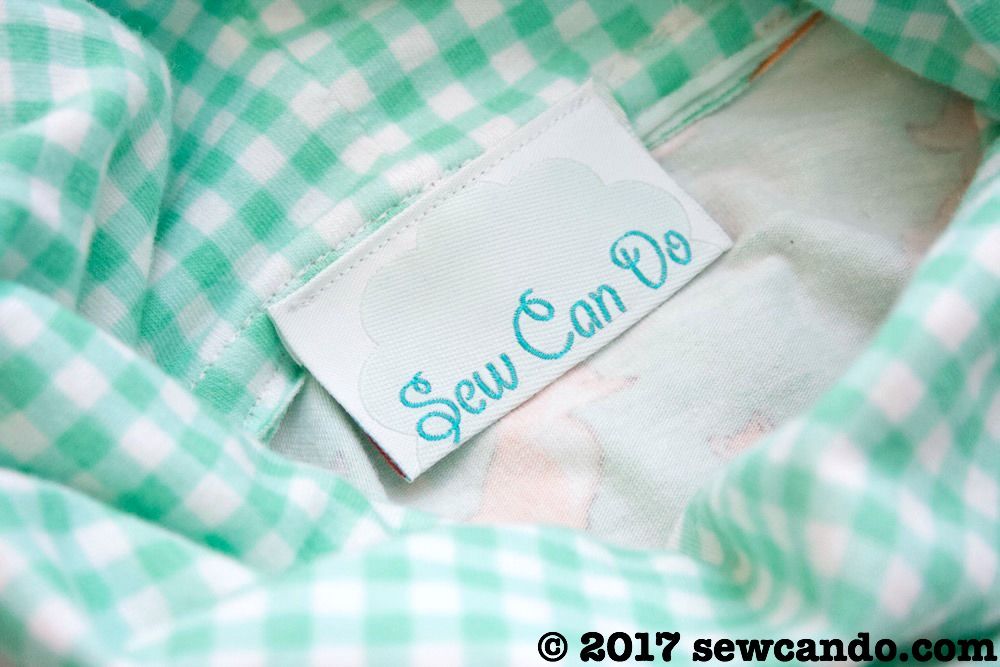
so they'd be perfect for smaller applications like the inside of this kid's top.  I love how I everything I make is a little more polished with my logo tag on it:


A key feature that really stood out to me was that their standard woven label minimum is just 25 pieces for $16.  Most label sources require minimums in the hundreds or crazy high prices for small amounts.  This is much more affordable and feasible for home sewers, those that do small volumes or just aren't sure exactly what they want and don't want to invest a lot upfront.  And if you want a custom logo label, those start at just 100 pieces.  Last time I had custom labels done for my shop I had to order 300, so this is a really handy option.    
  
Now, how about a chance to create the labels of your dreams?


Giveaway prize is a
$100 Gift Certificate to Wunderlabel.com!

a Rafflecopter giveaway


I was not financially compensated for this post.  I received custom labels from Wunderlabel.com, to review & use as I desired. The opinions are completely my own based on my experience.   For my complete disclosure policy, click here.
SaveSaveSaveSaveSaveSaveSaveSaveSaveSaveSaveSaveSaveSaveSaveSave
SaveSave

Friday, November 29, 2013

I Made It! Using Tags & Labels To Show Your Handmade Pride


Do you sign your handmade items?  I don't mean actually sign them, but adding a label or tag to show it was made by hand.  If you put in effort, time & love, to make something, doesn't it deserves to get a shout out when finished?  Here are a bunch of great ways to share that handmade pride:

Go the twill tape label route.  These Zakka and Sweet Heart styles have multiple designs by the yard:


They can be used to tie up a handmade gift or cut apart to make separate labels like this:


Embellish It.  These Wooden Handmade tags come in a 10 piece assortment (I'd already used two on projects by the time I took this).  I like that you can just glue them in place or use the holes to stitch them on.  


I stitched one onto my favorite bag (from my original free Off To Market pattern).  Even though it's been 2 years since I made it, I still hear compliments on it when I'm carrying it, so it feels good being able to add a handmade tag for a little extra polish.  


And there's the added bonus that the bird version was a perfect match to the fabric design:


Sassy Stitched Labels.  If you're feeling more cheeky, these fabulous labels from Sublime Stitching express the true sentiment behind some of those more pain-in-the-backside projects:


Metal Accents.  Go all sleek with some metal handmade tags & zipper pulls for a more upmarket finish:


There are even functional ways to add the handmade message, like this handmade snap fastener:


The custom label route is always an option too, but it can get pretty expensive per piece or require a lot bigger quantities than these options.  In my personal crafting I like to use different labels on a pair of kid's pajamas than I would on a swanky handbag or a gift to a sassy friend, so it's nice to have a lot of options that are budget friendly so I can keep a bunch of styles in my stash.

An artist wouldn't leave a painting unsigned to get lumped in with machine made prints, so why shouldn't a crafter add a little handmade flourish too?


I was not financially compensated for this post.  The opinions are completely my own based on my experiences.   I selected several items from my Sponsor, Wholeport, to review and am also sharing information on products from other sources I happen to like.  For my complete disclosure policy, click here. 

Tuesday, January 15, 2013

Tutorial Time: Let's Make Lip Balm!!


Today I thought I'd share a super easy & very rewarding how-to: Making Your Own Lip Balm.  With all the chilly air right now it's incredibly practical and so simple you can even make it with the kids.

I'm going to do the quickie method here.  I know there are more complicated ways to blend various ingredients, colors, etc., but for basic lip balm this is the way to go.  So let's do this!!


You'll Need:
- 2 oz. Lip balm base
- 1/4 tsp flavor oil
- Pyrex measuring cup
- Knife
- Stickers/Labels
- 10 Lip balm tubes & caps
- Optional: sweetener oil*

You can find the base, flavor oil & tubes at a lot of online shops.  Brambleberry is a good quality source with reasonable prices.  *Sweetener oil is available, but not necessary.  I don't want to give my 3yr old any ideas about eating lip balm, so I leave that out.

Start by scooping the base into the Pyrex cup.  It could be soft like this or more solid depending on the base - either way is ok since it'll get liquified when hot:


Microwaving for 30 seconds at a time on low/defrost setting (3-4) until melted.  In my microwave that was about 45 seconds total.  You don't want it to be boiling.


Stir until smooth, then pour in flavor oil and mix until blended.


Working quickly, pour the liquid balm into the tubes.  It helps to have them all lined up before you start so you can zip from one to another on down the line.  If it starts to firm up while pouring, just warm it up for a few seconds in the microwave.  Wipe away any drips and let cool.  Once hardened, if seem uneven at the top, just turn up slightly and then use a knife to smooth them over & add cap.


To make things look really nice, add some pretty labels.  My newest sponsor, Wholeport, carries these cool masking tape sticker sets that are ideal for this.  And FYI- they're also a totally fabulous source for other crafty goodies - including lip balm tubes.


I just stick a circle on the cap tops and write out the flavor on the strips for a nice custom look.


I think it makes them so much cuter -


Wasn't that easy?  It literally takes minutes and is way better than just buying the boring store varieties.  Even though I just made some, I totally feel like making more, which is always the sign of a good project to me;)

I'm also sharing this with my FAVE LINK PARTIES.
Click HERE to check them out!

Tuesday, November 25, 2008

A Gift for a Girly Girl

Having two boys I don't have much opportunity to make things for little girls and there are tons of great, girly fabrics and patterns out there, so I was very excited to make something for our niece's upcoming birthday. I have to say it's turned out just as I'd hoped and I really love it. I hope she does too.

I used a dimple dot minky fabric and lined the inside of the dress with chocolate brown so it would look nice & finished. I'm such a fan of kimono wrap clothing for kids - it always looks so simple, but stylish and is really easy to get on & off. She can wear the pieces together or separately, so there are several looks. The pattern (New Look 6333) is great because it included the pants, a shirt, as well as short & long sleeved versions of the dress and covered 6mos-4yrs so you can get a lot of looks out of one pattern. I recently snagged some amazingly cuddly fabric (softer than this minky if that's even possible) that I'm going to use to make a top & pant version for my littlest guy. I can't wait to start that, so hopefully I'll be posting those items soon too.


I used an awesome referral from my friend MadeByRae to get these custom labels made for this and my other gift creations. I've always had a thing for hedgehogs, so I came up with the design and MommieMadeIt did a phenomenal job making these for me. It makes me feel so professional and really puts the finishing touch on a handmade gift.

LinkWithin

Related Posts with Thumbnails