

I was looking for some fun Easter craft supplies for my shop and discovered, tiered tray sets. I decided to do one up myself to create some finished project photos and now I am ADDICTED!
Even if you're not super crafty, or great with decorating or short on space, these sets make it easy to create something lovely for the season (or everyday).

You simply paint and assemble the various dimensional elements and then place them with some little plants & knick knacks for a pretty themed look you can put anywhere. I'd seen a few dimensional sets like these and just assumed you had to be some incredible detail painter to make them look good, but the secret is that they come unassembled so you don't have to worry about staying in the lines.
I researched a bit and discovered that there were a few videos on YouTube showing some ways to paint them, but not very many and almost no blog posts. I like to do a quick read and then jump in to a craft rather than watch 1/2hr long videos that have a lot of filler chatter, so I thought I'd put together all the best tips I learned (and some of my own) for doing tiered tray decorations.
Tiered Tray Set Painting Tricks
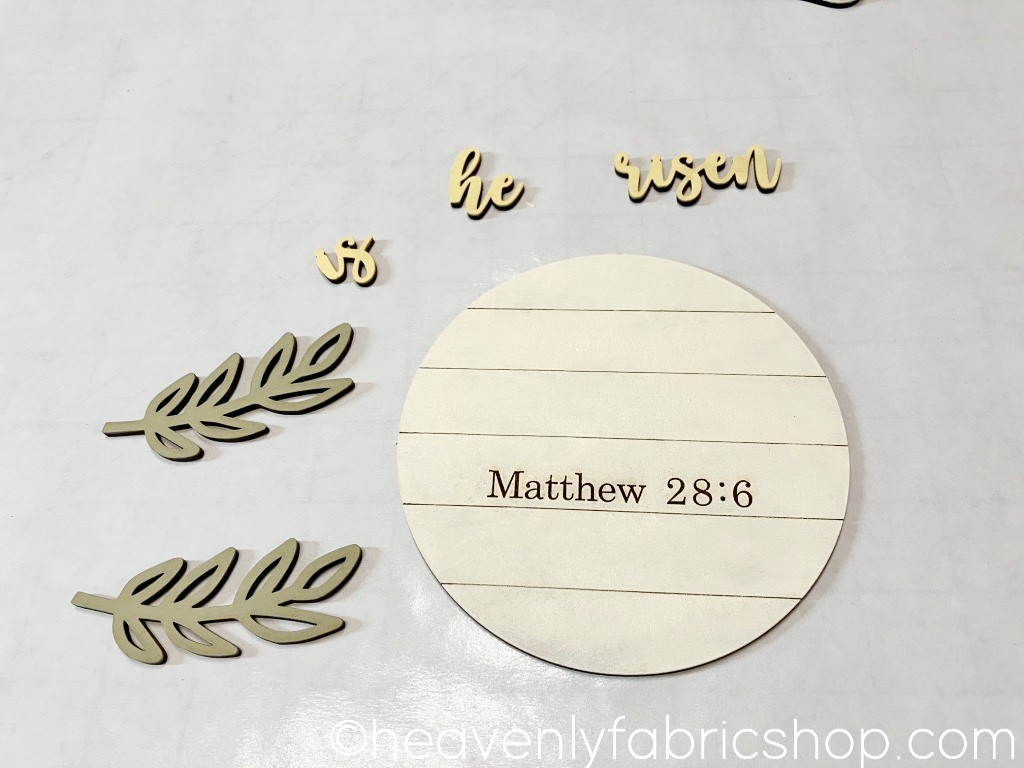
This particular set is for Easter & has these layered elements:

It's recommended to plan out your color scheme and group the elements by color to be efficient. For mine I chose an off-white, sage green, butter yellow and chocolate brown:

I did all my painting on freezer paper (shiny side up) to keep things clean and no-stick.

The trick to painting without brushstrokes is to use foam makeup wedges and dab the paint on. Super easy and drip-free too:

To make it simple to do the little pieces like letters, put a strip of painter's tape sticky side up and put the pieces on it. Then you can hold the tape rather than the pieces. Less mess and easier to coat:

I gave all the light colored pieces a double coat of paint. The trick to keeping the cut-in lettering nice & contrasting (unpainted) like the Matthew 28:6 here is to dab gently with very little paint in those areas and use a wet toothpick to remove any paint that does get in the grooves:
To smooth the finish, go over them gently with a high (fine) grit sandpaper. If you want to distress them, sand a little harder.

When dry, I grouped all my elements back together:

The detail pieces for mine were self adhesive so I just peeled the backing paper off and stuck them in place:

You can seal them with a poly spray if you want - especially if using for outdoors. I strung the banner elements on some baker's twine:
As someone who's free time is in short supply, I really loved how quick these came together and how fun it was to style them up. I also like that they don't take up a ton of storage space out of season, unlike wreaths and bigger decorations.
I used mine on a tiered tray, but they are also ideal to use in wreaths or turn into magnets. I could also see adding some pretty ribbon loops and hanging them to make an Easter tree too.

I bought this lovely tray off Amazon here. The quality is really nice for the price and it also came with the wood bead garland. My faux plants and flowers were all from Hobby Lobby. I know I can easily use them in other ways when it comes time to change the decor. You can find this set and others like it in my shop here. Happy decorating!

0 COMMENTS:
Post a Comment
Getting your comments brightens my day. I'd love if you left one:)