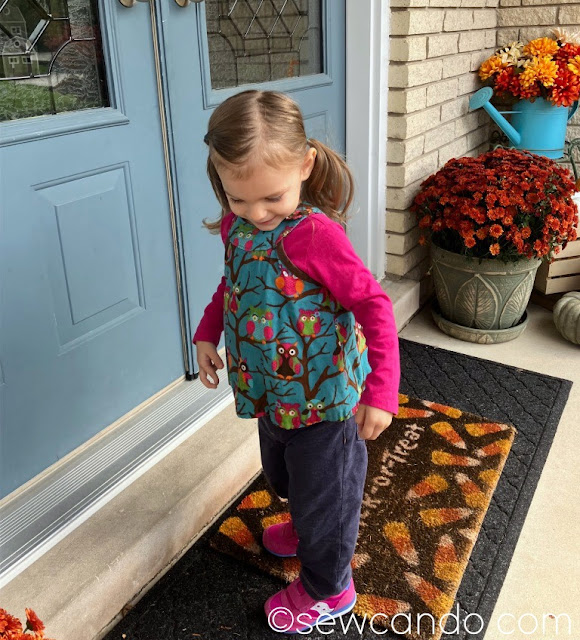
Everything old is new again, or so the saying goes, right? It blows my mind that it's been over 10yrs since I originally made this little pattern.
I was still relatively new to sewing back then and did this as a jumper-style dress for my then new baby girl. Who is now thirteen. Wow does time fly! The roomy fit worked well from about 3mos-12mos as a little dress. I saved it for my next daughter who was born in 2020. I found it at the back of the closet recently and I was thrilled to discover it also make a perfect toddler top for her size now 2T body, so this really is a grow-with-me DIY item!
It's a relatively simple sew - just 4 pieces to cut out. Totally easy to whip up in an hour or two with basic sewing skills. Not bad for an item that can be worn for 2yrs and then passed down to another kid!
You can use any woven fabric and it only takes 1/2yd. I had this adorable corduroy:
And it looks so cute from the front and the back:
Just excuse the ancient, so-so quality step-by-step photos (taken before I had a decent camera or any photo editing skills). They're basic, but I think they do the general how-to job.
Materials:
- 1/2yd woven fabric (cotton, corduroy, etc)
- 1/2yd double fold bias tape
- 2 snaps
Notions: Iron, pins, tailor's marking pen or chalk
Printing the Pattern: Print at 100% (actual size) no scaling.
Cutting: Front body (1 cut on fold), Back body (1 cut on fold), Front collar (cut 2), Back collar (cut 2)
Mark all pieces with front and back notations and start & stop points of collar. Put the front and back pieces together with right sides facing and pin along side seams. Stitch with a 3/8in seam allowance. To easily keep the raw edges from fraying I trim them with pinking shears, but you could serge them too. Press seams open.
Encase the raw edge of the underarms in bias tape and stitch in place:
With right sides facing, put together the flat short end of a front and a back piece of the collar and stitch together. Do the same with the remaining pair and press seams open. When complete, that seam will go over one shoulder and the open end will go over the other.
Pin those collars together (again right sides facing) and stitch together starting on the outside at one marking point and stitching all along the inside and back over the other end as shown:
Trim the seam allowance down and clip around the curves to make it easy to turn right side out. Press the flat. Then take the raw opening edges and press those under, toward the wrong side of the collar fabric. Insert the raw edge neckline of the top's front and back in the collar openings and pin together. Top stitch close to the folded edge, making sure you sandwich the top between the collar's inside and outside edges. Go all the way around the entire collar edge to attach everything together on the front and the back.
Fold the hem up 1/2in and fold again and stitch in place. Attach the snaps and the shoulder opening. Back then I didn't have a snap press so I did the old hammer & setting tool:
It's been really rewarding seeing this little item get a second life and for so long. It seemed like a good one to pass onto others here so they can enjoy making some too! Happy sewing:)


Aww! Owl sweet ;)
ReplyDeleteAlexandra
EyeLoveKnots.com
OnRockwoodLane.com