
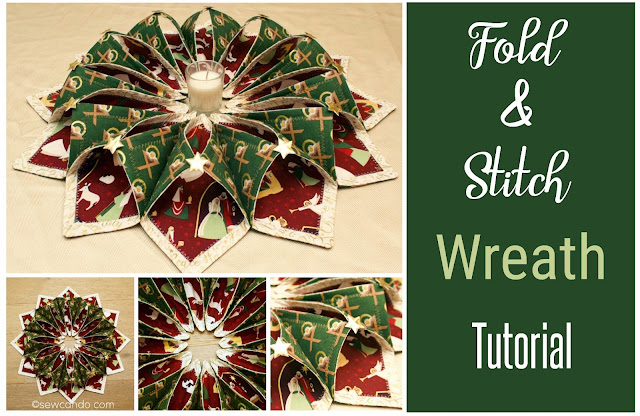
Make a gorgeous fabric wreath for the holidays to celebrate the season! This versatile project is simple to sew and can be used in two ways. As a hanging wreath:

Or a stunning table centerpiece:

The folds of the fabric squares create a stunning dimensional effect:

Despite looking intricate and complicated to make, it has a surprisingly simple construction. This wreath is made up of stabilized squares of fabric stitched together. If you can sew basic squares, you can make it! It's the ideal project for showcasing a number of fabrics, but doesn't uses much yardage.
My version was inspired by a wreath image of the original Fold'n Stitch Wreath Pattern by Poorhouse Quilt Designs (which includes templates, extra tips & tricks, plus hanging sleeve option, available here). Mine is done slightly differently, with a smaller center, and uses fusible fleece/batting to stabilize it. I'm sharing how I made it right here!
Materials:
- 3/4yd cotton backing fabric (I used Oh Holy Night Manger Green)
- 3/4yd cotton front fabric (I used Oh Holy Night Words Linen)
- 1/2yd cotton topper fabric (I used Oh Holy Night Nativity Mulberry)
- 1/2 yd fusible fleece
- 1/2 yd paper backed fusible
Optional: 1/2 yd of cut-apart trim or 12 beads or buttons for detailing. I used this Metallic Gold Cutout Star Trim
- Rotary cutter/shears, ruler/yard stick, iron, zipper foot, pins, clips, disappearing marker, hand sewing needle
If you're using non-directional fabric prints, you can use your ruler to measure the width & lengths across the fabrics easily to cut squares quickly. If you're using directional prints like ours, they'll need to be cut as diamonds so the designs will face outward around the entire wreath. We find making card stock squares in each of the square sizes first makes this much easier since precision is key.

Cut the following fabric squares:
- (12) 7 inch squares from backing fabric
- (12) 7 inch squares from front fabric
- (12) 5 inch squares from topper fabric
- (12) 6 inch squares from fusible fleece or batting

Center the fusible fleece on the wrong side of each backing fabric square and fuse with iron:

Take front fabric squares and, using a ruler and rotary cutter, cut a 2 inch "X" at the center of each square.

With right sides facing (and print directions matching), stitch front and backing fabrics together, using a 1/2 inch seam allowance so that the stitching borders the fusible fleece:

Trim down seam allowance and clip corners and then pull right side out through the X opening on the fronts, making sure all corners are nicely pointed and press flat.

Lay paper backed fusible paper side down on ironing surface. Place topper fabric squares on top, right side up. Lay a piece of parchment paper on top and iron according to product directions to adhere the fusible to the wrong sides of the topper squares. When cool, peel the paper backing off and cut out topper squares

Center each topper square right side up over each front side of fabric square, matching directions of fabric prints, and fuse together with iron, using a press cloth between fabrics and iron:

Stitch around topper edge with a decorative stitch, like a wide zig-zag, that goes off the edge of the topper fabric:

Repeat with all twelve squares:

From the top point of each square, measure 1 inch over to the right and mark. From the right side point measure down 3 inches and mark. Place ruler along marking points and draw a line. This will be the stitch line to attach them all together in a moment:

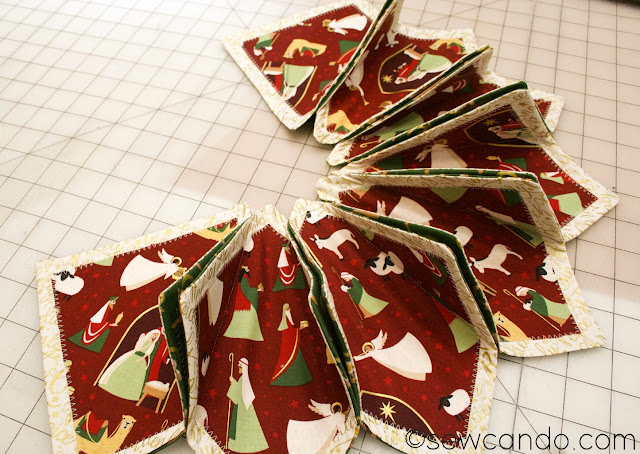
Take two squares and place them together with back sides facing, matching print directions and clip on right side as shown. Stitch down along the marked line of the top square. Open so both attached squares are facing up and repeat this step with the 2nd of the attached squares now being the top one and adding a new one underneath it (back sides facing) and repeating stitching along the marked line of the top one.
Repeat this square-by-square and you will see the wreath start to form. Stitch the last square to the first to close the wreath.
Bring the side points of each individual square together and hand stitch to create the dimensional shape:

The next step is optional, but adds a beautiful detail. Attach beads, buttons or trim on top of each point around the wreath by hand sewing - or - do what we did and use something like this metallic gold cut out star trim and cut 12 individual shapes apart:

Then hot glue each one to the wreath:

How to display it is up to you. Add a votive or single taper candle to create a beautiful centerpiece or sew on a metal sawtooth hanger or ribbon loop or other mounting method to hang it as a lovely wreath.


Lovely! I saw this same project on a YouTube channel last month and thought to myself that if someone could source out holiday themed pot holders (at discount stores) for the squares, this could also be done without a lot of sewing.
ReplyDeleteThanks Rochelle. If you were using really thin ones it might be possible, but the finished item would be quite heavy to hang up with 12 of them. That's why I used fusible fleece in mine - it adds a little "puff" but not much bulk or weight.
DeleteBeautiful. Fabulous job!
ReplyDeleteYour wreath is gorgeous! Thank you for sharing it with us at Party In Your PJ's - you are being featured on my blog Tuesday evening.
ReplyDeleteThank you Ann & thanks so much for the feature. I'm looking forward to it!
DeleteWow, that is so pretty. It really does look complicated!
ReplyDeleteThanks Julie and that's what I said when I first saw one, then when I looked at it for a while I realized it was incredibly simple. The creator of these is a genius!!
DeleteThis is beautiful! Thank you for sharing the specific details.
ReplyDelete~Lisa, Visiting from Grammy's Grid Christmas, #50
È molto bello. L'ho realizzato e mi è piaciuto molto venuto bene. Grazie per questo utilissimo tutorial
ReplyDeleteThank your for this fantastic tutorial. Your wreath is so beautiful, I love the Nativity fabrics. I am going to look for some so I can make one of these for my grandson, who loves the Nativity.
ReplyDelete