
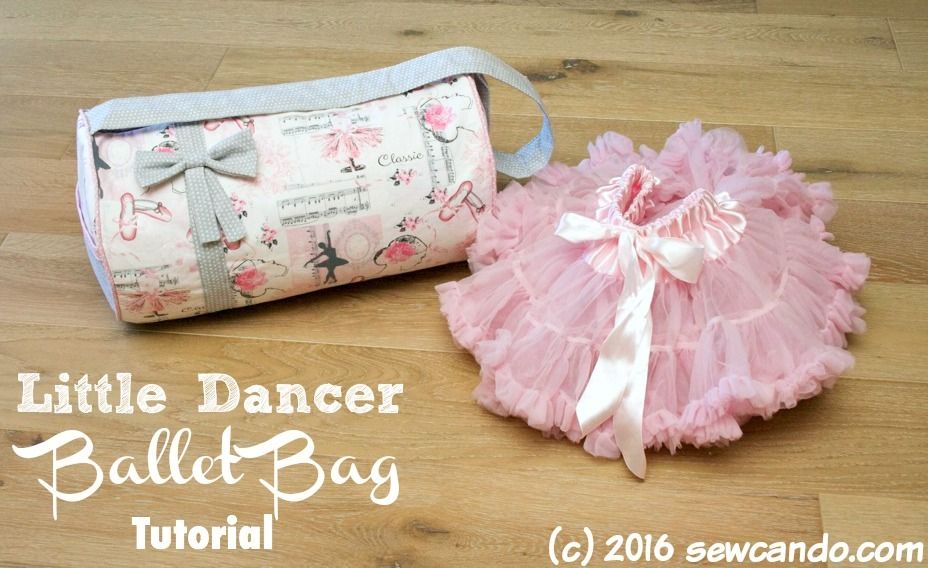
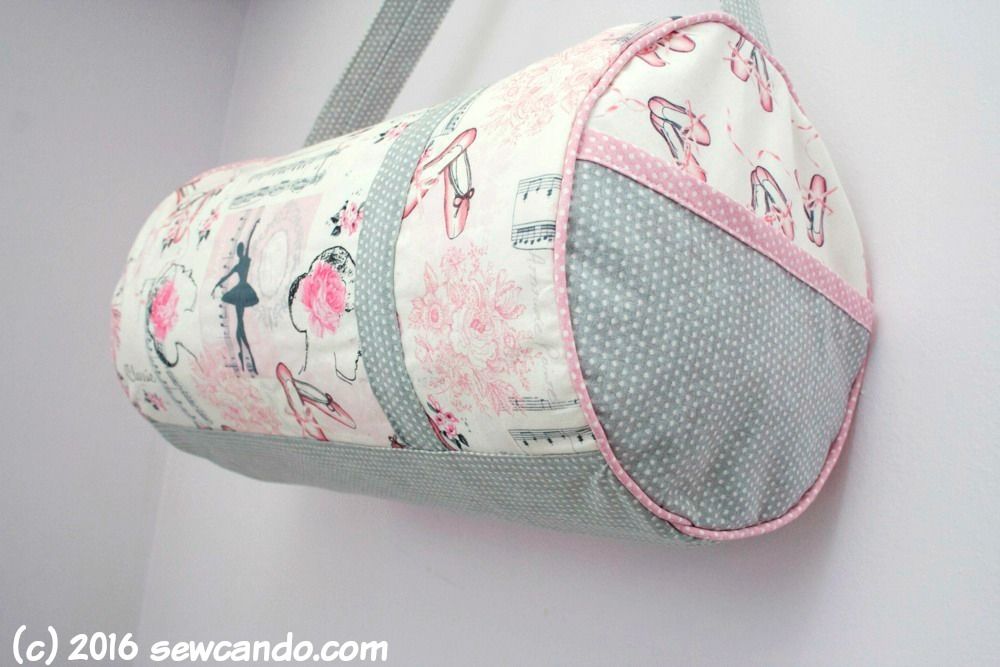
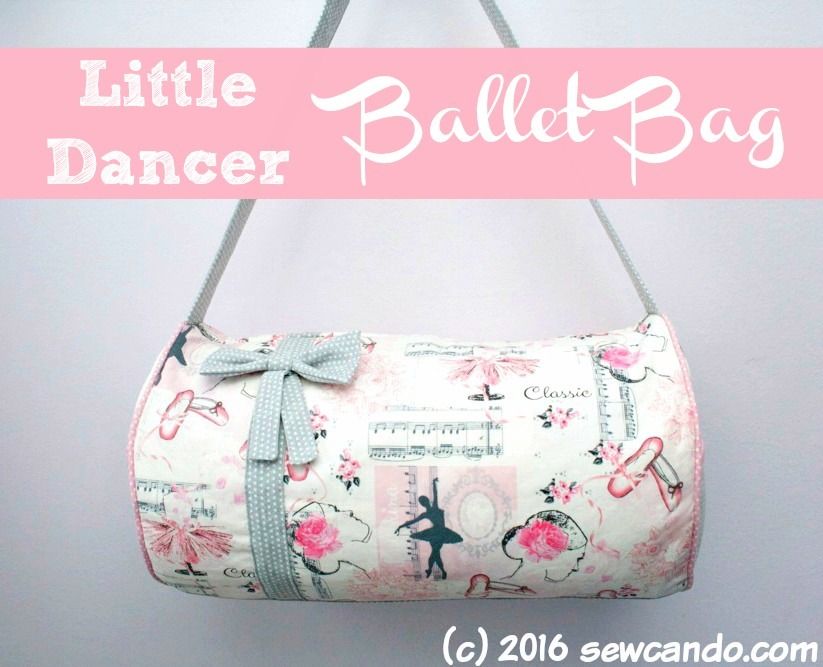
Let's wrap up April with two fun things: A new tutorial AND a new fabric giveaway!! Today's tutorial is for a sweet bag that's designed to get feet moving: the Little Dancer Ballet Bag.
The handy 16 inch wide by 9 inch high size provides plenty of room for dance slippers, tutus and anything else a ballerina could need.
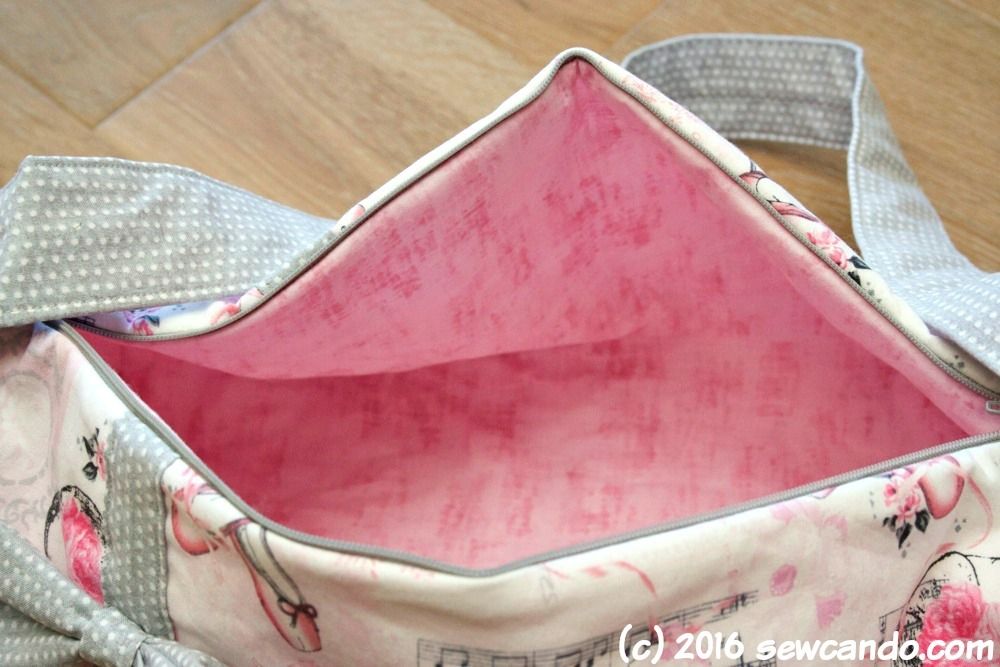
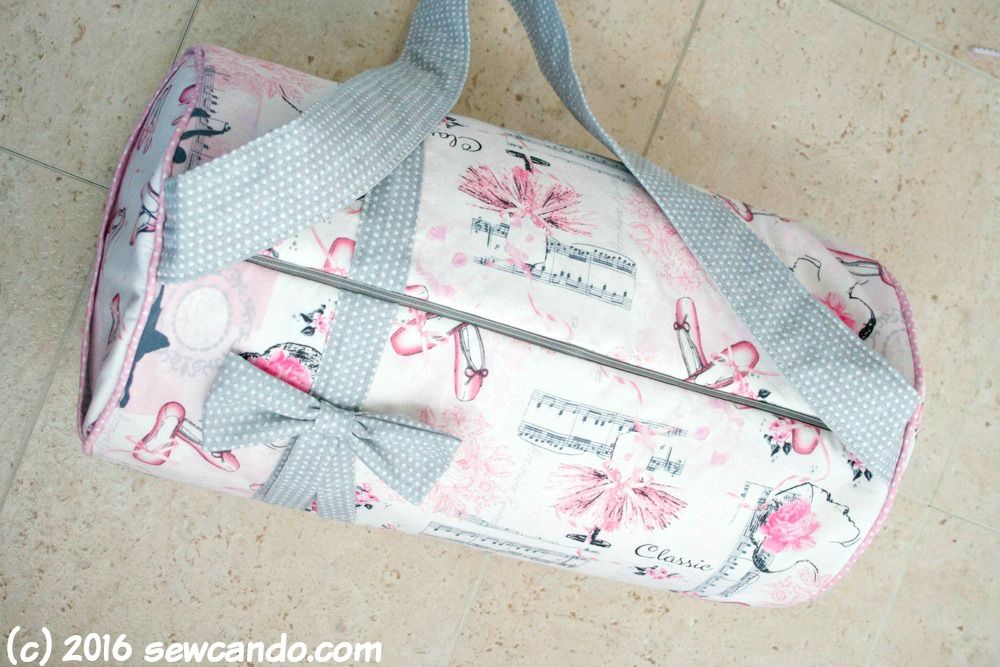
Full length zipper top closure means it's easy to get everything in and out of the bag:
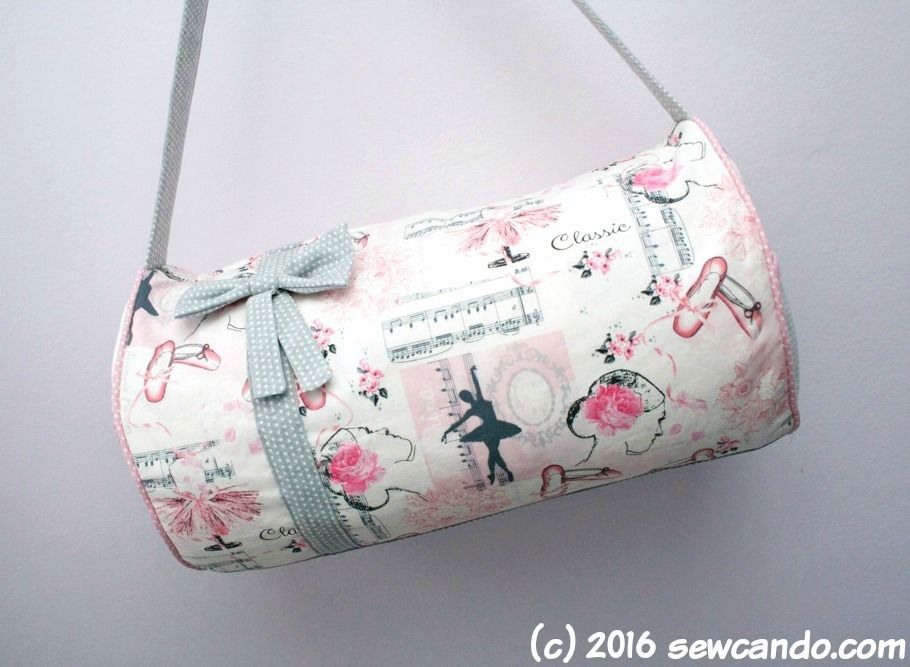
The sides feature custom piped pocket sides with coordinated fabrics. Perfect quick spots for tucking away small items:
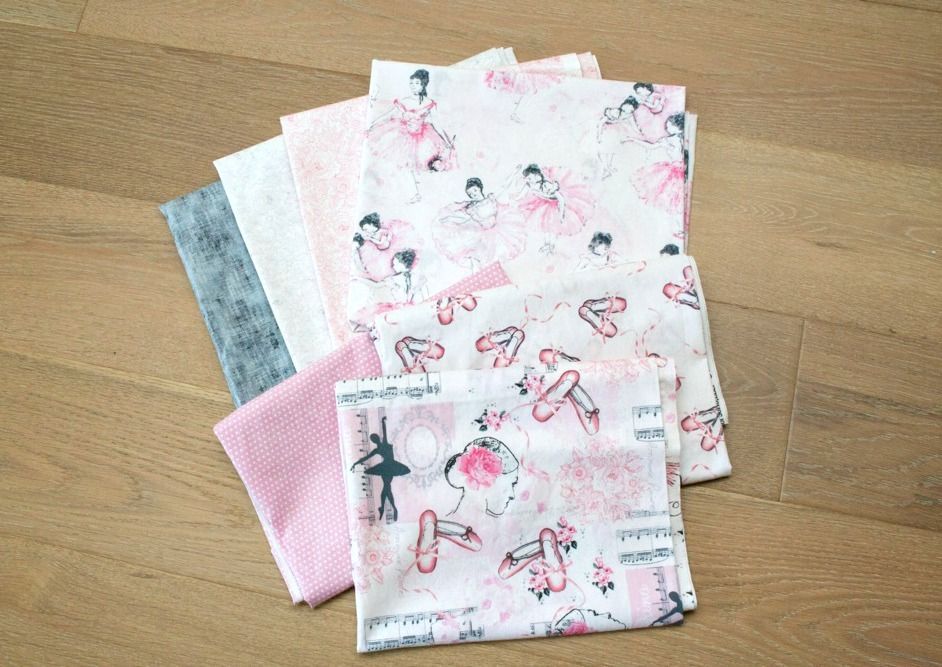
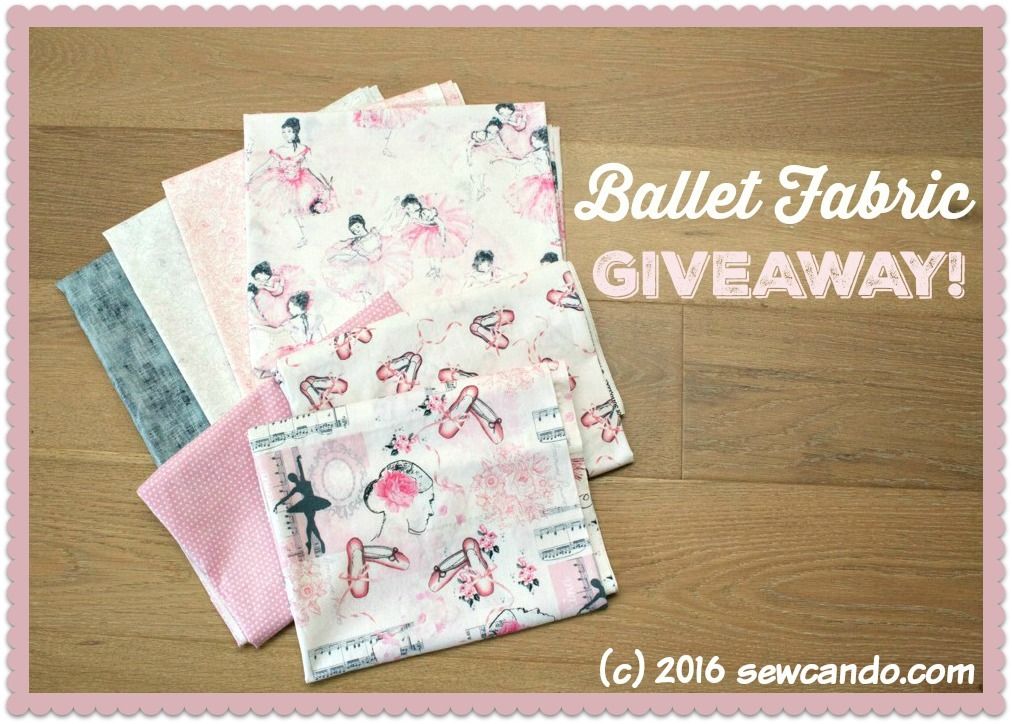
I created this as a guest project tutorial for Timeless Treasures' blog to showcase their new Ballet Collection last week. Now I'm sharing it here at Sew Can Do and giving you a chance to win a bundle of this graceful & gorgeous fabric:
Materials:
- 1/2 yard Ballet Collage
- 1 yard Studio Basic Blush
- 1/2 yard Ballet Dot Grey
- 1/2 yard Ballet Dot Pink
- 1/2 yard Ballet Slippers
- 2 yards 1/2 inch wide piping
- 1 yard Fusible fleece
- 16 inch zipper
- Notions (zipper foot, pins, rotary cutter, iron, hand sewing needle, matching thread)
Seam allowance is 1/2 inch unless otherwise specified.
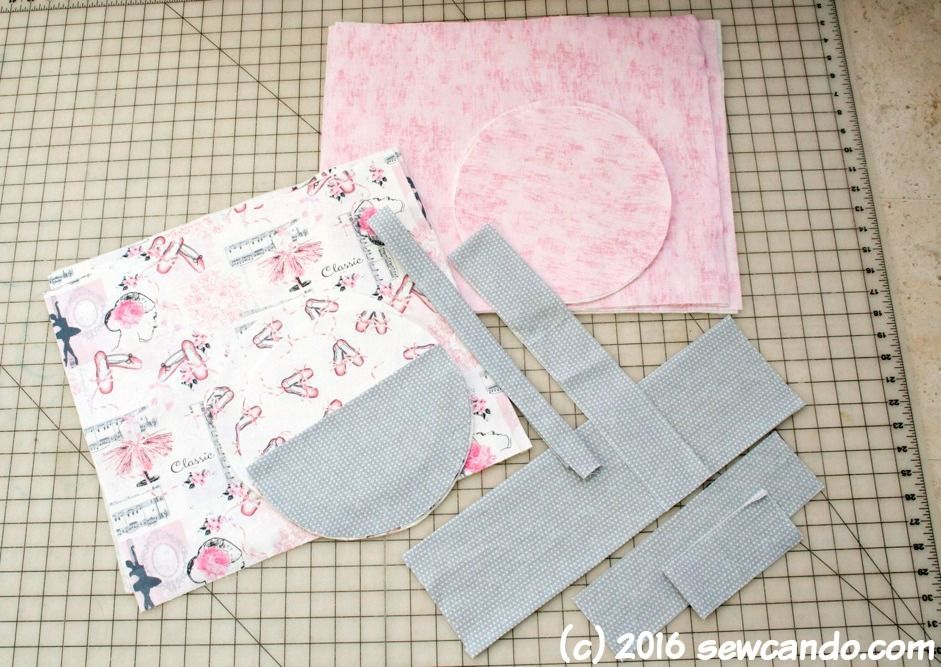
Cut the following pieces:
From Ballet
(2) Main pieces 17 inches wide by 15 inches high
From Ballet Shoes
(2) Circles 9 1/2 inches in diameter
From Grey Dot
(2) Circles 9 1/2 inches in diameter
(1) 2 3/4inches wide by 29 inches high - for side stripe
(1) Rectangle 11 inches wide by 3 inches high - for bow
(1) Strip 12 inches wide by 2 1/2 inches high - for bow ties
(1) Strap piece 34 inches wide by 4 1/2 inches high
(1) Bottom panel 17 inches wide by 6 inches high
From Pink Studio
(2) Main pieces 17 inches wide by 15 inches high
(2) Circles 9 1/2 inches in diameter
From Fusible fleece
(4) Main pieces 17 inches wide by 14 1/2 inches high
(4) Circles 9 1/4 inches in diameter
(1) Strap pieces 34 inches wide by 2 high
(1) Bottom panel 17 inches wide by 5 inches high
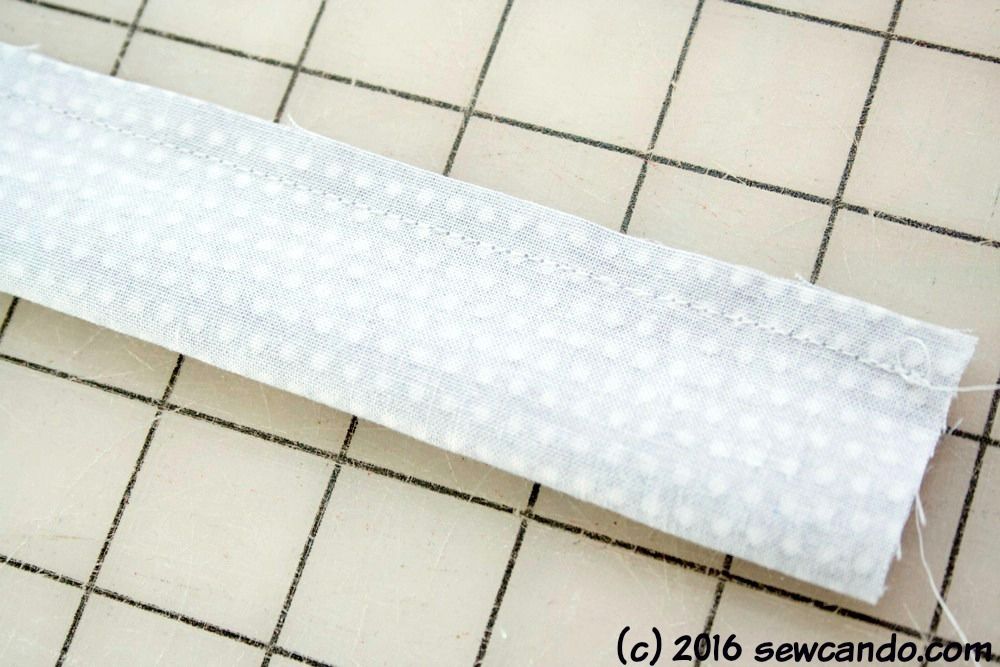
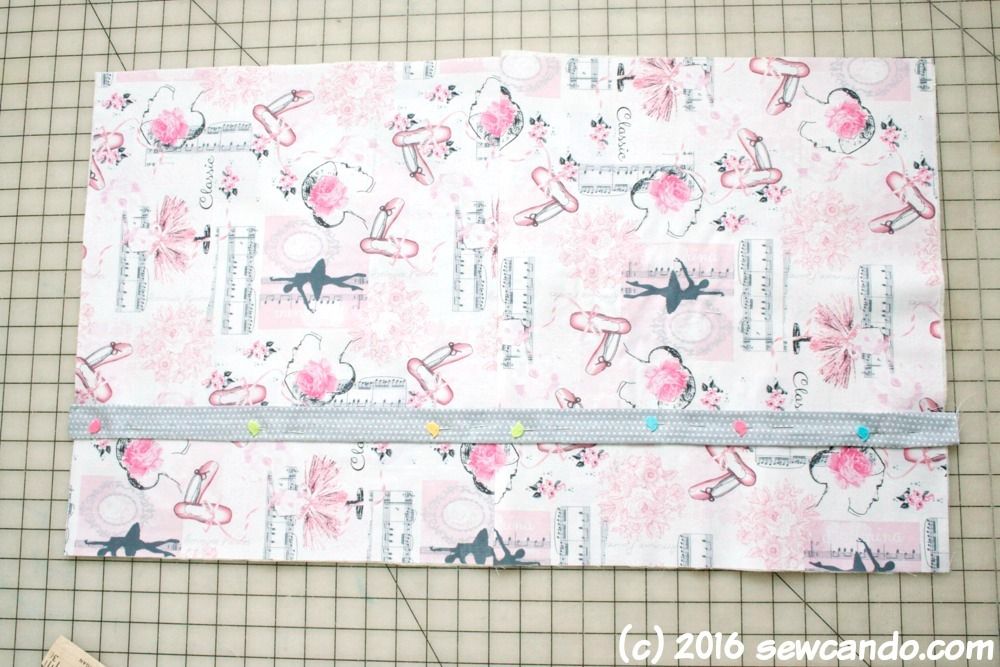
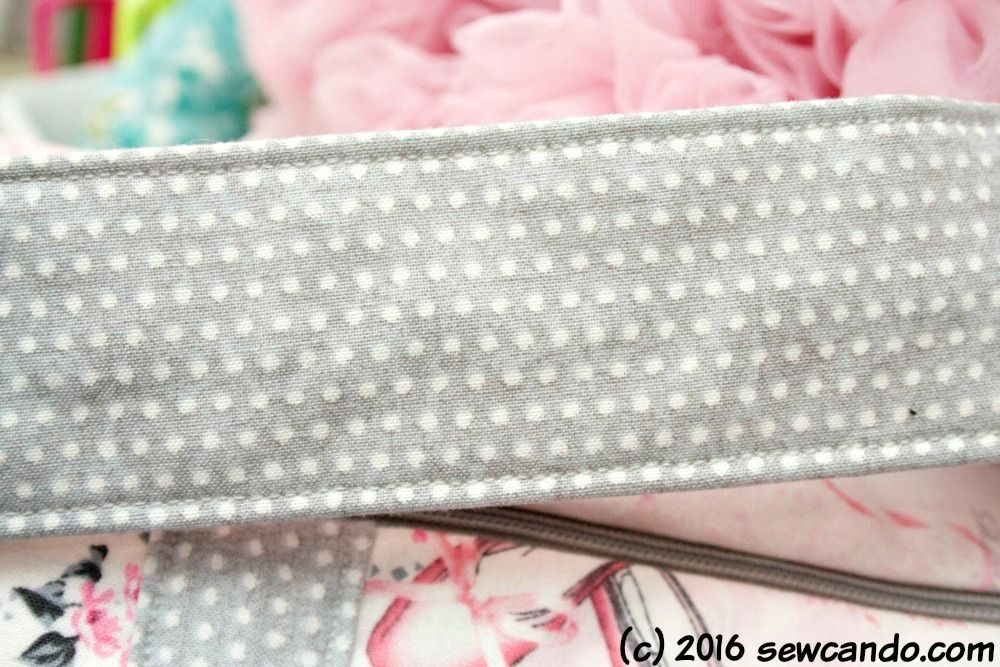
For the decorative stripe, fold the fabric lengthwise and stitch along the edge with a 1/4 inch seam allowance. Pull right side out and press so seam is in the center .
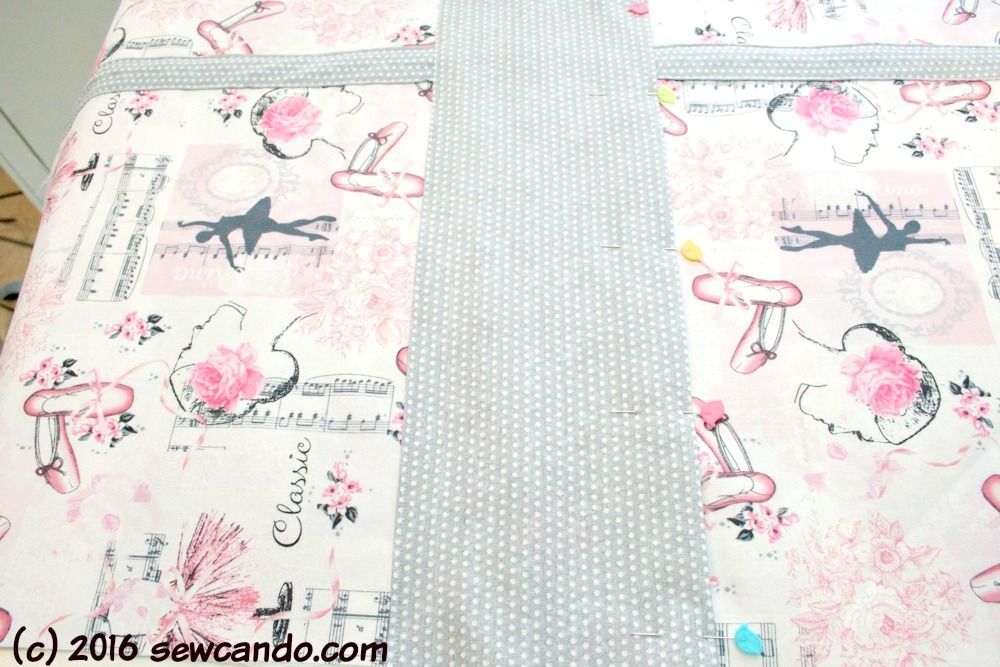
Take outer and pin the stripe 5 inches from one end, center seam facing down. Edge stitch together:
Take bottom panel and press the long sides under 1/2 inch. Center the bottom panel over the main bag's bottom seam, pin, then edge stitch in place.
For the outer pockets, take the grey circles and cut them to be half moons, about 5 1/2 inches high.
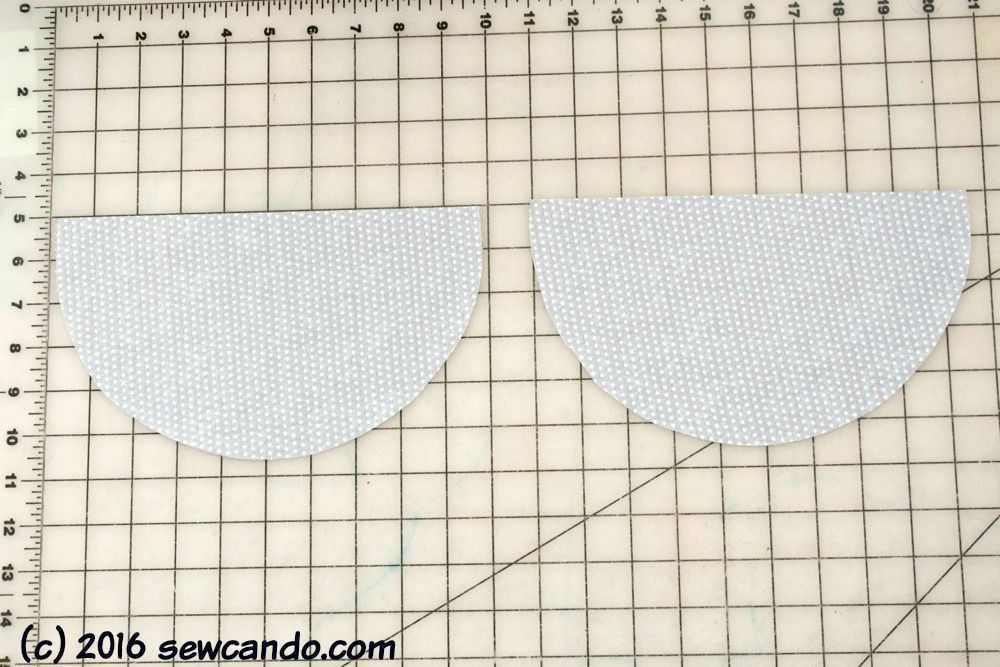
Make bias tape from the Pink Dot and apply to top edge. Baste to the Ballet Shoe circles around the curves only.
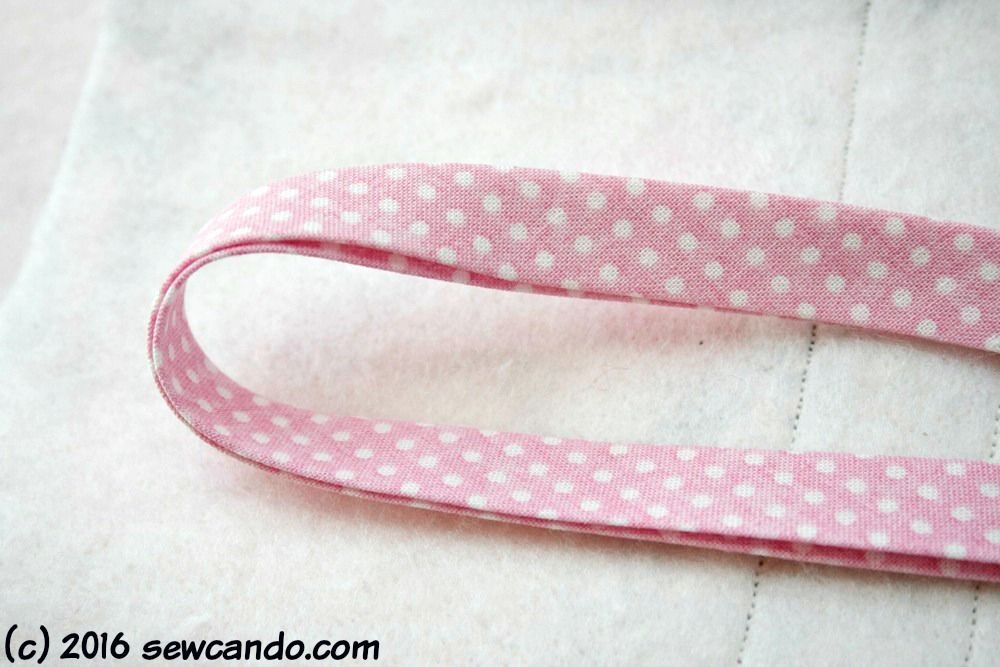
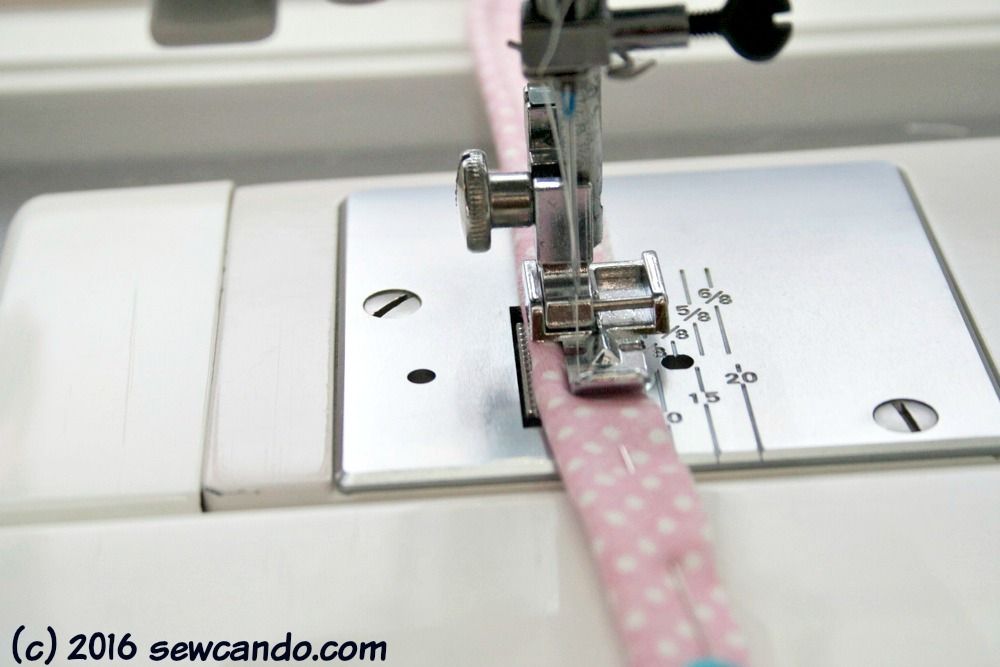
To make the custom piping, cut (2) 1 inch wide strips on the bias from the Pink Dot fabric. Note: Cutting can be done at a 60 degree angle, instead of the usual 45 degree, to get the full length needed out of a 1/2 yard cut. Trim the strips and two pieces of basic piping to be at least 28 inches long. Wrap strip around piping and pin into place. Stitch close to cording of the piping using a zipper foot.
With raw edges together, stitch piping to outer bag circles, again using a zipper foot, starting 1/2 inch from the starting end (this will be key for finishing): Upon reaching the end, overlap the raw ends, slightly downward and stitch into place as shown:
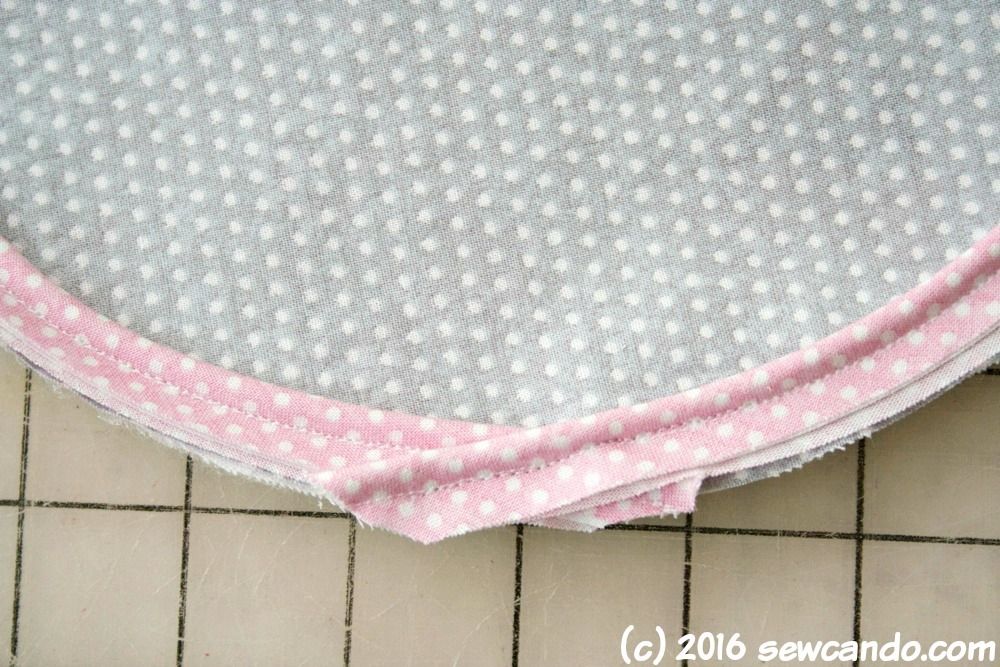
Now the outer circle sides are pocketed & piped:

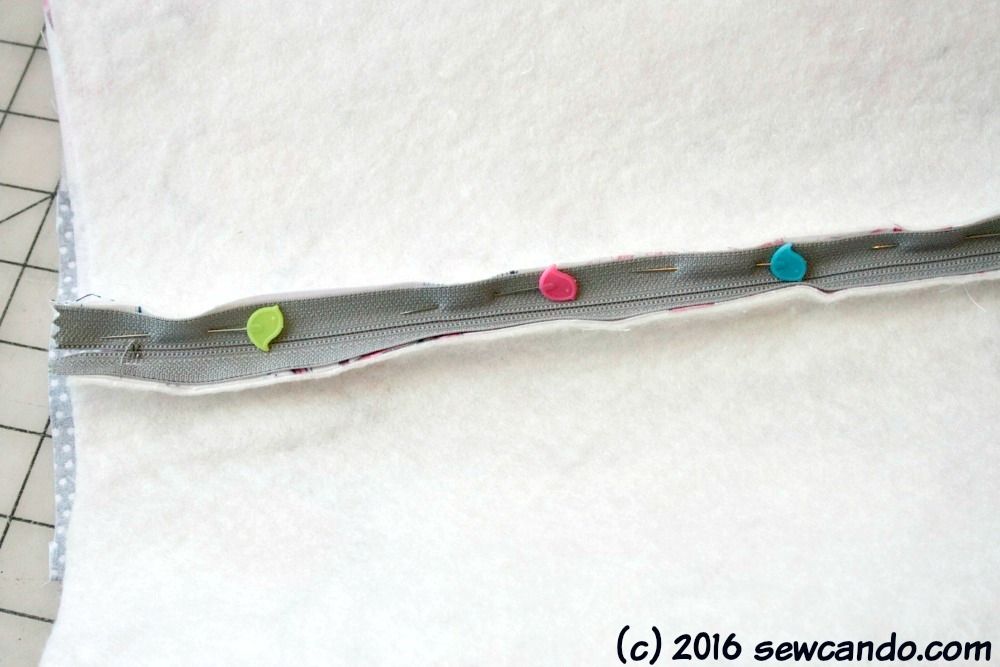
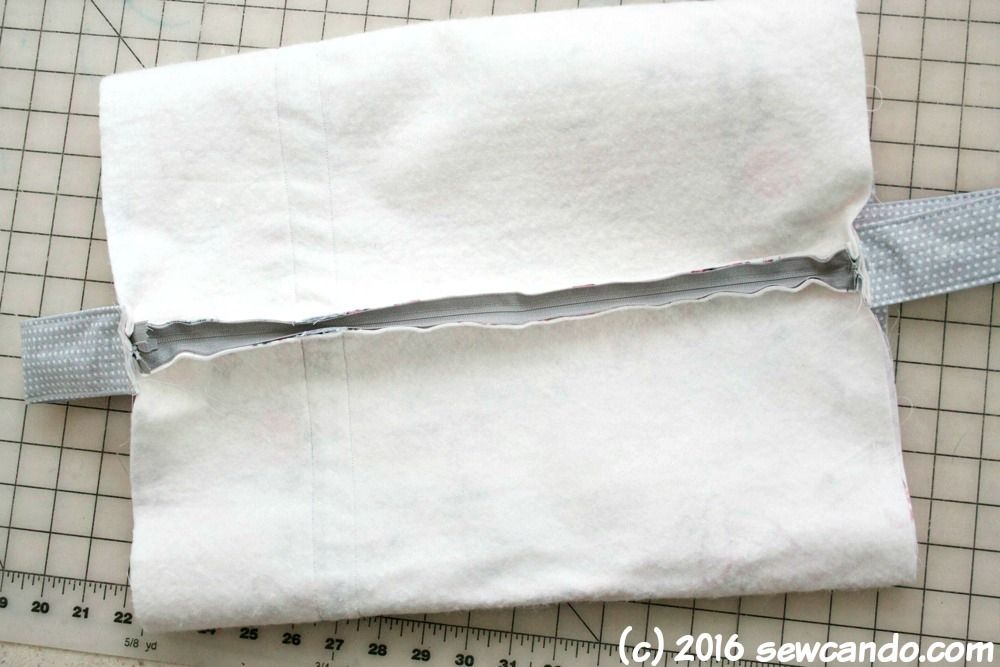
Time to attach the zipper. With zipper facing downward, pin zipper tape along the top raw edge of one side of the main bag. Stitch along close to zipper teeth, leaving 1/2 inch length unstitched at start & end.

Pin raw edges of strap, seam side facing up, to either end of the zipper section. Baste into place.
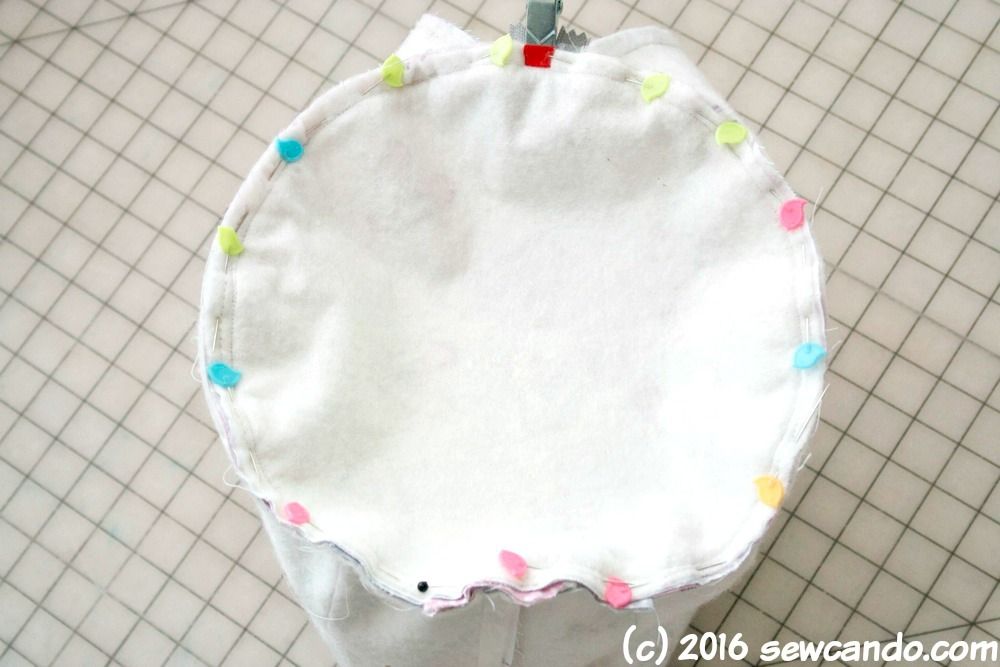
With right sides facing, pin each side circle to the newly made cylinder. Stitch on top of the stitching of the piping. Clip around curves, careful not to clip into stitching.
With the right side of the fabric facing down, pin one side of lining body to the seam allowance, along the zipper, of the already sewn main bag. Stitch over existing stitching with zipper foot. Pull remaining raw side of lining to other side of zipper seam and repeat. Now the lining will appear to be a tube connected at the zipper to the main bag. Attach side circles as done previously. It will now look like to bags connected at the zipper. Carefully pull the right sides out through the gap in the bottom of the lining.
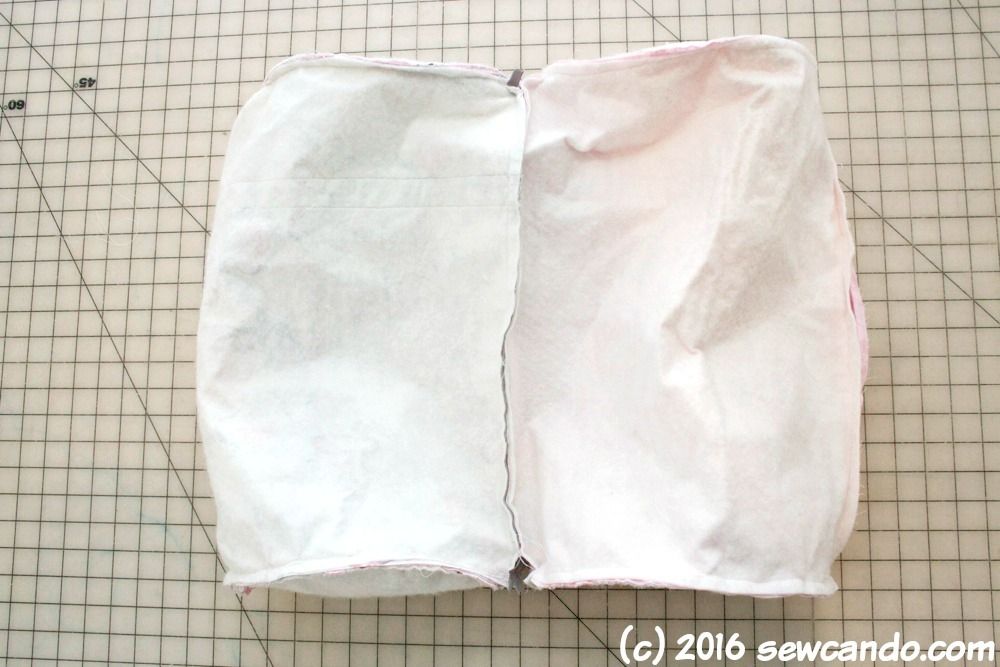
Slipstitch the gap closed by hand and push lining inside of the main bag.
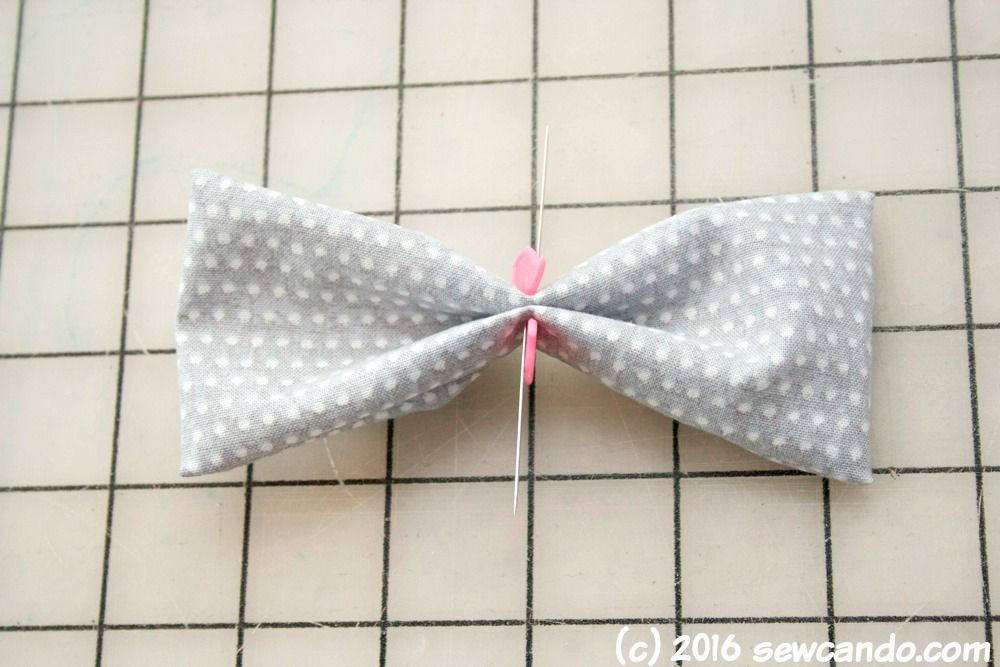
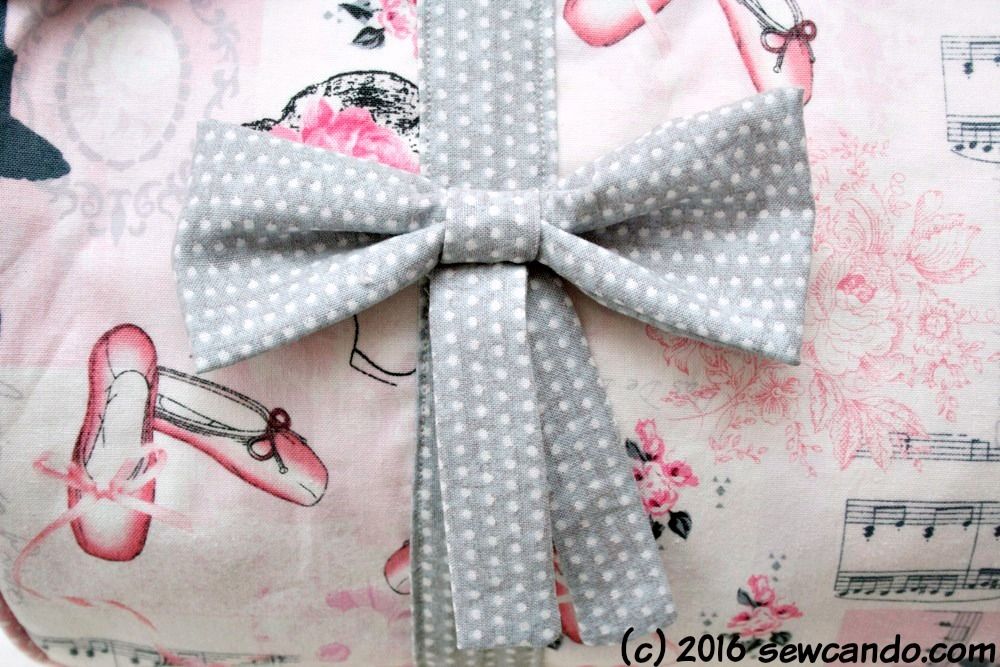
To make the decorative bow, cut the bow strip in half to get two 11 inch pieces. Fold one in half width-wise and stitch along the short side with a 1/4 inch seam allowance, leaving a small gap in the middle for turning.
Press the seam open so that it is in the center of the loop just made. Then stitch across the top and bottom edges with a 1/4 inch seam allowance. Turn right side out.

Pinch bow in center and secure with a pin:
Take remaining strip and cut into three equal 4 inch pieces. Fold each lengthwise and stitch along the length and one short sides. Turn right side out and press. Wrap one piece around the center of the bow. Hand stitch tail pieces to stripe on bag and then bow on top.
Now the bag is ready for a little ballerina!
And now for a chance to win this lovely fabric prize pack! Four full yards and three 1/2 yard cuts from the Ballet Collection:

I would make a small quilt.
ReplyDeleteLove these fabrics! And that Ballerina Bag is so cute! I'm a bag maker so I'll be using the fabrics for bags or wallets. Thanks for the tutorial.
ReplyDeleteI really like to make this bag..Your tutorial looks pretty easy to follow...love this.... happyness04431@yahoo.com
ReplyDeleteWhat a cute bag!! I've featured your tutorial on Craft Gossip: http://sewing.craftgossip.com/tutorial-little-dancer-ballet-bag/2016/04/27/ --Anne
ReplyDeleteThanks so much Anne!
DeleteI think I would make a bag for sure. Thanks for a chance to win.
ReplyDeleteI would make a wall hanging for my granddaughter's room.
ReplyDeletethey would make a beautiful little girl quilt
ReplyDeleteThis is so cute! I can see changing out the fabric and using it as a going-to-gramma's bag!
ReplyDeleteSqueeeeeeeeeee! So cute!
I love this fabric and can see a little lady getting made something special with it.
ReplyDeleteHI, I'D LIKE TO MAKE A LITTLE GIRL'S CHARITY QUILT! THANK YOU FOR SHARING!
ReplyDeletemsstitcher1214@gmail.com
I would make this adorable bag for a very special 5 year old.
ReplyDeleteI would make this bag for my daughter :)
ReplyDeleteI would definitely make that bag for my granddaughter. she goes to dance class every Thrusday. Thank you for the generous giveaway!
ReplyDeleteDmac5958ataoldotcom
I have a sweet little niece who would love a bag like this. That is what I would make.
ReplyDeleteHave just found out I am pregnant with my first baby so I would make a baby quilt xxx
ReplyDeleteIain.ross30 at gmail dot com
Love making bags! What a fun bag for a little dancer!
ReplyDeletedebbygrawn at yahoo dot com
I would make a bag!!
ReplyDeleteA quilt for a baby girl would be "sew" adorable!
ReplyDeleteMy granddaughter is in dance, so I would actually make this bag, it's so cute! Cdahlgren at live dot com
ReplyDeleteMy granddaughter is in dance, so I would actually make this bag, it's so cute! Cdahlgren at live dot com
ReplyDeleteI would definitely make the bag for my granddaughter who actually does tap and ballet right now! She would love it so much!
ReplyDeleteMy oldest granddaughter was taking ballet lessons so I might possibly attempt this bag, or another one if I'm not too chicken to use this one with the circles. If there is enough fabric left, then I might make her a small quilted mat of some sort which she could use to sit on while putting her ballet shoes on too.
ReplyDeleteProbably something for my nieces like a wall quilt or little bags.
ReplyDeleteI would make a quillow with the fabric. Thank you for the detailed tutorial. The projects are lovely.
ReplyDeleteI would make a sweet Bag/Tote for my Grangirlie! Your Bag is Awesome..& might just use your Tutorial! Thank you for sharing! Know she would love it
ReplyDeleteThank you for chance to win your Give-a-way! :D
Probably duffle bags for my two nieces. :)
ReplyDeleteI would make a quilt but Thank-you for such a great tutorial. You should enter it in Sew Mama's tutorial contest when they have it.
ReplyDeleteI have a niece who would love a small quilt made of these.
ReplyDeleteI would like to make the little ballet bag as a gift for a young girl who I am teaching to sew. She takes ballet lessons and loves sewing! I think she would be encouraged to continue learning both ballet and sewing!
ReplyDeleteI would make a sweet baby quilt for a friend who is expecting!
ReplyDeleteI would make a baby quilt!
ReplyDeleteI would make your bag! Love it and my daughter would love it, even though she doesn't do ballet, she loves all bags, just like her mama, and this one is especially cute!
ReplyDeleteI would make a bag like yours.
ReplyDeleteI would make a bag or a quilted pillow
ReplyDeleteflaura@gmail.com
I'd make a bag like yours - it's so cute!
ReplyDeleteThat bag is really cute! I love the bow! I would make a coin purse, but those dots would be perfect for just about anything!
ReplyDeleteI'd make a tote bag for ballet (I'm not handy enough to make a zipper, but I can make a mean tote. :)
ReplyDeleteI'd love to make this bag for a special niece!!! churcaeatauburndotedu
ReplyDeleteA great giveaway opportunity! Beautiful fabric!
ReplyDeleteI've been looking for the perfect materials to go w/ a Beautiful tulle piece w/ tiny pink bows all over for a tutu & these would be the MOST Perfect match for the piece I already have!! I would make a bag or skirts or tops or.............thinking here! WOW, Thank You & Timeless Treasures for this AWESOME giveaway!!
ReplyDeleteThat is so cute! I pinned the tutorial to make for my budding ballerina. Thanks!
ReplyDeleteI would make these little purses for my great grand daughters
ReplyDeleteI'm obsessed with this giveaway, I'm always searching for cute ballet fabrics to make things for my daughter and nieces. I would for sure make a dance bag for my little girl and I would love to make a ruffle diaper cover and matching bow for my niece who is going to be born in a couple months! Thanks for such a cute giveaway!
ReplyDeleteI would love to make one of these bags for a couple of young ladies that I know. Beautiful tutorial.
ReplyDeleteI have several friends having baby girls this summer, so something for them.
ReplyDeleteI would make a quilt for my niece.
ReplyDeleteI have a wonderful granddaughter who would love the bag made, shoes , and a nice lap quilt. Thanks for the chance to win !
ReplyDeleteI would make a sweet quilt!
ReplyDeletenikilsend(at)outlook(dot)com
Your ballet bag is just adorable, Cheryl. I've featured it here... http://www.threadingmyway.com/2016/05/showcasing-little-dancer-ballet-bag.html
ReplyDeleteThanks so much Pam! I'll be sharing your feature on my social media - the bag love is very appreciated:)
DeleteOmg! I would love to make my great neice Isabelle a bag for her ballet things! What a adorable give away! Thank you!
ReplyDeleteIf I won, I might make a bag for our granddaughter.
ReplyDeleteNancy
allibrary (at) aol (dot) com
Ca-Ute! Id make a bag like yours :-) Thanks for the chance!
ReplyDeleteI would love to make the bag, it's beautiful (thanks for the pattern), the left over I would make a small throw to match the bag. My Granddaughter loves ballet and this would be great to carry her little shoes and ribbons in. She can use the throw to sit on or drape over her on the way home.
ReplyDeleteDid any one make this bag. I know this was posted a while ago. I made this bag with different fabric and it turned out cute, but a little less firm than I would have liked. I am not sure how to add a photo of the project.
ReplyDeleteI just told my granddaughter I would make her a duffle to hold her ballet things. This hit the spot!!!! Thanks so much for sharing. When I’m done. I’ll post a pic!! So excited!!
ReplyDeleteI'm thrilled to hear that - I can't wait to see yours!!
DeleteAlmost done with the bag...it turned out so cute! Thanks for the tutorial. :) Just wondering about the instructions that say to cut the piece for the bow in two. That part was confusing to me, and I think it shouldn't be in there.
ReplyDeleteGreat to hear Janelle & would love to see your bag. Yes, you do need to cut the bow strip in two - one piece makes the actual bow & the other piece makes the tails & center of the bow, as mentioned here:
Delete"Take remaining strip and cut into three equal 4 inch pieces. Fold each lengthwise and stitch along the length and one short sides. Turn right side out and press. Wrap one piece around the center of the bow. Hand stitch tail pieces to stripe on bag and then bow on top."
I'm several years late to this, but I'm in the process of making this bag and scrolled down to the comments because I found the same issue as Janelle. You mention cutting the bow piece into two, but at the top where you list the pieces needed, it says:
Delete" (1) Rectangle 11 inches wide by 3 inches high for bow
(1) Strip 12 inches wide by 2 1/2 inches for bow ties"
Based on that, isn't the second piece of the bow that's been cut in half just extra now? I'm unsure of whether I should have actually cut it.
I love this material I'd make a ballet bag but it has to be bigger for the serious dancer who has two or three different dance shoes. Very inspirational.
ReplyDeleteThanks Marianne and, yes, this could be scaled up for an adult to fit all the extras the little girls don't need to carry. My Bon Voyage bag tutorial is very similar but a bigger bag - I've used it as a weekender bag when traveling, so it would be perfect for a dancer too: http://www.sewcando.com/2015/06/ooh-la-la-its-bon-voyage-duffel-bag.html
DeleteOlá
ReplyDeleteAmei a bolsa. Aonde consigo esse tecido maravilhoso? Vc fez algum vídeo fazendo? Sou nova no ramo de costura e ainda tenho algumas dificuldades. As vezes por video seria mais fácil de entender. Obrigada por compartilhar.
As noted in the post this fabric is by Timeless Treasures, but is several years from when it was released so your best chance to find them would be Etsy or eBay. I don't have the free time to create videos for my tutorials at this time, but if you're new to sewing there are a lot of good sewing skill video tutorials on YouTube. Good luck!
DeleteI just made this bag for my six-year-old ballet and tap dancing boy, because WOW - the choices out there are boring black or super feminine! He picked the fabrics, so it really is all him. I added an outside pocket that says "BOYS DANCE" vertically, made out of letters from the names of famous male dancers running horizontally (He's had a couple people tell him that dancing is for girls, so now he can just point to the names on the bag and tell them that they are all "boy" dancers). He's so thrilled with the bag that he wanted to sleep with it the past two nights!
ReplyDeleteI also left off the bow- forgot to mention that!
DeleteI LOVE hearing this & I'd be thrilled to see it (and feature it), if you could email me a photo to cheryl@sewcando.com. Thanks so much for using my tutorial!
DeleteSure thing! I'll shoot it off to ya!
DeleteI made this bag for my 7 year old daughter. My first bag project and it came out well! Thanks for the tutorial!
ReplyDeleteThat is wonderful to hear! I'd love to see it - you can email photos to cheryl@sewcando.com and I'd be happy to feature it :)
DeleteI'm starting this bag. Looks lovely and cant wait. I was cutting out the fabric and noticed that the bag pieces are all 17 x 15, yet to make the bottom panel it says 19 x 6 - I'm assuming its a misprint? Thanks
ReplyDeleteSorry - in terms of width - should it be 17 x 6?
DeleteHello Mary, sorry I didn't see this sooner. It's been 7 years since I wrote this so it took a while to reacquaint myself with this one, but I believe that was a typo so I've updated it to be 17 x 6 as that seems to be correct. I hope your bag turns out lovely!
Delete