
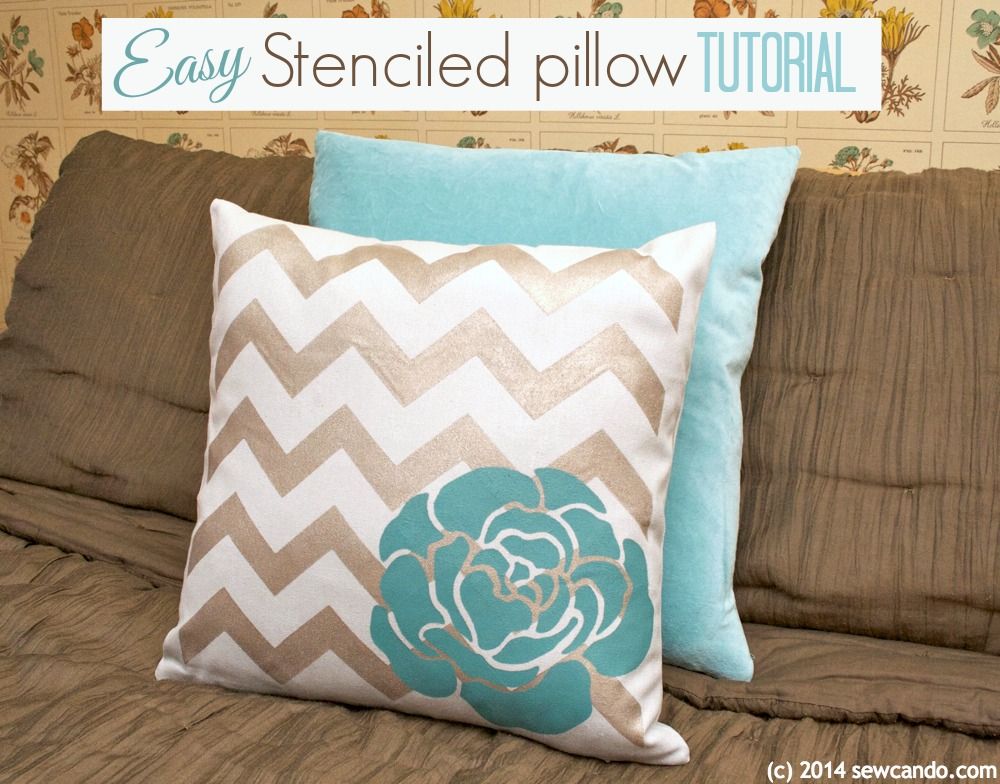

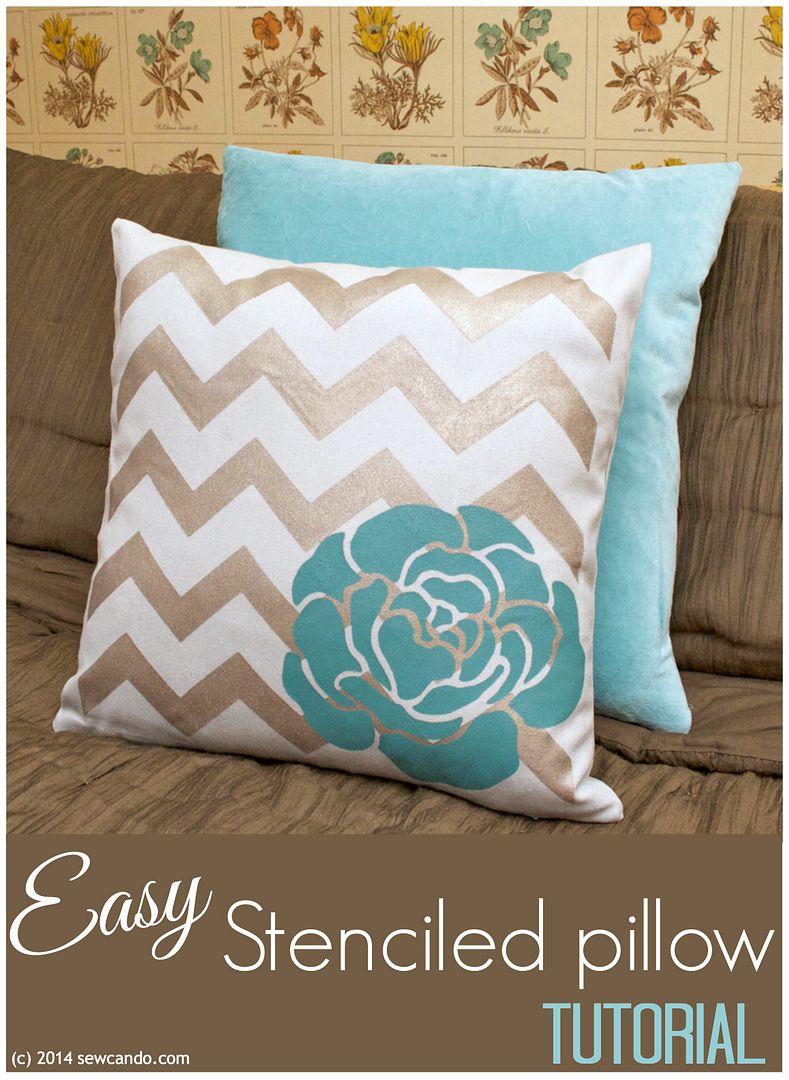
Updating the inside of our house is near the top of my "to-craft" list for 2014. I get so busy with making clothes, accessories & holiday stuff, I forget about how much our residence needs crafty attention. My limited decorating skills don't help matters either. Our master bedroom, where everything is at over a decade old, is first up for a makeover. Now that we've gotten some updated bedding, new throw pillows seemed like a good starter project. I usually struggle with getting the right look for this kind of thing, but this time it was easy - I used I Love To Create's Tulip For Your Home Stencil Supplies.
These coordinating fabric paints, stencils, textiles and accessories make DIY home decorating a lot easier for those of us who have limited time or aren't sure about how to incorporate new looks. I also like the idea of being able to grab pretty much everything you need in one spot and know it's meant to work together. Minimize the risk, maximize the return. Geez, I sound like a financial analyst...
Here's how I made a stylin' pillow in no time:
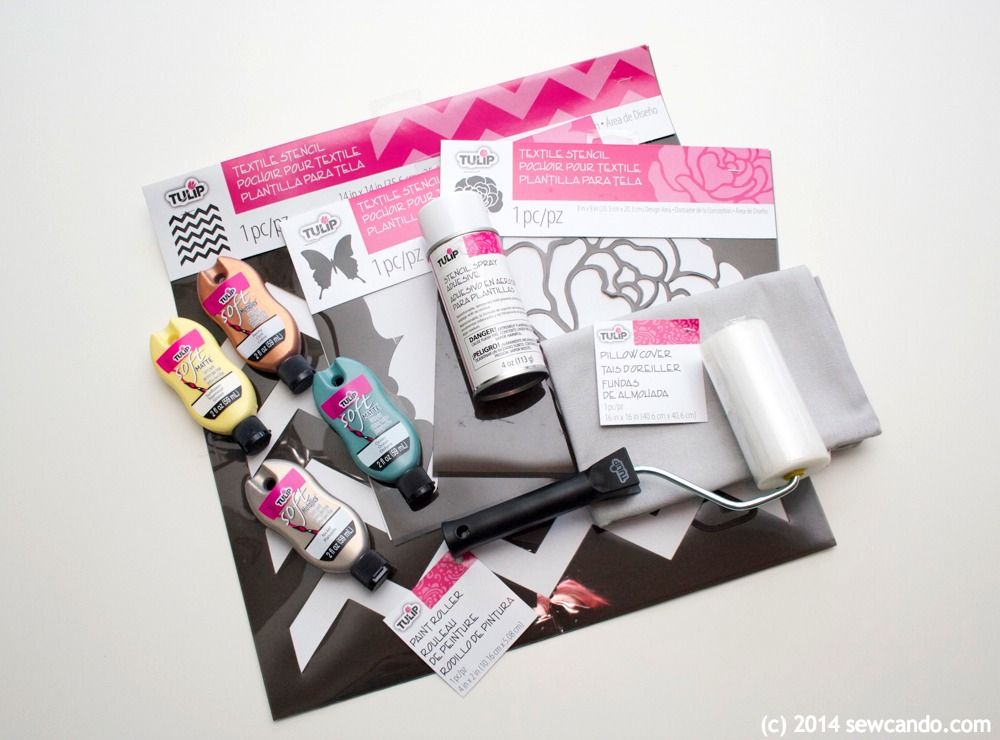
Materials Used:
- Pillow Cover (mine was Tulip's 16"x16" in gray)
- Pillow Form
- Large textile stencil
- Small motif stencil
- Soft fabric paints (I used Tulip's Matte Ocean and Metallic Nickel)
- Stencil spray adhesive
- Foam roller
- Waxed paper & paper plate
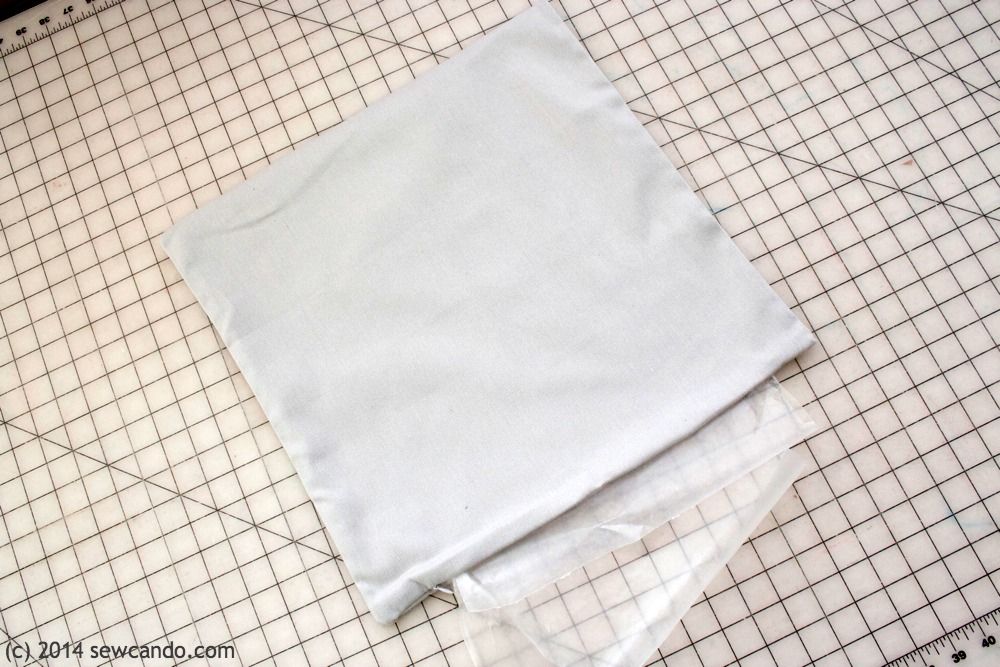
All my supplies (except the form, paper & plate) were by Tulip, which makes it pretty easy to put together. Start by placing some waxed paper inside the pillow cover to keep any paint from bleeding through:
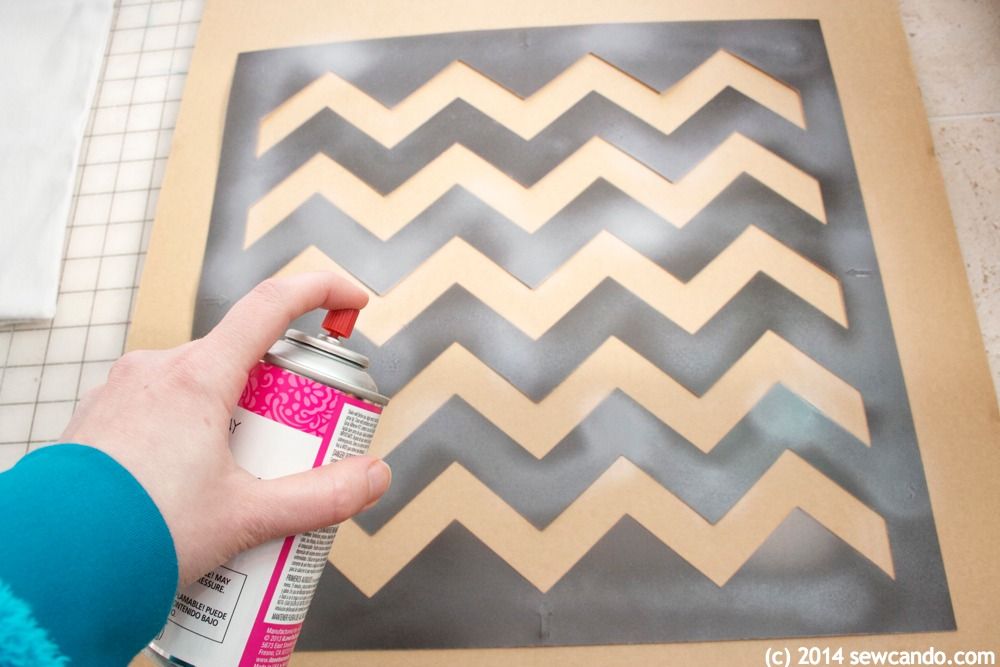
Spray the matte side of the large stencil with a light coating of adhesive and wait about a minute before pressing onto the fabric. Note that a little spray adhesive goes a long way. I didn't want any paint seep through the edges so I put quite a bit on the large stencil and it took some strength to pull it off. Less is more.
Pour a little fabric paint onto a paper plate and run roller in it. Make sure the roller has an even coating of paint, but it doesn't need to be thick. You can always add more coats if needed, but you can't take away if you do too much in the first one!

Roll over the stencil in every direction to get all the corners and edges. I did two coats, waiting a few minutes between them, to get nice, even coverage over the whole design.
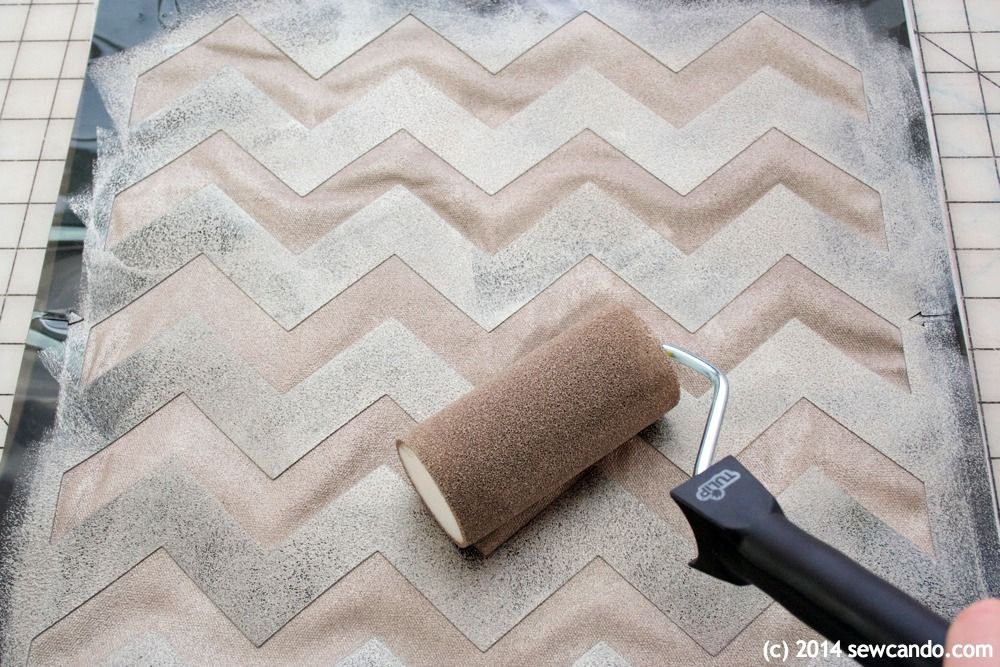
Peel the stencil off slowly, starting from one corner, so those crisp, clean lines don't smear. I also recommend cleaning the stencils right away. Then it's easy to get the paint and adhesive residue off so they can be used again.
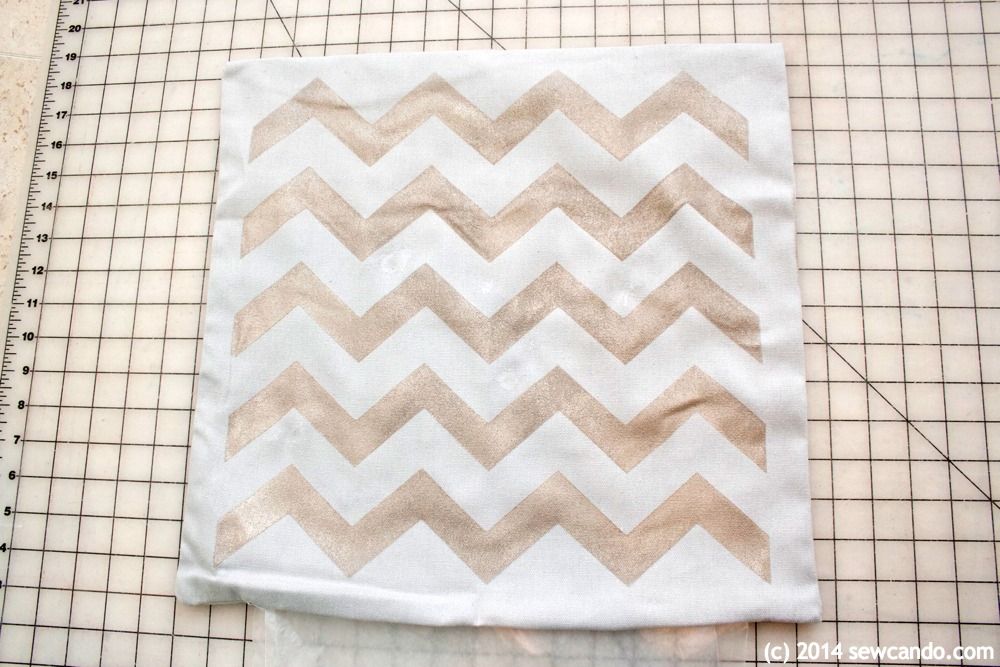
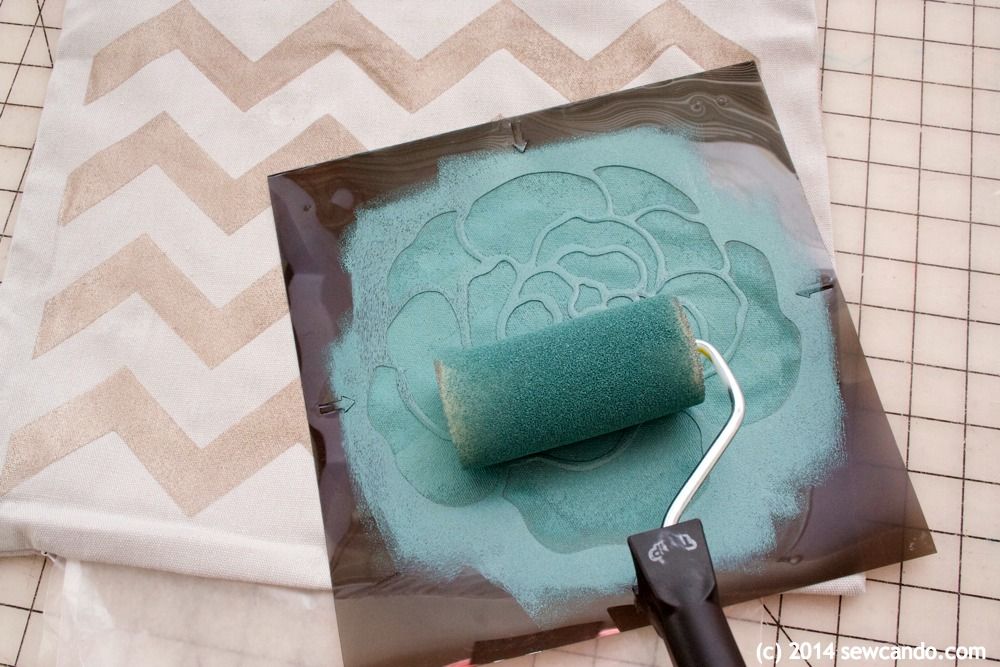
I let the chevron dry for a few hours before adding the motif layer on an angle in the corner. Less time is probably fine, but I like to play it safe. This time I did a light coat of the adhesive and it was a lot easier. Again, I did the same deal with two coats of paint and peeled off the stencil after a couple of minutes.
A couple of tips/observations: Clean the stencils & roller minutes after finishing. The paint & adhesive come off easily with soap and water if you wash them right away - if you wait it'll be a tougher job. The bonus with being quick to clean is that everything can be saved for more projects because they're pretty durable supplies. The Tulip foam roller really surprised me - it washed up beautifully and can be reused up to 25 times. Very handy for a cheapskate like me.
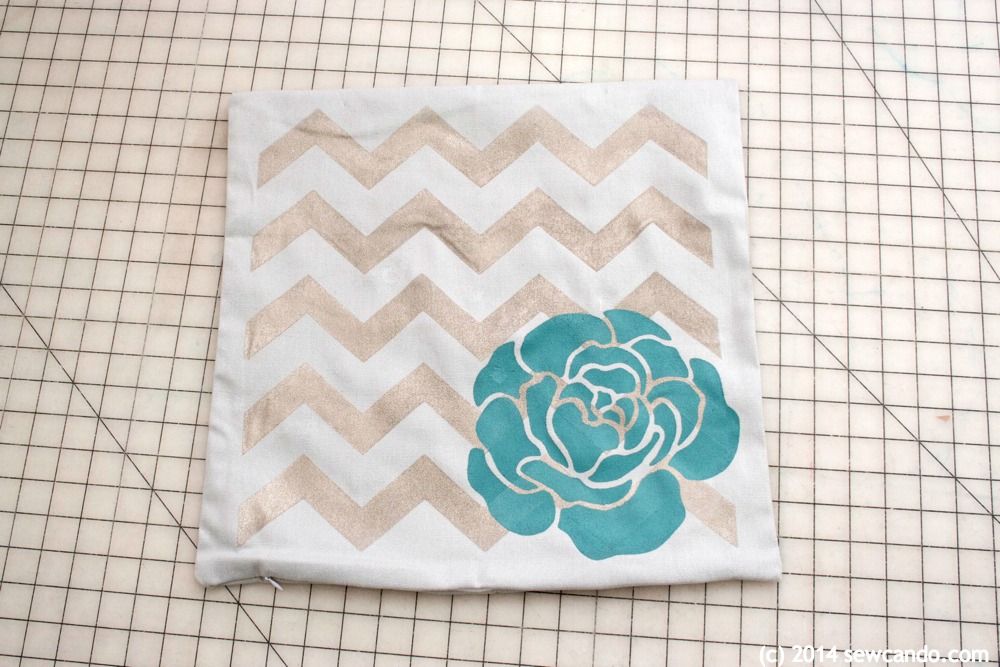
Our bedroom has a botanical wallpaper that I love, but can be tricky to accessorize. Not this time though! I'm so pleased with how well the pillow works with it. The paint colors & rosette echo the wallpaper, but the chevron adds a little modern touch. It really pops against our crinkle-finish bedding. My room updating is off to a great start!
Check out ILTC's Tulip For Your Home in these places for more crafty ideas, & products to inspire your home projects:

I was financially compensated for this post. I received select craft supplies from ILTC Tulip for their Tulip For Your Home program. The opinions are completely my own, based on my experience. For my complete disclosure policy, click here.
These are ADORABLE!
ReplyDeleteGorgeous---I want these!!!!!!
ReplyDeleteThese are gorgeous. I've wanted to try stenciling. Thanks for the tutorial! I'm visiting from Thrifty Thursday and would love for you to check out the link I shared.
ReplyDeletehttp://theorganizeddream.blogspot.com/2014/05/charming-diy-framed-quotes-for-little.html
Oh, and I'm following you on FB and Twitter, too!
Thanks Kate. Ever time I tried stencils before the results were always mediocre, now that I've tried these I can't wait to do more. I follow you already on Pinterest and now on Twitter too:)
DeleteThis sure is a far cry from the days when my mother stenciled bears in pillow cases! I'm not a fan of chevron but I seem to be warming up to it lately....
ReplyDeleteI agree - stencils don't look like stencils anymore (if that makes sense) and I think that's a good thing. And I feel the same way about chevron - when it first made the rounds I wasn't into it, but it's stuck around a lot longer than I expected and grown on me. Now I really like it.
DeleteLove this DIY project, Cheryl! I've added this to my Top 5 Pinterest finds of the week! I hope it will bring you some new followers! Thanks so much for sharing and I can't wait to give this DIY project a try! =)
ReplyDeletebeautiful!!! Thank you for sharing your sweet blog at the Thursday Favorite Things Blog Hop ♥
ReplyDelete