


Congrats Amanda & I can't wait to see the rooster camera strap!!
I'm thrilled to have Ashlee from I'm Topsy Turvy as our CraftShare Cake Maker Extraordinaire! Not only does she make awesome cakes, but she's a mom, a talented crafter & has her own Etsy shop, so give a warm welcome to Ashlee as she launches our Cake Decorating week:
My name is Ashlee and I make cakes! I love cakes and my specialty is carved or Topsy Turvy cakes!
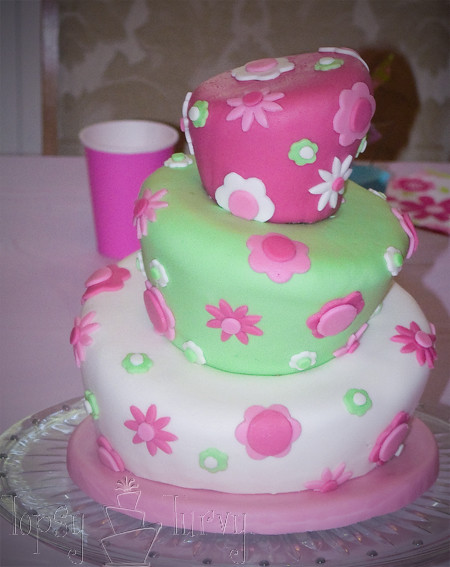
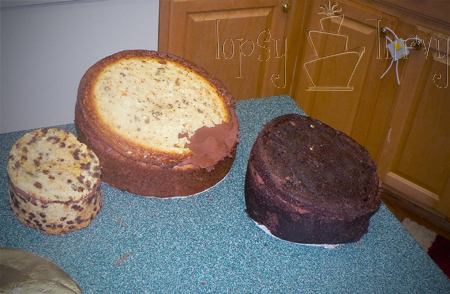
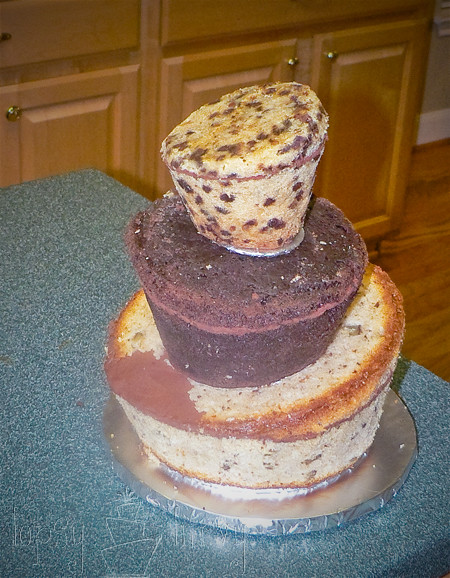
I blog over at I'm Topsy Turvy and today Cheryl asked me to teach you how I carve my Topsy Turvy cakes! My first one was an absolute MESS but I learned a lot from it and each one after that has gotten better and better! The pictures today actually came from my second attempt at a Topsy Turvy cake, the one I made for my baby girls 1st birthday party (she's 3 now). While I go through all the steps for carving a Topsy Turvy cake here I didn't want this post to be 5 pages long so I'm assuming you know some of the basics, but if not I'll add links to take you to some basic instructions to help you out. This is the cake I'll be showing you. The three layers are 4 inches, 6 inches and 8 inches. Each 3 inches tall.
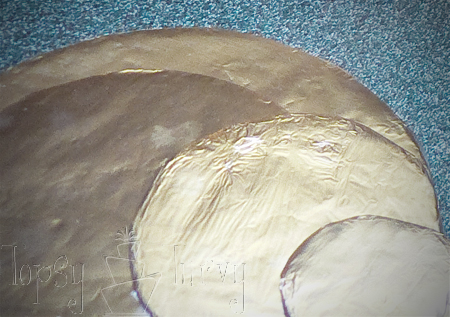
To get started the first thing I always do is to get the cake boards ready to go. You don't want to be ready with something and have to stop to make a board. You need a cake board for each layer, and each cake board should be 2 inches smaller than the layer (but no smaller than 2 inches). So for the 4 inch cake I had a 2 inch cake circle, the 6 inch cake had a 4 inch cake circle and the 8 inch cake had a 6 inch cake circle. Then wrap them all in foil. Then for the main cake base I took three 8 inch circles (3 for strength, this will be one heavy cake), stack them together and wrap it in Foil. So in the end I had a 2 inch, 4 inch, 6 inch and 8 inch (extra thick) cake circles.
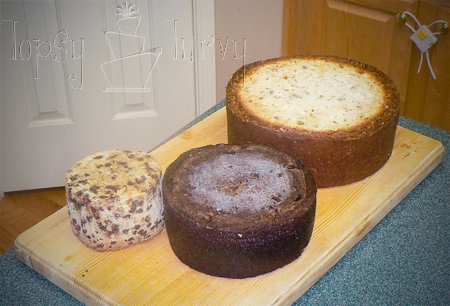
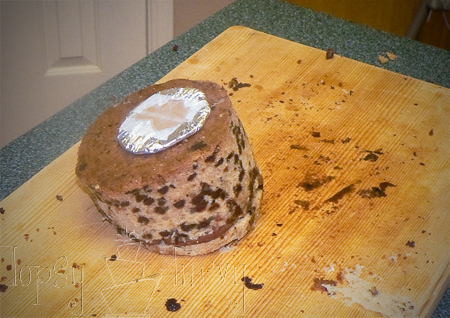
Time to start the cakes now. WARNING: do NOT use cake mixes. They are too weak and crumbly for the stacking and carving. Use very dense cakes, like pound cakes for your recipes. This is a great site for Pound cake recipes. For more tricks & instructions go to this post for my tips and tricks for baking a great cake. After the cake is baked, I let it cool for about 10 mins. Then, as soon as I can stand to handle it, I wrap it in a few layers of plastic wrap and put it in the freezer to cool. I do this so that instead of all the steam leaving the cake while it cools it's trapped inside, creating a super moist cake. Normally as soon as it's cool you can take it out, but I find it easier to carve a more frozen cake. So if I'm going to carve it, I leave it in the freezer. Start with cutting off the tops to create a flat surface to start with. You can see mine just got out of the freezer by the chalky white color on the chocolate layer.
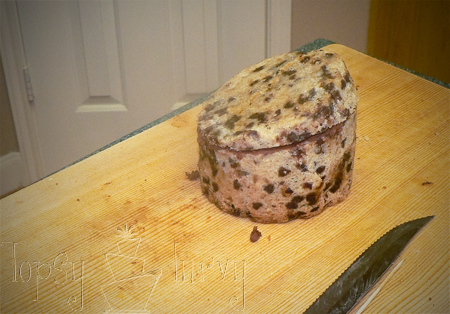
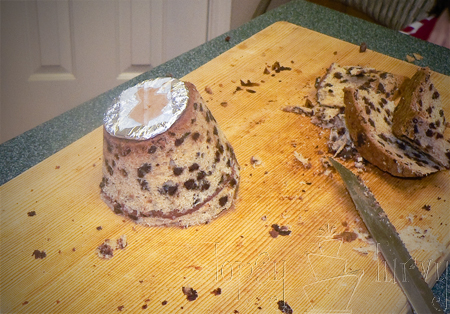
Now we're going to carve the top angle of the cake. Here is where it gets tricky. You want your cake to be at LEAST 3-4 inches tall for this style. A three inch tall pan is a great way to start, but you can also extend your pan height by using parchment paper, I show you how in this preparing your cake pan tutorial. Now, carve the angle on the cake. Sometimes I find it easier to place the cake on it’s side, if it's still mostly frozen. Starting at one of the top corners carve down at an angle. You want the larger side of the wedge to be about 1/3 of the cake height. In this cake the top wedge is 0" on one side and 1" on the other, while the bottom is 3 inches thick on the tall side and 2 inches thick on the short side. Here you can see the two pieces.

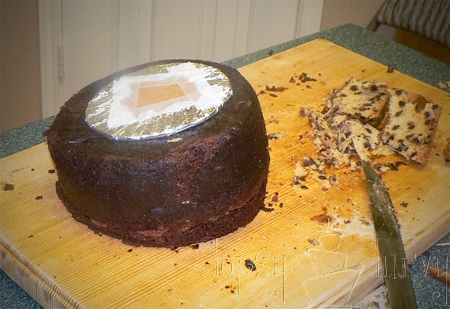
Then your going to GLUE the pieces back together, thick sides touching to create a sharper angle to the cake. You can use frosting, but I prefer to use room temperature Ganache-it prevents slipping. Spread it onto the thicker piece (you don't want to risk ripping the thin top slice.)

Then you are going to “glue” the two pieces together (cut side together). It's like you just rotated the cut top 180 degrees. This will create a 4 inch tall side and keep the 2 inch short side.
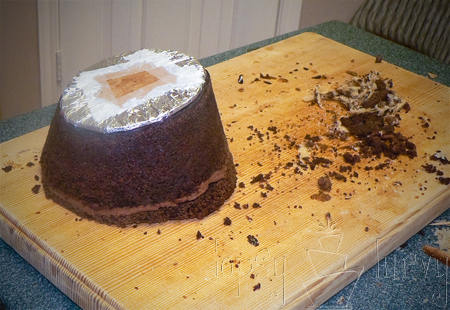
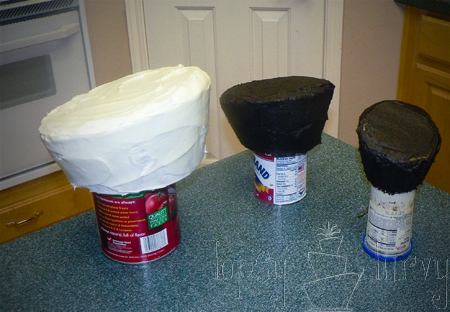
here are pictures of the other cakes with the angle carved and "glued" back on.
Now turn the cake upside down (I put the parchment circle down so it wouldn’t stick to the crumbs or to the board.) and put the cake board on the cake. For the largest layer place the cake board in the center of the cake (for the smaller 2 layers start with the cake circle closer to the tall side).
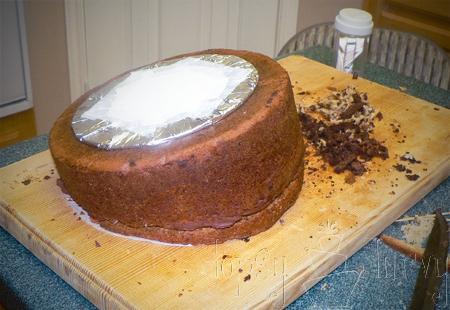
Starting at the cake board carve out to the edges. Carve a little at a time. Better to have to carve more later than to carve too much and regret it.
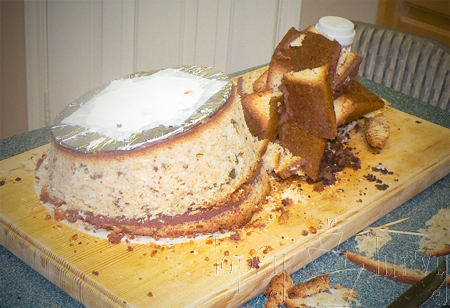
Then you flip it back over and carve a bit of the edge away so it’s a soft corner instead of a hard sharp corner. You don’t want to cut too much, so be careful! You just don't want it so sharp that it cuts the fondant when you lay it on!
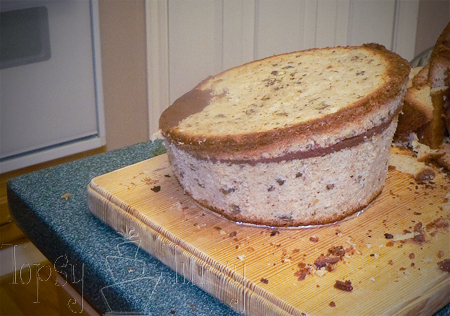
Repeat on the smallest layer. Here you can see how the cake board is closer to the tall edges on the smallest layers. It creates a better finished look.
Repeat on the middle layer. You can see again that the cake circle is much closer to the taller edge.
Here you can see a quick mock up of what it will look like finished… I just wanted to practice what angles I wanted everything at, but didn’t want to practice once the frosting and fondant were on and make a mess. You don’t want to just do opposites. Tall layer, to short layer to tall layer. It’s more like each tall layer is at one of 3 corners, instead of back and forth. Is that at all clear? Or toally confusing. Think like a clock shape. In the base layer here the tallest is at 12 o'clock, the middle layer tall side is at 8 o'clock and the mini layer tall side is at 4 o'clock. Was that more or less confusing… Anyway, now is the time to play with it a bit…
Then frosting. This is just like a regular cake, but a thinner layer. If you go too thick when you put the fondant on you'll just end up squeezing out a bunch of frosting OR you'll get a bulgy look instead of a nice sleek finish to the shape. You can use normal buttercream, or my new favorite Ganache. I like using the Ganache because when it cools it hardens a bit, but because it's almost completely chocolate I can just rub my hand over a spot and the heat of my finger is enough to melt a point right down and get a nice smooth layer. Be cautious frosting the smallest layer, it is so light I just held it in my hands to frost, it kept falling off anything I put it on. It doesn’t have to be perfect.
Fondant: THICK fondant is the key. I like mine between 1/8 and ¼ of an inch. Lay it over the cake then cut off the excess right away (excess is anything that hangs over the cake board, you don't want the weight of it pulling the rest of the fondant), then work on the shape, slowly going around the cake, don’t try to perfect one side at a time, it won’t work. Work a bit, turn, work a bit turn, work a bit turn… etc. Pushing it into itself and with the thick fondant you can allow for a bit of pulling down as well. Also use the fondant smoother (keep it clean and DRY) to help push the extra fondant down once the shape starts to hold. Then using a sharp knife cut just under the board streching the fondant around the cake board a bit to hold. You always want to cut underneath so none of the board shows (see the next one for more details). I like to use two fondant smoothers so I don't get any finger marks as I smooth everything down. If you get any air bubbles in your fondant use a very thin straight pin at a 45 degree angle (not straight in, it leaves a hole) and push it into the bubble. Using the fondant smoother press the air of of the hole you mad. Notice it isn’t perfect… Anything not perfect get’s covered up with the detail stuff later. To cover the cake board use piping gel, or corn syrup to make it sticky then lay the fondant on top. I spread it around the cake board and sides with my finger.

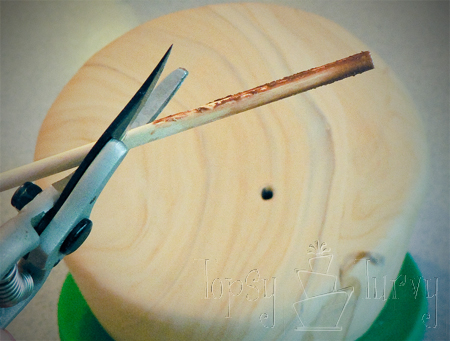
So that your cake doesn't collapse you want to support each layer with dowels. Usually, for a traditional stacked cake, you cut all the dowels to match (I bought a garden cutter for the dowels, it’s sharp and cuts well, but I keep it in the kitchen. You never want to use something you use on flowers on your food.). When they match perfectly your cake will be perfectly level. Also food grade dowels are considered safer than regular old dowels from the Home Depot… I’m not sure what difference it would really make, but when I make cakes for others I take ever precaution. ANYWAY... (this is a different cake, because I didn't photograph this party the first time around!)
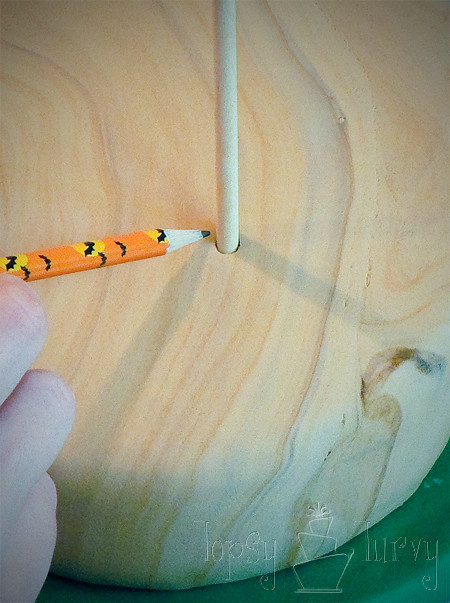
So push a dowel into the cake, mark all around with a pen or pencil and pull it back out.
Now your going to cut the dowel (with your separate, only for food, cutters). For a normal flat cake you cut the dowel flat. For this cake you want to cut at the angle you already marked. Fondant has a bit of give to it, so instead of cutting RIGHT at the mark your going to cut just underneath the mark you made. This way the next layer will sit down into the fondant a bit instead of sitting on top leaving a gap between the layers.
Do this for all 3-4 (or more depending on the size of the cake) dowels individually. Each one will be different height's obviously.
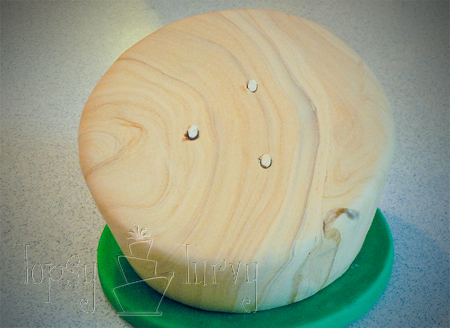
Place the next layer on top of that. Now to stabilize the layers. We don't want anything slipping off! So take a longer dowel and sharpen one edge. Push it into your cake layer. When you get to the cardboard you'll need to hammer it slightly to push it through. Then keep pushing it through the bottom layer, and hammer it into the bottom cardboard layers.
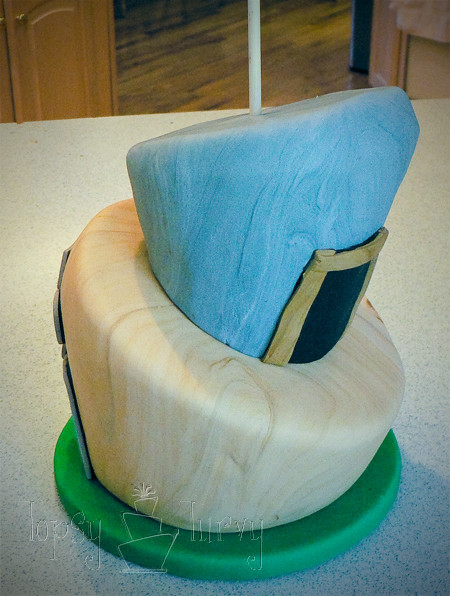
Now to add the top layer. In this case it's small enough that you don't have to add more support dowels but if you top layer is larger or heavier than mine you'll want to. You COULD put all three layers together and THEN hammer in the stabilizing dowel, but then your left with a hole in the top of the cake. So that only works if you have a decoration for the top of the cake. At the times when you don't have a top decoration, or not one large enough to cover the hole then this is what you want to do. Cut the dowel so it won't go through the top of your layer, and sharpen it.
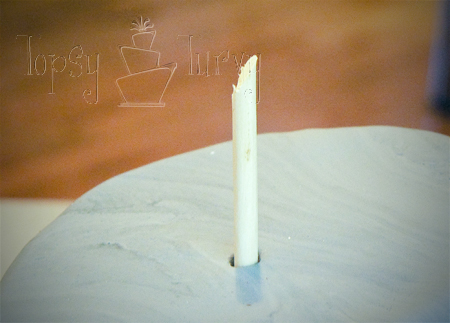
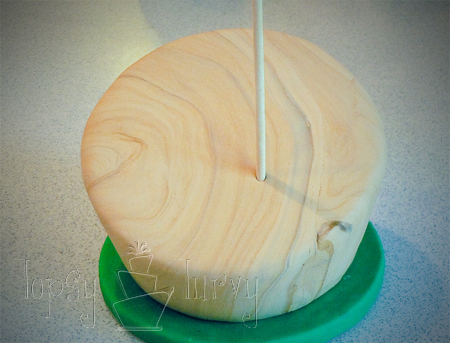
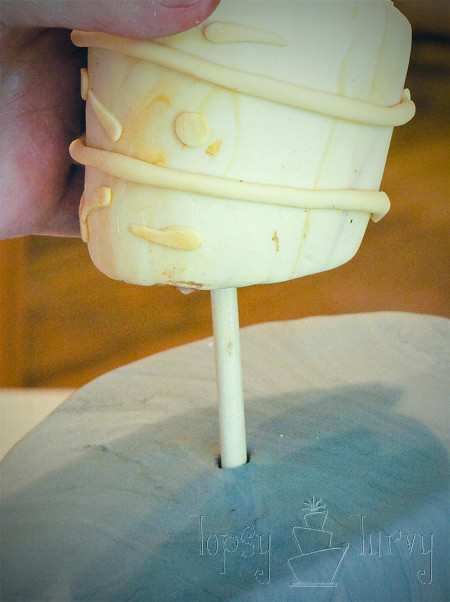
Now before I put the cake on this small cake board I put in a hole for preparation of this step. So just slowly slide the cake onto the dowel! Pretty slick, huh?
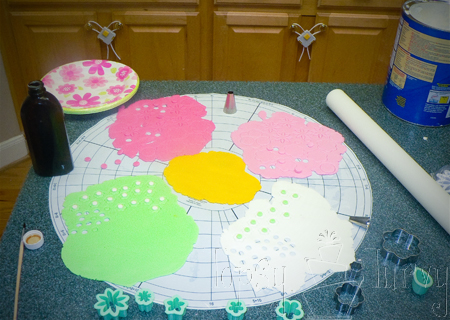
Now back to our first example cake. Finally roll out the colors for your decorating, as thin or thick as you want. Then cut out your shapes and decorate. To adhere them to the cake use Clear Vanilla. Notice I rolled out Yellow, but didn't use any.
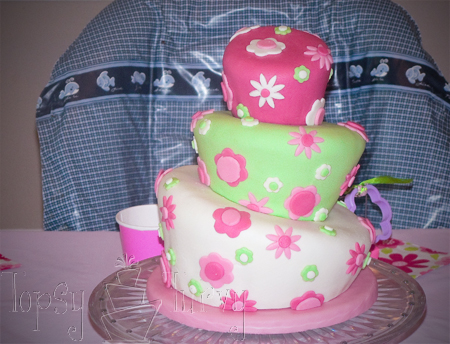
And you have the final cake!
Thanks so much Ashlee for sharing all this great cake making info!! Topsy turvy cakes, here we come! Have you made any fabulous cakes? Tell us all about them & post your pics to the CraftShare Flickr pool!

Such an amazing cake! Thanks for all the tips along the way.
ReplyDeleteOh my heck!! I was just crusing through my reader and there was my name!! I am so excited!! Thanks so much!
ReplyDeleteI saw your blog on New Friend Fridays at Trendy Treehouse and I am so impressed. You are so creative and talented in so many ways. I love your cookies and cakes. They are so adorable and they make me so sad that I am on a diet. Lol.
ReplyDeleteFinally got to use this tutorial! Thanks so much for it!!!
ReplyDeleteHere's the cake
http://muffinsnmore.blogspot.com/2010/08/pippi-longstocking-topsy-turvy-cake.html
Will also add pictures to the flickr-pool.