
My now 2yr old needed a versatile little jacket that could stretch from fall to spring. Something that would keep the chill out in the milder weather, but could also comfortably fit with bulky winter sweaters and fleeces worn underneath this time of year. So I did what us sewing moms do - I hacked a pattern to make one on the cheap!

I sifted through my pattern & fabric stash so I didn't have to buy anything new.

For my base design I borrowed from a pattern I've used several times before, Ottobre Design's Funny Dots Coverall. The last time I made it I used minky lining with an interlock knit outer. I originally made it for my now almost 4yr old and he & my little lady each wore it for an entire season and it still looks almost new:

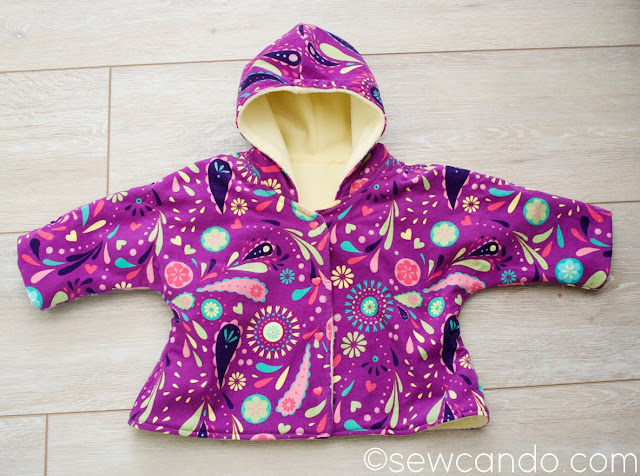
For this jacket version I used anti-pill fleece for the lining with a fun print corduroy for the outer fabric. The fun colors mean it works for fall, winter and spring seasons:

Since my daughter was almost 2 when I made this, I used the largest size (74cm) and added an extra 1/2inch or so to size it up a bit. The European shape always gives extra growth room too, which is a big plus when sewing for smalls.
I turned the original "snowsuit" style into a simple jacket by cutting the pattern pieces just below the waist area and skipping the placket front of the coverall - instead just extending the length of the front pieces to match the back. Then I cut those and the hood pieces out from both fabrics. Since I didn't have to worry about direction for either one, I was able to easily cut everything from a single yard of fabric for each layer.

Assembly was pretty fast since you just need to stitch the front halves to the back from shoulder to sleeve cuff along the top and from lower sleeve cuff to hem at the sides. No sleeves to set in!

The trick to easily bringing the lining & outer jackets together is to baste the hood (with both fabrics already stitch together at the front) onto the outer:

And then, with right sides facing, stitch together the outer and the lining all the way around, leaving a gap at the bottom for turning.

To attach the sleeves, I use this technique of folding over the lining like this and inserting it into the corresponding sleeve opening of the outer fabric and stitching the right sides together.

It looks crazy, but when you turn it right side out from the gap in the bottom, it puts everything perfectly together.

I used plastic snaps to finish the front. I had some cute heart shaped ones in my stash, which echoed the small hearts in the fabric print and in the perfect matching color too. These durable snaps make it really easy to get a restless toddler in and out of it.

This little coat has been nice and roomy. We turned up the cuffs at the beginning of the fall season, but I'm confident it'll comfortable fit her into the beginning of next fall by turning them down. Not bad for a thrifty stash-bust!

Looks like a cozy little sweater! And so cute!
ReplyDeleteAlexandra
OnRockwoodLane.com
EyeLoveKnots.com
It is! And not bulky, so I'm not fighting to get her in it or out of it:)
DeleteI love this fabric! The pattern is adorable too! Thanks for sharing on Crafty Creators!
ReplyDeleteXOXO,
Niki ~ Life as a LEO Wife
Thank you! I'm glad it went from just sitting in my big fabric stack to getting used all the time.
Delete