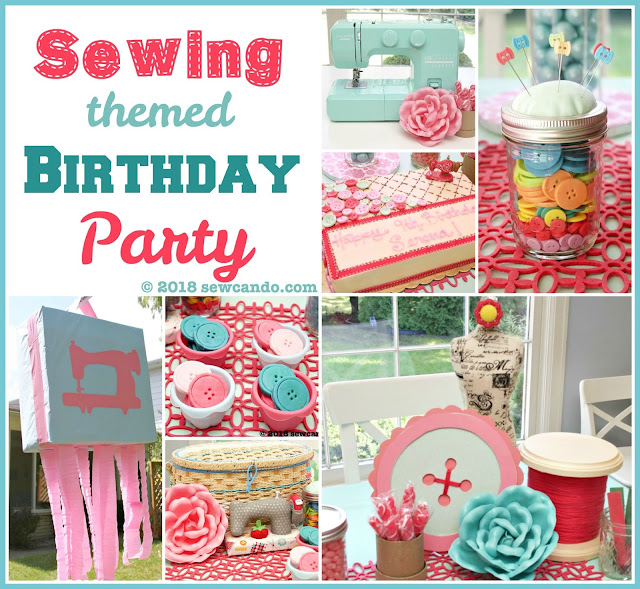
We recently celebrated our daughter's 9th birthday and it was an extra special one since she asked for her party to be sewing themed. That was totally in my wheelhouse and my birthday budget. I'm thrilled to be able to share how I put it together and the final results, which were a big hit with the birthday girl - and didn't result in utter exhaustion for me. So, c'mon and join the party!
I didn't want to stress out trying to DIY an elaborate party (which I have done many times before as seen here), so most of what I used was stuff I found around our house. When I was looking for party ideas I actually saw a party-planner styled sewing party where each child guest was gifted a $30 kiddie Singer machine as a "favor". Um, what??? $300+ just on favors? Get outta here. Ours was an extended family party, so I kept it pretty, but more realistic. Most of us aren't looking to spend a wedding level budget on a kid's party.
For the invitation I used some free clip art I found online here (obviously free for personal use only) and made this digital email invite using iPiccy (also free):
For the party items I utilized a lot items I already had like my great-grandmother's sewing basket and a sewing machine pincushion from my craft room. A quick trip to Hobby Lobby got my paper products, foam flowers and felt table runner (which I scored on clearance for just $1.49!).
I found some colorful plastic button assortments that were perfect table decoration and useful since they became part of her gift of sewing notions. One of my biggest party peeves is spending a bunch of money on themed decorations that are literally useless after the party is done. Not this time!
Extra buttons went into this DIY'd mason jar pincushion, with a set of matching thread spool pins:
I used other glass jars I had around the house to hold some color coordinated candies:
I tweaked my Sculptable Frosting recipe to make some sweet edible button candies:
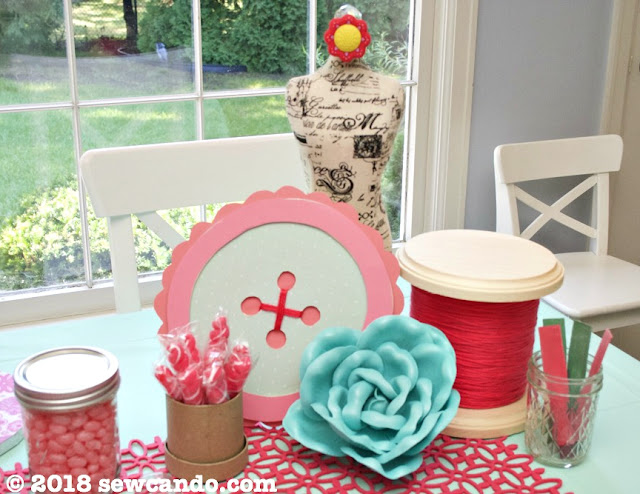
A mini dress form my daughter plays fashion design with (a gift from a few Christmases ago) plus a paper covered wood button shaped wall decoration that I'd bought years ago and never used served as other decorations, as well as a giant thread spool I crafted up for the occasion:
In keeping with my goal of saying no to useless post-party items, I made the big thread spool actually open to be a handy lidded storage container (find the tutorial for making it here):
I ordered a sewing themed cake with her party colors and a white background from our favorite local bakery and asked for it to just be frosted - no fondant. They've always done an amazing job on previous cakes so I didn't feel like I needed to get picky with copying a cake from a photo. That was a mistake. They made it cream colored with brown icing and, weirdly, put black ribbon all over it. It looked a bit odd with the fondant pink and mint buttons they stuck on it.
So at the 11th hour I peeled off the ribbon, replaced it with pink one that did match and put my silicone sewing machine usb drive on top as a decoration to help tie it all together. Much better!
Her extra special gift from us was her own sewing machine. She'd been wanting one for a long time and I wanted her to have a machine that will last her through adulthood. I decided to purchase this New Home Janome model because it was all metal parts inside (= solidly built), like my Janome HD1000, and the set up and features are nearly identical. Added bonus was that it came in her party color, Arctic Crystal!
I also crafted up this quick heat transfer shirt present with a blank tee I had:
And since she's all about jewelry these days, I made an easy necklace with this sewing-themed silicone bead set from my shop:
I kept waffling on making a piñata or not, because I know the kids love them, but I didn't want the hassle of an elaborate crafting project. Literally the day before the party I caved and made one from stuff we had in the house. On principal I can't see paying $20+ for something we're planning to destroy. That & there are no ready-made perfectly themed versions knocking about. It was basic, but fit with the theme, came together in 15 minutes and was sturdy enough that even a couple of teenagers gave it some serious whacks before it spilled the treats. Win!
Each year we either get weather in the 90s and/or full on rainstorms on her party day, which isn't ideal. I got smart this year and set up the majority of things inside. SO much better having a pretty set-up indoors and a lot easier than hauling everything outside and then drag it all back in later. This may be my favorite party to date!


When we go on craft retreats, we generally take a $5 gift; a fat quarter, a favourite recipe. I like the ones where you have to find something relating to a letter of the alphabet. Last year it was 'P' Pondered for some time, and came up with piñata. Using packing from a delivery, I fashioned a 'plastic' sewing machine cover, complete with handle. Packing noodles for bulk (& less mess) and sewing notions I'd found as a BARGAIN Christmas advent calendar. The base was only held on by tape. The girls were amazed. The 'winner' didn't want to destroy it so she could put it in her sewing room! Cheers, Barb
ReplyDeleteWhat an awesome idea Barb. And I can see why the winner didn't want to break it!
DeleteLooks like great fun and so colorful! Thanks for sharing at Hello Fall link party!
ReplyDeleteThanks so much & glad I found your fun party to share at!
DeleteSuper cute party idea! May have to remember this for my 9 year old's next birthday.
ReplyDeleteShe really loved it and it was minimal work so I highly recommend it:)
DeleteOh my goodness I just love this party idea! This is so unique and clever! I've pinned it to my party board in case my daughter wants to do it when she's older (she's only 2 right now). Happy Birthday Serena!
ReplyDeleteThanks so much Loni. We all enjoyed it and it came together so easily. It's really nice to do parties that are as fun to put on as they are for the birthday girl or boy.
DeleteWhat a sweet party theme, I love the idea of the spool (we call them Cotton Reels here in the UK incidentally) being useful later as well as run for the party.
ReplyDeleteThe cake is MUCH better with the switched ribbon - nice save!
I'm glad I'm not the only one that thought the ribbon needed swapping. And good detail to know about spools and cotton reels!
DeleteThis is the most unique and fun birthday party theme I have seen lately. The cake was really pretty but your change of ribbon made it much better.
ReplyDeleteThat’s such a cool party! I especially love the button candy idea.
ReplyDeleteThank you for sharing at The Really Crafty Link Party this week. Pinned!
Absolutely precious!! You did a marvelous job and I can imagine your daughter was over the moon.
ReplyDeleteThanks so much Brenda and yes, she was thrilled. It was like a party for both of us too!
DeleteThis idea is perfect for the Sit and Stitch party being planned for our annual (Kentucky) Quilters Day Out Celebration & Quilt Show in March 2020. Adorable, affordable and original. Thank you, thank you, thank you! (You & sewcando site will be honored)
ReplyDeleteThat is so wonderful to hear! I'm so honored to be an inspiration and would love to see your party!!
Delete